Mongodb源碼分析之Mongos分析
MongoDB提供了auto-sharding 功能。因為其是auto-sharding,即mongodb通過mongos(一個自動分片模塊,用于構建一個大規模的可擴展的數據庫集群,這個集群可以并入動態增加的機器)自動建立一個水平擴展的數據庫集群系統,將數據庫分表存儲在sharding的各個節點上。
一個mongodb集群包括一些shards(包括一些mongod進程),mongos路由進程,一個或多個config服務器
下面是一些相關詞匯說明:
Shards : 每一個shard包括一個或多個服務和存儲數據的mongod進程(mongod是MongoDB數據的核心進程)典型的每個shard開啟多個服務來提高服務的可用性。這些服務/mongod進程在shard中組成一個復制集
Chunks: Chunk是一個來自特殊集合中的一個數據范圍,(collection,minKey,maxKey)描敘一個chunk,它介于minKey和maxKey范圍之間。例如chunks 的maxsize大小是100M,如果一個文件達到或超過這個范圍時,會被切分到2個新的chunks中。當一個shard的數據過量時,chunks將會被遷移到其他的shards上。同樣,chunks也可以遷移到其他的shards上
Config Servers : Config服務器存儲著集群的metadata信息,包括每個服務器,每個shard的基本信息和chunk信息Config服務器主要存儲的是chunk信息。每一個config服務器都復制了完整的chunk信息。
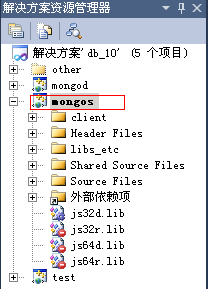
今天要介紹的源碼主要是Mongos的主入口函數的執行流程,首先我們打開Mongos的項目(可通過打開源碼db\db_10.sln加載所有項目),如下圖:
注:如果要調試mongos,需要設置一個mongod進程和一個Config Server,形如:
d:\mongodb>bin>mongod --dbpath d:\mongodb\db\ --port 27012
d:\mongodb>bin>mongod --configsvr --dbpath d:\mongodb\db\ --port 27022
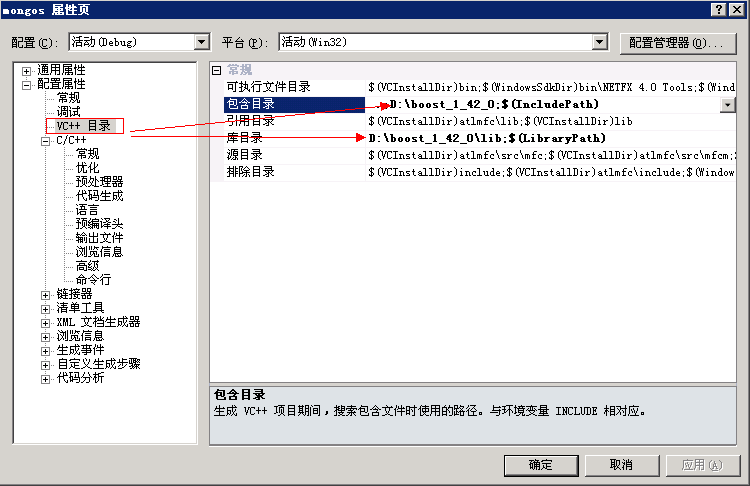
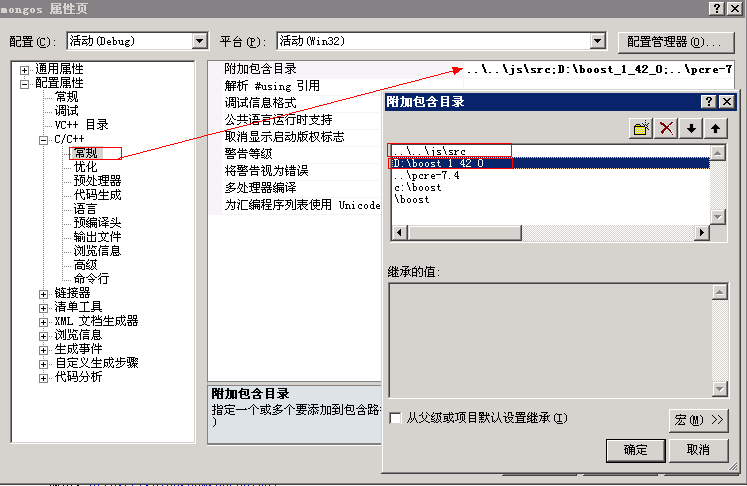
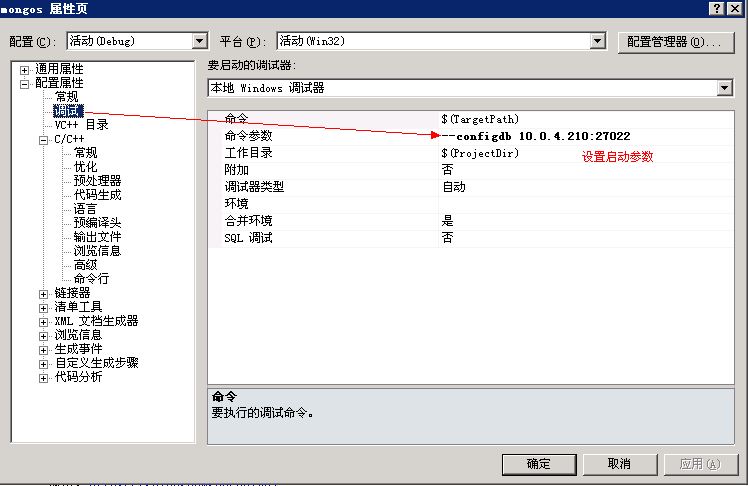
然后在vs2010中配置相應的boost路徑信息及啟動參數信息,如下圖:
#p#
下面開始正文。首先打開mongos項目中的server.cpp文件,找到下面方法:
- int main(int argc, char* argv[]) {
- try {
- return _main(argc, argv);
- }
- catch(DBException& e) {
- cout << "uncaught exception in mongos main:" << endl;
- cout << e.toString() << endl;
- }
- catch(std::exception& e) {
- cout << "uncaught exception in mongos main:" << endl;
- cout << e.what() << endl;
- }
- catch(...) {
- cout << "uncaught exception in mongos main" << endl;
- }
- return 20;
- }
該方法是mongos的主函數,代碼很簡,它主要是try方式執行_main方法,下面是_main的執行流程:
- int _main(int argc, char* argv[]) {
- static StaticObserver staticObserver;
- mongosCommand = argv[0];
- //聲明options信息描述對象
- po::options_description options("General options");
- po::options_description sharding_options("Sharding options");
- po::options_description hidden("Hidden options");
- po::positional_options_description positional;
- CmdLine::addGlobalOptions( options , hidden );
- //添加sharding選項描述信息
- sharding_options.add_options()
- ( "configdb" , po::value() , "1 or 3 comma separated config servers" )
- ( "test" , "just run unit tests" )
- ( "upgrade" , "upgrade meta data version" )
- ( "chunkSize" , po::value(), "maximum amount of data per chunk" )
- ( "ipv6", "enable IPv6 support (disabled by default)" )
- ( "jsonp","allow JSONP access via http (has security implications)" )
- ;
- options.add(sharding_options);
- .....
在完成option描述信息的初始化操作之后,下面就開始對啟動命令行參數進行分析和執行了,如下:
- .....
- // parse options
- po::variables_map params;
- //對argc,argv進行分析并轉換成params,以便下面使用
- if ( ! CmdLine::store( argc , argv , options , hidden , positional , params ) )
- return 0;
- // The default value may vary depending on compile options, but for mongos
- // we want durability to be disabled.
- cmdLine.dur = false;
- //如果是help
- if ( params.count( "help" ) ) {
- cout << options << endl;
- return 0;
- }
- //如果是版本信息
- if ( params.count( "version" ) ) {
- printShardingVersionInfo();
- return 0;
- }
- //如要設置chunkSize
- if ( params.count( "chunkSize" ) ) {
- Chunk::MaxChunkSize = params["chunkSize"].as() * 1024 * 1024;
- }
- ......
- //必選項,設置configdb信息
- if ( ! params.count( "configdb" ) ) {
- out() << "error: no args for --configdb" << endl;
- return 4;
- }
- vector configdbs;
- //對參數configdb進行分割 (以','分割 )
- splitStringDelim( params["configdb"].as() , &configdbs , ',' );
- //mongodb強制為1或3,具體原因不明
- if ( configdbs.size() != 1 && configdbs.size() != 3 ) {
- out() << "need either 1 or 3 configdbs" << endl;
- return 5;
- }
- // we either have a seeting were all process are in localhost or none is
- for ( vector::const_iterator it = configdbs.begin() ; it != configdbs.end() ; ++it ) {
- try {
- // 根據地址參數實例化HostAndPort對象,如地址不合法則拋出異常
- HostAndPort configAddr( *it );
- if ( it == configdbs.begin() ) {
- grid.setAllowLocalHost( configAddr.isLocalHost() );
- }
- //不允許在configdbs出現本地地址,注:如果configdb中全部為本地地址
- //(實際用處不大)時不會執行下面if邏輯
- if ( configAddr.isLocalHost() != grid.allowLocalHost() ) {
- out() << "cannot mix localhost and ip addresses in configdbs" << endl;
- return 10;
- }
- }
- catch ( DBException& e) {
- out() << "configdb: " << e.what() << endl;
- return 9;
- }
- }
上面完成了對命令行參數分析之后,接下來mongos要加載綁定幾個hook:
- // set some global state
- //添加對鏈接池hook的綁定(shardingConnectionHook對象引用),以最終調用其onHandedOut方法
- pool.addHook( &shardingConnectionHook );
- //設置鏈接池名稱
- pool.setName( "mongos connectionpool" );
- //不設置“延遲kill游標”
- DBClientConnection::setLazyKillCursor( false );
- //設置當replicaSet配置修改時的hook對象(replicaSetChangey方法會更新鏈接對象信息
- ReplicaSetMonitor::setConfigChangeHook( boost::bind( &ConfigServer::replicaSetChange , &configServer , _1 ) );
上面的hook主要是在mongos主程序啟動完成后,在運行期間執行一些數據操作時執行某些額外操作。從代碼可以看出,mongos使用了鏈接池功能以提升獲取鏈接的效率,具體實現機制我會在后緒章節中加以闡述。代碼中的ReplicaSetMonitor類為一個維護和獲取有效復制集的監視類,它提供了獲取有效master,slave 的方法。完成這一步綁定后,接著mongos就會對config server信息進行初始化和升級操作了,如下:
- //顯示sharding版本信息
- printShardingVersionInfo();
- //實始化configServer
- if ( ! configServer.init( configdbs ) ) {
- cout << "couldn't resolve config db address" << endl;
- return 7;
- }
- if ( ! configServer.ok( true ) ) {
- cout << "configServer startup check failed" << endl;
- return 8;
- }
- //檢查Config版本信息(必要時進行升級操作)
- int configError = configServer.checkConfigVersion( params.count( "upgrade" ) );
- if ( configError ) {
- if ( configError > 0 ) {
- cout << "upgrade success!" << endl;
- }
- else {
- cout << "config server error: " << configError << endl;
- }
- return configError;
- }
- //重新設置config db信息(包括shard中chunk的min,lastmod信息)
- configServer.reloadSettings();
***就是啟動偵聽服務,這里mongos啟動了兩個偵聽服務器,一個是以線程方式啟動,用于接收授權的用戶操作信息,另一個則是普遍的循環偵聽服務,用于偵聽客戶端message如下:
- //初始化一些Signals信息,用于處理程序退出,中斷等情況
- init();
- //以線程方式啟動webserver,循環偵聽授權訪問的 message信息,詳見dbwebserver.cpp文件中allowed方法
- boost::thread web( boost::bind(&webServerThread, new NoAdminAccess() /* takes ownership */) );
- MessageServer::Options opts;
- opts.port = cmdLine.port;
- opts.ipList = cmdLine.bind_ip;
- start(opts);//啟動message服務器,偵聽客戶端message
- dbexit( EXIT_CLEAN );
- return 0;
到這里,main代碼就介紹完了,但上面代碼段中的start才是啟動balancer來均衡各個shard間chunk的操作,所以我們接著再看一下該方法的實現:
- void start( const MessageServer::Options& opts ) {
- setThreadName( "mongosMain" );//設置線程名稱
- installChunkShardVersioning();//綁定chunk shard版本控制信息
- balancer.go();//均衡shard 中chunk(節點)信息,詳情參見 balance.cpp的run()方法
- cursorCache.startTimeoutThread();//對空閑(過期)游標進行清除操作
- log() << "waiting for connections on port " << cmdLine.port << endl;
- ShardedMessageHandler handler;
- MessageServer * server = createServer( opts , &handler );//構造server對象
- server->setAsTimeTracker();
- server->run();//啟動message服務
- }
好了,今天的內容到這里就告一段落了,在接下來的文章中,將會介紹balancer的實現方式和操作流程。
原文鏈接:http://www.cnblogs.com/daizhj/archive/2011/05/16/2022041.html
【編輯推薦】