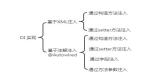
Android Spring依賴注入
使用構造器注入
使用屬性setter方法注入
使用Field注入(用于注解方式)
注入依賴對象可以采用手工裝配或自動裝配,在實際應用中建議使用手工裝配,因為自動裝配會產生未知情況,開發人員無法預見最終的裝配結果。
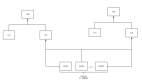
1.手工裝配依賴對象
手工裝配依賴對象,在這種方式中又有兩種編程方式
在xml配置文件中,通過在bean節點下配置
在java代碼中使用@Autowired或@Resource注解方式進行裝配
依賴注入--手工裝配--XML方式
通過setter方法注入依賴
<bean>元素的< property >子元素指明了使用它們的set方法來注入。可以注入任何東西,從基本類型到集合類,甚至是應用系統的bean。
通過setter方法注入依賴
簡單bean配置
配置bean的簡單屬性,基本數據類型和String。
- <beanidbeanid="personService" class="com.test.bean.impl.PersonServiceImpl">
- <!-- 基本類型,string類型 -->
- <propertynamepropertyname="age"value="20"></property>
- <propertynamepropertyname="name" value="張無忌"></property>
- </bean>
通過setter方法注入依賴
引用其它bean
- <beanidbeanid="person"class="com.test.bean.Person" />
- <beanidbeanid="personService"
- class="com.test.bean.impl.PersonServiceImpl">
- <!-- 引用類型 -->
- <propertynamepropertyname="person" ref="person" />
- </bean>
內部bean
- <beanidbeanid="personService"class="com.test.bean.impl.PersonServiceImpl">
- <!-- 內部bean注入 -->
- <propertynamepropertyname="personClass">
- <beanclassbeanclass="com.test.bean.PersonClass" />
- </propert>
- </bean>
這種方式的缺點是你無法在其它地方重用這個personClass實例,原因是它是專門為personService而用。
裝配集合
若bean的屬性是集合類型,按如下處理:
A、裝配List和數組:
- <!-- 裝配list -->
- <propertynamepropertyname="lists">
- <list>
- <value>list1</value>
- <value>list2</value>
- <refbeanrefbean="person"/>
- </list>
- </property>
- <!--裝配數組 -->
- <property name="obj">
- <list>
- <value>obj1</value>
- <value>obj2</value>
- <refbeanrefbean="person"/>
- </list>
- </property>
B、 裝配set:
- <!--裝配set -->
- <property name="sets">
- <set>
- <value>set1</value>
- <value>set2</value>
- <refbeanrefbean="person"/>
- </set>
- </property>
set使用方法和list一樣,不同的是對象被裝配到set中,而list是裝配到List或數組中裝配。
裝配集合
C、裝配map:
- <!-- 裝配map-->
- <propertynamepropertyname="maps">
- <map>
- <entrykeyentrykey="01">
- <value>map01</value>
- </entry>
- <entrykeyentrykey="02">
- <value>map02</value>
- </entry>
- </map>
- </property>
map中的<entry>的數值和<list>以及<set>的一樣,可以使任何有效的屬性元素,需要注意的是key值必須是String的。
D、裝配Properties:
- <!--裝配Properties -->
- <property name="props">
- <props>
- <prop key="01">prop1</prop>
- <prop key="02">prop2</prop>
- </props>
- </property>
E、設置null:
- <!--裝配null -->
- <property name="listnull">
- <null/>
- </property>
通過參數的順序:
- <constructor-argindexconstructor-argindex="0">
- <value>張三</value>
- </constructor-arg>
- <constructor-argindexconstructor-argindex="1">
- <value>56</value>
- </constructor-arg>
#p#
通過構造函數注入依賴
- <!--通過參數的類型 -->
- <constructor-argtypeconstructor-argtype="java.lang.Integer">
- <value>56</value>
- </constructor-arg>
- <constructor-argtypeconstructor-argtype="java.lang.String">
- <value>張三</value>
- </constructor-arg>
依賴注入--手工裝配—注解方式
在java代碼中使用@Autowired或@Resource注解方式進行裝配的前提條件是。
1、引入context命名空間 需要在xml配置文件中配置以下信息:
- <beansxmlnsbeansxmlns="http://www.springframework.org/schema/beans"
- xmlns:xsi="http://www.w3.org/2001/XMLSchema-instance"
- xmlns:context="http://www.springframework.org/schema/context"
- xsi:schemaLocation="http://www.springframework.org/schema/beans
- http://www.springframework.org/schema/beans/spring-beans-2.5.xsd
- http://www.springframework.org/schema/context
- http://www.springframework.org/schema/context/spring-context-2.5.xsd">
- <context:annotation-config/>
- </beans>
2、在配置文件中添加context:annotation-config標簽
- <context:annotation-config/>
這個配置隱式注冊了多個對注釋進行解析處理的處理器
- AutowiredAnnotationBeanPostProcessor,CommonAnnotationBeanPostProcessor,
- PersistenceAnnotationBeanPostProcessor,RequiredAnnotationBeanPostProcessor
注: @Resource注解在spring安裝目錄的lib\j2ee\common-annotations.jar
在java代碼中使用@Autowired或@Resource注解方式進行裝配,這兩個注解的區別是:@Autowired 默認按類型裝配,@Resource默認按名稱裝配,當找不到與名稱匹配的bean才會按類型裝配。
@Autowired
- privatePersonDao personDao;//用于字段上
@Autowired
- publicvoid setPersonDao(PersonDaopersonDao) { //用于屬性的set方法上
- this.personDao = personDao;
- }
@Autowired注解是按類型裝配依賴對象,默認情況下它要求依賴對象必須存在,如果允許null值,可以設置它required屬性為false。
- @Autowired(required=false)
- privatePersonDao personDao;//用于字段上
- @Autowired(request=false)
- public voidsetPersonDao(PersonDaopersonDao) { //用于屬性的set方法上
- this.personDao = personDao;
- }
如果我們想使用按名稱裝配,可以結合@Qualifier注解一起使用。如下:
- @Autowired@Qualifier("personDao")
- privatePersonDao personDao;//用于字段上
- @Autowired
- publicvoidsetPersonDao(@Qualifier("personDao") PersonDao personDao) {//用于屬性的set方法上
- this.personDao= personDao;
- }
@Qualifier注解也能夠被指定為構造器的參數或者方法的參數:
@Resource注解和@Autowired一樣,也可以標注在字段或屬性的setter方法上.
@Resource注解默認按名稱裝配。
名稱可以通過@Resource的name屬性指定,如果沒有指定name屬性,
當注解標注在字段上,即默認取字段的名稱作為bean名稱尋找依賴對象
當注解標注在屬性的setter方法上,即默認取屬性名作為bean名稱尋找依賴對象。
- @Resource(name="personDao")
- privatePersonDaopersonDao;//用于字段上
- @Resource(name="personDao")
- publicvoidsetPersonDao(PersonDao personDao) {//用于屬性的set方法上
- this.personDao = personDao;
- }
后一種相當于xml配置文件中的
- <propertynamepropertyname=“personDao"ref="personDao" />
注意:如果沒有指定name屬性,并且按照默認的名稱找不到依賴對象時, @Resource注解會回退到按類型裝配。但一旦指定了name屬性,就只能按名稱裝配了。
2.自動裝配依賴對象
對于自動裝配,大家了解一下就可以了,實在不推薦大家使用。例子:
- <beanidbeanid=“foo”class=“...Foo” autowire=“autowire type”>
autowire屬性取值如下
byType:按類型裝配,可以根據屬性的類型,在容器中尋找跟該類型匹配的bean。如果發現多個,那么將會拋出異常。如果沒有找到,即屬性值為null。
byName:按名稱裝配,可以根據屬性的名稱,在容器中尋找跟該屬性名相同的bean,如果沒有找到,即屬性值為null。
constructor與byType的方式類似,不同之處在于它應用于構造器參數。如果在容器中沒有找到與構造器參數類型一致的bean,那么將會拋出異常。
autodetect :首先嘗試使用constructor來自動裝配,然后使用byType方式。不確定性的處理與constructor方式和byType方式一致。
通過在classpath自動掃描方式把組件納入spring容器中管理
前面的例子我們都是使用XML的bean定義來配置組件。在一個稍大的項目中,通常會有上百個組件,如果這些組件采用xml的bean定義來配置,顯然會增加配置文件的體積,查找及維護起來也不太方便。
spring2.5為我們引入了組件自動掃描機制,它可以在類路徑底下尋找標注了@Component、@Service、@Controller、@Repository注解的類,并把這些類納入進spring容器中管理。它的作用和在xml文件中使用bean節點配置組件是一樣的。
要使用自動掃描機制,我們需要打開以下配置信息:
1、引入context命名空間 需要在xml配置文件中配置以下信息:
- <beansxmlnsbeansxmlns="http://www.springframework.org/schema/beans"
- xmlns:xsi="http://www.w3.org/2001/XMLSchema-instance"
- xmlns:context="http://www.springframework.org/schema/context"
- xsi:schemaLocation="http://www.springframework.org/schema/beans
- http://www.springframework.org/schema/beans/spring-beans-2.5.xsd
- http://www.springframework.org/schema/context
- http://www.springframework.org/schema/context/spring-context-2.5.xsd">
- <context:component-scanbase-packagecontext:component-scanbase-package="cn.itcast"/>
- </beans>
2、在配置文件中添加context:component-scan標簽
- <context:component-scanbase-packagecontext:component-scanbase-package="cn.itcast"/>
其中base-package為需要掃描的包(含子包)。
注:
1、在使用組件掃描元素時,AutowiredAnnotationBeanPostProcessor和CommonAnnotationBeanPostProcessor會隱式地被包括進來。 也就是說,連個組件都會被自動檢測并織入 - 所有這一切都不需要在XML中提供任何bean配置元數據。
2、功能介紹
@Service用于標注業務層組件、
@Controller用于標注控制層組件(如struts中的action)、
@Repository用于標注數據訪問組件,即DAO組件。
而@Component泛指組件,當組件不好歸類的時候,我們可以使用這個注解進行標注。
- //Dao層
- importorg.springframework.stereotype.Repository;
- importcom.test.dao.PersonDao;
- @Repository("personDao")
- publicclassPersonDaoBean implements PersonDao {
- }
- //業務層
- importjavax.annotation.Resource;
- importorg.springframework.stereotype.Service;
- importcom.test.dao.PersonDao;
- importcom.test.service.PersonService;
- @Service("personService")
- publicclassPersonServiceBean implements PersonService {
- @Resource(name="personDao")
- privatePersonDao personDao;
- }
【編輯推薦】