詳解關于Lua調試器代碼實現
作者:佚名
關于Lua調試器代碼實現是本文要介紹的內容,主要是來了解LUA調試器的使用,不多說,具體內容來看本文詳解。
關于Lua調試器代碼實現是本文要介紹的內容,主要是來了解LUA調試器的使用,不多說,具體內容來看本文詳解。
1、http://www.unknownworlds.com/decoda,這個工具可以注入到宿主程序內對lua腳本進行調試。
2、有2種方式對lua進行調試
從Decoda啟動宿主程序
(1)project菜單中的Settings
(2)在commond中填入你要運行的宿主程序。點擊ok

(3)用它打開lua腳本設置斷點。Decoda 中選擇Start Debugging
下面是簡單的例子。
- main.cpp
- #include <iostream>
- #include "luaDebug.h"
- using namespace std;
- int main() startLuaDebug();
- DebugFile("add.lua");
- ParamData in[1];
- ParamData out;
- in[0].tt = PNUM; in[0].value.p = "HELLO: ";
- out.tt = PNUM;
- DebugFunction("Hello",in,1,1,&out);
- stopLuaDebug();
- printf("%s\n",out.value.p);
- system("pause");
- return 0;
- }
- luaDebug.h
- #ifndef LUA_DEBUG_H
- #define LUA_DEBUG_H
- enum TT NIL, // null
- BNUM, // boolean
- CNUM, // char
- INUM, // int
- LNUM, // long
- FNUM, // float | double
- PNUM, // char *
- VNUM // void *
- };
- typedef union ParamValue bool b;
- char c;
- int i;
- long l;
- float f;
- char *p;
- void *v;
- }ParamValue;
- typedef struct ParamData int tt;
- ParamValue value;
- }ParamData;
- int startLuaDebug();
- void stopLuaDebug();
- int DebugFile(char *filename);
- void DebugFunction(char *funName,
- ParamData param[],
- int len,
- bool bret,
- ParamData *pRet
- );
- #endif
- luaDebug.cpp
- #include <stdio.h>
- #include <iostream>
- #include <stdlib.h>
- #include "lua.hpp"
- #include "luaDebug.h"
- lua_State *L;
- /*
- * 開啟lua虛擬機
- * ret 1 => open vm error!
- * 0 => open vm success! int startLuaDebug() L = lua_open();
- if(L == NULL) return 1;
- luaL_openlibs(L);
- return 0;
- }
- /*
- * 關閉lua虛擬機 void stopLuaDebug() lua_close(L);
- }
- /*
- * funName 函數名稱
- * param[] 參數數組
- * len 參數的長度
- * bret 是否有返回結果
- * pRet 返回的結果 void DebugFunction(char *funName,
- ParamData param[],
- int len,
- bool bret,
- ParamData *pRet {
- if(NULL == L || funName == NULL) return;
- lua_getglobal(L, funName);
- for(int i = 0; i < len; i++) {
- switch(param[i].tt) {
- case BNUM:
- lua_pushboolean(L,param[i].value.b);
- break;
- case CNUM:
- lua_pushinteger(L,(int)param[i].value.c);
- break;
- case INUM:
- lua_pushinteger(L,param[i].value.i);
- break;
- case LNUM:
- lua_pushinteger(L,param[i].value.l);
- break;
- case FNUM:
- lua_pushnumber(L,param[i].value.f);
- break;
- case PNUM: lua_pushstring(L,param[i].value.p);
- break; case VNUM: lua_pushlightuserdata(L,param[i].value.v);
- break; }
- } lua_call(L,len,(int)bret);
- if(bret) {
- if(pRet != NULL) {
- // 為了便于擴展和應用這里不采用[ lua_type(L,lua_gettop(L)) ]而由參數指定類型
- switch(pRet->tt) {
- case BNUM: pRet->value.b = lua_toboolean(L,-1); break;
- case CNUM: pRet->value.c = (char)lua_tointeger(L,-1); break;
- case INUM: pRet->value.i = lua_tointeger(L,-1); break;
- case LNUM: pRet->value.l = lua_tointeger(L,-1); break;
- case FNUM: pRet->value.f = lua_tonumber(L,-1); break;
- case PNUM: char *pRetTemp = (char *)malloc(strlen(lua_tostring(L,-1)) + 1);
- strcpy(pRetTemp,lua_tostring(L,-1));
- pRet->value.p = pRetTemp;
- break; case VNUM: break; //這里留給具體要用時再去擴展。 }
- lua_pop(L,1); }
- /*
- * filename 文件名
- * ret 1 => debug error!
- * 0 => debug success! int DebugFile(char *filename) if(filename == NULL) return 1;
- if(NULL == L) return 1;
- return luaL_dofile(L,filename);
- }
- add.lua
- function Hello(a)
- local c = a .. "yegui!";
- return c;
- end
- local i = 3
- local j = 4
- local k = i + j
- print(k);
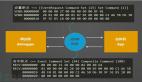
調試過程圖

Decoda注入宿主程序的調試方法
1、在宿主程序中放入getch()等暫停操作(貌似不能用設置斷點的方式,否則Decoda將會異常。為什么會這樣有待進一步學習),運行宿主程序
2、選擇decoda debug菜單。中的Processes選項。

3、選擇宿主程序Attach。
4、ok
小結:詳解關于Lua調試器代碼實現的內容介紹完了,希望通過本文的學習能對你有所幫助!
責任編輯:zhaolei
來源:
互聯網