小型企業商務應用程序設計及開發系列(3):自定義視圖
譯文教程說明
- 技術工具: iOS SDK
- 操作難度: 普通
- 執行時間: 30 到60分鐘
【51CTO譯文】歡迎大家閱讀小型企業商務應用程序設計及開發系列教程的最后一部分。在第三篇文章中,我們將共同學習如何設計并創建出飽含構思與靈感的視圖,進而讓公司服務以更鮮活的方式呈現在用戶面前。
教程概述
在本篇文章中,我將與大家共同探討如何設計商務應用程序的最后一環——企業服務信息界面,并嘗試以美觀簡潔的方式向用戶展示更詳盡的內容。
在本節內容完成后,我們的應用程序將如下圖所示:

屏幕內容在外觀及使用感受上與網站專題非常相似,包含了標題、圖片、作者等一系列除內容之外的描述信息。這一設計靈感源自BizApp iPhone應用設計模板。全部內容都將由UIWebView實現,我們可以在其中添加豐富的內容鏈接以及排版布局。
創建UI元素
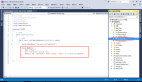
首先在Xcode項目中添加一個新的視圖控制器,并將其命名為DetailViewController。打開DetailViewController.h文件,并將以下域加入初始位置——這些就是我們要在視圖中使用到的UI元素。
- @interface DetailViewController : UIViewController
- @property (nonatomic, strong) UILabel *titleLabel;
- @property (nonatomic, strong) UIImageView *articleImageView;
- @property (nonatomic, strong) UILabel* metaLabel;
- @property (nonatomic, strong) UILabel* nameLabel;
- @property (nonatomic, strong) UIWebView* articleWebView;
- @property (nonatomic, strong) UIScrollView* scrollView;
- @end
在DetailViewController文件中,我們需要創建這些域并將其插入視圖當中。現在ViewDidLoad方法中已經一切就緒。
別忘了將這些域添加到文件開頭。
- @synthesize titleLabel, articleWebView, articleImageView, metaLabel, nameLabel, scrollView;
首先要插入到ViewDidLoad方法當中的兩個元素分別是滾視圖及標簽。UI標簽與滾動視圖相結合,用戶才能通過滑動操作閱讀屏幕下方尚未顯示出來的信息。
- self.scrollView = [[UIScrollView alloc] initWithFrame:CGRectMake(0, 0, 320, 480)];
- [self.view addSubview:scrollView];
- self.titleLabel = [[UILabel alloc] initWithFrame:CGRectMake(10, 0, 300, 61)];
- [titleLabel setFont:[UIFont boldSystemFontOfSize:20]];
- [titleLabel setNumberOfLines:2];
- [scrollView addSubview:titleLabel];
接下來要插入的元素是本章本身的圖像:
- self.articleImageView = [[UIImageView alloc] initWithFrame:CGRectMake(0, 58, 320, 109)];
- [articleImageView setContentMode:UIViewContentModeScaleAspectFill];
- [articleImageView setClipsToBounds:YES];
- [scrollView addSubview:articleImageView];
SetContentMode屬性能夠確保圖像始終保持原始狀態(不會被拉伸),而SetClipsToBounds屬性則用來保證圖像不會超過對應區塊的邊界。完成之后,我們要處理的是圖像下方的兩個標簽:
- self.nameLabel = [[UILabel alloc] initWithFrame:CGRectMake(10, 169, 170, 21)];
- [nameLabel setFont:[UIFont systemFontOfSize:13]];
- [nameLabel setText:@"By John Doe / Posted under: "];
- [scrollView addSubview:nameLabel];
- self.metaLabel = [[UILabel alloc] initWithFrame:CGRectMake(183, 169, 117, 21)];
- [metaLabel setFont:[UIFont systemFontOfSize:13]];
- [metaLabel setTextColor:[UIColor colorWithRed:30.0/255 green:144.0/255 blue:224.0/255 alpha:1.0]];
- [scrollView addSubview:metaLabel];
標簽本身為藍色,文本內容則使用系統中默認的13號字體。
然后是分隔線和web視圖,這里是顯示信息內容的重點區域。
- self.articleWebView = [[UIWebView alloc] initWithFrame:CGRectMake(10, 204, 300, 700)];
- [scrollView addSubview:articleWebView];
- UIView* dividerView = [[UIView alloc] initWithFrame:CGRectMake(10, 194, 300, 2)];
- [dividerView setBackgroundColor:[UIColor lightGrayColor]];
- [scrollView addSubview:dividerView];
到這里,我們已經完成了所有基本UI元素。現在把新的視圖控制器與Storyboard相關聯,這樣我們就能實現瀏覽操作了。
將視圖控制器添加到Storyboard當中
在MainStoryboard_iPhone文件中添加一個新的視圖控制器,選擇該視圖控制器并將類變更為DetailViewController。這樣才能確保我們在DetailViewController文件中執行的任何代碼都與新的視圖機制在Storyboard上保持匹配。

為了保證新的視圖控制器能夠在用戶觸摸網絡中的對應服務項目時生效,我們可以使用segue功能。這是iOS 5 SDK中新加入的功能,只需選擇Storyboard文件,按住Ctrl鍵并將其從GridViewController拖拽到DetailViewController即可。這時屏幕上會彈出幾個選項,選擇其中的“push”,這意味著新的視圖控制器將以普通UI界面視圖的形式顯示在屏幕中。

完成以上步驟后,為兩套視圖控制器建立鏈接(segue)。點擊segue圖標并將其命名為“detail”。

為了將最后一部分連接內容加入進來,我們需要打開GridViewController.m文件并添加以下代碼段:
- -(void)gridView:(AQGridView *)gridView didSelectItemAtIndex:(NSUInteger)index
- {
- [self performSegueWithIdentifier:@"detail" sender:self];
- }
當網格中的項目被選定時,方法會執行名為“detail”的segue操作(我們在前面的步驟中剛剛創建完成)。
現在如果大家在模擬器運行應用程序并點擊網格中的項目,就會看到新的視圖從屏幕右側切入并替換掉當前界面。
不過現在切入的新界面還是一片空白,因為我們還沒有為其添加任何數據。
從模型中添加數據
下一步工作是從我們的數據模型中(在第二部分文章中創建完成)提取信息,并發往Detail視圖控制器。要做到這一點,我們首先需要用需要的數據擴展模型。
現在我們為模型文件DataModel.h添加三個額外的域,分別為標題、圖像以及文章內容。
- @interface Model : NSObject
- @property (nonatomic, copy) NSString* name;
- @property (nonatomic, retain) UIImage* image;
- @property (nonatomic, copy) NSString* webContentTitle;
- @property (nonatomic, copy) NSString* webContent;
- @property (nonatomic, retain) UIImage* webContentImage;
- -(id)initWithName:(NSString*)theName andImage:(UIImage*)theImage andWebContentTitle:(NSString*)theTitle andWebContent:(NSString*)theWebContent andWebContentImage:(UIImage*)theWebImage;
- @end
然后將初始化方法引入DataModel.m文件。
- @synthesize name, image, webContent, webContentTitle, webContentImage;
- -(id)initWithName:(NSString*)theName andImage:(UIImage*)theImage andWebContentTitle:(NSString*)theTitle andWebContent:(NSString*)theWebContent andWebContentImage:(UIImage*)theWebImage
- {
- self = [super init];
- if(self)
- {
- self.name= theName;
- self.image = theImage;
- self.webContent = theWebContent;
- self.webContentTitle = theTitle;
- self.webContentImage = theWebImage;
- }
- return self;
- }
接下來就是向其中添加樣本數據。最好的辦法當然是從網絡服務端載入信息,但這就超出本文的討論范圍了,因此先放下不談。
為了節約字數,我只列出模型中的一條樣本數據。其它數據的形式都是一樣的,只是內容上有所不同。
- NSString *content = @"<p>Corporate law is the study of how shareholders, directors, employees, creditors, and other stakeholders such as consumers, the community and the environment interact with one another. </p><p>The four defining characteristics of the modern corporation are:</p> <ul><li>Separate Legal Personality of the corporation (access to tort and contract law in a manner similar to a person)</li><li>Limited Liability of the shareholders</li><li>Shares (if the corporation is a public company, the shares are traded on a stock exchange)</li><li>Delegated Management; the board of directors delegates day-to-day management</li><ul>";
- BusinessService *service1 = [[BusinessService alloc] initWithCaption:@"Litigation" andImage:[UIImage imageNamed:@"service-1.jpg"] andWebContentTitle:@"Litigation: Peace of mind with the experts" andWebContent:content andWebContentImage:[UIImage imageNamed:@"service-1.jpg"]];
至于要添加進來的圖片,我們必須將其命名為“service-1.jpg”到“service-6.jpg”,并保存在項目中的樣本文件夾里。現在樣本數據就處理完成了,讓我們將其關聯到UI元素上,看看能不能正確顯示出來。
在屏幕上顯示數據
在DetailViewController.h文件中添加新的域,它的作用是擔當BuisinessService類的實例。別忘了把BusinessService頭文件也加進來,并付諸執行。
- @property (nonatomic, retain) BusinessService* service;
在DetailViewController的ViewDidLoad方法中添加聲明,以保證所有UI元素及其對應的服務信息都被正確選中。
- [titleLabel setText:service.webContentTitle];
- [articleImageView setImage:service.webContentImage];
- [articleWebView loadHTMLString:service.webContent baseURL:nil];
- [metaLabel setText:service.caption];
現在我們可以運行應用程序了,點擊網格中的項目可以進入詳細視圖。最終顯示結果如下圖所示。

大家可以看到,現在我們的詳細視圖幾乎算是完成了。惟一的缺憾在于后退按鈕實在是太難看了,默認樣式與自定義導航欄實在是格格不入。
添加自定義UI菜單欄按鈕
為了解決這個問題,我們將使用資源文件夾中的“back.png”文件。要將該圖片設置為后退按鈕樣式,我們需要將以下代碼段添加到AppDelegate.m文件中的didFinishLaunchingWihOptions方法處。
- - (BOOL)application:(UIApplication *)application didFinishLaunchingWithOptions:(NSDictionary *)launchOptions
- {
- UIImage *navBarImage = [UIImage imageNamed:@"menubar.png"];
- [[UINavigationBar appearance] setBackgroundImage:navBarImage
- forBarMetrics:UIBarMetricsDefault];
- UIImage* backButtonImage = [UIImage imageNamed:@"back.png"];
- [[UIBarButtonItem appearance] setBackButtonBackgroundImage:backButtonImage forState:UIControlStateNormal barMetrics:UIBarMetricsDefault];
- return YES;
- }
上述代碼的作用是讓應用程序利用iOS 5 SDK改變后退按鈕的外觀。現在運行應用程序,我們會發現顯示效果如下所示。

總結
這個系列的三篇文章到此終于全部告一段落。
希望大家現在對于應用程序設計有更深刻的理解,并以此為基礎在未來的開發工作中制作出獨一無二的精彩作品。
感謝大家的支持與耐心,如果還有什么問題或者意見,不妨在評論欄中共同探討。
原文鏈接:
http://mobile.tutsplus.com/tutorials/iphone/design-build-a-small-business-app-custom-detail-views/