利用ModSecurity防御Wordpress的暴力破解
在閱讀本文前,先簡單了解下什么是ModSecurity,ModSecurity是一個入侵探測與阻止的引擎。它主要是用于Web應用程序所以也可以叫做Web應用程序防火墻,相信不少商業WAF的簽名開發同學也參考了ModSecurity的規則吧。
背景:
上周Wordpress網站遭受了大規模的暴力破解攻擊,攻擊者首先掃描互聯網上的Wordpress網站,然后利用Web服務器組建的僵尸網絡不斷嘗試用戶名和密碼試圖登錄管理界面。攻擊者使用了超過9萬臺Web服務器來進行暴力破解。
本文借用此例,來介紹下如何利用ModSecurity防御Wordpress的暴力破解。常規的緩解暴力破解方法如下:
1:更改admin默認賬戶名稱,或直接刪除admin,添加一個新的管理員帳戶。
2:使用雙因素認證
3:使用插件限制登錄
4:使用.htpasswd對訪問特定頁面實現用戶名和密碼驗證。
這些都有現成的方法去實現了,這里就介紹一下用ModSecurity V2.7.3來保護Wordpress,防止暴力破解。
1:Wordpress的登錄過程分析
下圖為Wordpress的登錄頁面:
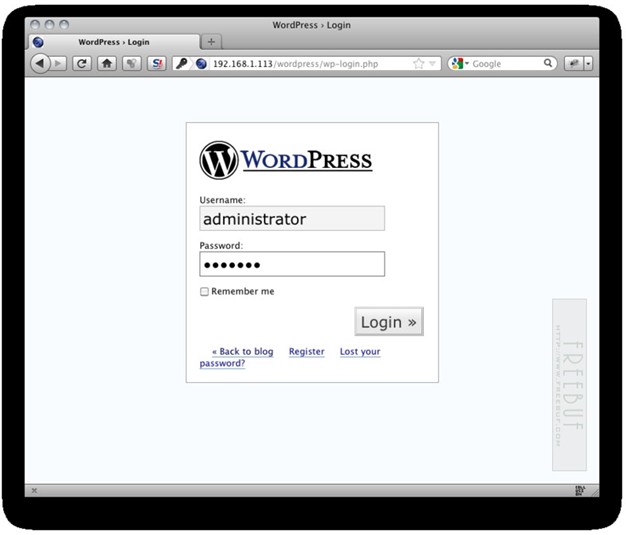
用戶登錄之后,發送請求到WP-loing.php頁面,HTTP請求包內容如下:
POST /wordpress/wp-login.php HTTP/1.1
Host: mywordpress.com
User-Agent: Mozilla/5.0 (Macintosh; Intel Mac OS X 10.6; rv:12.0) Gecko/20100101 Firefox/12.0
Accept: text/html,application/xhtml+xml,application/xml;q=0.9,*/*; q=0.8
Accept-Language: en-us,en;q=0.5
DNT: 1
Referer: http://freebuf.com/wordpress/wp-login.php
Content-Type: application/x-www-form-urlencoded
Via: 1.1 owaspbwa.localdomain
Connection: Keep-Alive
Content-Length: 73
log=administrator&pwd=freebuf&submit=Login+%C2%BB&redirect_to=wp-admin%2F
payload部分包含了用戶名和密碼,以及登錄成功后轉向的頁面。OK,了解數據包結構之后,我們可以創建規則,防止未經授權的訪問。#p#
2:檢查Rerfer
正常的用戶登錄Wordpress,在數據包頭部會包含一個Referer字段,但是通過人工編寫的程序,很多不會包含Referer字段,直接發送登錄請求到wp-login.php頁面,所以,我們可以根據此創建一個ModSecurity規則來檢查Rerfer字段信息:
SecRule REQUEST_METHOD "@streq POST" "chain,id:'1',phase:2,t:none,block,log,msg:'Warning: Direct Login Missing Referer.'"
SecRule REQUEST_FILENAME "@pm /wp-login.php /wp-admin/" "chain"
ecRule &REQUEST_HEADERS:Referer "@eq 0"
當然通過腳本,很容易實現Rerfer偽造,所以還需要接下來的規則一起配合。
3:限制訪問的IP
如果你不想修改默認管理員帳號,可以添加一個規則只允許特定的IP訪問管理頁面,如下:
SecRule REQUEST_METHOD "@streq POST" "chain,id:'1',phase:2,t:none,block,log,msg:'Warning: Direct Login Missing Referer.'"
SecRule REQUEST_FILENAME "@pm /wp-login.php /wp-admin/" "chain"
SecRule ARGS:log "@streq freebuf" "chain"
SecRule REMOTE_ADDR !@ipMatch 72.192.214.223
在這個例子里,只允許名稱為freebuf的管理員帳戶通過72.192.214.223的IP地址來訪問。#p#
4:跟蹤管理員帳戶的登錄嘗試
我們可以通過ModSecurity的規則來block掉惡意IP,以下為登錄失敗的返回包:
HTTP/1.1 200 OK Date: Fri, 11 May 2012 03:24:53 GMT Server: Apache Expires: Wed, 11 Jan 1984 05:00:00 GMT Last-Modified: Fri, 11 May 2012 03:24:54 GMT Cache-Control: no-cache, must-revalidate, max-age=0 Pragma: no-cache Vary: Accept-Encoding Content-Length: 1697 Connection: close Content-Type: text/html; charset=UTF-8 <!DOCTYPE html PUBLIC "-//W3C//DTD XHTML 1.0 Transitional//EN" "http://www.w3.org/TR/xhtml1/DTD/xhtml1-transitional.dtd"><html xmlns="http://www.w3.org/1999/xhtml"> <head><title>WordPress › Login</title><meta http-equiv="Content-Type" content="text/html; c harset=UTF-8" /><link rel="stylesheet" href="http://192.168.1.113/wordpress/wp-admin /wp-admin.css" type="text/css" /> <script type="text/javascript"> function focusit() { document.getElementById('log').focus();} window.onload = focusit; </script></head> <body><div id="login"> <h1><a href="http://wordpress.org/">WordPress</a></h1> <div id='login_error'><strong>Error</strong>: Incorrect password. </div> ... </body> </html>
可以看到狀態碼為200,而且返回的數據包中包含了Incorrect password,據此可以創建以下規則:
SecRule REQUEST_FILENAME "@streq /wordpress/wp-login.php"
"chain, phase:4,id:999323,t:none,block,msg:'Authentication Failure Violation .',
logdata:'Number of Authentication Failures: %{ip.failed_auth_ attempt}'"
SecRule REQUEST_METHOD "@streq POST" "chain"
SecRule ARGS:log "@streq admin" "chain"
SecRule RESPONSE_STATUS "200" "chain"
SecRule RESPONSE_BODY "@contains <strong>Error</strong>:Incorrect password."
"chain,setvar:ip.failed_auth_attempt=+1,expirevar:ip.failed_auth_attempt=60"
SecRule IP:FAILED_AUTH_ATTEMPT "@gt 5"
#p#
5:設置驗證請求的次數
ModSecurity可以在指定的時間內跟蹤請求的數量,設置閥值來進行阻斷攻擊,在它的規則集里已經個包含了該規則,modsecurity_crs_10_setup.conf
如下:
#
# -- [[ Brute Force Protection ]] ---------------------------------------------------------
#
# If you are using the Brute Force Protection rule set, then uncomment the following
# lines and set the following variables:
# - Protected URLs: resources to protect (e.g. login pages) - set to your login page
# - Burst Time Slice Interval: time interval window to monitor for bursts
# - Request Threshold: request # threshold to trigger a burst
# - Block Period: temporary block timeout
#
SecAction \
  "id:'900014', \
  phase:1, \
  t:none, \
  setvar:'tx.brute_force_protected_urls=/wp-login.php', \
  setvar:'tx.brute_force_burst_time_slice=60', \
  setvar:'tx.brute_force_counter_threshold=10', \
  setvar:'tx.brute_force_block_timeout=300', \
  nolog, \
  pass"
注意修改 setvar:’tx.brute_force_protected_urls=/wp-login.php‘,
設置完畢后,激活modsecurity_crs_11_brute_force.conf
#
# Anti-Automation Rule for specific Pages (Brute Force Protection)
# This is a rate-limiting rule set and does not directly correlate whether the
# authentication attempt was successful or not.
#
#
# Enforce an existing IP address block and log only 1-time/minute
# We don't want to get flooded by alerts during an attack or scan so
# we are only triggering an alert once/minute.  You can adjust how often
# you want to receive status alerts by changing the expirevar setting below.
#
SecRule IP:BRUTE_FORCE_BLOCK "@eq 1" "chain,phase:1,id:'981036',block,msg:
'Brute Force Attack Identified from %{tx.real_ip}
 (%{tx.brute_force_block_counter} hits since last alert)',
setvar:ip.brute_force_block_counter=+1"
SecRule &IP:BRUTE_FORCE_BLOCK_FLAG "@eq 0" "setvar:ip.brute_force_block_flag=1,
expirevar:ip.brute_force_block_flag=60,
setvar:tx.brute_force_block_counter=%{ip.brute_force_block_counter},
setvar:ip.brute_force_block_counter=0"
#
# Block and track # of requests but don't log
SecRule IP:BRUTE_FORCE_BLOCK "@eq 1" "phase:1,id:'981037',block,nolog,
setvar:ip.brute_force_block_counter=+1"
#
# skipAfter Checks
# There are different scenarios where we don't want to do checks -
# 1. If the user has not defined any URLs for Brute Force Protection in the 10 config file
# 2. If the current URL is not listed as a protected URL
# 3. If the current IP address has already been blocked due to high requests
# In these cases, we skip doing the request counts.
#
SecRule &TX:BRUTE_FORCE_PROTECTED_URLS "@eq 0" "phase:5,id:'981038',
t:none,nolog,pass,skipAfter:END_BRUTE_FORCE_PROTECTION_CHECKS"
SecRule REQUEST_FILENAME "!@within %{tx.brute_force_protected_urls}"
"phase:5,id:'981039',t:none,nolog,pass,skipAfter:END_BRUTE_FORCE_PROTECTION_CHECKS"
SecRule IP:BRUTE_FORCE_BLOCK "@eq 1" "phase:5,id:'981040',
t:none,nolog,pass,skipAfter:END_BRUTE_FORCE_PROTECTION_CHECKS"
#
# Brute Force Counter
# Count the number of requests to these resoures
#
SecAction "phase:5,id:'981041',t:none,nolog,pass,setvar:ip.brute_force_counter=+1"
#
# Check Brute Force Counter
# If the request count is greater than or equal to 50 within 5 mins,
# we then set the burst counter
#
SecRule IP:BRUTE_FORCE_COUNTER "@gt %{tx.brute_force_counter_threshold}"
 "phase:5,id:'981042',t:none,nolog,pass,t:none,setvar:ip.brute_force_burst_counter=+1,
expirevar:ip.brute_force_burst_counter=%{tx.brute_force_burst_time_slice},
setvar:!ip.brute_force_counter"
#
# Check Brute Force Burst Counter and set Block
# Check the burst counter - if greater than or equal to 2, then we set the IP
# block variable for 5 mins and issue an alert.
#
SecRule IP:BRUTE_FORCE_BURST_COUNTER "@ge 2" "phase:5,id:'981043',
t:none,log,pass,msg:'Potential Brute Force Attack from %{tx.real_ip}
 - # of Request Bursts: %{ip.brute_force_burst_counter}',
setvar:ip.brute_force_block=1,expirevar:ip.brute_force_block=%{tx.brute_force_block_timeout}"
SecMarker END_BRUTE_FORCE_PROTECTION_CHECKS
#p#
6:使用SecGuardianLog
從 1.9版本后,ModSecurity 支持一個新的指令,SecGuardianLog,設計此指令用于把所有允許數據通過管理日志功能發送到另一個程序。自從 apache部署成典型的多進程方式,信息共享變得困難了,這一想法就是部署一個獨立的外部進程使用狀態機的方式去觀察所有的請求,提供額外的保護。使用方法如下:
語法: SecGuardianLog |/path/to/httpd-guardian
示例: SecGuardianLog |/usr/local/apache/bin/httpd-guardian
范圍: Main
版本: 2.0.0
而且SecGuardianLog也可以和 SnortSam協同工作(http://www.snortsam.net)。如果已經配置過 httpd-guardian(具體介紹請查看源代碼)你只需要在 apache配置中添加一行就可以部署它:
SecGuardianLog |/path/to/httpd-guardian
規則如下:
# If defined, execute this command when a threshold is reached
# block the IP address for one hour.
# $PROTECT_EXEC = "/sbin/blacklist block %s 3600";
# $PROTECT_EXEC = "/sbin/samtool -block -ip %s -dur 3600 www.freebuf.com";
my $PROTECT_EXEC;
# For testing only:
# $PROTECT_EXEC = "/sbin/blacklist-webclient %s 3600";
# Max. speed allowed, in requests per
# second, measured over an 1-minute period
my $THRESHOLD_1MIN = 2; # 120 requests in a minute
跟蹤httpd守護進程數量,如果超過了限制,可以執行一些操作,如封鎖IP一小時。
原文地址:http://blog.spiderlabs.com/2013/04/defending-wordpress-logins-from-brute-force-attacks.html