如何為SSH登錄建立雙因子驗證機制(谷歌身份驗證器)?
譯文默認情況下,SSH已經在遠程機器之間使用安全的數據通信;但是如果你想為自己的SSH連接添加另外某種安全層,可以添加谷歌身份驗證器(Google Authenticator)雙因子驗證模塊,該模塊讓你可以在連接到SSH服務器時,輸入一個隨機的一次性密碼(TOTP)驗證碼。你在連接時,就得從智能手機或個人電腦輸入這個驗證碼。
谷歌身份驗證器是一種開源模塊,實施了由谷歌開發的一次性通行碼(TOTP)驗證令牌。除了PAM(可插入驗證模塊)外,它還支持幾種移動平臺。這些一次性通行碼是使用OATH(開放驗證組織)制定的開放標準生成的。
SSH雙因子驗證
我在本文中將為大家介紹如何在紅帽、CentOS、Fedora、Ubuntu、Linux Mint和Debian等系統環境下,建立和配置SSH,以實現雙因子驗證機制。
安裝谷歌身份驗證器模塊
打開你想建立雙因子驗證機制的那個機器,安裝下列PAM庫以及PAM模塊與谷歌身份驗證器模塊順利協同運行所需要的開發庫。
在紅帽、CentOS和Fedora等系統上,安裝‘pam-devel’安裝包。
# yum install pam-devel make gcc-c++ wget
在Ubuntu、Linux Mint和Debian等系統上,安裝‘libpam0g-dev’安裝包。
# apt-get install libpam0g-dev make gcc-c++ wget
下載谷歌身份驗證器模塊,并解壓縮到Home目錄下(假設你已經登錄到根目錄的home目錄)。
# cd /root
# wget https://google-authenticator.googlecode.com/files/libpam-google-authenticator-1.0-source.tar.bz2
# tar -xvf libpam-google-authenticator-1.0-source.tar.bz2
輸入下列命令,在系統上編譯和安裝谷歌身份驗證器模塊。
# cd libpam-google-authenticator-1.0
# make
# make install
# google-authenticator
一旦你運行了‘google-authenticator’命令,它會向你提示一系列問題。在大多數情況下,只要輸入‘y’(yes)作為答案。要是出了什么問題,你可以再次輸入‘google-authenticator’命令,以便重置設置。
◦你希望驗證令牌基于時間嗎(y/n)?y
在這個問題之后,你會獲得你的“密鑰”和“應急驗證碼”。把這些詳細信息記在某個地方,以后我們在安裝谷歌身份驗證器應用程序時要用到“密鑰”。
[root@tecmint libpam-google-authenticator-1.0]# google-authenticator
Do you want authentication tokens to be time-based (y/n) y
https://www.google.com/chart?chs=200x200&chld=M|0&cht=qr&chl=otpauth://totp/root@tecmint.com%3Fsecret%3DXEKITDTYCBA2TLPL
Your new secret key is: XEKITDTYCBA2TLPL
Your verification code is 461618
Your emergency scratch codes are:
65083399
10733609
47588351
71111643
92017550
#p#
下一步,按安裝向導的提示進行操作。在大多數情況下,只要輸入‘y’(yes)作為答案,如下所示。
Do you want me to update your "/root/.google_authenticator" file (y/n) y
你希望我更新你的“/root/.google_authenticator”文件嗎(y/n)?y
Do you want to disallow multiple uses of the same authentication
token? This restricts you to one login about every 30s, but it increases
your chances to notice or even prevent man-in-the-middle attacks (y/n) y
你希望禁止多次使用同一個驗證令牌嗎?這限制你每次登錄的時間大約是30秒,
但是這加大了發現或甚至防止中間人攻擊的可能性(y/n)?y
By default, tokens are good for 30 seconds and in order to compensate for
possible time-skew between the client and the server, we allow an extra
token before and after the current time. If you experience problems with poor
time synchronization, you can increase the window from its default
size of 1:30min to about 4min. Do you want to do so (y/n) y
默認情況下,令牌保持30秒有效;為了補償客戶機與服務器之間可能存在的時滯,
我們允許在當前時間前后有一個額外令牌。如果你在時間同步方面遇到了問題,
可以將窗口從默認大小即1分30秒加大到約4分。你希望這么做嗎(y/n)?y
If the computer that you are logging into isn't hardened against brute-force
login attempts, you can enable rate-limiting for the authentication module.
By default, this limits attackers to no more than 3 login attempts every 30s.
Do you want to enable rate-limiting (y/n) y
如果你登錄的那臺計算機沒有經過固化,以防范運用蠻力的登錄企圖,可以對驗證模塊
啟用嘗試次數限制。默認情況下,這限制攻擊者每30秒試圖登錄的次數只有3次。
你希望啟用嘗試次數限制嗎(y/n)?y
配置SSH,以便使用谷歌身份驗證器模塊
打開PAM配置文件‘/etc/pam.d/sshd’,把下面這行添加到該文件的頂部。
auth required pam_google_authenticator.so
下一步,打開SSH配置文件‘/etc/ssh/sshd_config’,精細滾動,找到顯示下面內容的這一行:
ChallengeResponseAuthentication no
把它更改成“yes”。所以,它現在變成了這樣子:
ChallengeResponseAuthentication yes
最后,重啟SSH服務,以便讓新的變更生效。
# /etc/init.d/sshd restart
#p#
配置谷歌身份驗證器應用程序
在智能手機中運行谷歌身份驗證器應用程序。摁Menu(菜單),選擇“Setup an account”(建立一個帳戶)。如果你沒有這個應用程序,可以下載谷歌身份驗證器應用程序(http://support.google.com/accounts/bin/answer.py?hl=en&answer=1066447),并安裝到你的安卓/iPhone/黑莓設備上。
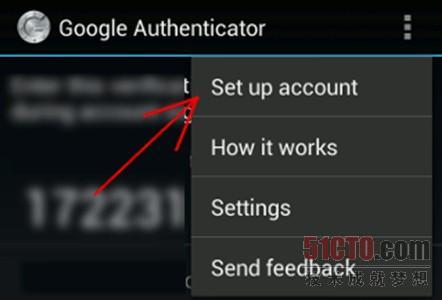
谷歌身份驗證器建立帳戶
摁“Enter key provided”(輸入提供的密鑰)。
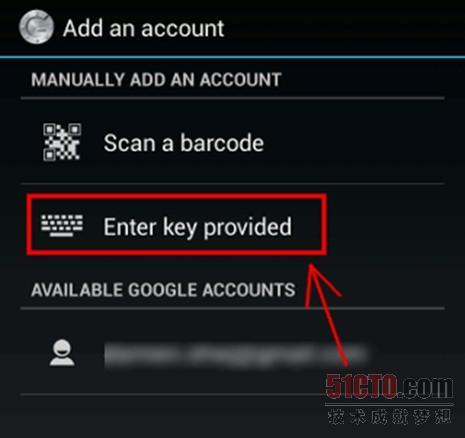
輸入谷歌身份驗證器密鑰
添加你的帳戶“Name”(名稱),輸入之前生成的“密鑰”。
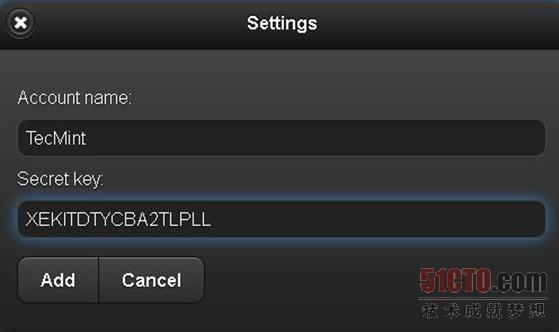
谷歌身份驗證器帳戶名稱和密鑰
它會生成一次性密碼(驗證碼),該一次性密碼在你的手機上每30秒就會不斷變化。
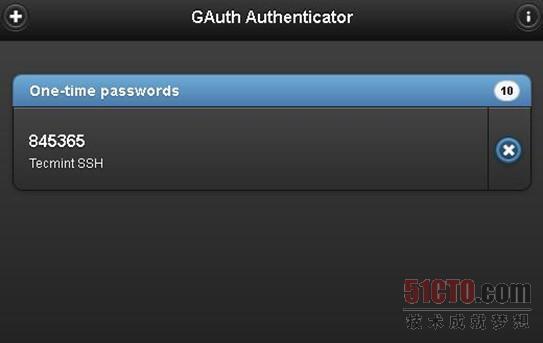
谷歌身份驗證器一次性密碼
現在試著通過SSH進行登錄,你會發現:每當你試圖通過SSH進行登錄,系統會提示你輸入谷歌身份驗證器代碼(驗證碼)和密碼。你只有30秒的時間來輸入這個驗證碼;要是錯過了時間,它會重新生成新的驗證碼。
login as: tecmint
Access denied
Using keyboard-interactive authentication.
Verification code:
Using keyboard-interactive authentication.
Password:
Last login: Tue Apr 23 13:58:29 2013 from 172.16.25.125
[root@tecmint ~]#
如果你沒有智能手機,還可以使用一個名為GAuth Authenticator的火狐插件(https://marketplace.firefox.com/app/gauth-authenticator/),實現雙因子驗證。
這點很重要:雙因子驗證與基于密碼的SSH登錄配套使用。要是你使用任何私鑰/公匙SSH會話,它會忽視雙因子驗證,讓你直接登錄進去。
原文地址:http://www.tecmint.com/ssh-two-factor-authentication/