Android Coding利器之掌握小技巧,助你Coding更上一層樓~
前言
話說前幾天在網上瀏覽到一大牛寫的關于Android布局優化的文章,看后感觸很深,回過頭看看自己寫過的代碼,發現還是有不少需要改進,今天找不到那天看的文章了,只能自己總結一些,以后有機會再次補充吧~ 。
本文目標
通過舉例說明Android開發中的小技巧,讓你我更6的玩轉Android~
掌握小技巧,助你Coding更上一層樓~
本文將通過以下幾點進行舉例說明:
- Android Studio 常用快捷鍵;
- Android Studio 強大的代碼補全;
- Android Studio 插件;
- Android 布局優化
Android Studio 常用快捷鍵
只從接觸Android Studio之后,愈發離不開這個開發神器了~也是,越接觸,越能感覺Studio的魅力,今天為大家帶來LZ開發中常用的一些快捷鍵。
1. Shift+F6 全局修改
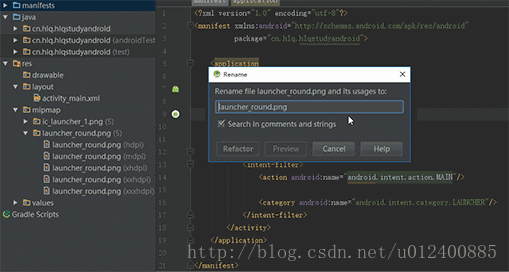
LZ一般使用這種方式去改全局變量,或者資源名稱。
2. Alt+F7 查看全局引用
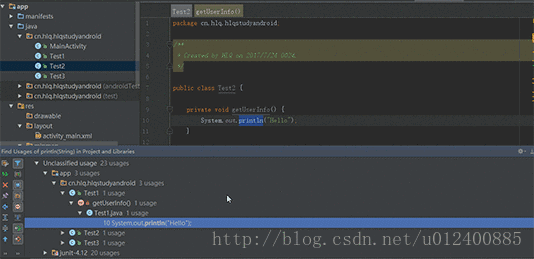
LZ一般優化時會使用這個去查看某個方法或者變量全局引用
3. Ctrl+Shift+上下鍵 移動代碼
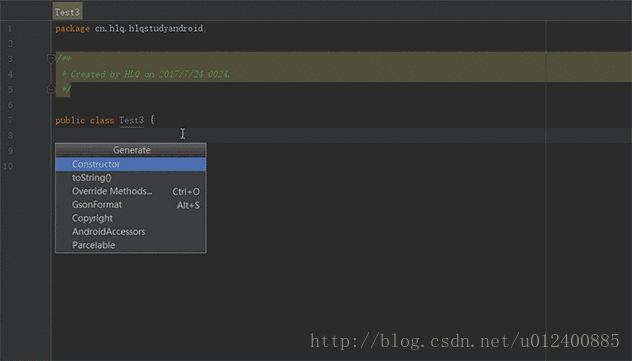
4. 強大的 Alt+Insert
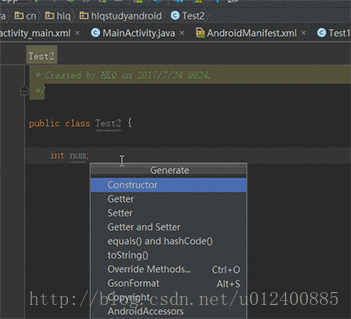
Alt+Insert,這個快捷鍵異常強大,里面包含生成get,set,toString ... 等一系列,愛不釋手~
5. Ctrl+F 局部查找

用這個找個方法啥的很6,但是僅限于局部,也就是本類
6. Ctrl+Alt+V 自動初始化變量 引入變量類型
只適用于基本類型
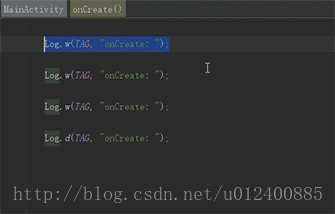
7. Ctrl+D 向下復制
還在Ctrl+C,Ctrl+V嘛?Out了,騷年~
8. Ctrl+Alt+L 格式化代碼
這個不得不說,都成為一種習慣,寫好一部分總是習慣格式化下代碼
9. Ctrl+Alt+O 去除無效引用(包名)
去除無用引用包以及格式化代碼都成為LZ標配了~GGG
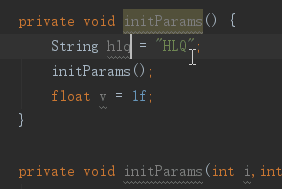
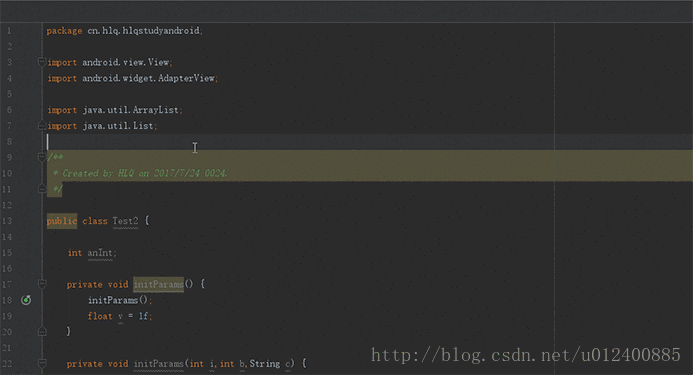
10. Ctrl+J 強大的代碼補全
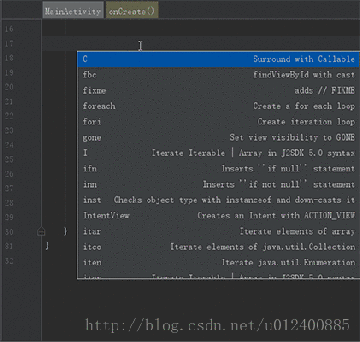
不得不說,這個真的666啊~
11. Ctrl+Alt+T 快速生成類似try塊 if塊 while等
這個LZ一般還是用于生成try塊方便,在項目中針對某些會出現異常的代碼塊都需要添加try
塊,防止異常導致崩潰
12. 貫穿全局的Alt+Enter
此子可用于導包,或者修正某些異常,類似于某些方法需要拋出異常或者添加try塊等
13. Ctrl+N 查找類
不想用鼠標,還想找個類腫么辦?Ctrl+N來幫你~
14. Ctrl+E 查看瀏覽歷史
15 .Alt+Shift+C 對比本地歷史紀錄
這個技能不錯,666
16. Ctrl+Shift+Space 自動補全代碼
17. Ctrl+Y 刪除當前行
18. F2 或Shift+F2 高亮錯誤或警告快速定位
19. Alt+J 多行編輯
想要一次性寫多行么?想一次性修改多行么?完全不是夢~
關于常用快捷鍵介紹到此,以后用到再補充~
Android Studio 強大的代碼補全
在上面已經為大家列舉LZ個人開發中常用的一些快捷鍵,下面簡單說明下強大的代碼補全功能~繼續感受Android Studio的魅力~
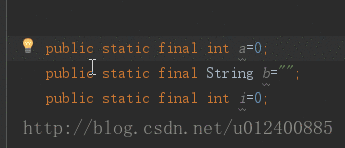
騷年,還在手動寫public static final嗎?
作為項目中常用也幾乎為必備的東西,強大的Studio早已看穿一切~當然LZ這里沒有全面,大家可以自行挖掘~或者直接使用快捷鍵~
Android Studio 插件
強大的Android Studio背后肯定會有n多插件使其更加優秀,下面將列舉LZ常用的幾種,具體大家可自行發掘~
1. GsonFormat json快速生成實體類
還在為Json編寫實體類犯愁嗎?趕快來使用它~
2. ButterKnife Zelezny 一鍵生成注解 簡化代碼
使用這個需要添加相應的依賴,為了省事兒,LZ直接盜圖了~勿怪
3. Parcelable 序列化
Android中的序列化有兩種方式,分別是實現Serializable接口和Parcelable接口,但在Android中是推薦使用Parcelable,而且這邊過程比較繁瑣,幸好有這神器~
4. Genymotion 優秀的模擬器
不解釋,也不截圖了,不過現在谷歌推出的模擬器使用起來也還不錯,個人比較支持谷歌更新后的模擬器
LZ目前嘗試用的也就以上幾個,當然,還有很多優秀的插件,附上地址,大家自行瀏覽選擇使用即可~
https://www.zhihu.com/question/28026027
Android 布局優化
布局優化,這是個有意思的話題,下面通過不同例子一起來看看吧~
一、巧用android:drawab系列+Style提高代碼可讀性以及簡潔性
TextView這個東西,想必大家用的都熟透了吧?今天我們來說說如何更好玩轉TextView。
舉一個很通用的例子,微信"我"的界面布局
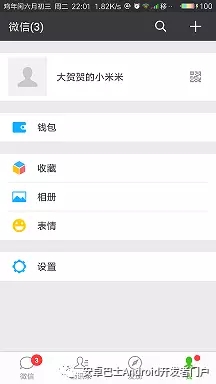
大家注意到"錢包","收藏","相冊"等布局了么?
以前,我們會這么寫:
- <LinearLayout
- android:layout_width="match_parent"
- android:layout_height="wrap_content"
- android:layout_marginTop="15dp"
- android:background="#FFF"
- android:orientation="horizontal"
- android:padding="15dp">
- <ImageView
- android:layout_width="30dp"
- android:layout_height="30dp"
- android:background="@mipmap/ic_launcher_1"/>
- <TextView
- android:layout_width="match_parent"
- android:layout_height="wrap_content"
- android:layout_gravity="center_vertical"
- android:text="錢包"/>
- </LinearLayout>
- ... ...
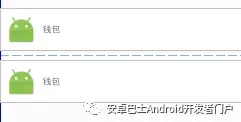
如果點擊項多的話,反而顯得亂,而且多了很多無用的代碼,今天我們來嘗試新的玩法~
- <TextView
- android:layout_width="match_parent"
- android:layout_height="wrap_content"
- android:layout_marginTop="15dp"
- android:background="#FFF"
- android:drawableLeft="@mipmap/ic_launcher_1"
- android:drawablePadding="10dp"
- android:gravity="center_vertical"
- android:padding="10dp"
- android:text="錢包"/>
- ... ...
倆者實現效果如下:
TextView多的話還可以提取Style文件,代碼簡潔易讀。
二、TextView跑馬燈
附上效果圖:

部分代碼如下:
- <TextView
- android:id="@+id/id_test"
- android:layout_width="match_parent"
- android:layout_height="wrap_content"
- android:layout_marginTop="15dp"
- android:background="#FFF"
- android:singleLine="true"
- android:ellipsize="marquee"
- android:marqueeRepeatLimit="marquee_forever"
- android:text="失戀算個啥?輕輕的,你走吧,千萬別后悔,因為只要你一揮手,就會發現,已經有那等不及的意中人,正偷偷摸摸拉你的手!"/>
記得Activity要設置一個屬性,否則無效。
- findViewById(R.id.id_test).setSelected(true);
要想實現跑馬燈效果,必須滿足一個條件,就是TextView內容必須超出屏幕,否則無效!當然你可以自定義。
三、關于顯示價格優化
效果如下:

按照之前的想法,我們會這么玩:
- <TextView
- android:layout_width="wrap_content"
- android:layout_height="wrap_content"
- android:text="您需要支付:"/><TextView
- android:layout_width="wrap_content"
- android:layout_height="wrap_content"
- android:text="¥50"
- android:textColor="@android:color/holo_red_light"/>
可有簡單用法,干嘛還多寫一個TextView,這不是浪費嘛?瞧著~
string文件中這樣寫:
- <string name="string_pay_price">您需要支付:%1$s</string> <!-- %1$s:代碼***位是String類型,同理,第二位%2$s -->
Activity定義方法:
- private void setPayPrice(String payPrice) {
- tvShow.setText(getString(R.string.string_pay_price, payPrice));
- SpannableStringBuilder builder = new SpannableStringBuilder(tvShow.getText().toString());
- ForegroundColorSpan colorSpan = new ForegroundColorSpan(Color.RED); // 根據要求自定義顏色值
- builder.setSpan(colorSpan, 4, tvShow.getText().toString().length(), Spannable.SPAN_EXCLUSIVE_EXCLUSIVE);
- tvShow.setText(builder);
- }
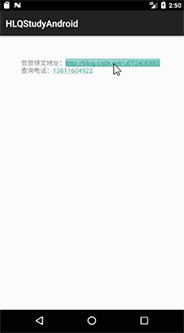
四、自動鏈接TextView內容,例如網址,電話,e-mail等
效果如下:
代碼部分:
- <TextView
- android:id="@+id/id_test"
- android:layout_width="wrap_content"
- android:autoLink="all"
- android:text="賀賀博文地址:http://blog.csdn.net/u012400885 \n查詢電話:13811604922"
- android:layout_height="wrap_content"/>
五、巧用LinearLayout,節省不必要代碼~
下面為大家附上一個簡單效果圖,大家首先想想,如果是你,怎么寫?

這里為大家引入另一種寫法,也就是小標題如何巧用LinearLayout
首先編寫shape文件,很簡單,設置高度和顏色。
- <shape xmlns:android="http://schemas.android.com/apk/res/android">
- <size android:height="15dp"/>
- <solid android:color="#FFF000"/></shape>
其次,在布局文件中設置divider以及showDividers屬性即可。
- <?xml version="1.0" encoding="utf-8"?><LinearLayout
- xmlns:android="http://schemas.android.com/apk/res/android"
- xmlns:tools="http://schemas.android.com/tools"
- android:layout_width="match_parent"
- android:layout_height="match_parent"
- android:background="#FFF"
- android:divider="@drawable/shape_0"
- android:orientation="vertical"
- android:showDividers="middle|beginning|end"
- tools:context="cn.hlq.hlqstudyandroid.MainActivity">
- <TextView
- android:layout_width="match_parent"
- android:layout_height="wrap_content"
- android:drawableLeft="@mipmap/ic_launcher_1"
- android:drawablePadding="10dp"
- android:gravity="center_vertical"
- android:padding="10dp"
- android:text="item項111"/>
- <TextView
- android:layout_width="match_parent"
- android:layout_height="wrap_content"
- android:drawableLeft="@mipmap/ic_launcher_1"
- android:drawablePadding="10dp"
- android:gravity="center_vertical"
- android:padding="10dp"
- android:text="item項222"/></LinearLayout>
下面簡單介紹下android:showDividers屬性:
android:showDividers="middle|beginning|end":鑒名其意,三個屬性值分別為 中間 開始部分 結束部分,也就是在三個部分顯示分割線。
有個哥兒們會說了,不是還有v7包下LinearLayoutCompat不也能實現分割線嗎?
確實,不過我試了下,感覺倆者一樣,這里就不做過分說明了~
六、禁止截屏功能,間接保護App
想想實現禁止應用截屏,只需要一行代碼,如下:
- getWindow().addFlags(WindowManager.LayoutParams.FLAG_SECURE);
防止setContentView后即可,之后截屏的時候,會提示以下內容:

結束語
東西很簡單,LZ簡單總結了下,給自己留點東西~