使用Stratis從命令行管理Linux存儲
通過從命令行運行它,得到這個易于使用的 Linux 存儲工具的主要用途。
正如本系列的***部分和第二部分中所討論的,Stratis 是一個具有與 ZFS 和 Btrfs 相似功能的卷管理文件系統。在本文中,我們將介紹如何在命令行上使用 Stratis。
安裝 Stratis
對于非開發人員,現在嘗試 Stratis 最簡單的方法是在 Fedora 28 中。
你可以用以下命令安裝 Stratis 守護進程和 Stratis 命令行工具:
# dnf install stratis-cli stratisd
創建一個池
Stratis 有三個概念:blockdevs、池和文件系統。 Blockdevs 是組成池的塊設備,例如磁盤或磁盤分區。一旦創建池,就可以從中創建文件系統。
假設你的系統上有一個名為 vdg 的塊設備,它目前沒有被使用或掛載,你可以在它上面創建一個 Stratis 池:
# stratis pool create mypool /dev/vdg
這假設 vdg 是完全清零并且是空的。如果它沒有被使用,但有舊數據,則可能需要使用 pool create 的 -force 選項。如果正在使用,請勿將它用于 Stratis。
如果你想從多個塊設備創建一個池,只需在 pool create 命令行中列出它們。你也可以稍后使用 blockdev add-data 命令添加更多的 blockdevs。請注意,Stratis 要求 blockdevs 的大小至少為 1 GiB。
創建文件系統
在你創建了一個名為 mypool 的池后,你可以從它創建文件系統:
# stratis fs create mypool myfs1
從 mypool 池創建一個名為 myfs1 的文件系統后,可以使用 Stratis 在 /dev/stratis 中創建的條目來掛載并使用它:
# mkdir myfs1# mount /dev/stratis/mypool/myfs1 myfs1
文件系統現在已被掛載在 myfs1 上并準備可以使用。
快照
除了創建空文件系統之外,你還可以創建一個文件系統作為現有文件系統的快照:
# stratis fs snapshot mypool myfs1 myfs1-experiment
這樣做后,你可以掛載新的 myfs1-experiment,它將初始包含與 myfs1 相同的文件內容,但它可能隨著文件系統的修改而改變。無論你對 myfs1-experiment 所做的任何更改都不會反映到 myfs1 中,除非你卸載了 myfs1 并將其銷毀:
# umount myfs1# stratis fs destroy mypool myfs1
然后進行快照以重新創建并重新掛載它:
# stratis fs snapshot mypool myfs1-experiment myfs1# mount /dev/stratis/mypool/myfs1 myfs1
獲取信息
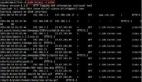
Stratis 可以列出系統中的池:
# stratis pool list
隨著文件系統寫入更多數據,你將看到 “Total Physical Used” 值的增加。當這個值接近 “Total Physical Size” 時要小心。我們仍在努力處理這個問題。
列出池中的文件系統:
# stratis fs list mypool
列出組成池的 blockdevs:
# stratis blockdev list mypool
目前只提供這些最少的信息,但它們將在未來提供更多信息。
摧毀池
當你了解了 Stratis 可以做什么后,要摧毀池,首先確保從它創建的所有文件系統都被卸載并銷毀,然后使用 pool destroy 命令:
# umount myfs1# umount myfs1-experiment (if you created it)# stratis fs destroy mypool myfs1# stratis fs destroy mypool myfs1-experiment# stratis pool destroy mypool
stratis pool list 現在應該顯示沒有池。