如何為雙活Redis Enterprise搭建基于Docker的開發環境?
譯文【51CTO.com快譯】Redis Enterprise這種雙活數據庫是地域分布式應用程序的理想選擇。其架構基于無沖突復制數據類型(CRDT)方面是突破性的學術研究。這種方法與其他雙活數據庫相比具有許多優點,包括如下:
1. 為讀寫操作提供本地延遲
2. 為簡單和復雜的數據類型提供內置的沖突解決方案
3. 跨區域故障切換
4. 簡化實施了諸多用例,比如積分榜、分布式緩存、共享會話和多用戶計費等。
最近我們發布了一篇關于如何使用雙活Redis Enterprise來開發應用程序的教程。為了模擬生產環境,開發人員或測試人員需要一種小型化的開發環境,很容易用Docker來搭建。
Redis Enterprise在Docker hub上以redislabs/redis的形式存在,我們已經在Redis Enterprise說明文檔頁面和docker hub本身上介紹了如何在Docker上搭建Redis Enterprise的詳細逐步說明。
我們在本文中介紹創建基于Docker的Redis Enterprise集群的步驟,這一切通過命令行來完成。下面大體介紹了整個過程(更多詳細信息如下):
1. 安裝數據庫
1)創建一個3個節點的Redis Enterprise集群,每個節點在單獨的子網上
2)創建基于CRDT的Redis Enterprise數據庫
3)連接到三個不同的實例
2. 驗證安裝的環境
3. 拆分網絡
4. 恢復連接
5. 停止Redis Enterprise
在開始之前,確保你已有一個bash shell,并為docker進程分配了足夠的內存。你可以進入到Docker -> Preferences -> Advanced來檢查內存。

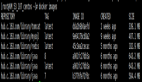
圖1:Docker內存***項高級選項卡
1. 安裝數據庫
下列腳本在3節點集群上創建基于CRDT的Redis Enterprise數據庫。將其保存在文件中并為其命名,比如“create_3_node_cluster.sh”。然后將模式改成可執行(chmod + x create_3_node_cluster.sh),并運行腳本([path] /create_3_node_cluster.sh)。
- #!/bin/bash
- # Delete the bridge networks if they already exist
- docker network rm network1 2>/dev/null
- docker network rm network2 2>/dev/null
- docker network rm network3 2>/dev/null
- # Create new bridge networks
- echo “Creating new subnets…”
- docker network create network1 –subnet=172.18.0.0/16 –gateway=172.18.0.1
- docker network create network2 –subnet=172.19.0.0/16 –gateway=172.19.0.1
- docker network create network3 –subnet=172.20.0.0/16 –gateway=172.20.0.1
- # Start 3 docker containers. Each container is a node in a separate network
- # These commands pull redislabs/redis from the docker hub. Because of the
- # port mapping rules, Redis Enterprise instances are available on ports
- # 12000, 12002, 12004
- echo “”
- echo “Starting Redis Enterprise as Docker containers…”
- docker run -d –cap-add sys_resource -h rp1 –name rp1 -p 8443:8443 -p 9443:9443 -p 12000:12000 –network=network1 –ip=172.18.0.2 redislabs/redis
- docker run -d –cap-add sys_resource -h rp2 –name rp2 -p 8445:8443 -p 9445:9443 -p 12002:12000 –network=network2 –ip=172.19.0.2 redislabs/redis
- docker run -d –cap-add sys_resource -h rp3 –name rp3 -p 8447:8443 -p 9447:9443 -p 12004:12000 –network=network3 –ip=172.20.0.2 redislabs/redis
- # Connect the networks
- docker network connect network2 rp1
- docker network connect network3 rp1
- docker network connect network1 rp2
- docker network connect network3 rp2
- docker network connect network1 rp3
- docker network connect network2 rp3
- # Sleep while the nodes start. Increase the sleep time if your nodes take
- # longer than 60 seconds to start
- echo “”
- echo “Waiting for the servers to start…”
- sleep 60
- # Create 3 Redis Enterprise clusters – one for each network. You can login to
- # a cluster as https://localhost:8443/ (or 8445, 8447). The user name is
- # r@r.com, password is password. Change the user
- echo “”
- echo “Creating clusters”
- docker exec -it rp1 /opt/redislabs/bin/rladmin cluster create name cluster1.local username r@r.com password test
- docker exec -it rp2 /opt/redislabs/bin/rladmin cluster create name cluster2.local username r@r.com password test
- docker exec -it rp3 /opt/redislabs/bin/rladmin cluster create name cluster3.local username r@r.com password test
- # Create the CRDB
- echo “”
- echo “Creating a CRDB”
- docker exec -it rp1 /opt/redislabs/bin/crdb-cli crdb create –name mycrdb –memory-size 512mb –port 12000 –replication false –shards-count 1 –instance fqdn=cluster1.local,username=r@r.com,password=test –instance fqdn=cluster2.local,username=r@r.com,password=test –instance fqdn=cluster3.local,username=r@r.com,password=test
2. 驗證安裝的環境
在端口12000、12002和12004上運行redis-cli,驗證你可以連接到所有三個Redis Enterprise端口。如果你將應用程序連接到Redis Enterprise,需要應用程序的三個實例連接到三個不同的端口。比如:
- $ redis-cli -p 12000
- 127.0.0.1:12000> incr counter
- (integer) 1
- 127.0.0.1:12000> get counter
- “1”
3. 拆分網絡
拆分網絡可幫助你在Redis Enterprise副本之間引入“網絡分區”。你在設計應用程序時,必須設計成副本斷開連接后可以順暢運行。該腳本幫助你隔離三個副本。將該腳本保存在文件“split_networks.sh”中,并在運行之前更改模式,讓它成為可執行(chmod +x split_networks.sh)。
- #!/bin/bash
- docker network disconnect network2 rp1
- docker network disconnect network3 rp1
- docker network disconnect network1 rp2
- docker network disconnect network3 rp2
- docker network disconnect network1 rp3
- docker network disconnect network2 rp3
4. 恢復連接
你運行腳本“split_netorks.sh”后,本地副本會停止與其他副本共享數據庫更新。恢復連接將讓它們能夠交換所有更新,并獲得同樣的最終狀態,這歸功于Redis Enterprise提供了很強的最終一致性。下列腳本恢復副本之間的網絡連接。將這保存在文件“restore_networks.sh”中,并更改模式讓它成為可執行(chmod +x restore_networks.sh)。
- #!/bin/bash
- docker network connect network2 rp1
- docker network connect network3 rp1
- docker network connect network1 rp2
- docker network connect network3 rp2
- docker network connect network1 rp3
- docker network connect network2 rp3
5. 停止Redis Enterprise
完成開發和測試后,只要運行下列腳本,就可以終止Redis Enterprise的所有三個節點。將該文件保存在文件中,并將文件命名為“stop.sh”,更改模式,讓它成為可執行(chmod +x stop.sh)。
- #!/bin/bash
- docker stop rp1 rp2 rp3
- docker rm rp1 rp2 rp3
- docker network rm network1
- docker network rm network2
- docker network rm network3
就是這樣。完成了上述步驟后,現在你有了自己的基于Docker的Redis Enterprise雙活數據庫環境。若有任何問題,歡迎留言交流。
原文標題:How to Set Up a Docker-based Development Environment for Active-Active Redis Enterprise,作者:Roshan Kumar
【51CTO譯稿,合作站點轉載請注明原文譯者和出處為51CTO.com】