雙十一剛過(guò),你的手還好嗎?這些Colab技巧幫你愉快地薅谷歌羊毛
Google Colab 是一個(gè)免費(fèi)的 Jupyter 環(huán)境,用戶(hù)可以用它創(chuàng)建 Jupyter notebook,在瀏覽器中編寫(xiě)和執(zhí)行 Python 代碼,以及其他基于 Python 的第三方工具和機(jī)器學(xué)習(xí)框架,如 Pandas、PyTorch、Tensorflow、Keras、Monk、OpenCV 等。
Google Colab 的好處在于,不需要任何配置就能直接上手使用,并提供免費(fèi)的 GPU,你可以和任何人共享實(shí)時(shí)代碼、數(shù)學(xué)公式、數(shù)據(jù)可視化結(jié)果、數(shù)據(jù)處理、數(shù)值模擬、機(jī)器學(xué)習(xí)模型等各種項(xiàng)目。
以前,機(jī)器之心也曾經(jīng)介紹過(guò)很多關(guān)于 Colab 的知識(shí)點(diǎn),比如:20種小技巧,玩轉(zhuǎn)Google Colab。
本文將介紹如何用 Python 使用 Google Colab,以及一些 Colab 使用技巧。
項(xiàng)目地址:https://github.com/towardsai/tutorials/tree/master/google_colab_tutorial
為什么大家都愛(ài) Colab
Colab 的優(yōu)點(diǎn)包括:
- 提供了免費(fèi)的 Jupyter notebook 環(huán)境;
- 帶有預(yù)安裝的軟件包;
- 完全托管在谷歌云上;
- 用戶(hù)無(wú)需在服務(wù)器或工作站上進(jìn)行設(shè)置;
- Notebook 會(huì)自動(dòng)保存在用戶(hù)的 Google Drive 中;
- 提供基于瀏覽器的 Jupyter notebook;
- 完全免費(fèi),且提供 GPU 和 TPU(Pro 用戶(hù)可以使用更多資源,但需要付費(fèi));
- 支持 Python 2 和 Python 3;
- 提供兩種硬件加速器:GPU 和 TPU。
第一步:?jiǎn)?dòng) Google Colab
我們可以使用 Colab 在 Web 瀏覽器上直接運(yùn)行 Python 代碼,使用指南:https://mktg.best/d7b6u。
啟動(dòng)窗口隨之打開(kāi),彈窗中提供了多項(xiàng)功能:
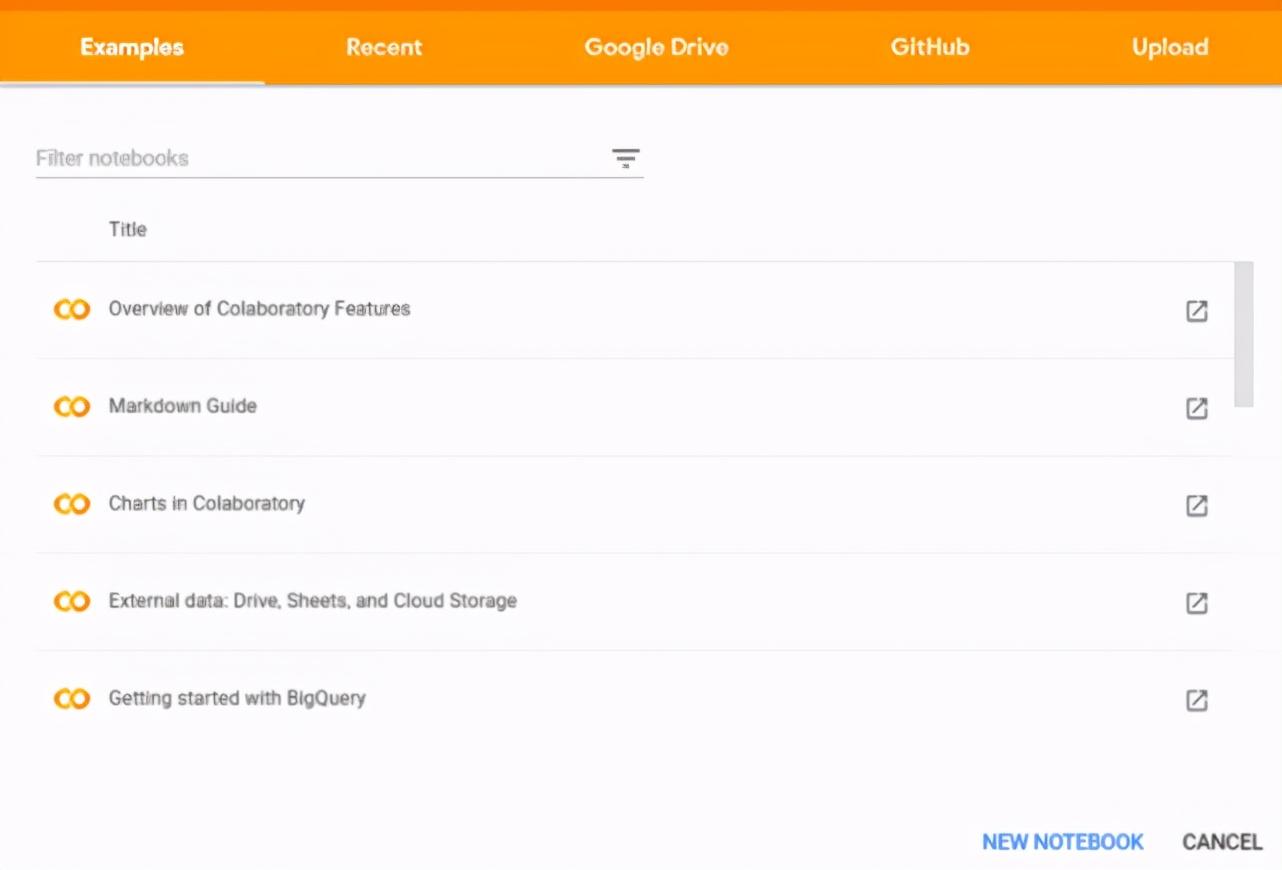
它提供了創(chuàng)建 notebook 以及從不同來(lái)源上傳和選擇的選項(xiàng),比如 GitHub、Google Drive 或本地計(jì)算機(jī)。
從 GitHub 上傳 Notebook
我們可以使用項(xiàng)目 URL,或者搜索組織和用戶(hù)等方法,直接從 GitHub 上傳 Python 代碼。
使用 URL 的步驟上傳項(xiàng)目的步驟如下圖所示:
- 啟動(dòng) Google Colab
- 從彈框中選擇 GitHub 這一項(xiàng)。
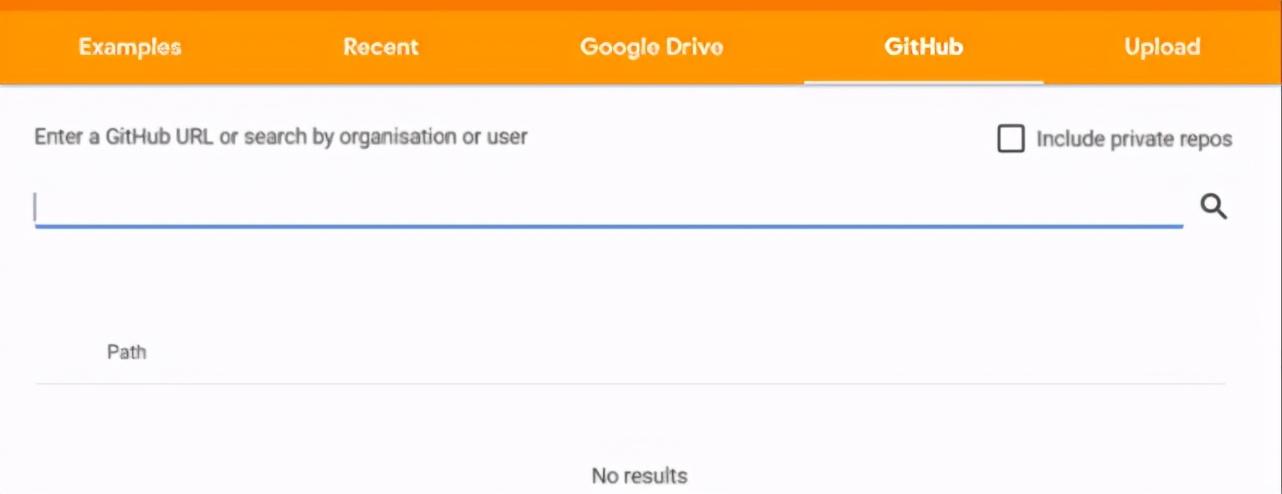
輸入 GitHub 項(xiàng)目 URL 并搜索以獲取代碼:
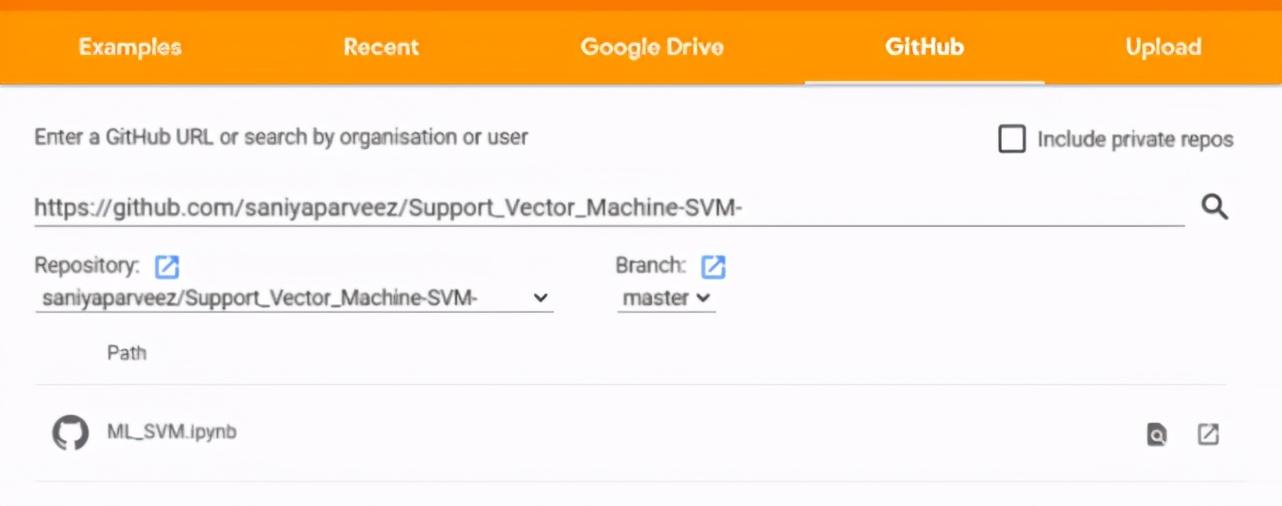
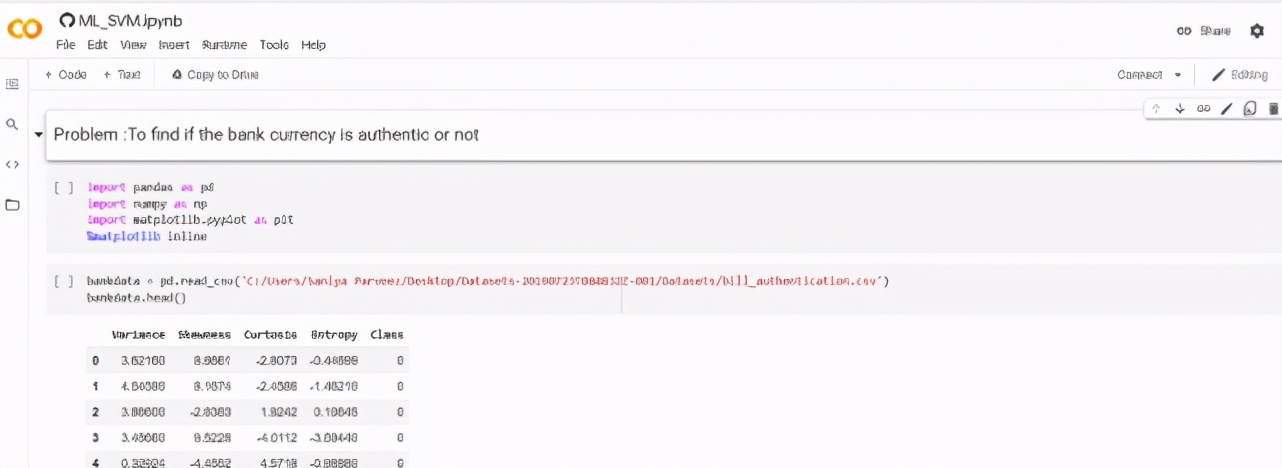
將完整代碼一鍵上傳到 Google Colab notebook:
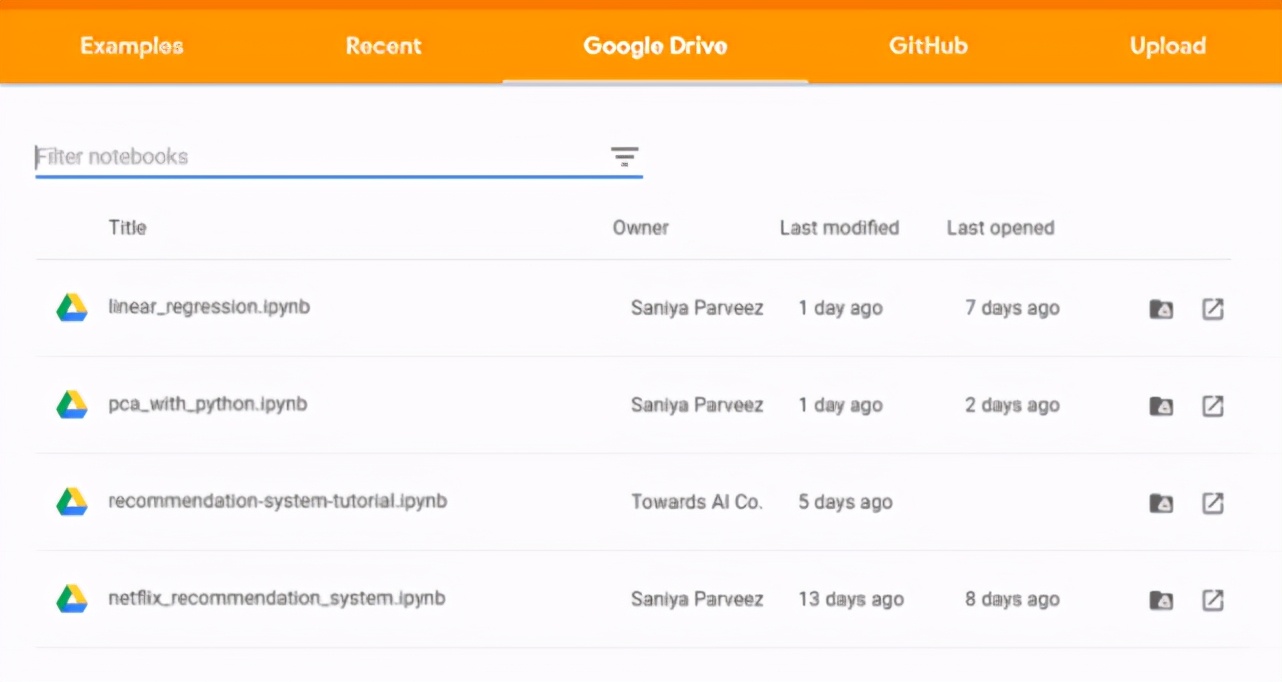
同樣地,用戶(hù)可以通過(guò)按名稱(chēng)、日期、所有者或者修改日期過(guò)濾保存的 notebook,直接從 Google Drive 上傳代碼。
從 Kaggle 上傳數(shù)據(jù)
(1) 從 Kaggle 生成 API Token
來(lái)自 Kaggle 的數(shù)據(jù)可以直接上傳到 Colab,不過(guò)這需要 Kaggle 的 API Token 才能完成數(shù)據(jù)導(dǎo)入,步驟如下:
- 打開(kāi) Kaggle
- 轉(zhuǎn)至「我的賬戶(hù)」
- 向下滾動(dòng)到「API」部分

- 如果需要,先單擊「Expire API Token」以刪除先前的 token
- 點(diǎn)擊「Create New API Token」,生成一個(gè)新的 token 并下載一個(gè)名為「kaggle.json」的 JSON 文件
「kaggle.json」文件包含用戶(hù)名和密鑰,如下所示:

(2) 從 Kaggle 上傳數(shù)據(jù)的步驟
將「kaggle.json」文件保存在本地計(jì)算機(jī)上。
安裝 Kaggle 軟件包:
- !pip install -q kaggle
導(dǎo)入包:
- from google.colab import files
上傳本地文件「kaggle.json」:
- files.upload()

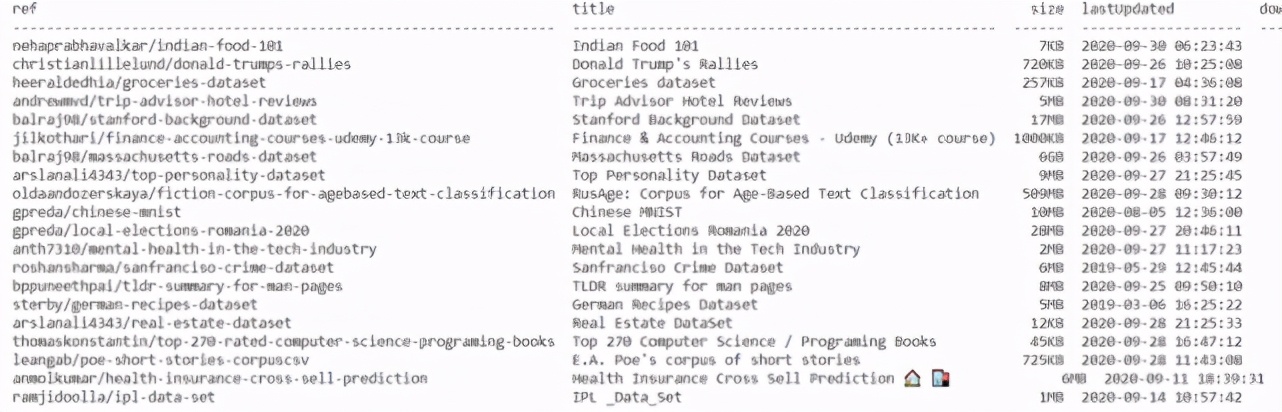
檢查 Colab notebook 是否與 Kaggle 正確連接:
- !kaggle datasets list
從 Kaggle 下載任意比賽數(shù)據(jù):
- !kaggle competitions download -c competitive-data-science-predict-future-sales
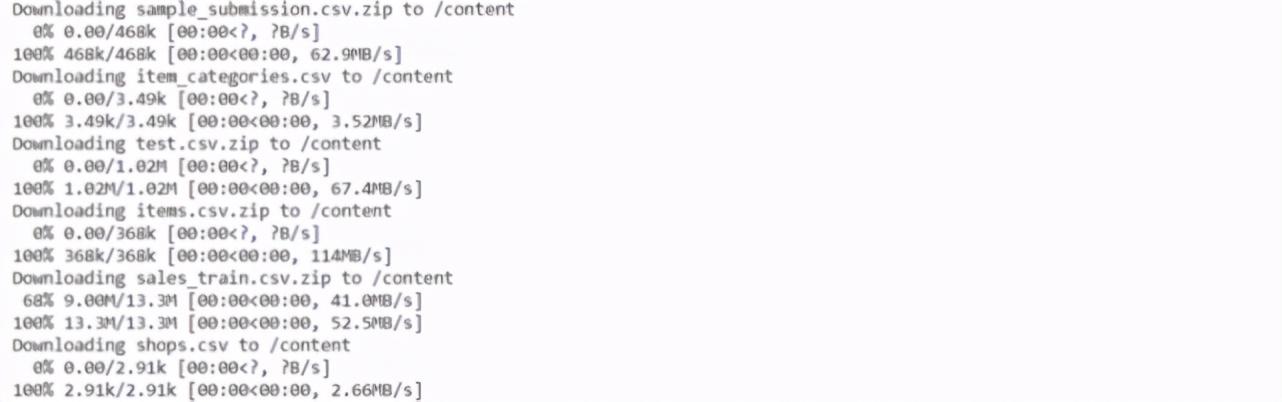
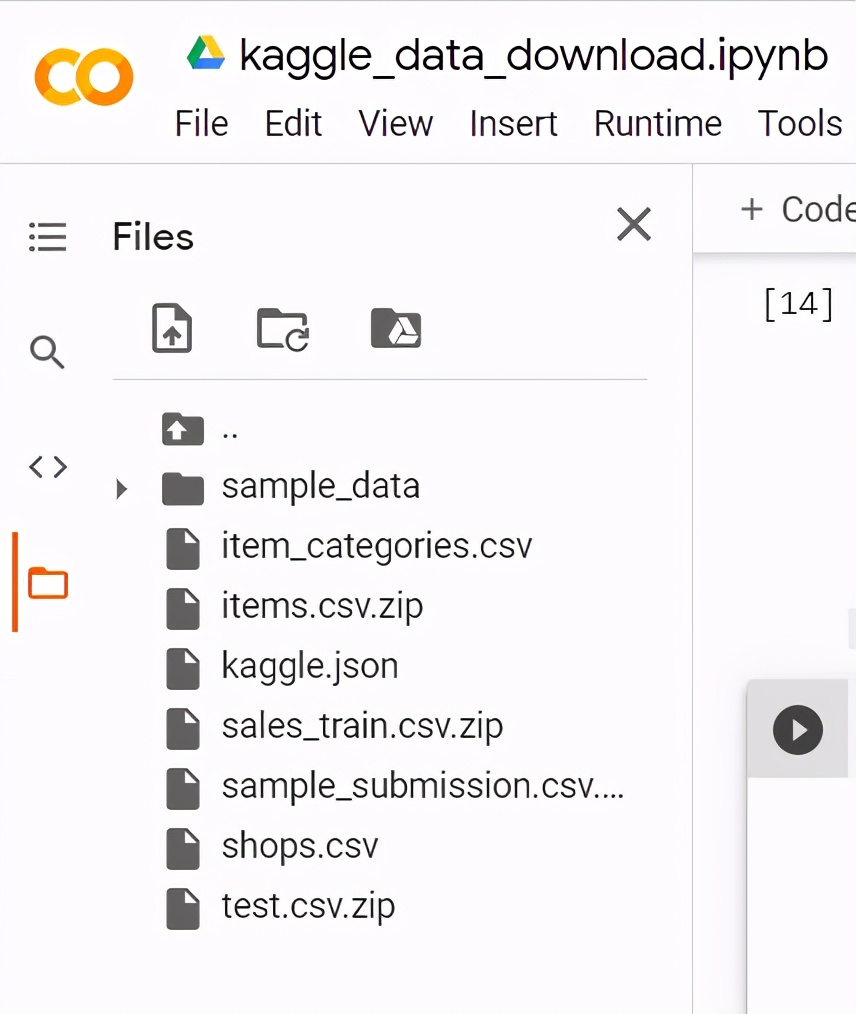
Kaggle 數(shù)據(jù)將在 Colab 中下載和上傳,如下所示:
從 Google Drive 中讀取文件
Colab 還提供從 Google Drive 讀取數(shù)據(jù)的功能。
導(dǎo)入包:
- import globimport pandas as pdfrom google.colab import drive
掛載 Google Drive:
- drive.mount('/gdrive')
這一步要求填寫(xiě) Google Drive 的授權(quán)碼:
- 授權(quán)碼輸入框
- 單擊鏈接并生成授權(quán)碼
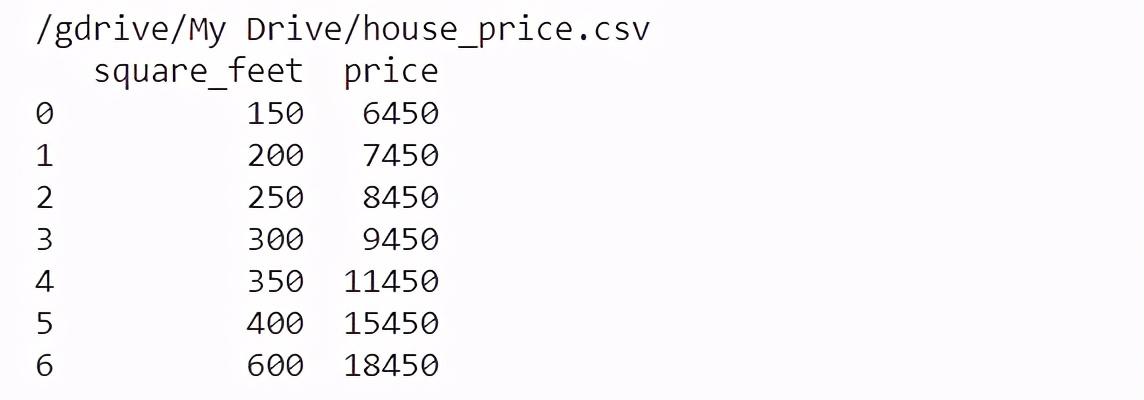
- 從 Google Drive 讀取 CSV 文件
- file_path = glob.glob("/gdrive/My Drive/***.csv")for file in file_path:
- df = pd.read_csv(file)
- print(df)
將運(yùn)行時(shí)硬件加速器設(shè)置為 GPU
Google Colab 提供免費(fèi)的 GPU 硬件加速器云服務(wù)。在機(jī)器學(xué)習(xí)和深度學(xué)習(xí)中需要同時(shí)處理多個(gè)計(jì)算,高性能 GPU 的價(jià)格很高,但非常重要。
GPU 通過(guò)并行化提供優(yōu)秀的性能,可在一次調(diào)用中啟動(dòng)數(shù)百萬(wàn)個(gè)線程。盡管與 CPU 相比,GPU 的 clock speed 較低,且缺少多核管理功能,但 GPU 的表現(xiàn)通常比 CPU 好。
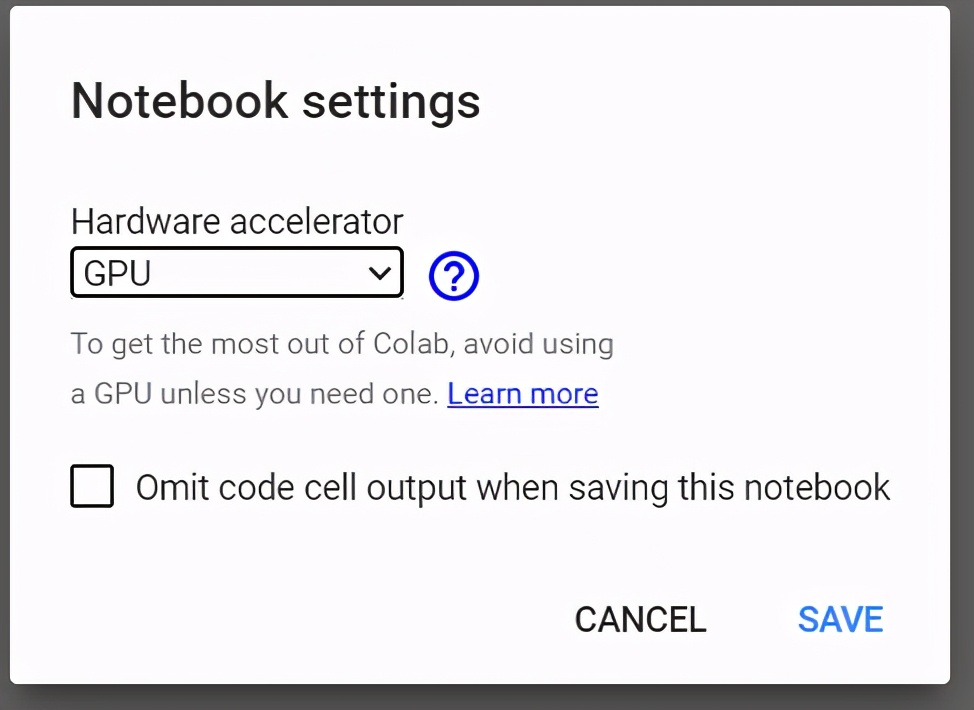
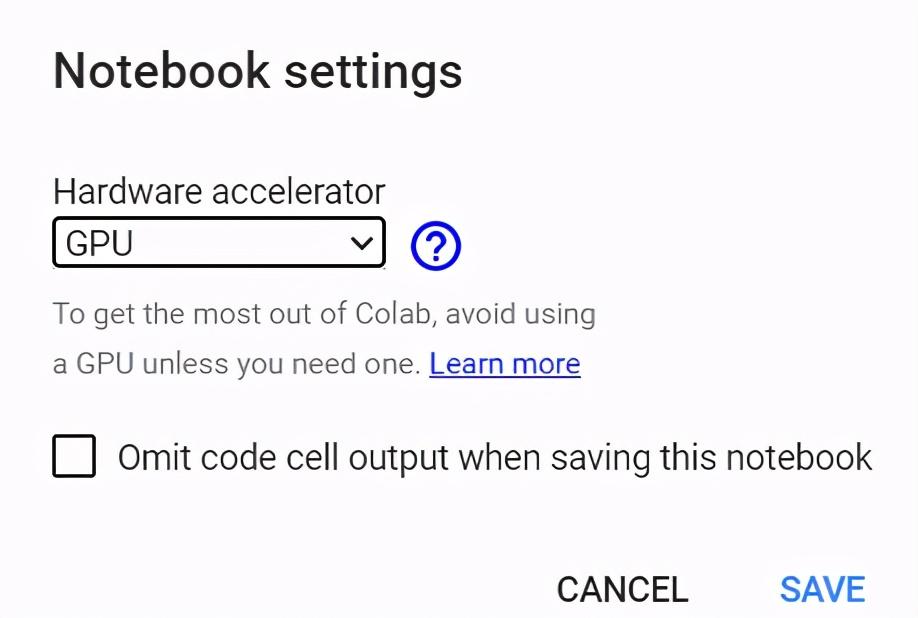
(1) 在 Colab 中設(shè)置 GPU 硬件加速器
設(shè)置步驟如下:
- 選擇 Runtime → Change runtime type
- 在彈出窗口中選擇「GPU」
(2) 檢查 Colab 中 GPU 的詳細(xì)信息
導(dǎo)入重要的包:
- import tensorflow as tffrom tensorflow.python.client import device_lib
檢查 GPU 加速器
- tf.test.gpu_device_name()
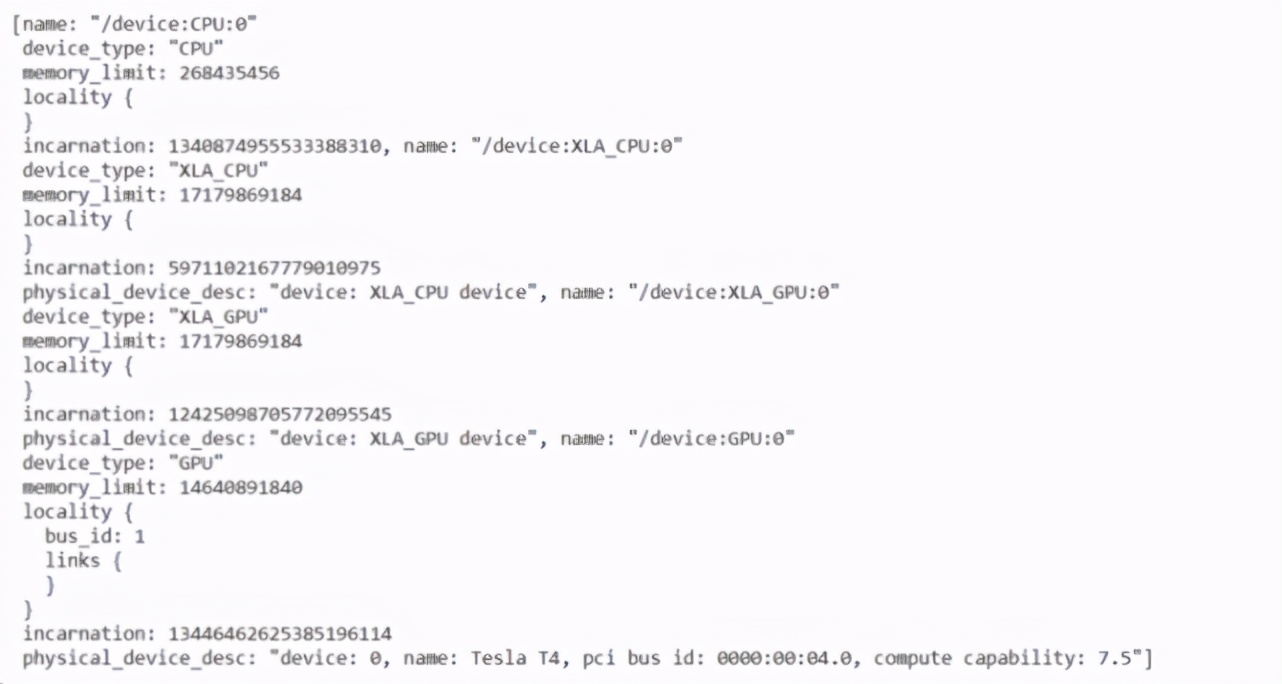
檢查用于 GPU 的硬件:
- device_lib.list_local_devices()
(3) 使用 GPU 的代碼示例
在未選擇運(yùn)行時(shí) GPU 的情況下檢查可用 GPU 的數(shù)量,使其設(shè)置為「None」。
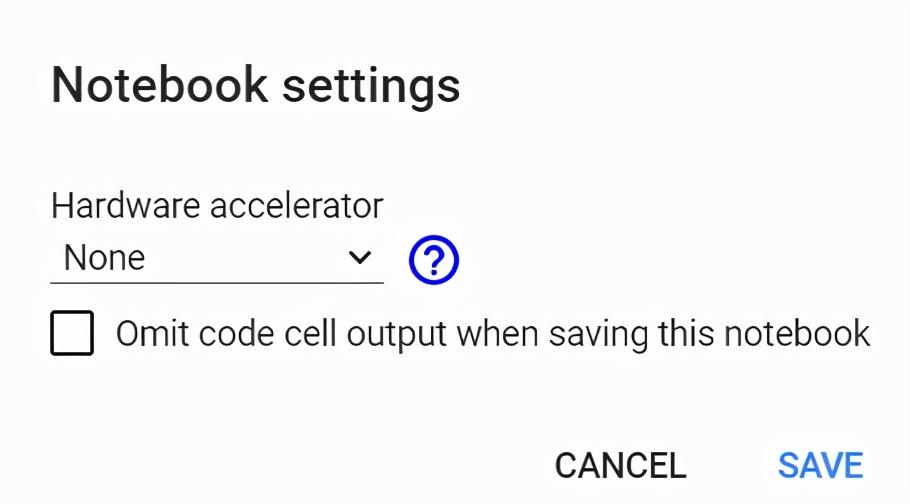
- import tensorflow as tfno_of_gpu = len(tf.config.experimental.list_physical_devices('GPU'))print("Total GPUS:", no_of_gpu)
硬件加速器為 None,因此 GPU 數(shù)量的值為 0。
將運(yùn)行時(shí)硬件加速器設(shè)置為 GPU:
- import tensorflow as tfno_of_gpu =len(tf.config.experimental.list_physical_devices('GPU'))print("Total GPUS:", no_of_gpu)
硬件加速器為 GPU,因此 GPU 數(shù)量值為 1。
在 GPU 上執(zhí)行張量乘法:
- try:
- with tf.device('/device:GPU:1'):
- tensor1 = tf.constant([[1.0, 2.0, 3.0], [4.0, 5.0, 6.0]])
- tensor2 = tf.constant([[1.0, 2.0], [3.0, 4.0], [5.0, 6.0]])
- result = tf.matmul(tensor1, tensor2)
- print(result)
- except RuntimeError as exception:
- print(exception)

張量乘法結(jié)果。
將 GitHub repo 復(fù)制到 Google Drive
GitHub repo 代碼可以復(fù)制和存儲(chǔ)到 Google Drive 中,具體步驟如下:
掛載 Google Drive
- from google.colab import drive
- drive.mount('/content/gdrive')
進(jìn)入 Google drive,創(chuàng)建目錄「project」。
- %cd gdrive/My Drive/mkdir project%cd project/
復(fù)制 GitHub repo,例如:
- !git clone https://github.com/saniyaparveez/youtube_video_type_prediction.git

檢查復(fù)制的項(xiàng)目:
- !ls

Colab 魔法
Colab 提供許多有趣的 trick,包括多個(gè)可以執(zhí)行快速操作的命令,這些命令通常使用 % 作為前綴。
(1) Colab 魔法命令列表
- %lsmagic

(2) 本地目錄
- %ldir

(3) 獲取 Notebook 歷史
- %history
(4) CPU 時(shí)間
- %time

(5) 系統(tǒng)運(yùn)行多久?
- !uptime

(6) 展示可用和已用的內(nèi)存
- !free -hprint("-"*100)

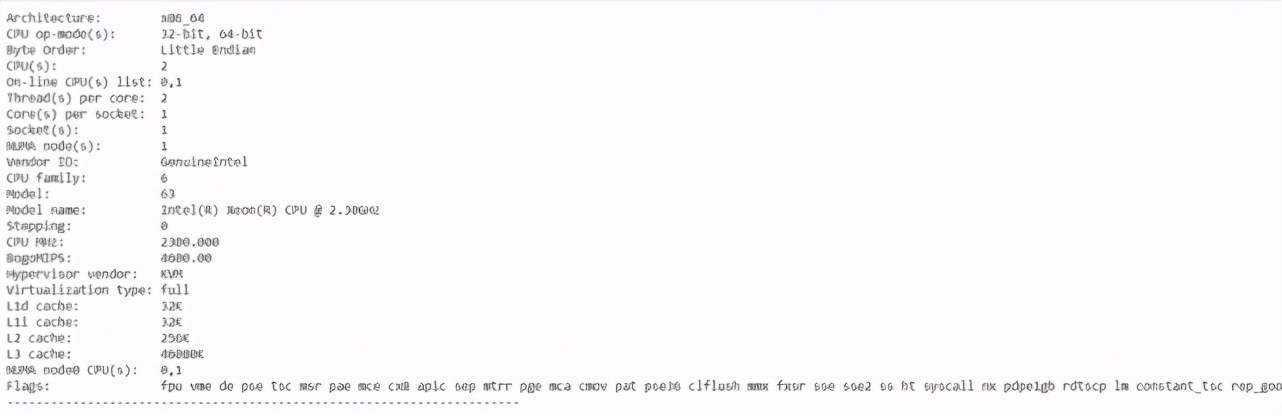
(7) 展示 CPU 產(chǎn)品規(guī)格
- !lscpuprint("-"*70)
(8) 列出所有運(yùn)行虛擬機(jī)進(jìn)程
- %%shecho "List all running VM processes."ps -efecho "Done"

(9) 在 HTML 中嵌入文本
- %%html<marquee>Towards AI is a great publication platform</marquee>
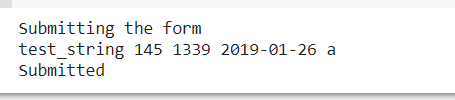
(10) 設(shè)計(jì) HTML 格式
- #@title Personal Details#@markdown Information.Name = 'Peter' #@param {type: "string"}Age = 25 #@param {type: "slider", min: 1, max: 100}zip = 1234 #@param {type: "number"}Date = '2020-01-26' #@param {type: "date"}Gender = "Male" #@param ['Male', 'Female', 'Other']#@markdown ---print("Submitting the form")print(string_type, slider_value, number, date, pick_me)print("Submitted")
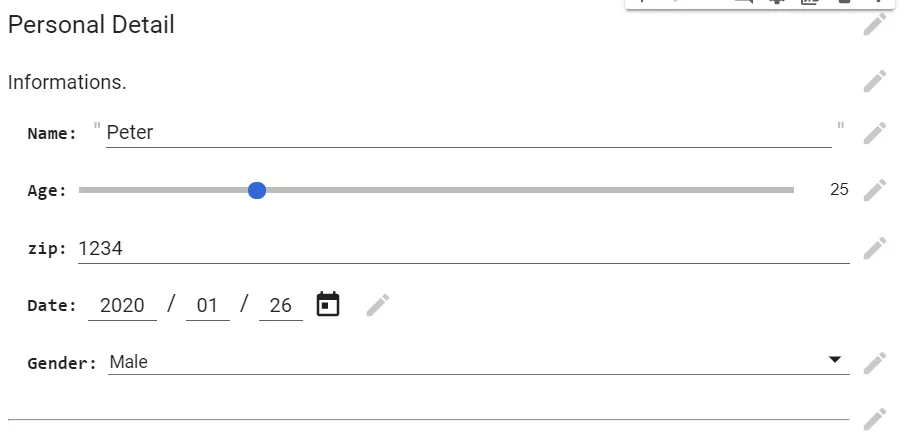
在 Google Colab 中生成 HTML 格式。
繪圖
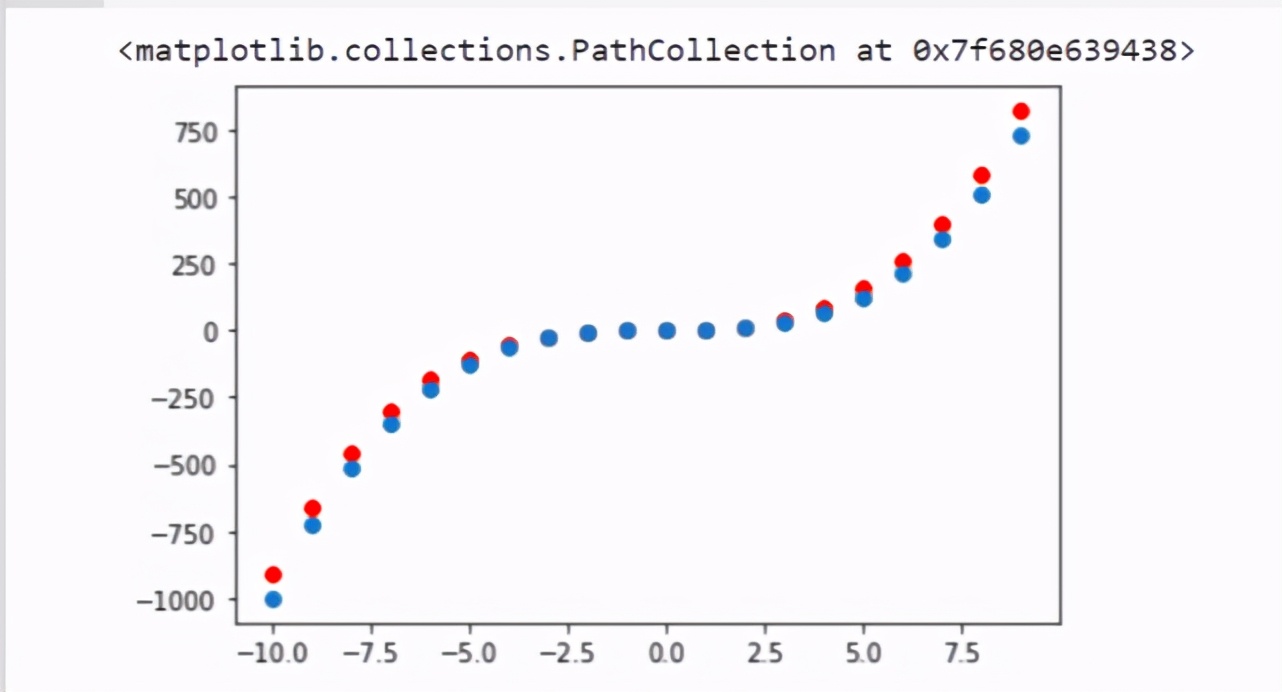
Google Colab 還可用于數(shù)據(jù)可視化。以下代碼和圖展示了 Google Colab 對(duì)一個(gè)以上多項(xiàng)式的繪圖,Y = X³+X²+X。
- x = np.arange(-10,10)y = np.power(x,3)y1 = np.power(x,3) + np.power(x,2) + xplt.scatter(x,y1,c="red")plt.scatter(x,y)
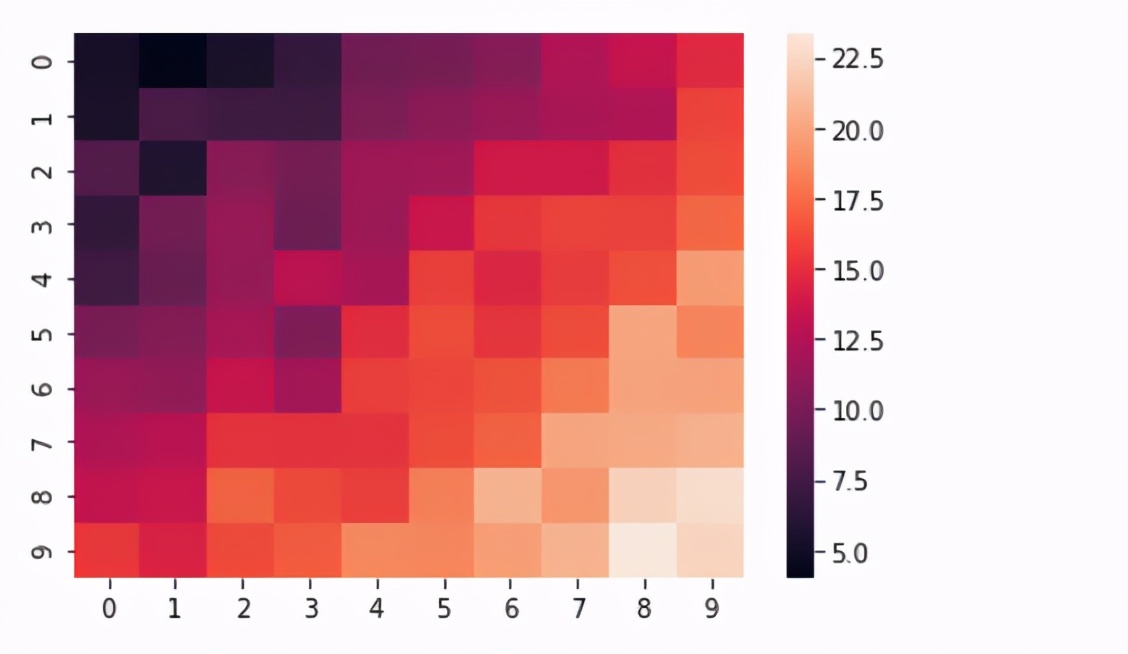
以下代碼和圖用于生成熱圖:
- import matplotlib.pyplot as pltimport numpy as npimport seaborn as snslength = 10data = 5 + np.random.randn(length, length)data += np.arange(length)data += np.reshape(np.arange(length), (length, 1))sns.heatmap(data)plt.show()
Google Colab 中的 TPU
Google Colab 使用 TPU(張量處理單元)進(jìn)行 Tensorflow 圖上的加速。TPU 是谷歌開(kāi)發(fā)的、專(zhuān)為神經(jīng)網(wǎng)絡(luò)機(jī)器設(shè)計(jì)的 AI 加速器專(zhuān)用集成電路 (ASIC)。
TPU 具備優(yōu)秀的 teraflop 配置、浮點(diǎn)運(yùn)算性能等。每個(gè) TPU 的計(jì)算能力達(dá)到每秒 180 萬(wàn)億次浮點(diǎn)運(yùn)算(180 teraflops),擁有 64 GB 的高帶寬內(nèi)存。
(1) 在 Colab 中設(shè)置 TPU
在 Google Colab 中設(shè)置 TPU 的步驟如下:
運(yùn)行時(shí)菜單 → 更改運(yùn)行時(shí)
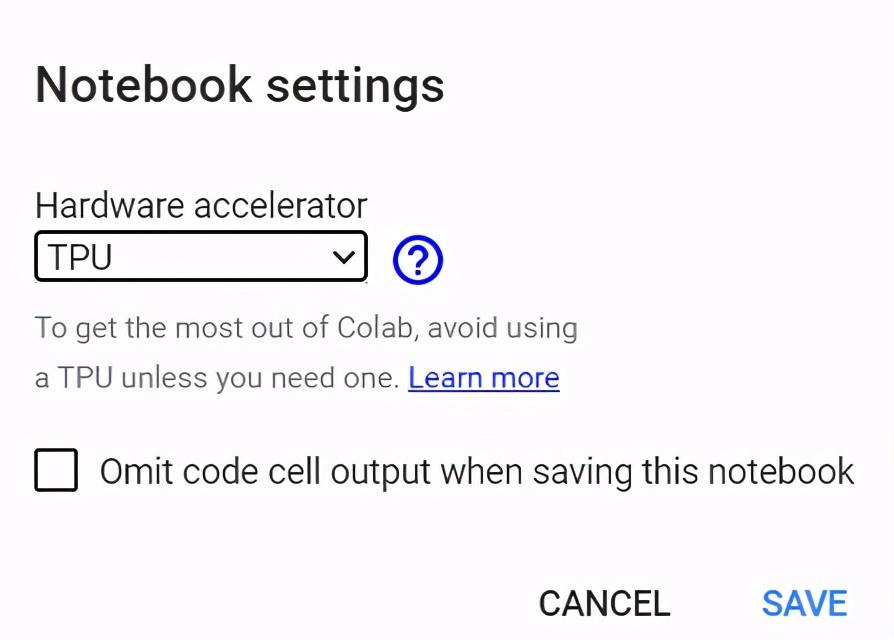
選擇 TPU 硬件加速器
(2) 確認(rèn)在 TPU 硬件加速器上運(yùn)行
這需要 TensorFlow 包。以下代碼和實(shí)現(xiàn)可以確認(rèn) Colab 是否設(shè)置 TPU 加速器:
- import tensorflow as tf
- try:
- tpu = tf.distribute.cluster_resolver.TPUClusterResolver()
- print('Running on TPU', tpu.cluster_spec().as_dict()['worker'])
- except ValueError:
- print('Exception')

如果 TPU 未設(shè)置成功,則代碼會(huì)報(bào)錯(cuò)。
結(jié)論
Google Colab 是一種 Jupyter notebook 環(huán)境,通過(guò)執(zhí)行基于 Python 的代碼來(lái)構(gòu)建機(jī)器學(xué)習(xí)或深度學(xué)習(xí)模型。Google Colab 完全免費(fèi)(pro 版除外),并提供 GPU 和 TPU 硬件加速器,易于使用和共享。
本文列舉了 Google Colab 的使用技巧,希望能夠幫助大家更好地利用 Google Colab 資源。
資源:
- Google colab 實(shí)現(xiàn):https://colab.research.google.com/drive/1ymIYzFg4Q7iBjnTut31aBqPHgOpkjHYD?usp=sharing
- Github repository:https://github.com/towardsai/tutorials/tree/master/google_colab_tutorial
【本文是51CTO專(zhuān)欄機(jī)構(gòu)“機(jī)器之心”的原創(chuàng)譯文,微信公眾號(hào)“機(jī)器之心( id: almosthuman2014)”】