如何在 ASP.Net Core 中使用 Swagger
本文轉載自微信公眾號「碼農讀書」,作者碼農讀書 。轉載本文請聯系碼農讀書公眾號。
大家在開發完 webapi 后,經常為了方便接口雙方對接,需要將 webapi 接口文檔化,那有沒有什么快捷可交互的文檔呢?可以利用快捷工具 Swagger,它的可視化 UI 可輕松助你 API 文檔化的同時還方便測試 API。
Swashbuckle 就是一個用于生成 Swagger 文檔的開源工具包,這篇文章將會討論如何利用 Swashbuckle 來為你的 Restful API 生成可交互的文檔。
安裝 Swagger 中間件
要想利用 Swagger 文檔化,需要 nuget 引用 Swashbuckle.AspNetCore 包,還可以通過 Visual Studio 2019 的 NuGet package manager 可視化界面安裝 或者 通過 NuGet package manager 命令行工具輸入以下命令:
- dotnet add package Swashbuckle.AspNetCore
配置 Swagger 中間件
為了配置 Swagger,在 Startup.ConfigureServices 方法中添加如下代碼,注意下面的 AddSwaggerGen 方法是用于給 API 文檔 添加一些元數據。
- services.AddSwaggerGen(c =>
- {
- c.SwaggerDoc("v1", new Info
- {
- Version = "v1",
- Title = "Swagger Demo",
- Description = "Swagger Demo for ValuesController",
- TermsOfService = "None",
- Contact = new Contact() { Name = "Joydip Kanjilal",
- Email = "joydipkanjilal@yahoo.com",
- Url = "www.google.com" }
- });
- });
接下來就要啟動 Swagger了,在 Startup.Configure 方法下添加如下代碼:
- app.UseSwagger();
- app.UseSwaggerUI(c =>
- {
- c.SwaggerEndpoint("/swagger/v1/swagger.json", "v1");
- });
為了完整性,下面是 Startup 中的所有代碼清單。
- using Microsoft.AspNetCore.Builder;
- using Microsoft.AspNetCore.Hosting;
- using Microsoft.AspNetCore.Mvc;
- using Microsoft.Extensions.Configuration;
- using Microsoft.Extensions.DependencyInjection;
- using Swashbuckle.AspNetCore.Swagger;
- namespace IDGSwaggerDemo
- {
- public class Startup
- {
- public Startup(IConfiguration configuration)
- {
- Configuration = configuration;
- }
- public IConfiguration Configuration { get; }
- public void ConfigureServices(IServiceCollection services)
- {
- services.AddMvc().SetCompatibilityVersion
- (CompatibilityVersion.Version_2_2);
- services.AddSwaggerGen(c =>
- {
- c.SwaggerDoc("v1", new Info
- {
- Version = "v1",
- Title = "Swagger Demo",
- Description = "Swagger Demo for ValuesController",
- TermsOfService = "None",
- Contact = new Contact() { Name = "Joydip Kanjilal",
- Email = "joydipkanjilal@yahoo.com",
- Url = "www.google.com"
- }
- });
- });
- }
- public void Configure(IApplicationBuilder app,
- IHostingEnvironment env)
- {
- if (env.IsDevelopment())
- {
- app.UseDeveloperExceptionPage();
- }
- app.UseMvc();
- app.UseSwagger();
- app.UseSwaggerUI(c =>
- {
- c.SwaggerEndpoint("/swagger/v1/swagger.json", "v1");
- });
- }
- }
- }
瀏覽 Swagger UI
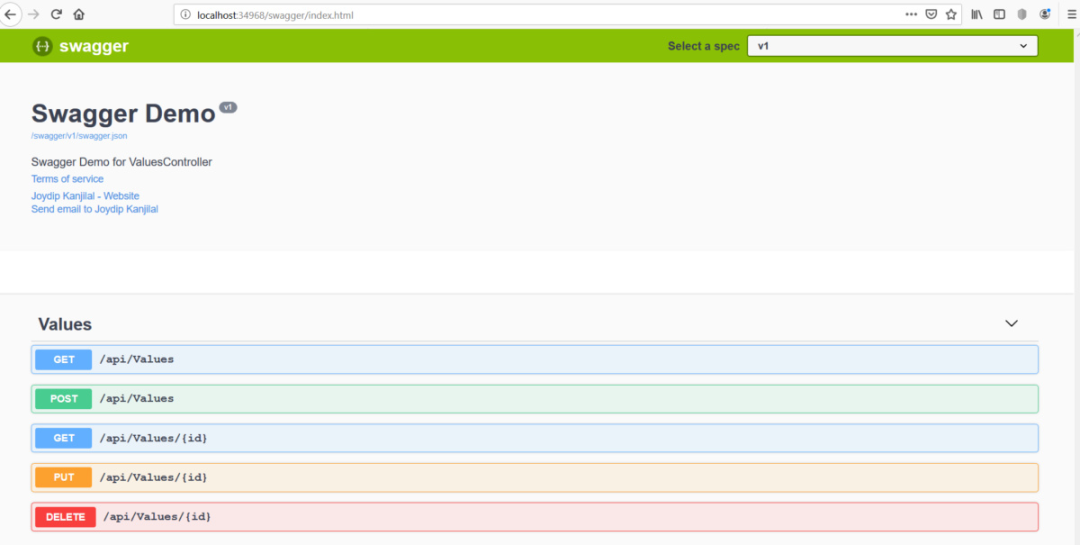
現在我們運行一下應用程序來瀏覽一下 Swagger UI 地址,可以看到 UI 界面如下圖所示,圖中不同的 Http 請求使用了不同的顏色進行標識,你甚至可以在UI上直接測試不同的 api 接口。
在 Action 方法上創建xml注解
到目前為止一切順利,在剛才生成的 swagger 文檔中,并沒有看到 5 個 api 接口的任何注解,這就不優雅了,如果想要在 swagger 文檔上增加 xml 注解,簡單粗暴的做法可以直接在 Controller.Action 頂部寫上注解信息。
接下來在 ValuesController 下的每一個 Action 上都加上注解,下面就是修改后的 ValueController。
- [Route("api/[controller]")]
- [ApiController]
- public class ValuesController : ControllerBase
- {
- /// <summary>
- /// Get action method without any argument
- /// </summary>
- /// <returns></returns>
- [HttpGet]
- public ActionResult<IEnumerable<string>> Get()
- {
- return new string[] { "value1", "value2" };
- }
- /// <summary>
- /// Get action method that accepts an integer as an argument
- /// </summary>
- /// <param name="id"></param>
- /// <returns></returns>
- [HttpGet("{id}")]
- public ActionResult<string> Get(int id)
- {
- return "value";
- }
- /// <summary>
- /// Post action method to add data
- /// </summary>
- /// <param name="value"></param>
- [HttpPost]
- public void Post([FromBody] string value)
- {
- }
- /// <summary>
- /// Put action method to modify data
- /// </summary>
- /// <param name="id"></param>
- /// <param name="value"></param>
- [HttpPut("{id}")]
- public void Put(int id, [FromBody] string value)
- {
- }
- /// <summary>
- /// Delete action method
- /// </summary>
- /// <param name="id"></param>
- [HttpDelete("{id}")]
- public void Delete(int id)
- {
- }
- }
打開 xml 注解
值得注意的是:Swagger 默認并不會顯示 XML 注解,需要手工打開它,那怎么做呢?右鍵 Project,選擇 Properties 后切換到 Build 頁面,然后選中 XML documentation file 項 并且指定好 xml 生成的位置,參考如下:

接下來還要在 ConfigureServices 方法下將生成xml 的路徑配置到 swagger 中,如下代碼所示:
- c.IncludeXmlComments(@"D:\Projects\IDG\IDGSwaggerDemo\IDGSwaggerDemo\IDGSwaggerDemo.xml");
這就是打開 Swagger 中的 xml 注解 所需的所有事情。
指定啟動url 到 Swagger UI
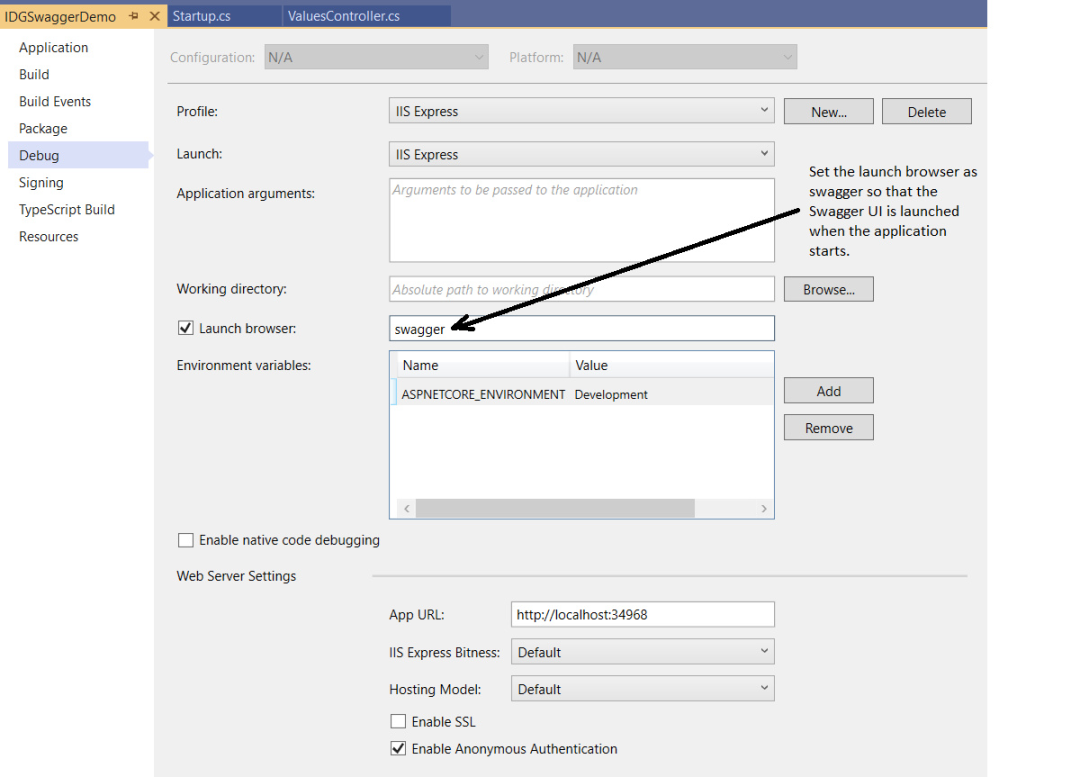
要想將啟動項目的url指到 SwaggerUI,右鍵 Project 并選擇 Properties,在 Debug 的 Lanuch browser 上指定 swagger 即可,如下圖所示:
再次運行程序可以發現默認頁就是 Swagger URL 了,如下圖所示:
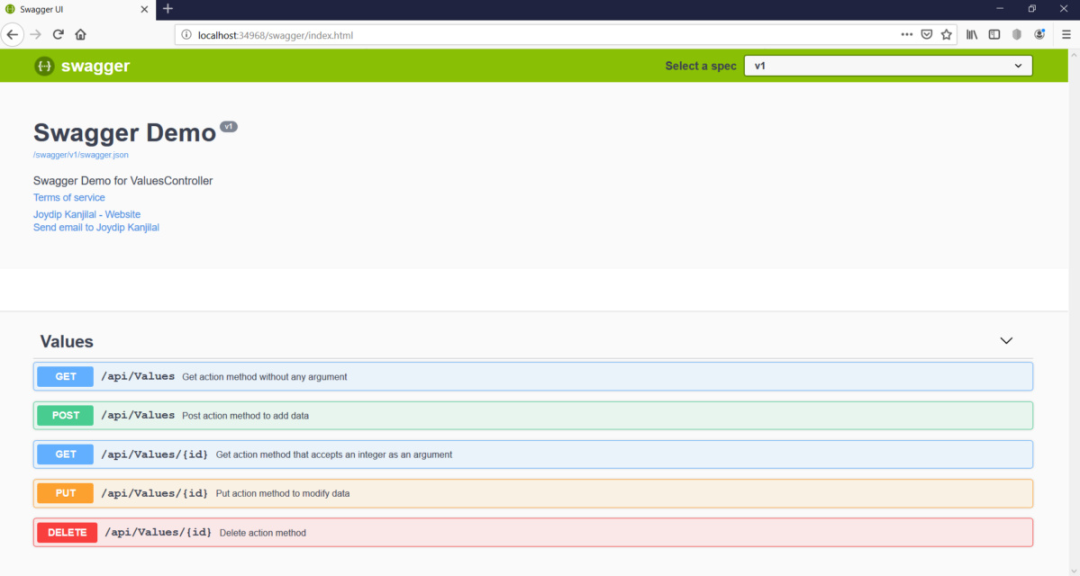
從圖中可以看到,5個API方法后面都有相應的 xml 注解了。
Swashbuckle 是一個非常好的工具,可以簡單粗暴的給 API接口生成文檔,從文中也可以看出 Swashbuckle 的配置非常簡單,Swagger 還有一些更高級的功能,比如通過 CSS 來定制 Swagger UI,還可以根據API的版本生成不同的 Swagger 文檔,后續的文章還會跟大家介紹更多高級的功能。
譯文鏈接:https://www.infoworld.com/article/3400084/how-to-use-swagger-in-aspnet-core.html