持續集成流水線中的制品管理(Nexus)
作者:Lizeyang
Nexus是一個存儲庫管理器,可存儲和檢索制品。它使您能夠將構建的制品托管在私有且安全的存儲庫中。默認開發同學在進行開發的時候會使用一些包管理工具,例如:maven、ant、gradle這些都是常見項目編譯構建工具 。
我們可以在該工作流中通過Maven和CI服務器來構建,存儲,管理已編譯完成的制品。
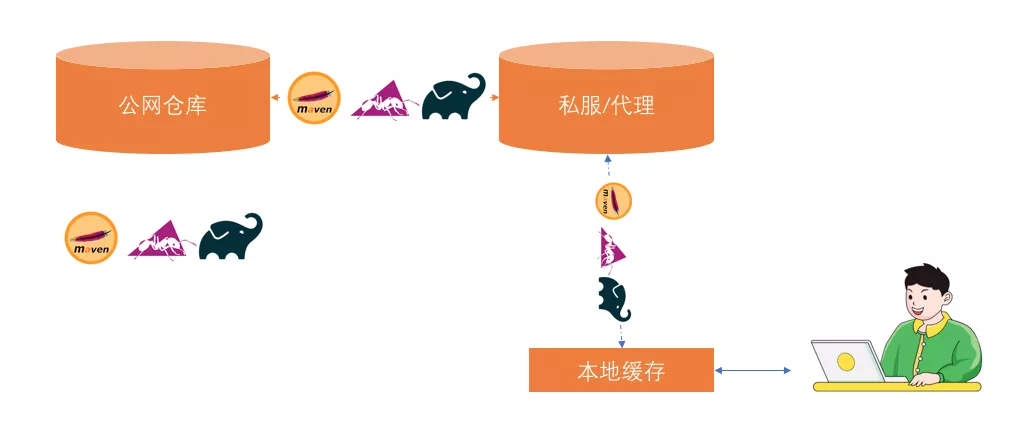
Nexus是一個存儲庫管理器,可存儲和檢索制品。它使您能夠將構建的制品托管在私有且安全的存儲庫中。默認開發同學在進行開發的時候會使用一些包管理工具,例如:maven、ant、gradle這些都是常見項目編譯構建工具 。這些工具可以理解為是一個命令行工具, 本身不會存儲任何依賴包,而是通過公網官方的倉庫中下載當前項目構建所需要的包。(內網的速度要比公網快,這會直接影響管道的構建速度)
制品上傳
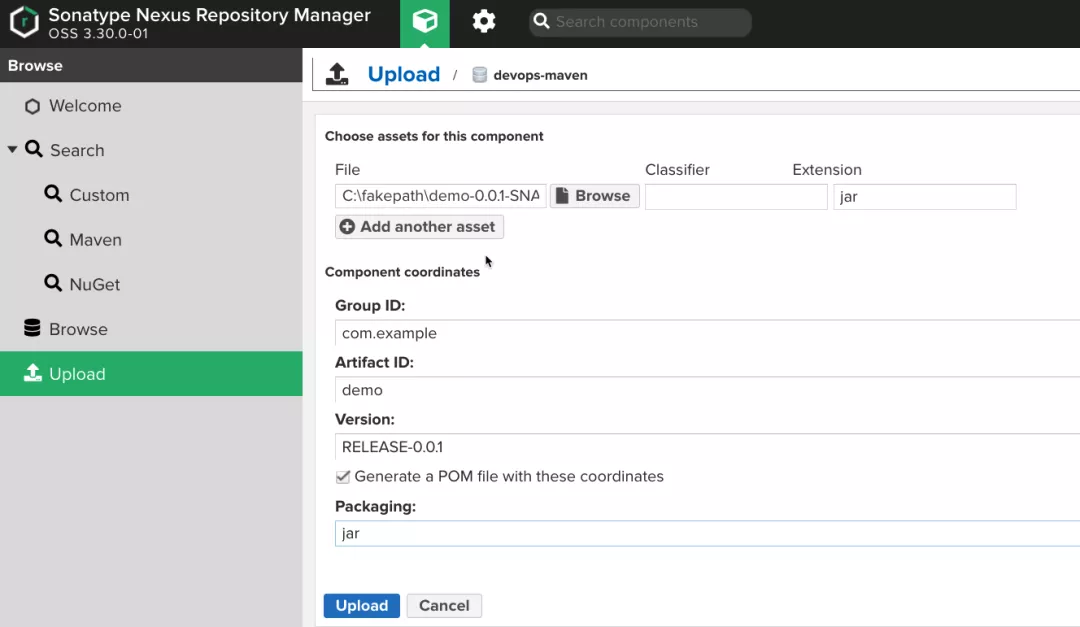
NexusUI頁面
Nexus的UI中提供制品上傳的功能, 導航Upload, 選擇要上傳的目標倉庫。 最后填寫倉庫中包的坐標和包信息。
使用Maven工具
一般倉庫都是需要認證后才能上傳的, 所以首先需要在maven的配置文件中(settings.xml)填寫倉庫的認證信息。
- <server>
- <id>mymaven</id>
- <username>admin</username>
- <password>admin123</password>
- </server>
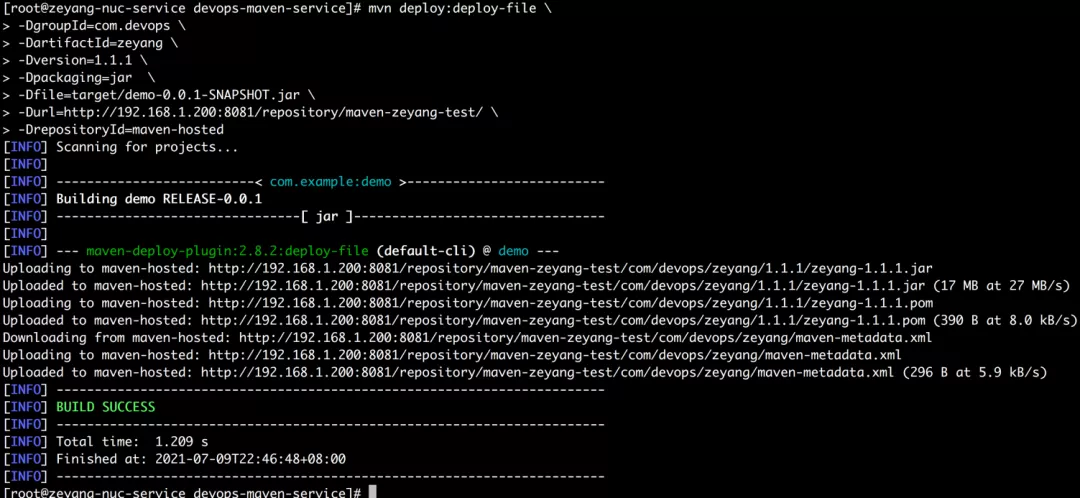
使用mvn deploy 命令上傳發布制品,命令參數與格式:
- mvn deploy:deploy-file
- -DgroupId=xxxxxx pom中的groupId
- -DartifactId=xxxxxx pom中的artifactId
- -Dversion=xxxxxx pom中的版本號version
- -Dpackaging=xxxxxx pom中打包方式
- -Dfile=xxxxxx 本地文件
- -Durl=xxxxxx 倉庫url
- -DrepositoryId=xxxxxx 對應的是setting.xml(認證)
如果此時包已經有pom.xml 文件描述, 可以直接通過pom.xml文件進行上傳:
- mvn deploy:deploy-file \
- -DgeneratePom=false \
- -DrepositoryId=mymaven \
- -Durl=http://192.168.1.200:8081/repository/mymavenrepo \
- -DpomFile=pom.xml \
- -Dfile=target/demo-0.0.1-SNAPSHOT.jar
使用Jenkins插件
安裝Nexus Artifact Uploader插件、使用片段生成器生成DSL。
- nexusArtifactUploader artifacts: [[artifactId: 'devopstest',
- classifier: '',
- file: 'target/demo-0.0.1-SNAPSHOT.jar',
- type: 'jar']],
- credentialsId: '1de05a13-197c-4a72-8c6a-cd330fc45559',
- groupId: 'com.jenkins',
- nexusUrl: '192.168.1.200:8081',
- nexusVersion: 'nexus3',
- protocol: 'http',
- repository: 'mymavenrepo',
- version: '1.1.2'
擴展: 如果需要經常上傳制品, 我們最后將其封裝在一個函數中,便于復用。
- //NexusUploadByPlugin('devops-test', 'target/demo-0.0.1-SNAPSHOT.jar', 'jar', 'com.jenkins','1.1.2')
- def NexusUploadByPlugin(artifactId, file, type, groupId,version){
- nexusArtifactUploader artifacts: [[artifactId: artifactId,
- classifier: '',
- file: file,
- type: type]],
- credentialsId: '1de05a13-197c-4a72-8c6a-cd330fc45559',
- groupId: groupId,
- nexusUrl: '192.168.1.200:8081',
- nexusVersion: 'nexus3',
- protocol: 'http',
- repository: 'mymavenrepo',
- version: version
- }
使用Nexus API
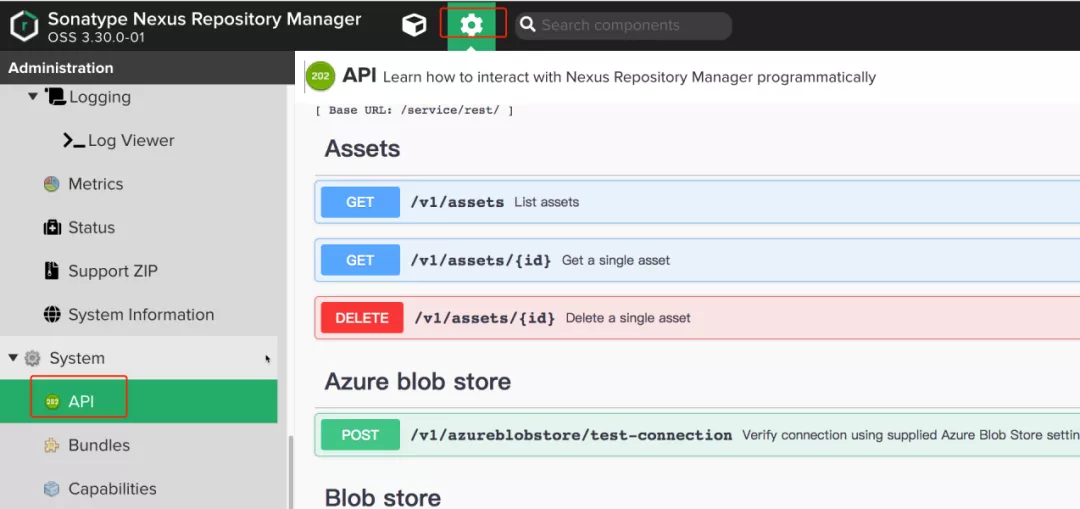
經過調試,整理如下類型文件上傳的接口:
- ##PNG
- curl -X POST "http://192.168.1.200:8081/service/rest/v1/components?repository=myrepo" \
- -H "accept: application/json" \
- -H "Content-Type: multipart/form-data" \
- -F "raw.directory=/tmp" \
- -F "raw.asset1=@默認標題_自定義px_2020-10-01-0.png;type=image/png" \
- -F "raw.asset1.filename=默認標題_自定義px_2020-10-01-0.png"
- ## tar.gz & ZIP
- curl -X POST "http://192.168.1.200:8081/service/rest/v1/components?repository=myrepo" \
- -H "accept: application/json" \
- -H "Content-Type: multipart/form-data" \
- -F "raw.directory=/tmp" \
- -F "raw.asset1=@nexus-3.30.0-01-unix.tar.gz;type=application/x-gzip" \
- -F "raw.asset1.filename=aaa.tar.gz"
- curl -X POST "http://192.168.1.200:8081/service/rest/v1/components?repository=myrepo" -H "accept: application/json" -H "Content-Type: multipart/form-data" -F "raw.directory=/tmp" -F "raw.asset1=@waypoint_0.1.5_linux_amd64.zip;type=application/x-gzip" -F "raw.asset1.filename=waypoint_0.1.5_linux_amd64.zip"
- ## Jar file
- curl -X POST "http://192.168.1.200:8081/service/rest/v1/components?repository=myrepo" \
- -H "accept: application/json" \
- -H "Content-Type: multipart/form-data" \
- -F "raw.directory=/tmp" \
- -F "raw.asset1=@aopalliance-1.0.jar;type=application/java-archive" \
- -F "raw.asset1.filename=aopalliance-1.0.jar"
下載制品
cURL
- curl -u admin:admin123 http://192.168.1.200:8081/repository/anyops/com/anyops/a
- nyops-devops-service/1.1.1/anyops-devops-service-1.1.1.jar -o anyops-devops-service-1.1.1.jar
Wget
- wget --http-user=admin --http-passwd=admin123 http://192.168.1.200:8081/repos
- itory/anyops/com/anyops/anyops-devops-service/1.1.1/anyops-devops-service-1.1.1.jar
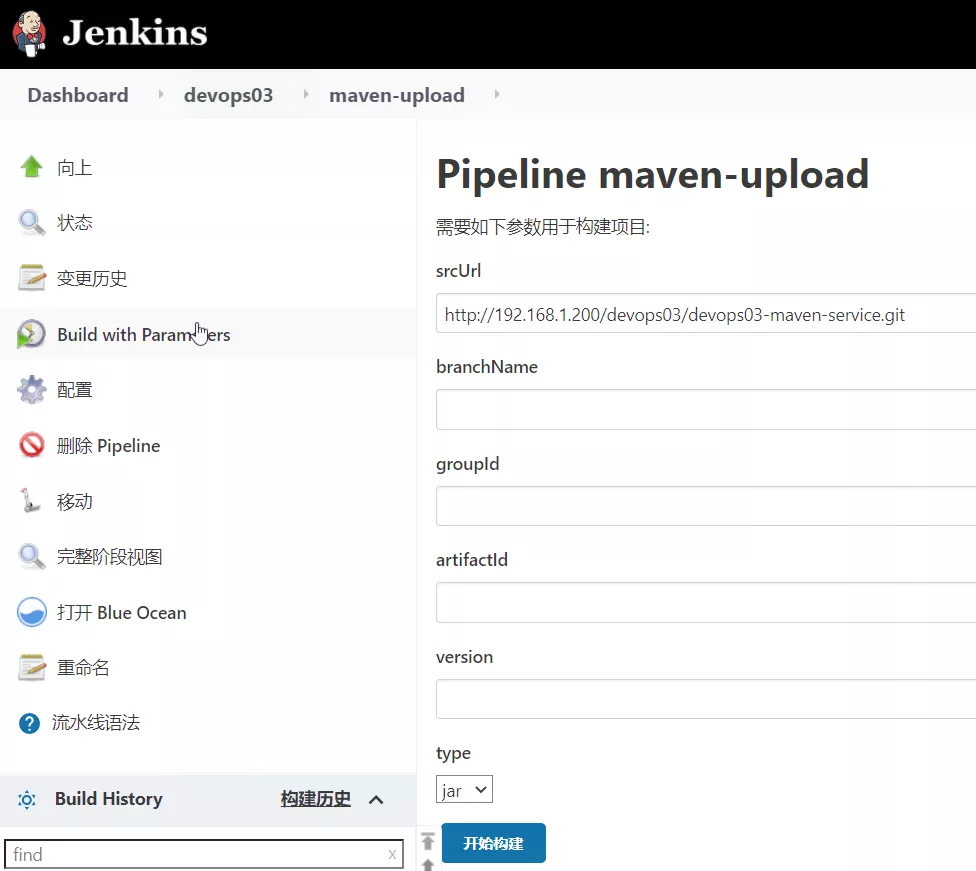
案例: 配置制品上傳Pipeline
其實我們可以參考Nexus的UI頁面, 使用Jenkins來做一個用于上傳制品包的流水線作業:
- srcUrl 指的是源碼包的源碼/包的倉庫;
- branchName 源碼包倉庫的分支;
- groupId、artifactid、 version maven類型倉庫的坐標;
- type 包類型;
這個Jenkinsfile包含4個階段, 分別是下載代碼、代碼編譯、單元測試、上傳制品。
- @Library("mylib@main") _
- import org.devops.*
- def checkout = new Checkout()
- def build = new Build()
- def unittest = new UnitTest()
- def sonar = new Sonar()
- pipeline {
- agent { label "build" }
- options {
- skipDefaultCheckout true
- }
- stages{
- stage("Checkout"){
- steps{
- script {
- println("GetCode")
- checkout.GetCode("${env.srcUrl}", "${env.branchName}")
- }
- }
- }
- stage("Build"){
- steps{
- script{
- println("Build")
- sh "mvn clean package "
- }
- }
- }
- stage("UnitTest"){
- steps{
- script{
- unittest.CodeTest("${env.buildTool}")
- }
- }
- }
- stage("Upload"){
- steps{
- script{
- NexusUploadByPlugin("${env.artifactId}",
- 'target/demo-0.0.1-SNAPSHOT.jar',
- "${env.type}",
- "${env.groupId}",
- "${env.version}")
- }
- }
- }
- }
- }
- //NexusUploadByPlugin('devops-test', 'target/demo-0.0.1-SNAPSHOT.jar', 'jar', 'com.jenkins','1.1.2')
- def NexusUploadByPlugin(artifactId, file, type, groupId,version){
- nexusArtifactUploader artifacts: [[artifactId: artifactId,
- classifier: '',
- file: file,
- type: type]],
- credentialsId: '1de05a13-197c-4a72-8c6a-cd330fc45559',
- groupId: groupId,
- nexusUrl: '192.168.1.200:8081',
- nexusVersion: 'nexus3',
- protocol: 'http',
- repository: 'mymavenrepo',
- version: version
- }
歷史與Nexus相關的主題
本文轉載自微信公眾號「DevOps云學堂」

責任編輯:姜華
來源:
DevOps云學堂