lowcode-cms開源社區源碼設計分享,你學會了嗎?

開源背景
lowcode可視化社區 是我之前在設計研發 Dooring低代碼 平臺時開發的一個面向低代碼內容分享的知識社區, 內容端采用 SSR 技術來渲染頁面, 對 SEO 更加友好, 同時后端服務采用 Nodejs 來實現, 內容端和服務端同端, 也就是傳說中的內容服務“同構”. 管理端采用前端最最流行的 React hooks 來實現, 無論是技術人員還是非技術人員, 通過簡單的操作就可以輕松部署一套專屬自己的 CMS 系統.
本著滿滿的開源精神, 我對這套 CMS 系統進行了開源, 讓更多技術小白或者非技術人員, 可以輕松部署自己的網站.
接下來我會從技術的角度, 分享一下我開源的 lowcode-cms 系統的技術實現, 以及如何本地運行 + 部署這套開箱即用的 CMS 系統.
系統設計架構
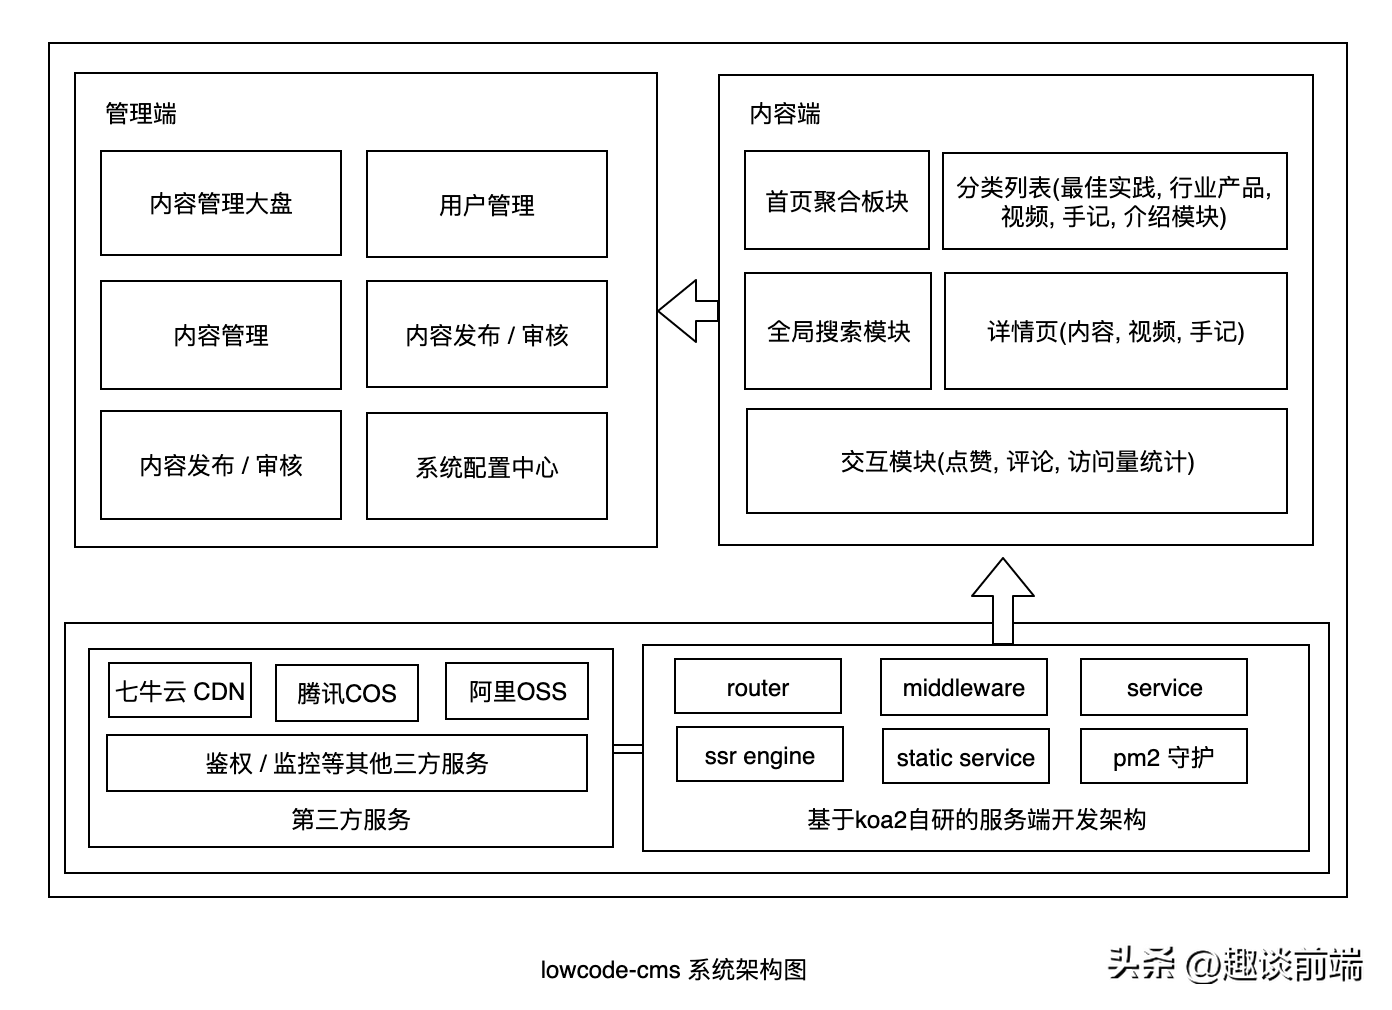
接下來我會具體和大家介紹一下管理端, 內容端, 服務端的技術架構.
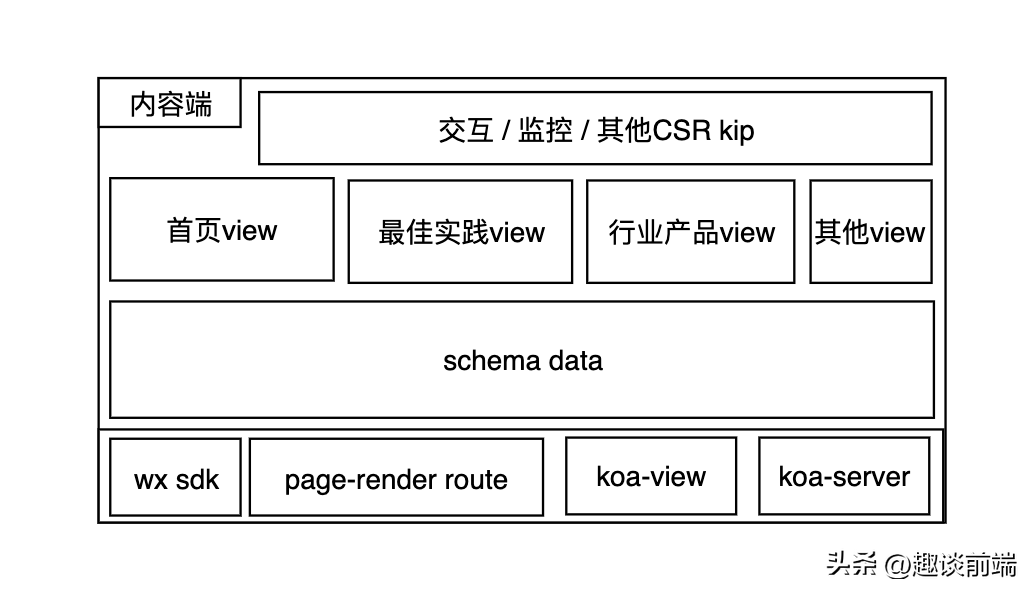
內容端架構設計
內容端主要用來展現個人或者企業的內容信息, 相當于一個門戶站, 這里為了更好的 SEO, 我采用了模版引擎來渲染 html, 也就是koa-views + pug 模式, 具體界面如下:
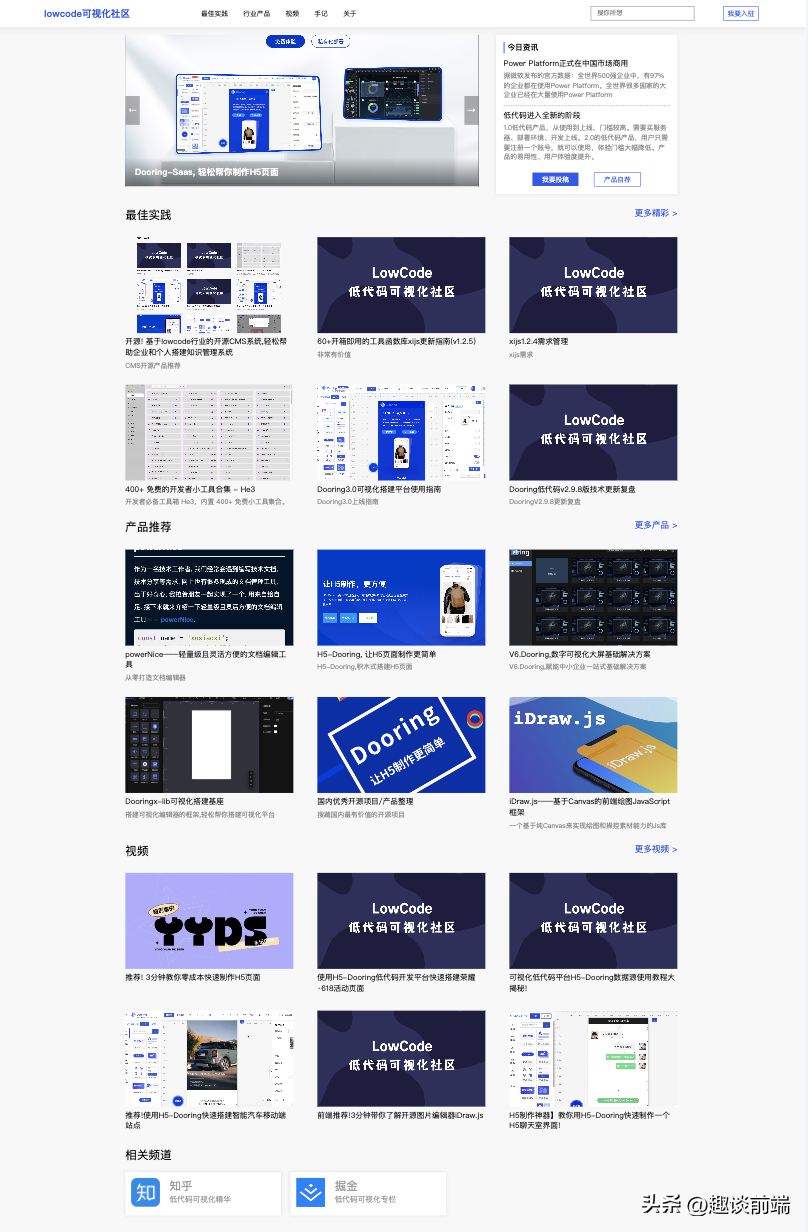
當然這只是首頁模塊, 還有諸如行業產品, 最佳實踐, 視頻, 手記等, 這里就不一一介紹了, 大家如果會編程的話, 也可以自定義自己的模塊頁面. 我們接下來看看具體的技術實現.
大家可以在github中server的views目錄下看到每個渲染層的具體實現, 這里和大家分享一下 lowcode-cms 搭建的ssr模式.
1. 配置pug支持
import koa from "koa";
import views from "koa-views";

// ... (此處省略服務端自治的部分代碼)

// 掛載路由
glob.sync(`${config.routerPath}/*.js`).forEach((item) => {
  require(item).default(router, config.API_VERSION_PATH);
});

//使用模版引擎
app.use(views(resolve(__dirname, "./views"), { extension: "pug" }));

app.use(router.routes()).use(router.allowedMethods());
2. ssr路由數據直出
這塊主要是基于用戶發起的請求, 在服務端格式化好數據供 pug 消費:
/**
 * 文章路由
 * @param {*} router
 * @param {*} apiPath
 */
const pageRenderRouter = (router) => {
  // api路徑
  const api = {
    // 渲染首頁
    index: "/",
    // 最佳實踐列表
    bestPractice: "/best-practice",
    product: "/product",
    video: "/video",
    note: "/note",
    login: "/login",
    // 其他渲染路由...
  };
  // 內容端導航配置
  const nav = [
    {
      id: "0",
      title: "最佳實踐",
      link: "/best-practice"
    },
    {
      id: "1",
      title: "行業產品",
      link: "/product"
    },
    {
      id: "3",
      title: "視頻",
      link: "/video"
    },
    {
      id: "4",
      title: "手記",
      link: "/note"
    },
    {
      id: "5",
      title: "關于",
      link: "/about"
    },
  ]

  const copyright = "版權所有 @lowcode可視化社區"

  // 登錄
  router.get(api.login, async (ctx) => {
    await ctx.render("login", {
      url: api.login,
      title: "登錄",
      description: "新用戶?",
      href: "去注冊",
      firstInput: "郵箱",
      twoInput: "密碼",
      btnText: "登錄",
      logoText: "Dooring低代碼社區",
    });
  });

  // 渲染首頁
  router.get(api.index, async (ctx) => {
    const filePath = `${config.publicPath}/db/homeConfig.json`;
    const articlesPath = `${config.publicPath}/db/article_index.json`;
    const productsPath = `${config.publicPath}/db/product_index.json`;
    const videosPath = `${config.publicPath}/db/video_index.json`;
    const homeConfig = RF(filePath);
    const articles = RF(articlesPath);
    const products = RF(productsPath);
    const videos = RF(videosPath);
    await ctx.render("index", {
      nav,
      articles: articles.filter(v => v.review === 1).slice(0, 6),
      products: products.filter(v => v.review === 1).slice(0, 6),
      videos: videos.filter(v => v.review === 1).slice(0, 6),
      copyright,
      ...homeConfig
    });

    // 統計訪問量
    const viewPath = `${config.publicPath}/db/views.json`;
    const views = RF(viewPath);
    WF(viewPath, {...views, home: views.home + 1});
  });

  // 渲染文章詳情頁
  router.get(api.articleDetail, async (ctx) => {
    const id = ctx.query.fid;
    const articlePath = `${config.publicPath}/db/articles/${id}.json`;
    const commentPath = `${config.publicPath}/db/comments/${id}.json`;
    const article = RF(articlePath) || {};
    const comments = RF(commentPath) || {};
    comments.views = comments.views + 1;
    await ctx.render("article_detail", {
      nav,
      viewTitle: article.title,
      topImg: article.img,
      authorInfo: { name: article.author, date: formatTime(article.ct, "-") },
      cate: article.cate,
      val:  article.type ? marked(article.val) : article.val,
      commentInfoList: comments.comments || [],
      flover: comments.flover,
      views: comments.views || 0,
      copyright,
    });
    WF(commentPath, comments);
  });

  // 其他頁面渲染服務邏輯...
  });
};

export default pageRenderRouter;
3. 模版消費
這里給大家參考一個我寫的 pug 頁面的例子:
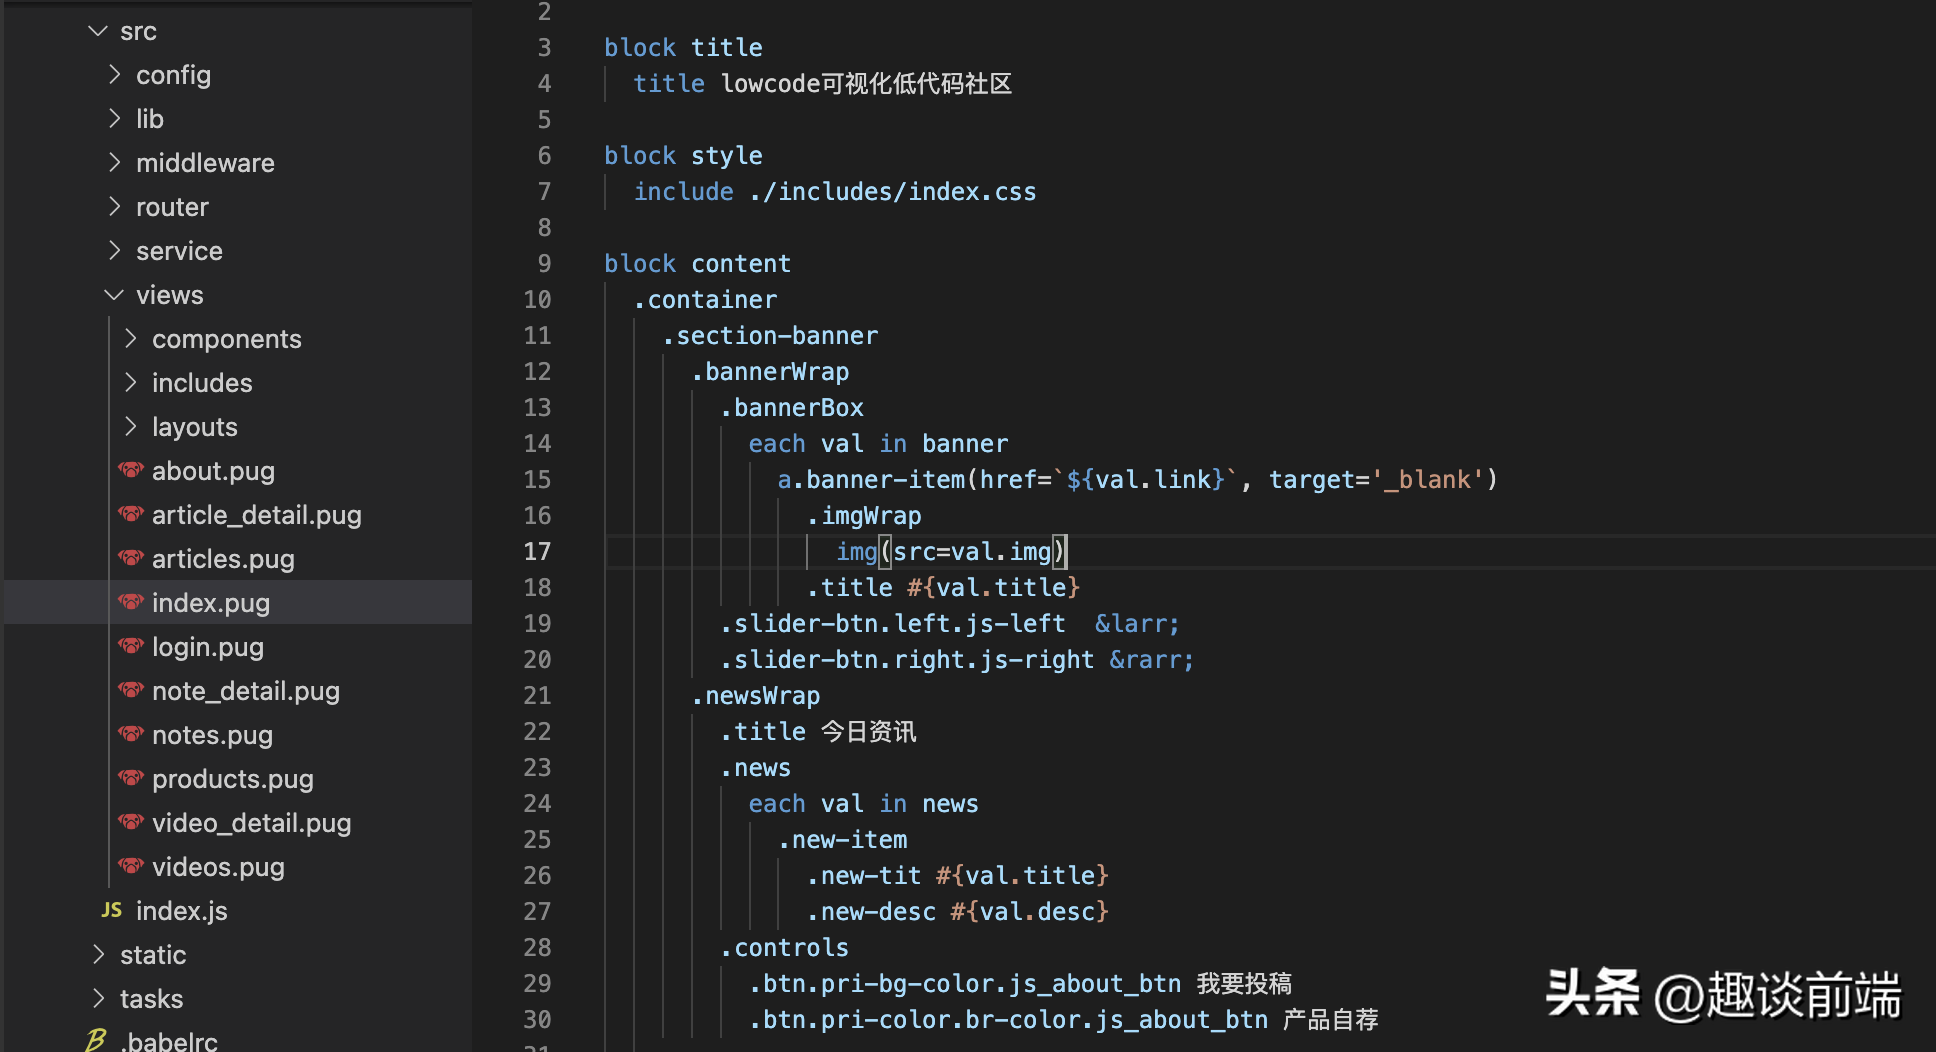
大家感興趣的可以參考一下具體的實現:https://github.com/MrXujiang/lowcode-cms
服務端架構設計
服務端本質上主要實現兩塊能力:
- 內容端頁面渲染(SSR)
- 后臺API和三方接口服務對接
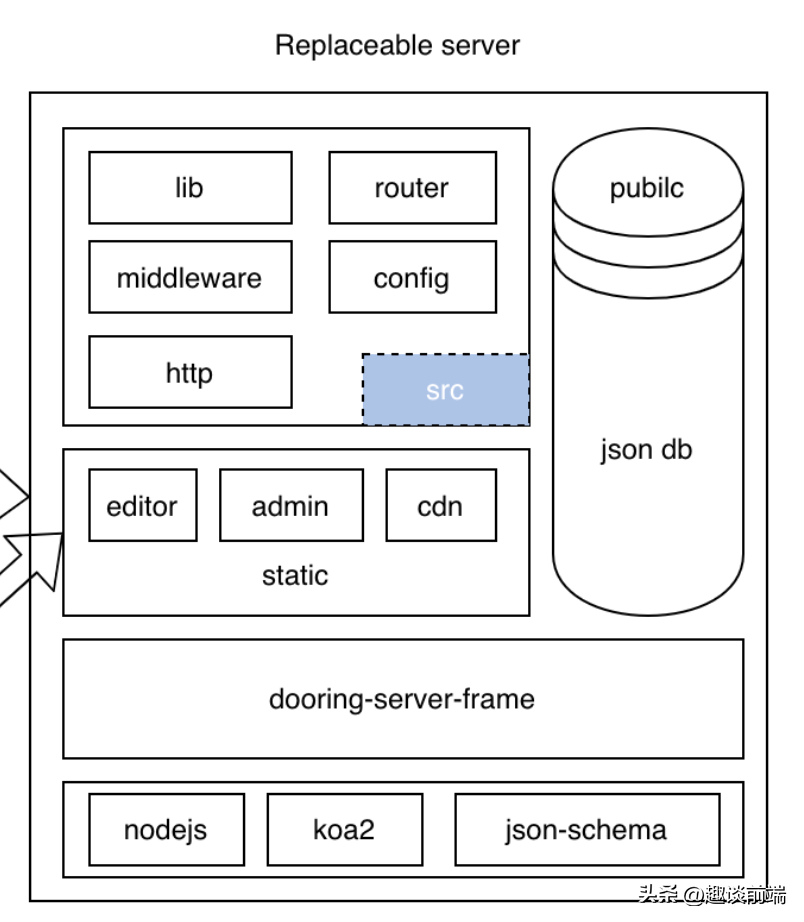
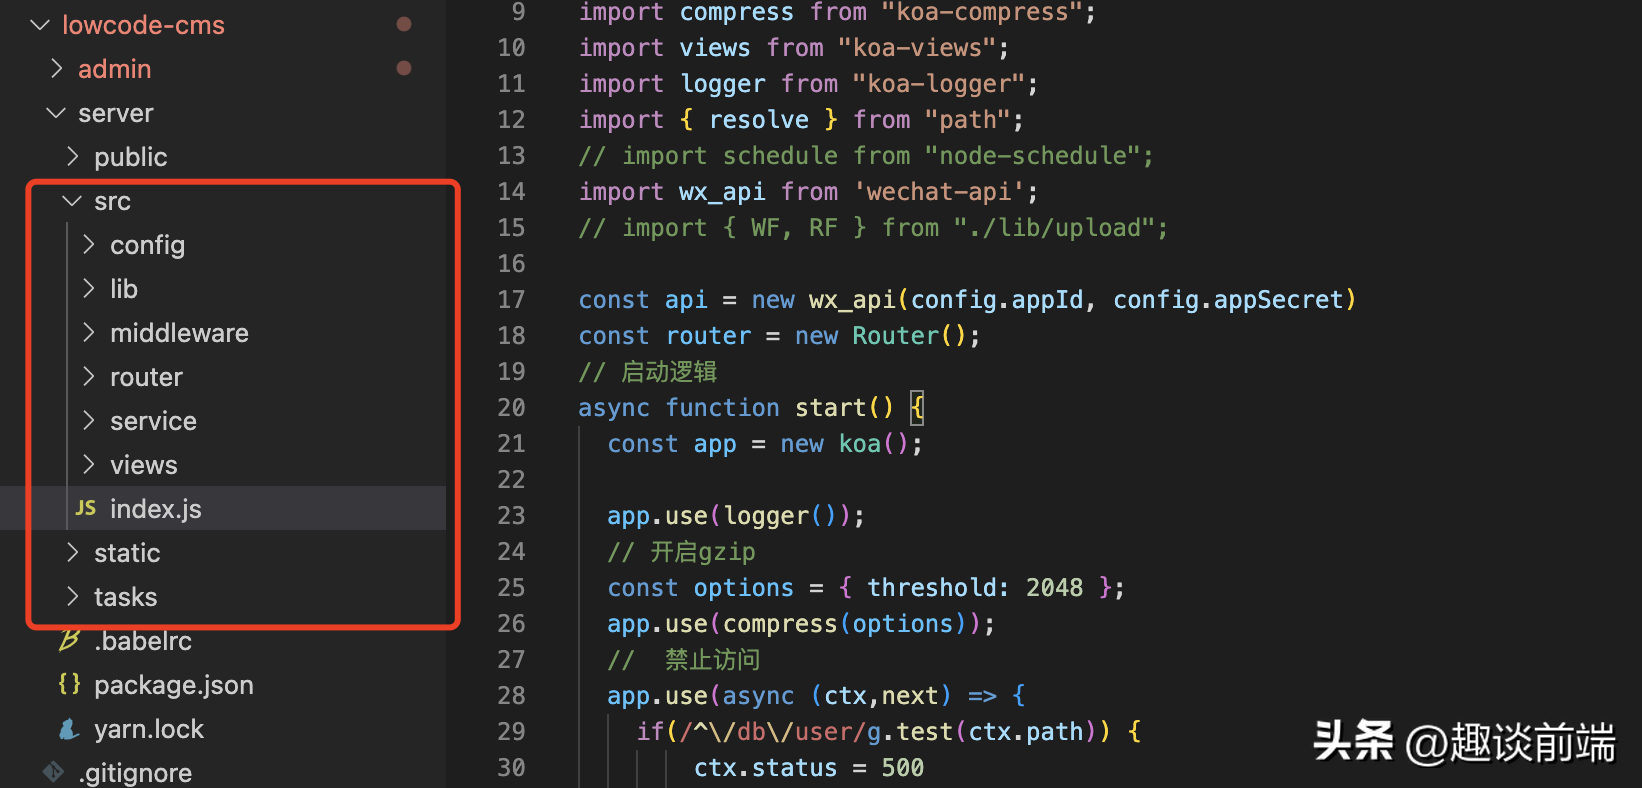
服務端我參考了通用后端服務的 MVC 模式, 基于 koa2 搭建了一個簡易的服務端 MVC 模型, 如下是一個服務端的代碼目錄:
主要實現的核心模塊有:
- 靜態資源服務器
- 微信分享, CDN上傳等第三方服務模塊
- api路由
- 中間件模塊
- 資源上傳模塊
- 用戶權限模塊
- ssr服務模塊
如果搭建感興趣可以參考 github 中具體的實現代碼:https://github.com/MrXujiang/lowcode-cms
管理端系統架構設計
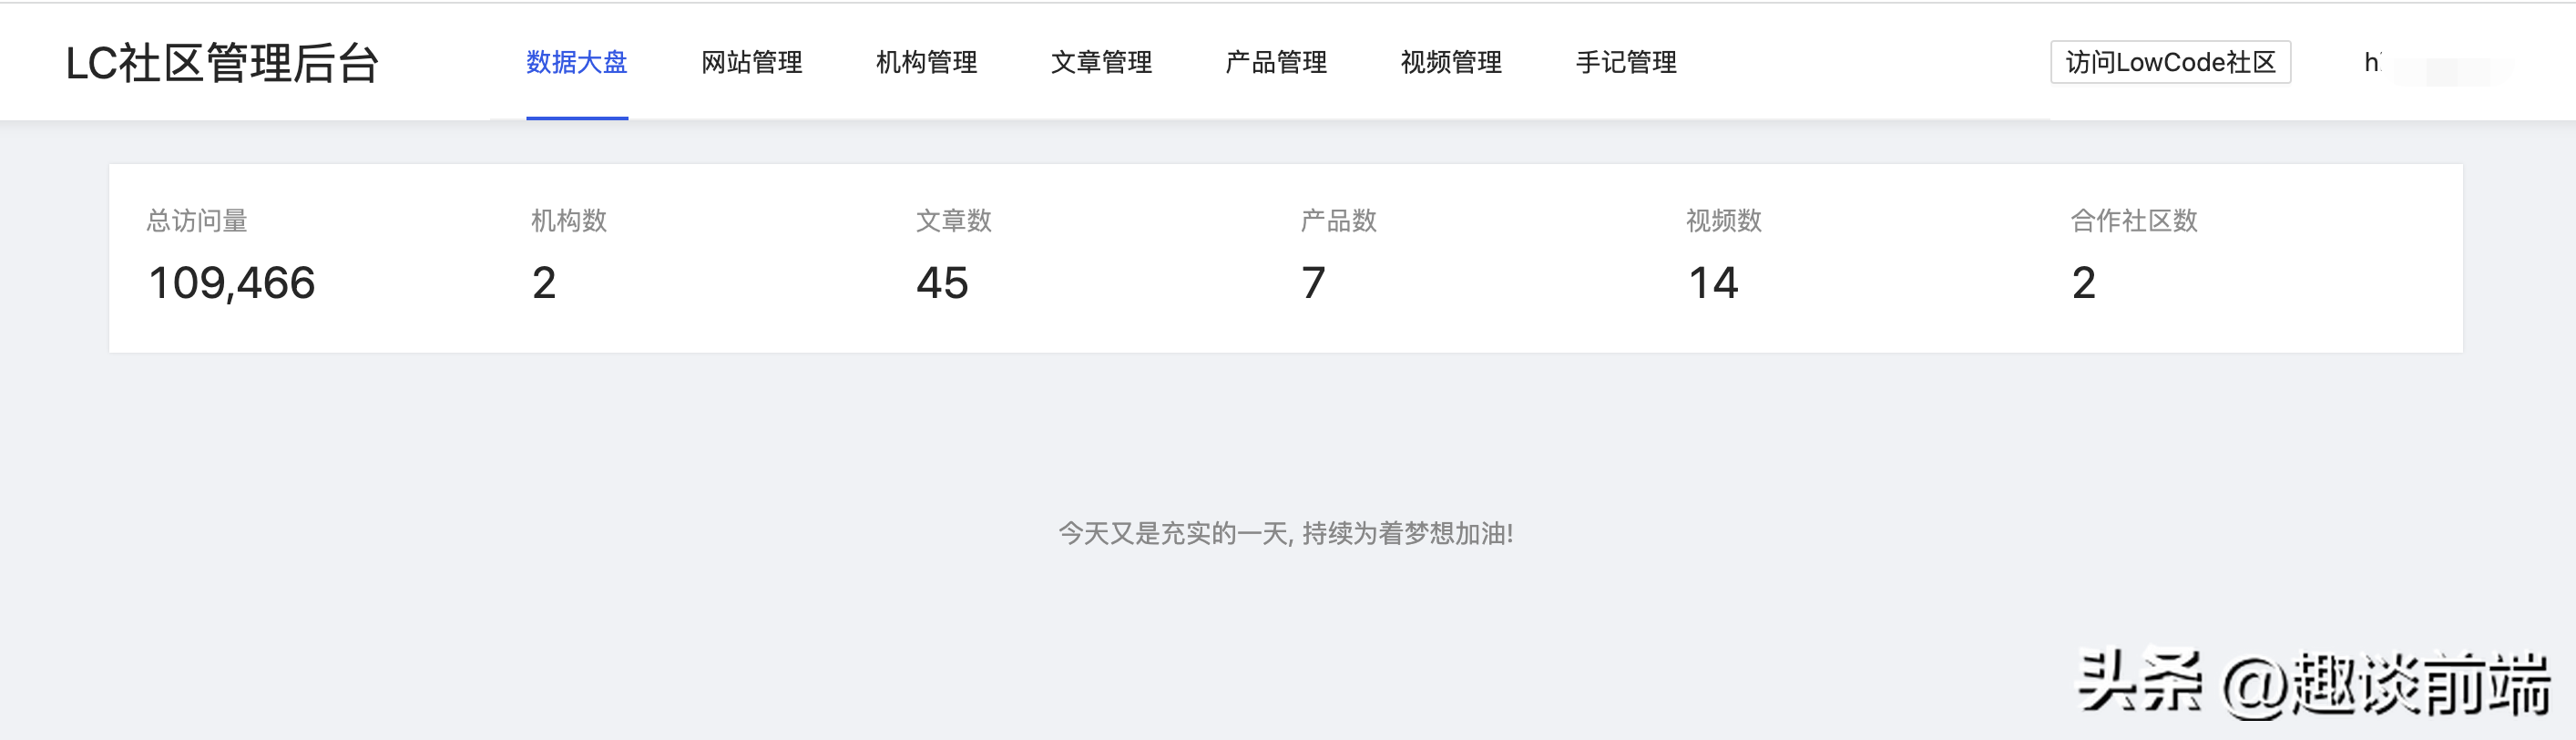
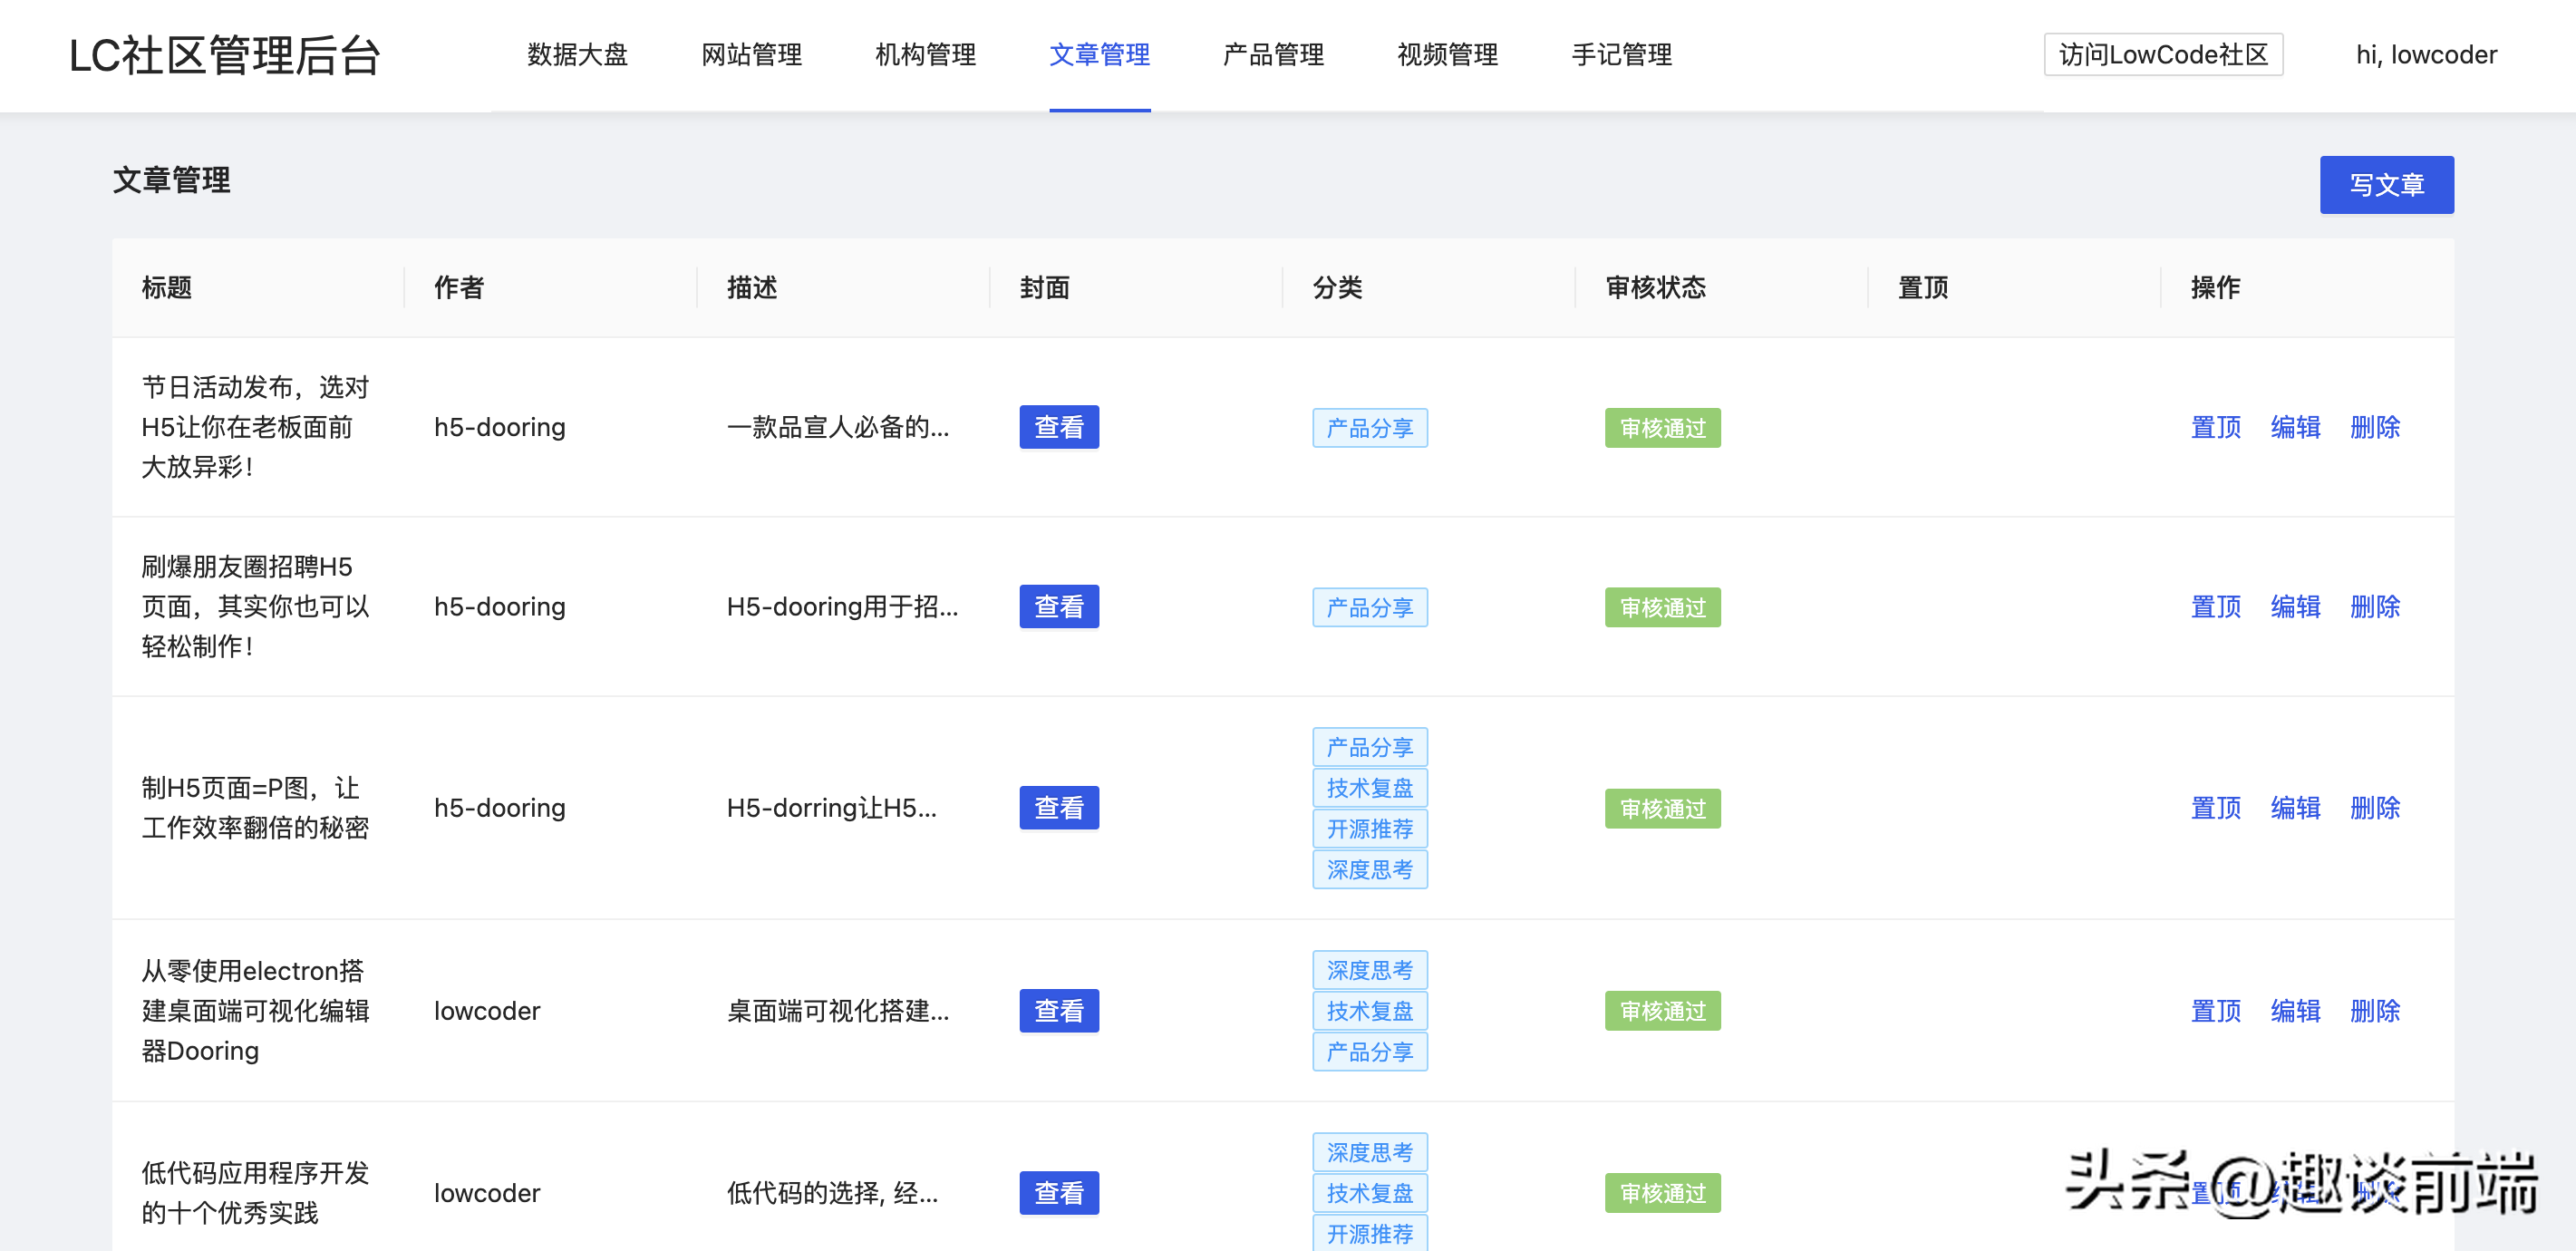
管理端采用的是 umi + react + antd4.0 實現的, 當然封裝了很多成熟的插件模塊, 比如說 富文本編輯器, md編輯器, 文件上傳模塊等, 大家可以在學習源碼的過程中受益非淺.
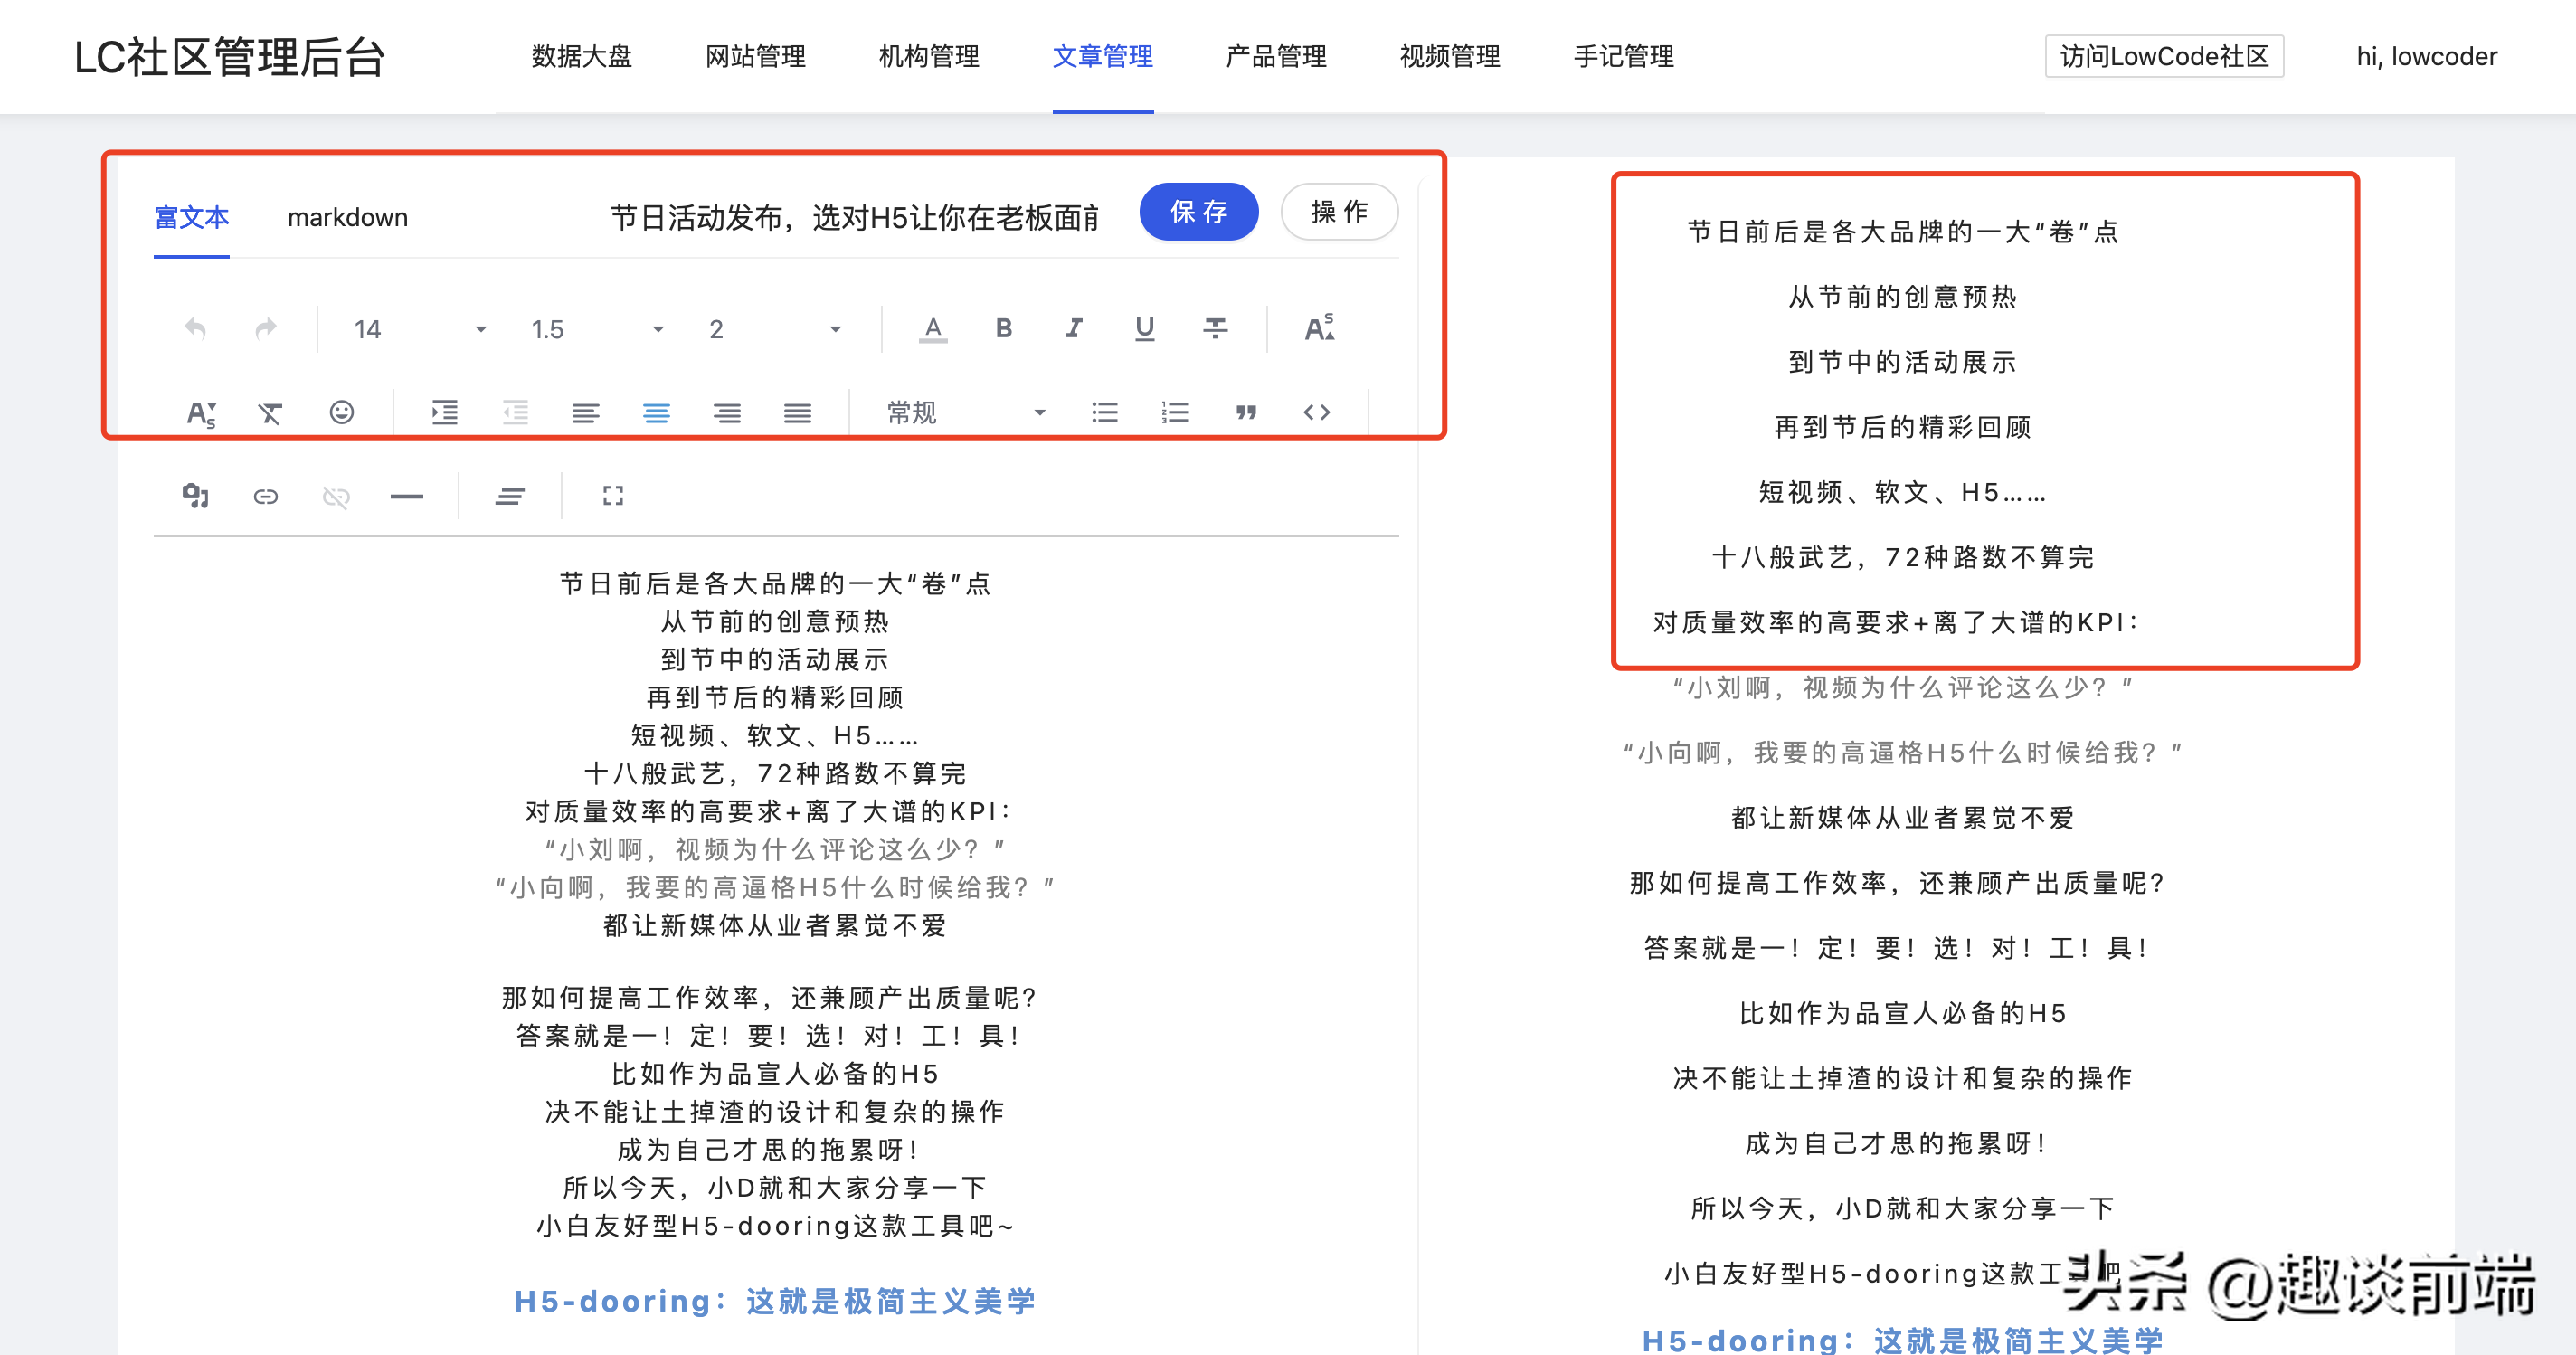
上圖就是編輯模塊, 我封裝了實時預覽 md 和富文本的模塊, 大家可以拿來即用.
本地運行
1. 目錄介紹
- server 基于nodejs的服務端, 啟動后可直接訪問3000 端口, 也就是內容SSR端
- admin CMS的管理后臺, 集成了用戶管理, 內容審核, 內容發布, 數據統計等模塊
開箱即用~~
2. 本地啟動
- server端
# 進入server目錄
cd server
# 安裝依賴
yarn
# 服務端啟動
yarn start
注: 如果是window系統, 可以執行 yarn start:win
- 管理端
# 進入admin目錄
cd admin
# 安裝依賴
yarn
# 啟動
yarn start
初始化賬號: super_123, 密碼: zxzk_123
- 內容端
訪問3000端口即可.
部署發布
推薦使用 pm2 來管理 Node 服務進程, 只需要把 server 端上傳到服務器, 安裝對應依賴, 用 pm2 啟動即可:
pm2 start server/dist有關 pm2 相關問題可以在我往期的文章中學習參考.
github: https://github.com/MrXujiang/lowcode-cms