HarmonyOS NEXT體驗官#拼圖小游戲

用鴻蒙開發工具寫一個拼圖小游戲
想想就很激動,那就開工吧。
一、游戲開盤準備
大體思路,先開個游戲盤用來存放拼圖,然后動態生成拼圖塊并且打亂它,再者編輯游戲邏輯,最后判斷輸贏,差不多了,真簡單hh。
開局就是個"Hello World",真是親切(?? 3(???c)

生成游戲盤前,我要先準備點資料,一些配置參數,方便我掌控全局。
/**
   * 游戲配置
   */
  @State gameConfig:config_message = {
    w: 800, // 寬高參數,由圖片的像素尺寸決定
    h: 800,
    rows: 5, // 行數
    cols: 5, // 列數
    isOver: false, // 游戲是否結束
    imgUrl: $r("app.media._0") // 圖片路徑
  };
緊接著是完成游戲邏輯的。
/游戲luoji
 ├── 設置拼圖寬高
 │
 ├── 選擇自己喜歡的圖片
 │
 ├── 開始游戲
 │    ├── 生成拼圖
 │    ├── 玩家扣件
 │    └── 判斷輸贏
 │
 └── 結束游戲并重置
先是第一步設置寬高,我選擇使用Textinput組件,因為這樣可以讓使用者自定義任何寬高,理論上可以達到無窮大,不知道會不會有大佬愿意拿顯微鏡玩拼圖呢,哈哈哈~~
Row(){
  Text("拼圖的尺寸:")
  TextInput()
    .width("50vp")
    .height("40vp")
    .backgroundColor(Color.Grey)
    .fontColor(Color.White)
    .textAlign(TextAlign.Center)
    .maxLength(2)
    .onChange((val)=>{
      this.gameConfig.rows = parseInt(val);
    })
  Text("X")
  TextInput()
    .width("50vp")
    .height("40vp")
    .backgroundColor(Color.Grey)
    .fontColor(Color.White)
    .textAlign(TextAlign.Center)
    .maxLength(2)
    .onChange((val)=>{
      this.gameConfig.rows = parseInt(val);
    })
}
接下來就是選擇圖片了,我使用的是鴻蒙自帶的選擇框組件真的很高科技,我只要傳個數組進去就完事了。
Button("選擇圖片")
 .width("100vp")
 .onClick(() => {
   TextPickerDialog.show({
     // 文檔:https://developer.huawei.com/consumer/cn/doc/harmonyos-references-V5/ts-methods-textpicker-dialog-V5#%E7%A4%BA%E4%BE%8B1
     range: this.imgName,
     selected: this.select,
     disappearTextStyle: {color: Color.Red, font: {size: 15, weight: FontWeight.Lighter}},
    textStyle: {color: Color.Black, font: {size: 20, weight: FontWeight.Normal}},
                selectedTextStyle: {color: Color.Blue, font: {size: 30, weight: FontWeight.Bolder}},
     onAccept: (value: TextPickerResult) => {
       // 設置select為按下確定按鈕時候的選中項index,這樣當彈窗再次彈出時顯示選中的是上一次確定的選項
       this.select = value.index;
       this.gameConfig.imgUrl = $r(`app.media._${this.select}`);
       console.log("我的配置:" + JSON.stringify(this.gameConfig.imgUrl));
       console.log(this.select + '')
       console.info("TextPickerDialog:onAccept()" + JSON.stringify(value))
     }
   })
 })
二、游戲開發環節
經過上面的充分準備,終于可以開始寫最激動人心的游戲代碼了,同時也最麻煩的~~~~~~~~~~
1.生成游戲環境
Column(){
  /**
   * 初始化游戲面板
   */
  Flex({wrap:FlexWrap.Wrap}){

    /**
     * 渲染拼圖
     */
    ForEach(this.isShuffle?this.blocks: this.blocks, (item: Block, idx:number) => {
      setPiece({block: item, blocks: this.blocks, idx: idx, isShuffle: this.isShuffle, isShow: this.isWin})
    })

    /**
     * 贏的組件
     */
    Text("Win")
      .fontSize(80)
      .fontColor(Color.White)
      .position({x:70, y: 80})
      .visibility(this.isWin?Visibility.Visible:Visibility.Hidden)

 }
 .width(this.gameConfig.w + 4 + "px") // 4px的邊框
 .height(this.gameConfig.h + 4 + "px")
 .borderWidth("2px")
 .borderColor("#ccc")
2.初始化游戲的信息

/**
* 初始化生成信息
*/
aboutToAppear(): void {
  // 準備數組
  this.initBlocksArray();
  // 數組洗牌
  this.shuffle();
}
initBlocksArray:Function = ()=>{
for(let i = 0; i < this.gameConfig.rows; i ++ ){
for(let j = 0; j < this.gameConfig.cols; j ++ ) {
// i行號 j列號
this.blocks.push({
x: j * this.blockWidth * -1, // 當前背景圖的橫坐標
y: i * this.blockHeight * -1, // 當前背景圖的縱坐標
currentX: j * this.blockWidth * -1, // 正確的背景圖的橫坐標
currentY: i * this.blockHeight * -1, // 正確的背景圖的縱坐標
w: this.blockWidth,
h: this.blockHeight,
imgUrl: this.gameConfig.imgUrl,
isVisible: (i === this.gameConfig.rows - 1 && j === this.gameConfig.cols - 1 ? false : true) // 拼圖是否可見
})
}
}
return ;
}/**
* 打亂拼圖
*/
shuffle:Function = ()=>{
let len = this.blocks.length;
for(let i = 0; i < len - 1; i ++ ) {
let idx = Math.floor(Math.random() * len) % (len - 1);
while(idx == i){
idx = Math.floor(Math.random() * len) % (len - 1);
}
// 交換兩個拼圖塊
this.blocks[i].x += this.blocks[idx].x;
this.blocks[i].y += this.blocks[idx].y;
this.blocks[idx].x = this.blocks[i].x - this.blocks[idx].x;
this.blocks[idx].y = this.blocks[i].y - this.blocks[idx].y;
this.blocks[i].x = this.blocks[i].x - this.blocks[idx].x;
this.blocks[i].y = this.blocks[i].y - this.blocks[idx].y;
}
}3.生成拼圖塊
為了更加好的描繪出拼圖塊的細節,我自定義了組件。
Flex()
      .width(this.block.w + "px") // 每塊拼圖的寬度
      .height(this.block.h + "px") // 每塊拼圖的高度
      .borderWidth("1px")
      .borderColor(Color.White)
      .backgroundImage(this.block.imgUrl)
      .backgroundImagePosition({x: this.block.x, y: this.block.y})
      .visibility(this.block.isVisible ? Visibility.Visible: Visibility.Hidden)
	  .onClick(()=>{....}) // 存放著移動拼圖塊的邏輯
在做移動時,有著一個的細節處理,首先的浮點數比較大小,在計算過程中浮點數會產生精度問題,也就是除不盡的情況,這個時候比較相等時會比較不出來,為了避免這種情況可以用取整的方式進行處理,當然還其它很多方法我就不一一說明了。
/**
 * 移動拼圖塊
 */
if(!this.isShow && ((Math.floor(y1) === Math.floor(y2) && Math.floor(Math.abs(x1 - x2)) === w) || (Math.floor(x1) === Math.floor(x2) && Math.floor(Math.abs(y1 - y2)) === h))){
  	this.blocks[this.idx].x += inVisibleBlock.x;
  	this.blocks[this.idx].y += inVisibleBlock.y;
  	inVisibleBlock.x = this.blocks[this.idx].x - inVisibleBlock.x;
  	inVisibleBlock.y = this.blocks[this.idx].y - inVisibleBlock.y;
 	this.blocks[this.idx].x = this.blocks[this.idx].x - inVisibleBlock.x;
 	this.blocks[this.idx].y = this.blocks[this.idx].y - inVisibleBlock.y;
 	let temp = this.blocks[this.idx].isVisible;
 	this.blocks[this.idx].isVisible = inVisibleBlock.isVisible;
 	inVisibleBlock.isVisible = temp;
 	this.isShuffle = !this.isShuffle;
}
4.定乾坤
我這使用了數組自帶的方法來構建數組(filter)。
/**
 * 判斷游戲輸贏
 */
let wrongs = this.blocks.filter((item)=>{
  // 找到所有不在正確位置上的拼圖塊
  return !this.isCorrect(item);
})

if(wrongs.length === 0) {
  this.isShow = true;
}
這里寫了兩個輔助函數,輔助判斷拼圖塊是否在正確的位置。
/**
 * 判斷兩值是否相等
 */
isEqual:Function = (x:number, y:number)=>{
  return Math.floor(x) === Math.floor(y);
}

/**
 * 判斷當前拼圖塊是否在正確位置
 */
isCorrect:Function = (block: Block)=>{
  let flag1:boolean = this.isEqual(block.x, block.currentX);
  let flag2:boolean = this.isEqual(block.y, block.currentY);
  return flag1 && flag2;
}
到此游戲開發就結束了。
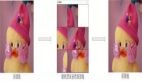
三、游戲測試
|
|
|
領域展開 | 空間移動 | 時間回溯 |


測試非常順得,界面還算美觀哈。
四、總結一下
自從我接觸到鴻蒙系統,我就被它強大的性能和無限的可能性所吸引。作為一個熱愛編程和游戲開發的我,決定嘗試在這個全新的系統上開發一款手機拼圖游戲。這個過程充滿了挑戰,但也讓我收獲頗豐。
在開始開發之前,我首先對鴻蒙系統進行了深入的研究,了解了它的架構、開發工具以及API等。我發現,鴻蒙系統為開發者提供了豐富的接口和工具,使得開發過程變得更加高效和便捷。同時,我也被它的分布式架構所吸引,這讓我思考如何在游戲中實現跨設備的互動體驗。
在開發過程中,我遇到了不少挑戰。其中最大的挑戰是如何實現拼圖的平滑移動和旋轉效果。為了實現這一效果,我深入研究了鴻蒙系統的圖形渲染機制,并嘗試了各種算法和優化方法。經過不斷的嘗試和調整,我終于找到了一個既流暢又美觀的解決方案。
當游戲終于開發完成時,我感到無比的自豪和滿足。