「我的 Redis Server 關不掉了!」認識 systemd / systemctl Linux 服務管理工具
你需要一個 Redis 服務做開發(fā)調(diào)試,于是你照著教程在一臺平平無奇的 Ubunut 安裝 Redis 服務并且啟動:
sudo apt install redis-server
sudo systemctl start redis-server
接著,你的另一個服務需要用到 6379 端口,但是此時因為 6379 端口被 Redis 服務占用,所以你無法啟動另一個服務。
因此你決定要 kill 掉 Redis 服務:
kill -9 $(pidof redis-server)結(jié)果,卻怎么也無法 kill 掉 Redis 服務。
一時間,你陷入了一個尷尬的境地,去搜索“我的 Redis 怎么也關不掉”,卻發(fā)現(xiàn)別人面臨的場景總是奇奇怪怪,而你,剛剛只是簡單地在本地安裝了一個 Redis 服務。
終于,你想到,你是用 systemctl 來 start 你的 Redis 服務的,那么,你可以試試用 systemctl 來 stop 你的 Redis 服務?
sudo systemctl stop redis-server果然,你又重新“奪回”了 6379 的控制權(quán),你終于可以愉快地啟動你的另一個服務了。
于是你下定決心,了解下 systemctl 到底是個什么東西。
首先介紹 systemd
systemd 是一個 Linux 系統(tǒng)基礎組件的集合,它提供了一系列強大的功能來管理系統(tǒng)的啟動、服務、進程以及資源等。通過 systemd 這些單元的配置和組合,可以靈活地控制系統(tǒng)的各種行為。
人話:systemd 可以理解為大多數(shù) Linux 發(fā)行版中用于取代 SysVinit 的初始化系統(tǒng)。如果你去看你 Linux 的第一個進程,你會發(fā)現(xiàn)它是 systemd ( sbin/init 是 systemd 的軟鏈接)。
$ ps aux|head -2
USER         PID %CPU %MEM    VSZ   RSS TTY      STAT START   TIME COMMAND
root           1  0.0  0.6 168980 12544 ?        Ss    2023   7:02 /sbin/init noibrs

$ ls -lha /sbin/init
lrwxrwxrwx 1 root root 20 Jan 10  2022 /sbin/init -> /lib/systemd/systemd
操作系統(tǒng)中的第一個進程,其作用可以理解為:
- 初始化內(nèi)存管理系統(tǒng),確定系統(tǒng)內(nèi)存的布局與可分配資源
- 啟動文件系統(tǒng)的相關服務,還會創(chuàng)建并初始化系統(tǒng)的基礎服務進程,像負責網(wǎng)絡通信的守護進程等
- 是開機后的第一個進程,負責啟動其他進程,是所有進程的父進程
但是人們厭倦了 SysVinit 的復雜,于是就有了 systemd 。
systemctl 則是 systemd 的命令行工具,它提供了一組命令來管理系統(tǒng)服務。通過 systemctl ,你可以啟動、停止、重啟、查看服務的狀態(tài)。
與之類似,還有 journalctl ,它是 systemd 的日志管理工具,用于查看系統(tǒng)服務的日志。
systemctl 常用命令
# 查看服務狀態(tài)
systemctl status redis-server

# 啟動服務
systemctl start redis-server

# 停止服務
systemctl stop redis-server

# 重啟服務
systemctl restart redis-server

# 查看服務是否開機啟動
systemctl is-enabled redis-server

# 開機啟動服務
systemctl enable redis-server

# 取消開機啟動服務
systemctl disable redis-server

# 查看服務日志
journalctl -u redis-server

# 查看服務依賴關系
systemctl list-dependencies redis-server
服務如何被 systemd 管理
在你 apt install 一個服務的時候,系統(tǒng)會自動幫你創(chuàng)建一個 .service 文件,這個文件就是 systemd 管理的服務的配置文件。
比如 apt install redis-server 之后,你可以看到如下文件。
$ cat /etc/init.d/redis-server
#! /bin/sh
### BEGIN INIT INFO
# Provides:             redis-server
# Required-Start:       $syslog $remote_fs
# Required-Stop:        $syslog $remote_fs
# Should-Start:         $local_fs
# Should-Stop:          $local_fs
# Default-Start:        2 3 4 5
# Default-Stop:         0 1 6
# Short-Description:    redis-server - Persistent key-value db
# Description:          redis-server - Persistent key-value db
### END INIT INFO


PATH=/usr/local/sbin:/usr/local/bin:/sbin:/bin:/usr/sbin:/usr/bin
DAEMON=/usr/bin/redis-server
DAEMON_ARGS=/etc/redis/redis.conf
...
/etc/init.d/redis-server 是為了兼容 SysVinit 而存在的,并不會被 systemd 所使用。你可以看到其直接書寫 shell 腳本,這點為人詬病(不安全、不方便),在 systemd 中,我們可以使用配置文件來管理服務。
$ cat /etc/systemd/system/redis.service
[Unit]
Description=Advanced key-value store
After=network.target
Documentation=http://redis.io/documentation, man:redis-server(1)

[Service]
Type=forking
ExecStart=/usr/bin/redis-server /etc/redis/redis.conf
PIDFile=/run/redis/redis-server.pid
TimeoutStopSec=0
Restart=always
User=redis
Group=redis
RuntimeDirectory=redis
RuntimeDirectoryMode=2755

UMask=007
PrivateTmp=yes
LimitNOFILE=65535
PrivateDevices=yes
ProtectHome=yes
ReadOnlyDirectories=/
ReadWritePaths=-/var/lib/redis
ReadWritePaths=-/var/log/redis
ReadWritePaths=-/var/run/redis

NoNewPrivileges=true
CapabilityBoundingSet=CAP_SETGID CAP_SETUID CAP_SYS_RESOURCE
MemoryDenyWriteExecute=true
ProtectKernelModules=true
ProtectKernelTunables=true
ProtectControlGroups=true
RestrictRealtime=true
RestrictNamespaces=true
RestrictAddressFamilies=AF_INET AF_INET6 AF_UNIX

# redis-server can write to its own config file when in cluster mode so we
# permit writing there by default. If you are not using this feature, it is
# recommended that you replace the following lines with "ProtectSystem=full".
ProtectSystem=true
ReadWriteDirectories=-/etc/redis

[Install]
WantedBy=multi-user.target
Alias=redis.service
/etc/systemd/system/redis.service 是 systemd 管理的服務的配置文件,你可以看到其使用了 systemd 的配置語法。
systemd 的相關守護進程們,會根據(jù)這些配置文件,達到程序預期的目的。
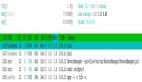
$ ps aux|grep systemd
root         225  0.0  7.6 211704 154572 ?       S<s   2023   4:27 /lib/systemd/systemd-journald
root         253  0.0  0.2  21664  5188 ?        Ss    2023   1:31 /lib/systemd/systemd-udevd
systemd+     406  0.0  0.3  27428  7608 ?        Ss    2023   2:42 /lib/systemd/systemd-networkd
systemd+     422  0.0  0.5  24580 12048 ?        Ss    2023   9:48 /lib/systemd/systemd-resolved
message+     446  0.0  0.2   7424  4260 ?        Ss    2023   0:08 /usr/bin/dbus-daemon --system --address=systemd: --nofork --nopidfile --systemd-activation --syslog-only
root         459  0.0  0.3  17532  7868 ?        Ss    2023   0:59 /lib/systemd/systemd-logind
root     1572894  0.0  0.4  18824  9048 ?        Ss   00:20   0:00 /lib/systemd/systemd --user
root     1573931  0.0  0.0   9032   736 pts/2    S+   00:39   0:00 grep --color=auto systemd
如果我自己安裝的 binary 文件,沒有通過 apt install 安裝,那怎么辦呢?
很簡單,根據(jù)需求,自己寫一個 .service 文件,然后放到 /etc/systemd/system/ 目錄下,然后執(zhí)行 systemctl enable xxx.service 即可。