用鴻蒙開發AI應用(六)UI篇
https://harmonyos.51cto.com/#zz
環境準備
1. 安裝DevEco Studio
解壓相應的壓縮包(文末附下載鏈接),這里以win10為例,雙擊`deveco-studio-2.0.12.201.exe`

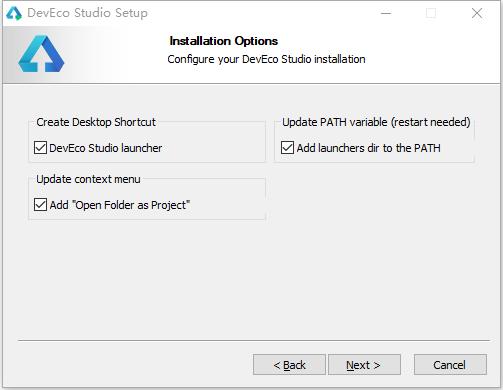
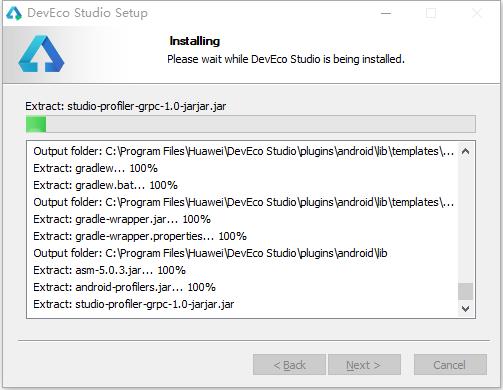
同意用戶協議后,就能正常啟動了。

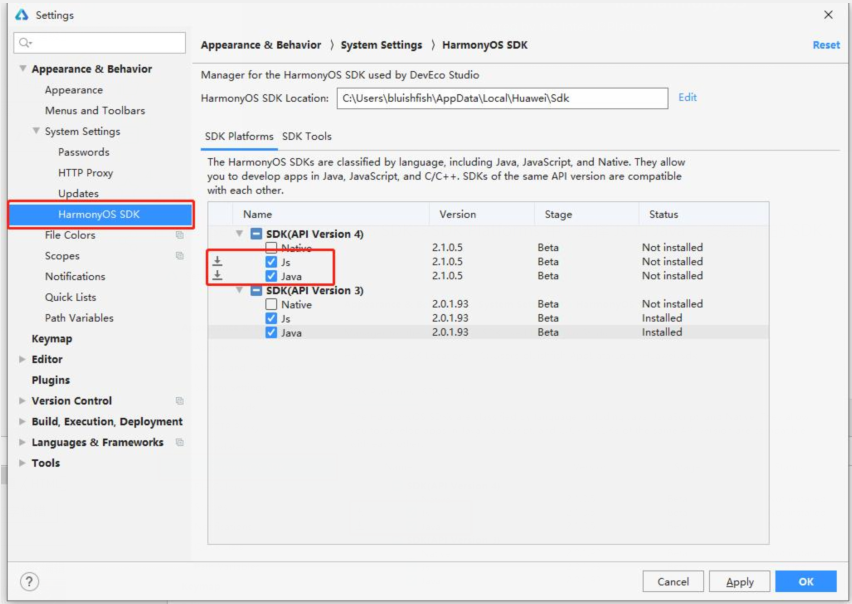
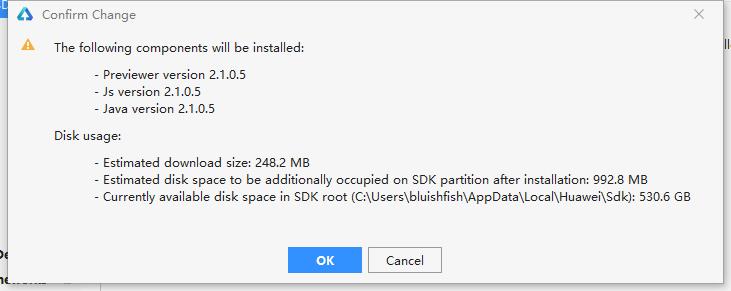
同樣在`SDK Tools`中,選中新版的`Previewer`。
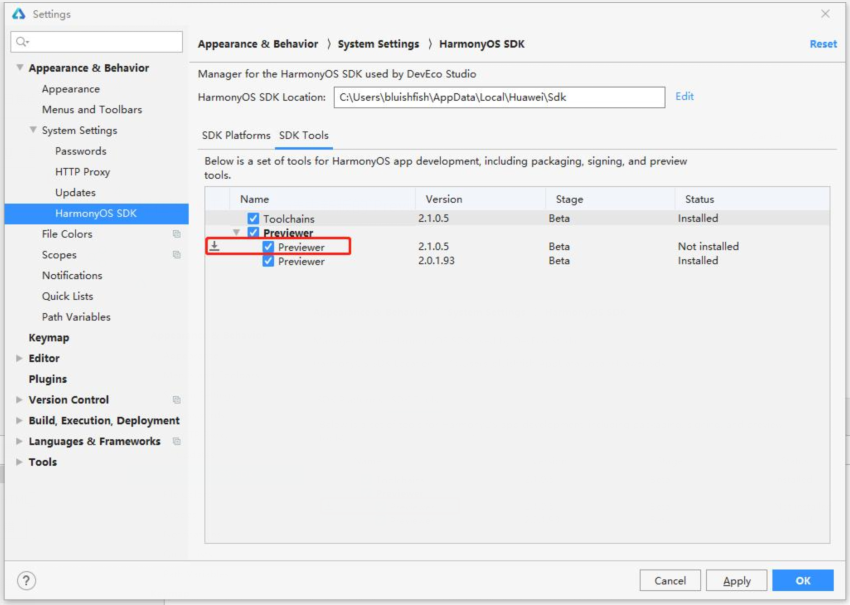
點擊Apply更新
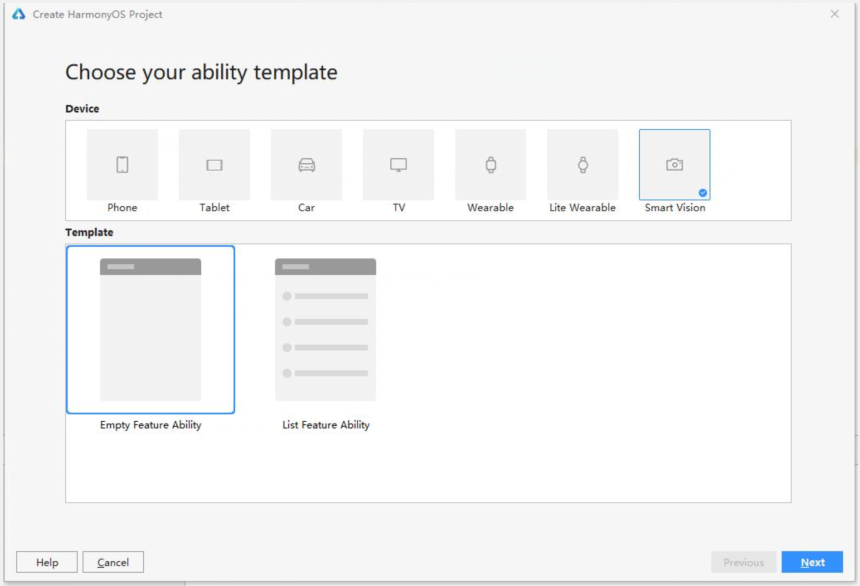
新建項目
點擊菜單`File->New Project...`,選擇智慧屏`Smart Vision`,創建一個空模板應用。
- https://services.gradle.org/distributions/
目錄結構
我們先分析一下目錄結構,做`Android`開發的會倍感親切。
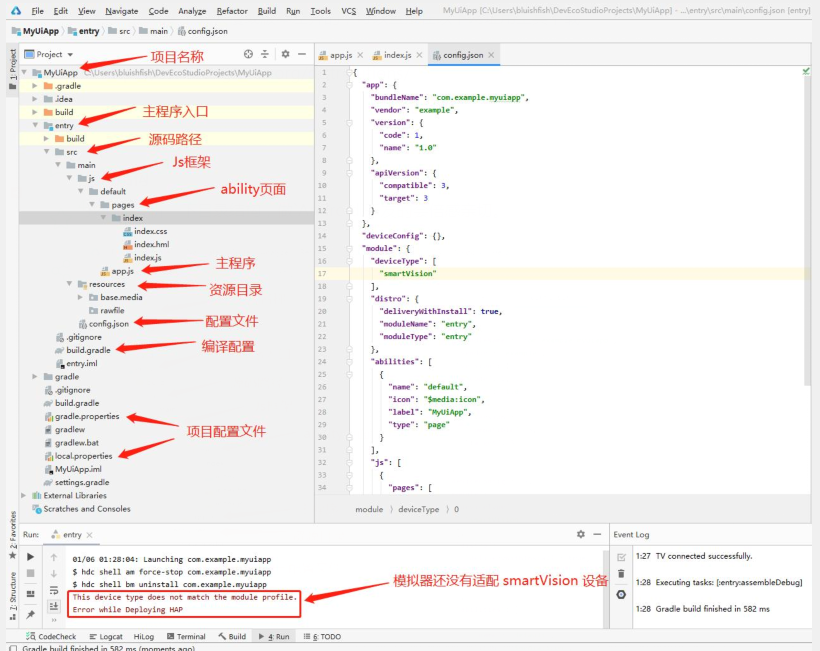
1. APP
`HarmonyOS`的應用軟件包以`APP Pack(Application Package)`形式發布,它是由一個或多個`HAP(HarmonyOS Ability Package)`以及描述每個`HAP`屬性的`pack.info`組成。`HAP`是`Ability`的部署包,`HarmonyOS`應用代碼圍繞`Ability`組件展開。
一個`HAP`是由代碼、資源、第三方庫及應用配置文件組成的模塊包,可分為`entry`和`feature`兩種模塊類型。
- **entry**:應用的主模塊。一個APP中,對于同一設備類型必須有且只有一個`entry`類型的`HAP`,可獨立安裝運行。
- **feature**:應用的動態特性模塊。一個`APP`可以包含一個或多個`feature`類型的`HAP`,也可以不含。只有包含`Ability`的`HAP`才能夠獨立運行。

2. Ability
Ability是應用所具備的能力的抽象,一個應用可以包含一個或多個`Ability`。`Ability`分為兩種類型:`FA(Feature Ability)`和`PA(Particle Ability)`。`FA/PA`是應用的基本組成單元,能夠實現特定的業務功能。`FA`有`UI`界面,而`PA`無`UI`界面。
3. 資源文件
應用的資源文件(字符串、圖片、音頻等)統一存放于`resources`目錄下,便于開發者使用和維護。`resources`目錄包括兩大類目錄,一類為`base`目錄與限定詞目錄,另一類為`rawfile`目錄。
4. 配置文件
配置文件` (config.json) `是應用的`Ability`信息,用于聲明應用的`Ability`,以及應用所需權限等信息。
- 應用的全局配置信息,包含應用的包名、生產廠商、版本號等基本信息。
- 應用在具體設備上的配置信息,包含應用的備份恢復、網絡安全等能力。
- `HAP`包的配置信息,包含每個`Ability`必須定義的基本屬性(如包名、類名、類型以及`Ability`提供的能力),以及應用訪問系統或其他應用受保護部分所需的權限等。
5. JS UI 框架
`JS UI`框架是一種跨設備的高性能`UI`開發框架,支持聲明式編程和跨設備多態`UI`。
- 聲明式編程
`JS UI`框架采用類`HTML`和`CSS`聲明式編程語言作為頁面布局和頁面樣式的開發語言,頁面業務邏輯則支持`ECMAScript`規范的`JavaScript`語言。`JS UI`框架提供
的聲明式編程,可以讓開發者避免編寫`UI`狀態切換的代碼,視圖配置信息更加直觀。
- 跨設備
開發框架架構上支持`UI`跨設備顯示能力,運行時自動映射到不同設備類型,開發者無感知,降低開發者多設備適配成本。
- 高性能
開發框架包含了許多核心的控件,如列表、圖片和各類容器組件等,針對聲明式語法進行了渲染流程的優化。
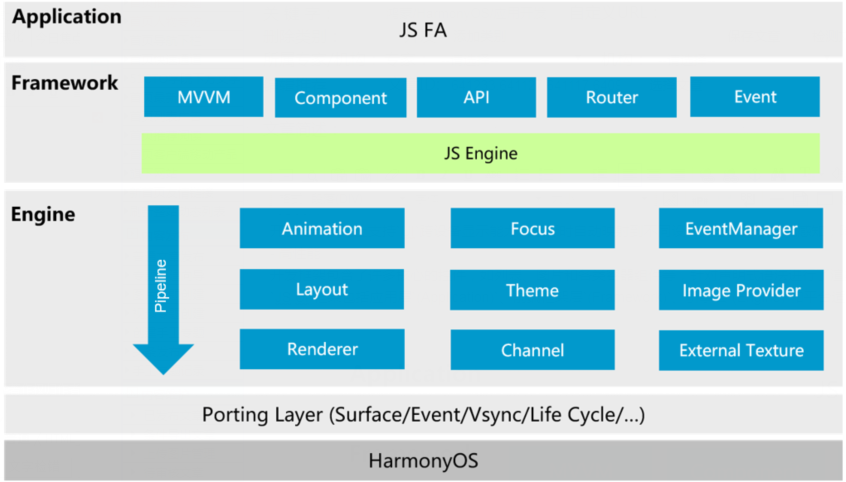
`JS UI`框架包括應用層`(Application)`、前端框架層`(Framework)`、引擎層`(Engine)`和平臺適配層`(Porting Layer)`。
# 空氣質量監測 UI
## 1. 創建首頁面
空氣質量監測App包含兩個界面`(Page)`,工程創建完成后會生成一個名為`index`的`Page`,可以作為首頁。
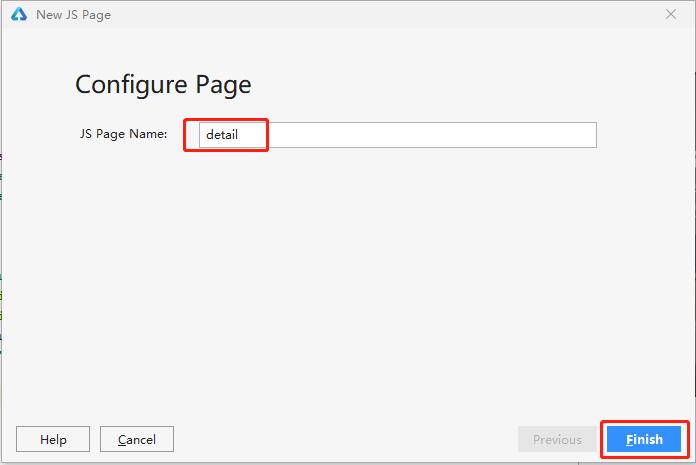
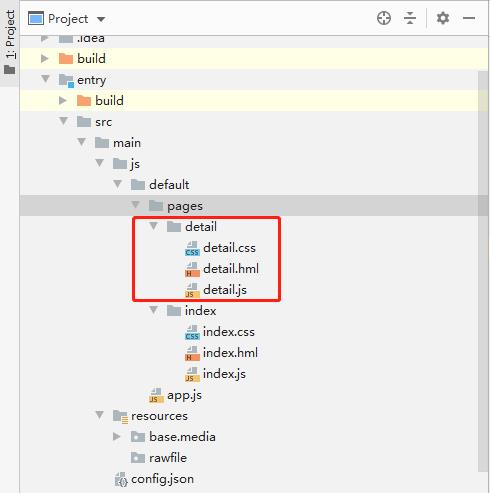
## 2. 創建詳情頁
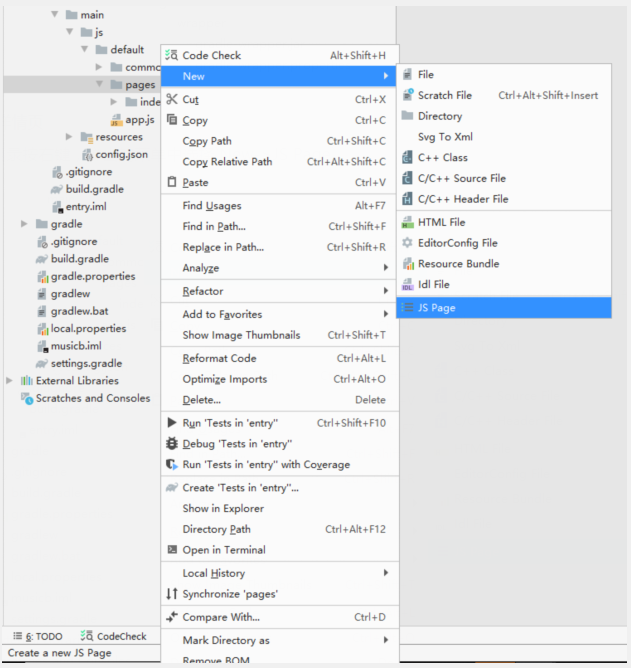
在`pages`目錄按右鍵,彈出的菜單中選擇`New->JS Page`。
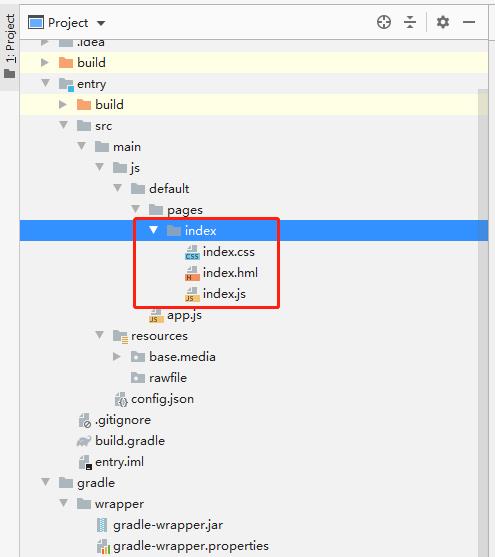
詳情頁創建完成后應用工程目錄如下圖所示,每個`Page`包括三個文件:布局文件`hml`、樣式文件`css`、業務邏輯代碼`js`。
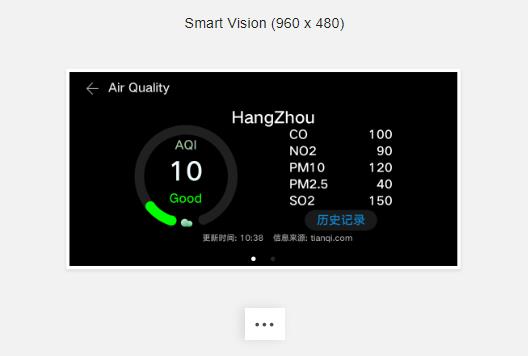
## 3. 開發首頁
應用首頁主要展示城市的空氣質量概況。首頁總共有兩屏(可以根據需求設置多屏),每屏顯示一個城市的空氣質量信息:主要包括AQI指數、城市名稱、污染物指數、更新時間和信息來源等數據。
### 3.1 創建根節點
修改`entry/src/main/js/default/pages/index/index.hml`,加入根節點`div`:
- <div class="container">
- </div>
### 3.2 創建樣式
修改`entry/src/main/js/default/pages/index/index.css`
- container {
- flex-direction: column;
- height: 480px;
- width: 960px;
- }
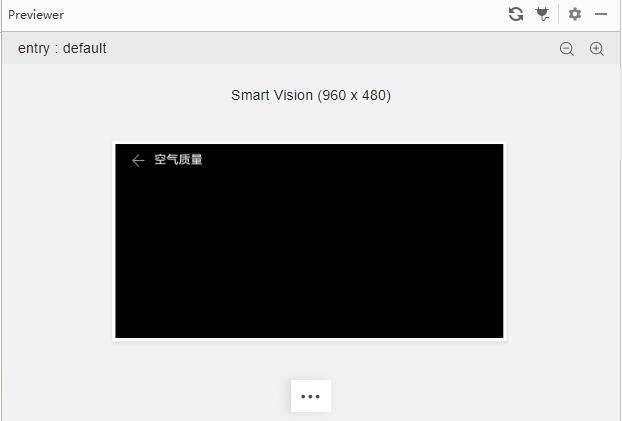
標題欄包括一個退出按鈕和一個標題,兩個控件是橫向排列
- <div class="container">
- <div class="header" onclick="exitApp">
- <image class="back" src="common/ic_back.png"></image>
- <text class="title">
- 空氣質量
- </text>
- </div>
- </div>
注意,這里要先導入common/ic_back.png圖標資源。
3.4 添加標題欄樣式
修改entry/src/main/js/default/pages/detail/detail.css,添加以下代碼,設置組件的高度、邊距、顏色等屬性。
- .header {
- width: 960px;
- height: 72px;
- }
- .back {
- width: 36px;
- height: 36px;
- margin-left: 39px;
- margin-top: 23px;
- }
- .title {
- width: 296px;
- height: 40px;
- margin-top: 20px;
- margin-left: 21px;
- color: #e6e6e6;
- }
### 3.5 添加退出事件
`onclick="exitApp"` 設置了`div`組件的`click`事件,當在標題欄上觸發點擊事件時,就會執行函數`exitApp`,該函數位于`index.js`文件中,代碼如下:
- exitApp() {
- console.log('start exit');
- app.terminate();
- console.log('end exit');
- }
`app.terminate()`函數實現了程序退出功能;在使用該函數前,需要引入`app`模塊,在`index.js`文件的最上方寫如下代碼:
- import app from '@system.app'
在 Previewer 窗口中,可以預覽界面效果
### 3.6 滑動組件
實現城市空氣質量信息的多屏左右滑動,需要使用`“swiper”`組件。
在根節點中添加一個子節點`swiper`, 修改`index.hml`
- <swiper class="swiper" index="{{swiperPage}}" duration="500" onchange="swiperChange">
- </swiper>
- .swiper {
- height: 385px;
- width: 960px;
- }
- //引入router模塊,用戶頁面跳轉
- import router from'@system.router'
- import app from '@system.app'
- export default {
- //定義參數
- data: {
- //默認是第一頁
- swiperPage: 0
- },
- onInit () {
- },
- exitApp(){
- console.log('start exit');
- app.terminate();
- console.log('end exit');
- },
- //swiper滑動回調事件,保存當前swiper的index值,每次滑動都會將index值保存在swiperPage變量中
- swiperChange (e) {
- this.swiperPage = e.index;
- }
- }
在`swiper`中添加兩個子組件`stack`(絕對布局),每個`stack`組件內分別添加`text、image、progress`等組件來顯示對應的信息。
- <div class="container">
- <div class="header" onclick="exitApp">
- <image class="back" src="common/ic_back.png"></image>
- <text class="title">
- 空氣質量
- </text>
- </div>
- <swiper class="swiper" index="{{swiperPage}}" duration="500" onchange="swiperChange">
- <!--第一屏-->
- <stack class="swiper">
- <!--空氣質量-->
- <text class="airquality" style="color:{{textColor1}};">{{airData[0].airQuality}}</text>
- <!--城市名稱-->
- <text class="location-text">{{airData[0].location}}</text>
- <!--進度條-->
- <progress
- class="circleProgress"
- style="color:{{textColor1}};background-Color:{{bgColor1}};"
- type="arc"
- onclick="openDetail"
- percent="{{percent1}}">
- </progress>
- <!--云朵圖片-->
- <image class="image" src="{{src1}}"></image>
- <!--AQI數值-->
- <text class="pm25-value">{{ airData[0].detailData }}</text>
- <text class="pm25-name">AQI</text>
- <!--空氣指標詳細信息-->
- <div class="detail">
- <div class="text-wrapper">
- <text class="gas-name">
- CO
- </text>
- <text class="gas-value">
- 100
- </text>
- </div>
- <div class="text-wrapper">
- <text class="gas-name">
- NO2
- </text>
- <text class="gas-value">
- 90
- </text>
- </div>
- <div class="text-wrapper">
- <text class="gas-name">
- PM10
- </text>
- <text class="gas-value">
- 120
- </text>
- </div>
- <div class="text-wrapper">
- <text class="gas-name">
- PM2.5
- </text>
- <text class="gas-value">
- 40
- </text>
- </div>
- <div class="text-wrapper">
- <text class="gas-name">
- SO2
- </text>
- <text class="gas-value">
- 150
- </text>
- </div>
- <input class="btn" type="button" onclick="openDetail" value="歷史記錄"></input>
- </div>
- <!--更新時間和網站等信息-->
- <div class="footer">
- <text class="update-time">
- 更新時間: 10:38
- </text>
- <text class="info-source">
- 信息來源: tianqi.com
- </text>
- </div>
- </stack>
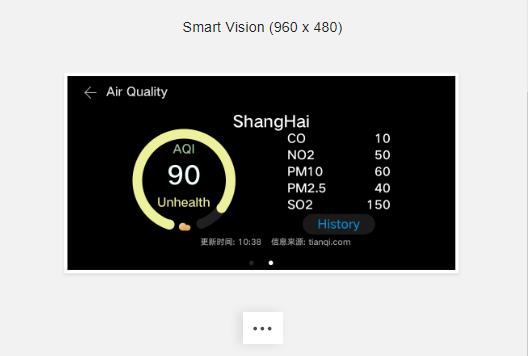
- <!--第二屏-->
- <stack class="swiper">
- <text class="airquality" style="color: {{textColor2}};">{{airData[1].airQuality}}</text>
- <text class="location-text">{{airData[1].location}}</text>
- <progress class="circle-progress" style="color: {{textColor2}};background-Color: {{bgColor2}};" type="arc"
- percent="{{percent2}}"></progress>
- <image class="image" src="{{src2}}"></image>
- <text class="aqi-value">{{airData[1].detailData}}</text>
- <text class="aqi">
- AQI
- </text>
- <div class="detail">
- <div class="text-wrapper">
- <text class="gas-name">
- CO
- </text>
- <text class="gas-value">
- 10
- </text>
- </div>
- <div class="text-wrapper">
- <text class="gas-name">
- NO2
- </text>
- <text class="gas-value">
- 50
- </text>
- </div>
- <div class="text-wrapper">
- <text class="gas-name">
- PM10
- </text>
- <text class="gas-value">
- 60
- </text>
- </div>
- <div class="text-wrapper">
- <text class="gas-name">
- PM2.5
- </text>
- <text class="gas-value">
- 40
- </text>
- </div>
- <div class="text-wrapper">
- <text class="gas-name">
- SO2
- </text>
- <text class="gas-value">
- 150
- </text>
- </div>
- <input class="btn" type="button" onclick="openDetail" value="歷史記錄"></input>
- </div>
- <div class="footer">
- <text class="update-time">
- 更新時間: 10:38
- </text>
- <text class="info-source">
- 信息來源: tianqi.com
- </text>
- </div>
- </stack>
- </swiper>
- </div>
### 3.7 頁面位置指示器
添加頁面位置指示器:由于當前`swiper`不支持設置`indicator`,需要開發者自己來實現該效果。在根節點中添加一個子組件`div`,并設置相應樣式;然后在該`div`中添
加兩個子組件`div`,設置兩個`div`的`border-radius`,并在`swiper`滑動事件中動態改變對應`div`的背景色來實現該效果。
修改`index.hml`,在`swiper`組件后加入以下代碼:
- <div class="images">
- <div class="circle-div" style="background-color: {{iconcheckedColor}};"></div>
- <div class="circle-div" style="background-color: {{iconUncheckedColor}};margin-left: 36px;"></div>
- </div>
### 3.8 新增文字樣式
修改 `index.css`
- aqi-value {
- text-align: center;
- font-size: 65px;
- color: #f0ffff;
- width: 156px;
- height: 92px;
- top: 134px;
- left: 210px;
- }
- .aqi {
- text-align: center;
- color: #a2c4a2;
- width: 156px;
- height: 45px;
- top: 90px;
- left: 210px;
- }
- .airquality {
- top: 222px;
- text-align: center;
- width: 156px;
- height: 45px;
- left: 210px;
- }
- .image {
- top: 285px;
- left: 274px;
- width: 32px;
- height: 32px;
- }
- .location-text {
- text-align: center;
- color: #ffffff;
- width: 250px;
- height: 52px;
- font-size: 40px;
- left: 380px;
- top: 16px;
- }
- .container {
- flex-direction: column;
- height: 480px;
- width: 960px;
- }
- .circle-progress {
- center-x: 128px;
- center-y: 128px;
- radius: 128px;
- startAngle: 198;
- totalAngle: 320;
- strokeWidth: 24px;
- width: 256px;
- height: 256px;
- left: 160px;
- top: 58px;
- }
- .detail {
- width: 256px;
- height: 265px;
- left: 544px;
- top: 58px;
- flex-direction: column;
- }
- .text-wrapper {
- width: 256px;
- height: 35px;
- margin-top: 6px;
- }
- .gas-name {
- width: 128px;
- height: 35px;
- text-align: left;
- }
- .gas-value {
- width: 128px;
- height: 35px;
- text-align: right;
- }
- .btn {
- width: 180px;
- height: 50px;
- margin-top: 6px;
- margin-left: 38px;
- background-color: #1a1a1a;
- color: #1085CE;
- }
- .footer {
- top: 326px;
- width: 960px;
- height: 28px;
- }
- .header {
- width: 960px;
- height: 72px;
- }
- .back {
- width: 36px;
- height: 36px;
- margin-left: 39px;
- margin-top: 23px;
- }
- .title {
- width: 296px;
- height: 40px;
- margin-top: 20px;
- margin-left: 21px;
- color: #e6e6e6;
- }
- .swiper {
- height: 385px;
- width: 960px;
- }
- .images {
- width: 60px;
- height: 15px;
- margin-left: 450px;
- }
- .update-time {
- width: 480px;
- height: 28px;
- font-size: 20px;
- color: #A9A9A9;
- text-align: right;
- }
- .info-source {
- width: 450px;
- height: 28px;
- font-size: 20px;
- color: #A9A9A9;
- text-align: left;
- margin-left: 24px;
- }
- .circle-div {
- width: 12px;
- height: 12px;
- border-radius: 6px;
- }
修改`index.js`,綁定頁面數據`data`。初始化時,根據不同的數值顯示不同的字體和圖片`onInit`。實現頁面跳轉`openDetail`,將當前頁面索引傳遞給`detail`頁面。滑動觸發后`swiperChange`改變指示位置。
- //引入router模塊,用戶頁面跳轉
- import router from'@system.router'
- import app from '@system.app'
- export default {
- //定義參數
- data: {
- //頁面綁定數據
- textColor1: "#00ff00",
- textColor2: "#00ff00",
- bgColor1: "#669966",
- bgColor2: "#669966",
- //默認是第一頁
- swiperPage: 0,
- percent1: 10,
- percent2: 90,
- iconUncheckedColor: '#262626',
- iconcheckedColor: '#ffffff',
- iconcheckedBR: '6px',
- src1: "common/cloud_green.png",
- src2: "common/cloud_green.png",
- airData: [
- {
- location: "HangZhou",
- airQuality: "Good",
- detailData: 10
- },
- {
- location: "ShangHai",
- airQuality: "Unhealth",
- detailData: 90
- }
- ]
- },
- onInit () {
- //根據數值的不同,設置不同的字體、背景顏色和圖片
- if(this.airData[0].detailData > 100){
- this.src1 = 'common/cloud_red.png';
- this.textColor1 = '#ff0000';
- this.bgColor1 = '#9d7462';
- } else if(50 < this.airData[0].detailData && this.airData[0].detailData <= 100){
- this.src1 = 'common/cloud_yellow.png';
- this.textColor1 = '#ecf19a';
- this.bgColor1 = '#9d9d62';
- }
- if(this.airData[1].detailData > 100){
- this.src2 = 'common/cloud_red.png';
- this.textColor2 = '#ff0000';
- this.bgColor2 = '#9d7462';
- } else if(50 < this.airData[1].detailData && this.airData[1].detailData <= 100){
- this.src2 = 'common/cloud_yellow.png';
- this.textColor2 = '#ecf19a';
- this.bgColor2 = '#9d9d62';
- }
- if(this.selectedCityIndex){
- this.swiperPage = this.selectedCityIndex;
- if(this.swiperPage == 0){
- this.iconcheckedColor = '#ffffff';
- this.iconUncheckedColor = '#262626';
- }else{
- this.iconcheckedColor = '#262626';
- this.iconUncheckedColor = '#ffffff';
- }
- }
- },
- //跳轉到詳情頁面
- openDetail () {
- router.replace({
- uri: 'pages/detail/detail',
- params: {selectedCityIndex:this.swiperPage}
- });
- },
- //退出應用
- exitApp(){
- console.log('start exit');
- app.terminate();
- console.log('end exit');
- },
- //swiper滑動回調事件,保存當前swiper的index值,每次滑動都會將index值保存在swiperPage變量中
- swiperChange (e) {
- this.swiperPage = e.index;
- if(e.index == 0){
- this.iconcheckedColor = '#ffffff';
- this.iconUncheckedColor = '#262626';
- }else{
- this.iconcheckedColor = '#262626';
- this.iconUncheckedColor = '#ffffff';
- }
- }
- }
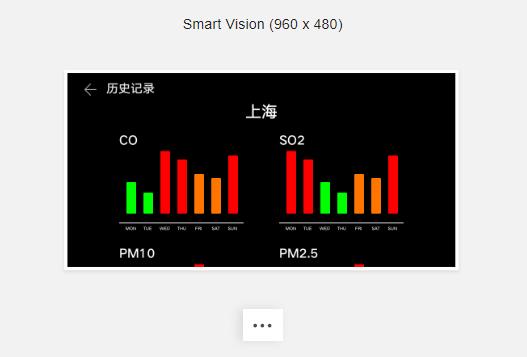
## 4. 開發詳情頁
詳情頁以圖表的形式展示一周內空氣質量指標值。本頁面由兩部分組成:標題欄和圖表欄;在圖表欄,考慮顯示效果,我們使用多個`div`替代`chart`組件來實現圖表功能。
### 4.1 添加標題欄
修改 `entry/src/main/js/default/pages/detail/detail.hml`
- <div class="container">
- <div class="header" onclick="backMain">
- <image class="back" src="common/ic_back.png"></image>
- <text class="title">
- 歷史記錄
- </text>
- </div>
- <list class="chart-list">
- </list>
- </div>
### 4.2 添加圖表欄
添加城市位置到`list-item-title`,圖表到`list-item-chart`
- <list class="chart-list">
- <list-item class="list-item-title">
- <text class="location">{{location}}</text>
- </list-item>
- <list-item class="list-item-chart">
- </list-item>
- </list>
- <div class="chart-wrapper" style="margin-left: 128px;">
- <text class="gas-name">CO</text>
- <div class="chart">
- <div class="chart-item" style="height: 78px;background-color: #00ff00;"></div>
- <div class="chart-item" style="height: 52px;background-color: #00ff00;"></div>
- <div class="chart-item" style="height: 155px;background-color: #ff0000;"></div>
- <div class="chart-item" style="height: 134px;background-color: #ff0000;"></div>
- <div class="chart-item" style="height: 98px;background-color: #FF7500;"></div>
- <div class="chart-item" style="height: 88px;background-color: #FF7500;"></div>
- <div class="chart-item" style="height: 144px;background-color: #ff0000;"></div>
- </div>
- <div class="white-line"></div>
- <div class="week"></div>
- </div>
- .location {
- text-align: center;
- color: #ffffff;
- width: 960px;
- height: 52px;
- font-size: 40px;
- }
- .container {
- height: 480px;
- width: 960px;
- flex-direction: column;
- }
- .header {
- width: 960px;
- height: 72px;
- }
- .back {
- width: 36px;
- height: 36px;
- margin-left: 39px;
- margin-top: 23px;
- }
- .title {
- width: 296px;
- height: 40px;
- margin-top: 20px;
- margin-left: 21px;
- color: #e6e6e6;
- }
- .chart-list {
- width: 960px;
- height: 408px;
- }
- .list-item-title {
- width: 960px;
- height: 52px;
- }
- .list-item-chart {
- width: 960px;
- height: 280px;
- }
- .chart-wrapper {
- width: 308px;
- height: 256px;
- flex-direction: column;
- }
- .gas-name {
- width: 308px;
- height: 35px;
- text-align: left;
- }
- .chart {
- width: 308px;
- height: 155px;
- margin-top: 10px;
- justify-content: flex-start;
- align-items: flex-end;
- }
- .chart-item {
- width: 24px;
- margin-left: 18px;
- border-radius: 3px;
- }
- .white-line {
- width: 308px;
- height: 2px;
- background-color: #ffffff;
- margin-top: 22px;
- }
- .week {
- width: 308px;
- height: 17px;
- margin-top: 6px;
- border-color: #ffffff;
- border-radius: 2px;
- margin-top: 6px;
- }
- .day {
- width: 26px;
- height: 17px;
- font-size: 10px;
- margin-left: 16px;
- text-align: center;
- }
其中`onclick="backMain"`為返回主頁事件,根據傳遞的頁面索引,顯示不同的位置數據,`detail.js`中的代碼實現如下:
- import router from '@system.router'
- export default {
- data: {
- location: ''
- },
- onInit() {
- if (this.selectedCityIndex === 0) {
- this.location = '杭州';
- } else {
- this.location = '上海';
- }
- },
- backMain() {
- router.replace({
- uri: 'pages/index/index',
- params: {
- selectedCityIndex: this.selectedCityIndex
- }
- });
- }
- }
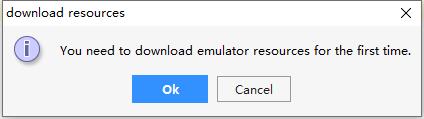
5. 模擬器調試
菜單Tools->HVD Manager,可以打開云端的模擬器

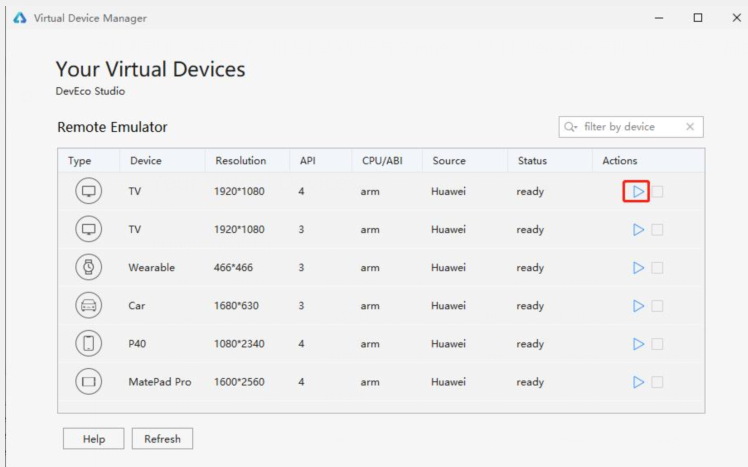
可惜還沒有可用于`smartVision`設備的模擬器,現階段我們還只能燒錄到設備中調試,總體上"富鴻蒙"的進度比較快,期待一波更新。
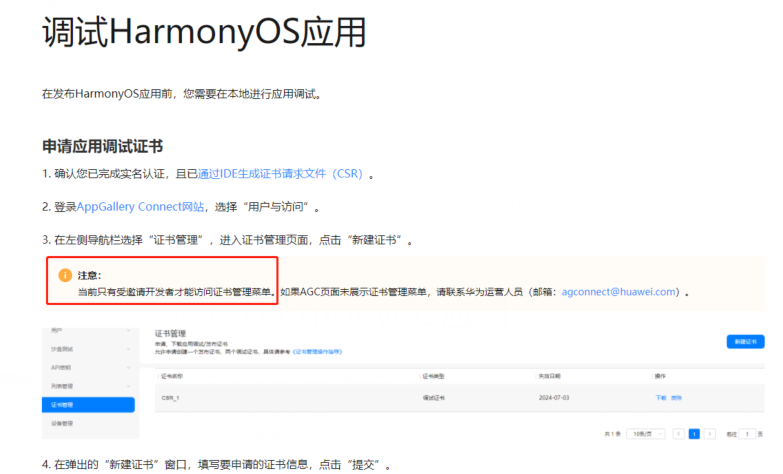
## 6. 編譯打包
若開發手機端的`App`,則需要申請證書,對應用程序進行簽名。這樣才能發布到應用市場,才被允許安裝到真機上運行。
`IPCamera`應用**暫時不支持簽名模式**,所以需要將應用發布為未簽名的應用安裝包。
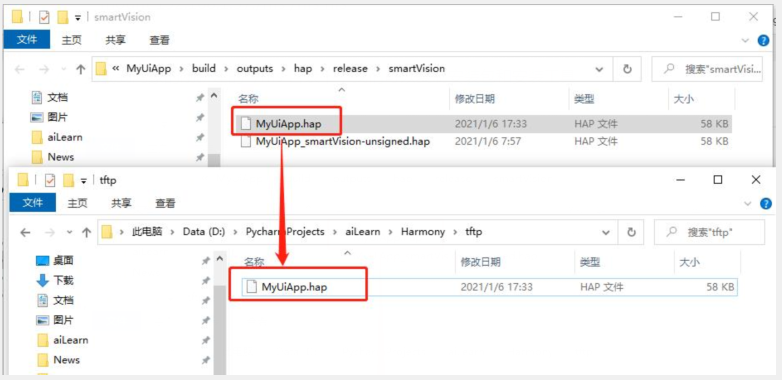
菜單`Build->Buildo APP(s)/Hap(s)->Build Release Hap(s)`,生成`Hap`文件。
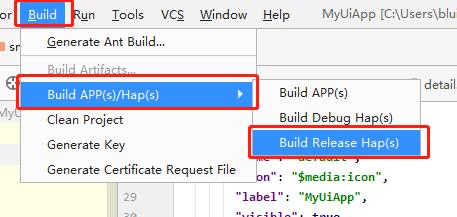
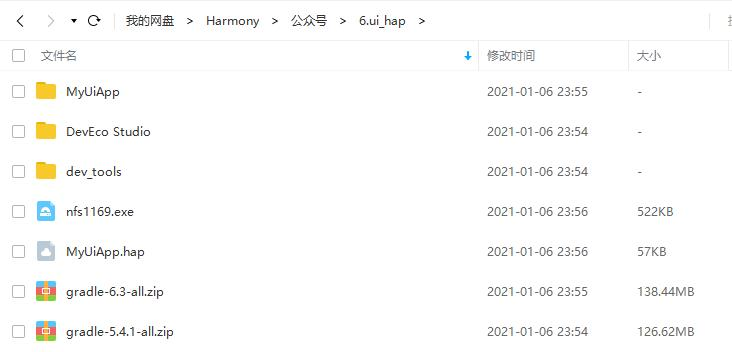
輸出文件為 `build/outputs/hap/release/smartVision/entry-release-smartVision-unsigned.hap`,改名為`MyUiApp.hap`便于安裝。
## 7. 通過sdcard安裝
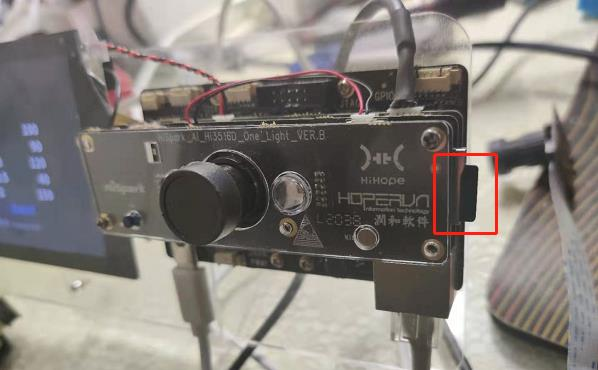
### 7.1 復制安裝包和工具
將IDE編譯的未簽名應用安裝包和安裝工具(`Z:\openharmony\out\my_hi3516dv300\dev_tools`)放在`sdcard`中,將`sdcard`插入開發板卡槽。
### 7.2 禁用簽名校驗
應用安裝默認要校驗簽名,需要執行以下命令,關閉簽名校驗。
- ./sdcard/dev_tools/bin/bm set -s disable

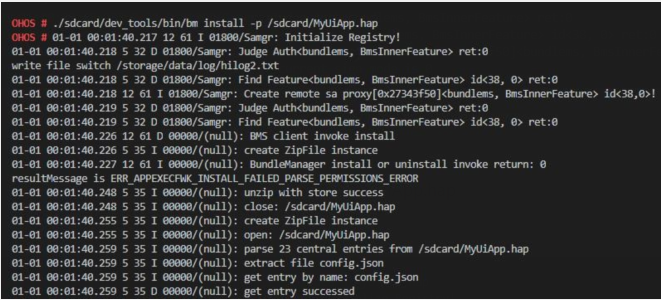
7.3 安裝應用
- ./sdcard/dev_tools/bin/bm install -p /sdcard/MyUiApp.hap
## 8. 通過NFS安裝
每次插拔`sdcard`還是蠻不方便的,這里我們安裝一個`NFS`服務器,讓鴻蒙系統能直接訪問`Win10`的目錄,后續安裝調試就會方便很多。
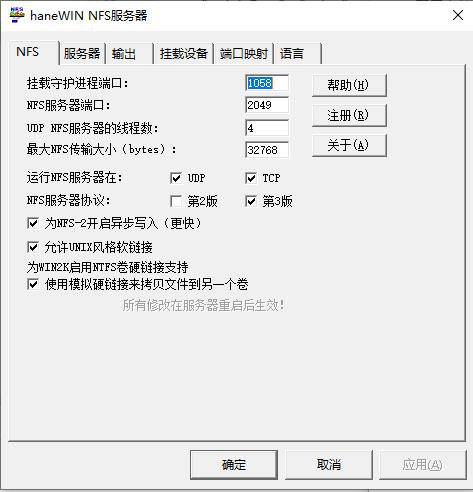
### 8.1 安裝NFS服務器
我們先安裝一個`haneWIN NFS服務器`, 雙擊文末網盤里的`nfs1169.exe`,一路下一步即可。
8.2 配置目錄參數
編輯輸出表文件,定義傳輸目錄
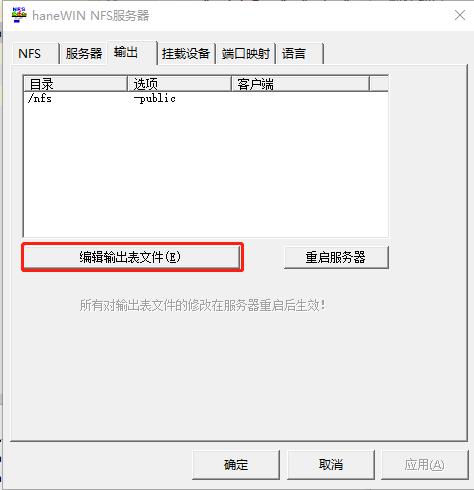
- # exports example
- # C:\ftp -range 192.168.1.1 192.168.1.10
- # c:\public -public -readonly
- # c:\tools -readonly 192.168.1.4
- D:\PycharmProjects\aiLearn\Harmony\tftp -public -name:nfs
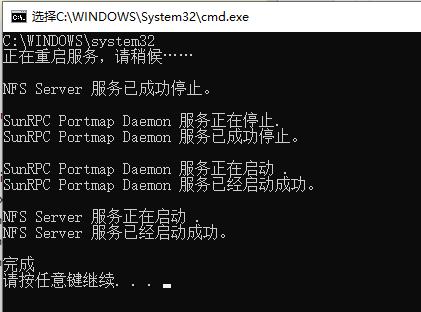
右鍵管理員權限,重啟所有服務,讓配置生效。
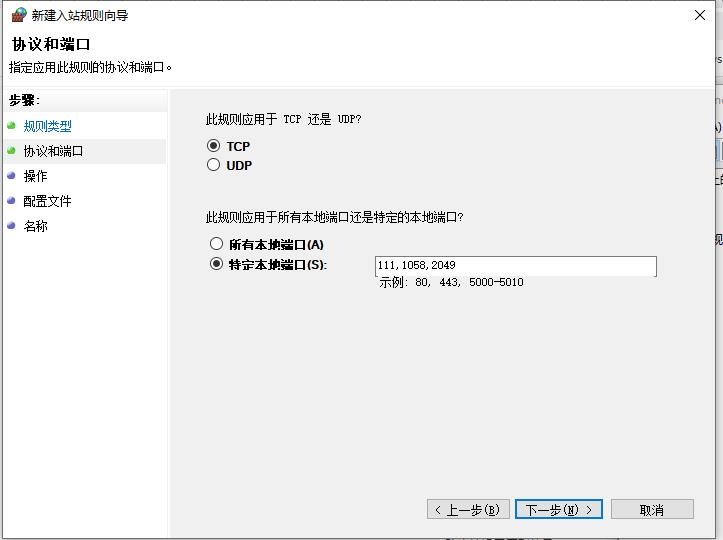
### 8.4 設置防火墻
防火墻設置`111、1058、2049`這些端口的`TCP`和`UDP`,入站規則放行。
### 8.5 鴻蒙上掛載目錄
主電腦的`ip`地址為`192.168.1.57`,`NFS`服務的別名為`nfs`,對應的目錄為`D:\PycharmProjects\aiLearn\Harmony\tftp`
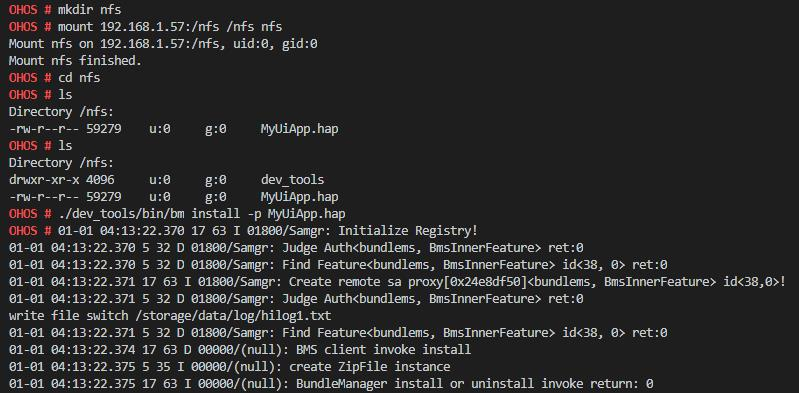
- mkdir nfs
- mount 192.168.1.57:/nfs /nfs nfs
8.6 安裝應用
- cd nfs
- ./dev_tools/bin/bm set -s disable
- ./dev_tools/bin/bm install -p MyUiApp.hap
前面做了這么多的鋪墊,后續開發只要復制`hap`安裝包,直接一條命令安裝即可,非常方便。
# 運行程序
安裝完成后,點擊桌面上的`MyUiApp`就能看見界面效果了。
`Js UI框架`對開發者還是比較友好的,有小程序或快應用的開發經驗,上手應該都比較順滑。
不過`HarmonyOS Device`的支持庫精簡的非常嚴重,例如網絡訪問的`@system.request`和`@system.fetch`都不可用,這些功能在“富鴻蒙”的設備上開發就會比較方便。
# 資料下載
# 下一篇預告
> 本期主要介紹了一下JS框架下的界面開發,
> 下一篇我們將嘗試熟悉更多的設備能力,
> 并打通從框架用戶態到驅動內核態之間的聯系,
> 敬請期待...

https://harmonyos.51cto.com/#zz