如何在你的Android手機上配置 Python 環境?
本文旨在講解如何在Android平板或手機上搭建Python開發環境,幫助Python初學者有效利用碎片化時間進行學習,從而達到良好的學習效果。
對于大部分初學Python的人來說,由于工作、生活等因素常常無法進行連貫、系統的學習。初學者為了利用上下班通勤等碎片化時間進行學習,通常會在平板上觀看學習視頻并做記錄。雖然這種方法很好,但效果還是不如邊學邊練來得好。
因此,你需要的是這個:
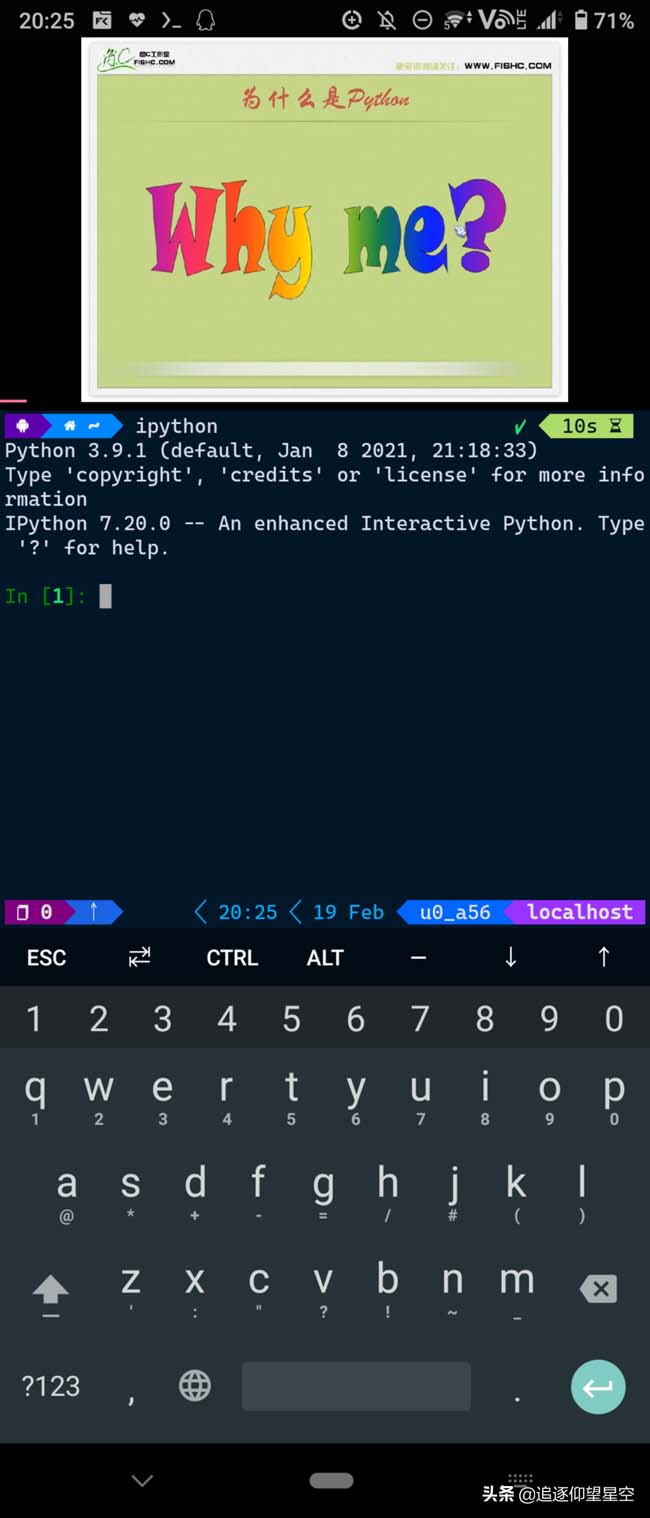
不多說,讓我們開始吧!
一、Termux安裝與配置
1. 系統要求
Android 7.0以上的平板或手機。這里建議使用兼顧了便攜性和屏幕尺寸的8寸平板。
2G以上可用空間。由于需要安裝各種軟件包,對存儲空間的消耗還是比較大的。
2. Termux安裝
在安裝Termux前,需要了解一下什么是Termux。
Termux 是一款支持 Linux 環境的 Android 終端模擬器APP。你無需對手機進行root或額外設置即可使用。這款APP會在手機中自動安裝一個最小化基本系統,并支持使用 APT 包管理工具安裝軟件。
目前Termux官網(https://termux.com/)建議使用F-Droid進行安裝,不再支持通過Google Play進行安裝。
主程序Termux下載地址:
- https://f-droid.org/repo/com.termux_106.apk
美化工具Termux:Styling下載地址:
- https://f-droid.org/repo/com.termux.styling_29.apk
3. Termux基本操作
快捷鍵
- Ctrl + A -> 將光標移動到行首
- Ctrl + E -> 將光標移動到行尾
- Ctrl + C -> 中止當前進程
- Ctrl + D -> 注銷終端會話
- Ctrl + K -> 從光標刪除到行尾
- Ctrl + U -> 從光標刪除到行首
- Ctrl + L -> 清除終端
- Ctrl + Z -> 掛起(發送SIGTSTP到)當前進程
- 音量加 + E -> Esc鍵
- 音量加 + T -> Tab鍵
- 音量加 + 1 -> F1(音量增加 + 2 → F2…以此類推)
- 音量加 + 0 -> F10
- 音量加 + B -> Alt + B,使用readline時返回一個單詞
- 音量加 + F -> Alt + F,使用readline時轉發一個單詞
- 音量加 + X -> Alt+X
- 音量加 + W -> 向上箭頭鍵
- 音量加 + A -> 向左箭頭鍵
- 音量加 + S -> 向下箭頭鍵
- 音量加 + D -> 向右箭頭鍵
- 音量加 + L -> | (管道字符)
- 音量加 + H -> 〜(波浪號字符)
- 音量加 + U -> _ (下劃線字符)
- 音量加 + P -> 上一頁
- 音量加 + N -> 下一頁
- 音量加 + . -> Ctrl + \(SIGQUIT)
- 音量加 + V -> 顯示音量控制
- 音量加 + Q -> 切換顯示的功能鍵視
- 音量加 + K -> 切換顯示的功能鍵視圖
4. 修改軟件源
安裝完Termux后,使用如下命令自動替換官方源為清華鏡像源:
- sed -i 's@^\(deb.*stable main\)$@#\1\ndeb https://mirrors.tuna.tsinghua.edu.cn/termux/termux-packages-24 stable main@' $PREFIX/etc/apt/sources.list
- sed -i 's@^\(deb.*games stable\)$@#\1\ndeb https://mirrors.tuna.tsinghua.edu.cn/termux/game-packages-24 games stable@' $PREFIX/etc/apt/sources.list.d/game.list
- sed -i 's@^\(deb.*science stable\)$@#\1\ndeb https://mirrors.tuna.tsinghua.edu.cn/termux/science-packages-24 science stable@' $PREFIX/etc/apt/sources.list.d/science.list
- apt update && apt upgrade
5. 安裝基本組件
在配置Python開發環境前,我們還需要使用如下命令安裝一些基本軟件包:
- pkg install -y zsh curl wget build-essential
- pkg install -y git python nodejs-lts perl ipython
- pkg install -y neovim lazygit ranger fzf
二、終端配置
1. Shell配置
安裝oh-my-zsh
Shell的類型有很多種,Termux下默認使用的是bash,這里使用功能更強大的zsh來代替bash。為了讓初學者更好地使用zsh,需要先安裝高檔大氣上檔次,狂拽炫酷吊炸天的oh-my-zsh。
- sh -c "$(curl -fsSL https://raw.github.com/ohmyzsh/ohmyzsh/master/tools/install.sh)"
安裝過程中,會提示是否切換shell為zsh,輸入回車或Y即可。
此外,還需要安裝zsh-autosuggestions插件,用于自動補全:
- git clone https://github.com/zsh-users/zsh-autosuggestions ${ZSH_CUSTOM:-$HOME/.oh-my-zsh/custom}/plugins/zsh-autosuggestions
oh-my-zsh需要使用nano、neovim等終端編輯器修改.zshrc文件來進行配置,在plugins部分添加插件支持:
- plugins=(
- git
- python
- colorize
- zsh-interactive-cd
- zsh-navigation-tools
- zsh-autosuggestions
- )
2. 主題美化
2.1 配色與字體
長按屏幕,點擊More,選擇Style可以選擇配色和字體,推薦使用Neon配色和JetBrains Mono字體,也可以通過修改~/.termux/目錄下的colors.properties和font.ttf文件進行自定義。
2.2 主題配置
接下來安裝powerlevel10k的主題:
安裝
輸入如下命令下載powerlevel10k:
- git clone --depth=1 https://gitee.com/romkatv/powerlevel10k.git ${ZSH_CUSTOM:-$HOME/.oh-my-zsh/custom}/themes/powerlevel10k
修改.zshrc文件,將ZSH_THEME="robbyrussell"改為ZSH_THEME="powerlevel10k/powerlevel10k"。
配置
重新打開Termux,輸入p10k configure進入powerlevel10k的配置界面。第一次會自動下載默認字體,安裝后會自動退出,重新打開Termux即可。
可以根據配置向導的提示,定制適合自己風格的終端界面。
3. 啟用vi模式(可選)
Termux命令行中修改已經輸入的命令比較麻煩。通過開啟vi模式,用戶可以像在vi編輯器里一樣進行操作。對于vi用戶來說,進入這種模式后,編輯和修改命令就顯得十分得心應手了。
使用nano、neovim等終端編輯器修改.zshrc文件來進行配置,在plugins部分添加vi-mode項,開啟vi模式。在命令行狀態下,按Esc鍵,即可進入vi模式的普通模式。

不過在默認的vi模式存在按鍵bug,需要在.zshrc文件最后添加如下配置:
- # Better searching in command mode
- bindkey -M vicmd '?' history-incremental-search-backward
- bindkey -M vicmd '/' history-incremental-search-forward
- # Beginning search with arrow keys
- bindkey "\033[1~" beginning-of-line
- bindkey "\033[4~" end-of-line
- bindkey '^[[3~' delete-char
- bindkey "^[OA" up-line-or-beginning-search
- bindkey "^[OB" down-line-or-beginning-search
- bindkey -M vicmd "k" up-line-or-beginning-search
- bindkey -M vicmd "j" down-line-or-beginning-search
三、Python包安裝與配置
1. 安裝環境配置
- # 配置pypi源
- pip install pip -U
- pip config set global.index-url https://pypi.tuna.tsinghua.edu.cn/simple
- # 依賴項
- pip install wheel
- pip install setuptools --upgrade
2 Python包安裝
安裝numpy和scipy
- # 添加第三方倉庫
- curl -LO https://its-pointless.github.io/setup-pointless-repo.sh
- bash setup-pointless-repo.sh
- # 從倉庫安裝numpy scipy
- pkg install -y numpy scipy
安裝lxml
- # 安裝lxml的依賴項
- pkg install -y libxml2 libxslt
- # 安裝lxml
- pip install lxml
安裝pillow
- # 安裝pillow的依賴項
- pkg install -y libjpeg-turbo libtiff
- pkg install -y littlecms tk libwebp libsodium
- # 安裝pillow
- pip install pillow
安裝matplotlib
- # 安裝matplotlib的依賴項
- pkg install -y freetype libpng
- pip install kiwisolver cycler
- pip install pyparsing python-dateutil
- # 安裝matplotlib
- pip install matplotlib
安裝pandas
- # 安裝pandas的依賴項
- pip install -y pytz cython
- # 安裝pandas
- export CFLAGS="-Wno-deprecated-declarations -Wno-unreachable-code"
- pip install pandas
安裝jupyter
- # 安裝jupyter依賴項
- pkg install -y libzmq libcrypt pkg-config
- # 安裝jupyter
- pip install jupyter
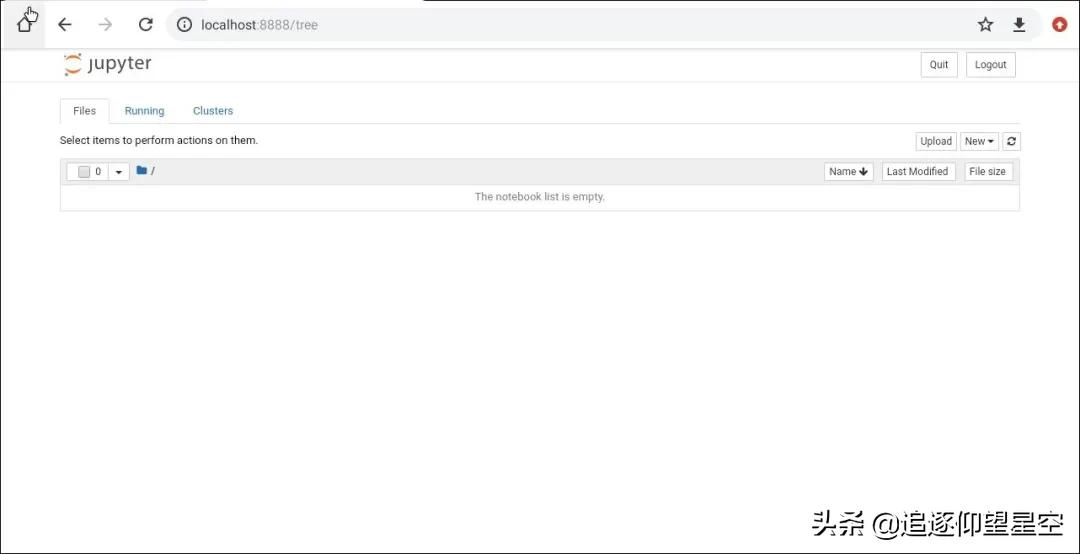
待安裝完成,輸入jupyter notebook啟動,將地址復制到瀏覽器中即可打開Jupyter。
四、IPython和NeoVim配置
對于希望在終端下進行使用的同學,推薦IPython+NeoVim組合。
1. IPython配置
安裝IPython
- # 安裝yapf
- pip install yapf
- # 安裝Pygments
- pip install pygments
- # 安裝ipython
- pip install ipython
創建配置文件
使用ipython profile create命令在
~/.ipython/profile_default/目錄下的創建ipython_config.py配置文件。
修改配置文件
使用neovim、nano等終端編輯器修改
~/.ipython/profile_default/目錄下的ipython_config.py文件,添加如下配置:
- # 配置終端顏色
- c.InteractiveShell.colors = 'Linux'
- c.TerminalInteractiveShell.autoformatter = 'yapf'
- # 配置高亮方案,可通過pygmentize -L styles瀏覽所有可選配置
- c.TerminalInteractiveShell.highlight_style = 'monokai'
- # 配置魔術命令%editor使用的編輯器
- c.TerminalInteractiveShell.editor = 'nvim'
2. NeoVim配置
在配置NeoVim前,需要安裝pynvim插件,以擴展NeoVim對Python的支持。
- pip install pynvim
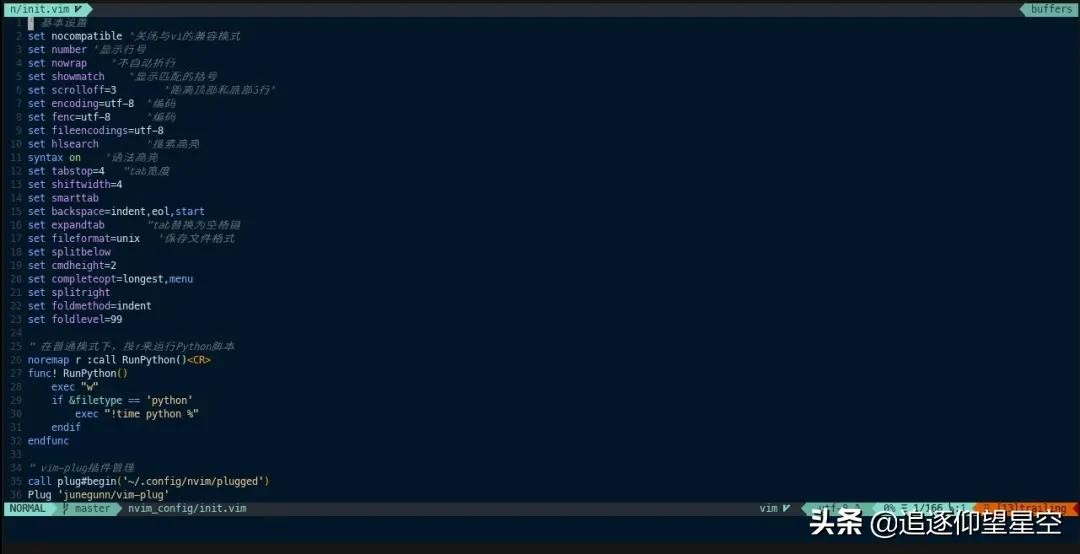
創建init.vim文件進行基本配置
在命令行下,通過nvim命令進入NeoVim編輯器,輸入:e $MYVIMRC編輯NeoVim配置文件,使用:w進行保存,基本設置如下:
- " 一般設置
- set nocompatible "關閉與vi的兼容模式
- set number "顯示行號
- set nowrap "不自動折行
- set showmatch "顯示匹配的括號
- set scrolloff=3 "距離頂部和底部3行"
- set encoding=utf-8 "編碼
- set fenc=utf-8 "編碼
- set fileencodings=utf-8
- set hlsearch "搜索高亮
- syntax on "語法高亮
- set tabstop=4 "tab寬度
- set shiftwidth=4
- set smarttab
- set backspace=indent,eol,start
- set expandtab "tab替換為空格鍵
- set fileformat=unix "保存文件格式
- set splitbelow
- set cmdheight=2
- set completeopt=longest,menu
- set splitright
- set foldmethod=indent
- set foldlevel=99
- " 設置空格為leader鍵
- let mapleader=" "
使用vim-plug安裝NeoVim插件
vim-plug是一款Vim插件管理工具,支持異步并行,可以快速安裝、更新或卸載插件。可以通過如下命令進行安裝,或手動下載plug.vim文件,復制到在~/.config/nvim/autoload文件夾中。
- curl -fLo ~/.config/nvim/autoload/plug.vim --create-dirs \
- https://raw.githubusercontent.com/junegunn/vim-plug/master/plug.vim
使用vim-plug時,需要在init.vim中添加下列代碼塊。
- " vim-plug插件管理
- call plug#begin('~/.config/nvim/plugged')
- Plug 'junegunn/vim-plug'
- call plug#end()
保存后,在普通模式下輸入:so %使配置文件生效,再通過:PlugInstall進行安裝。
常用插件及設置
下面列舉了一下常用插件和基本設置:
- call plug#begin('~/.config/nvim/plugged')
- Plug 'junegunn/vim-plug'
- " git支持
- Plug 'tpope/vim-fugitive'
- " Python自動縮進插件
- Plug 'vim-scripts/indentpython.vim'
- " 項目管理工具
- Plug 'mhinz/vim-startify'
- " 快速對齊插件
- Plug 'junegunn/vim-easy-align'
- " 當前光標下的單詞增加下劃線
- Plug 'itchyny/vim-cursorword'
- " 快速選擇插件
- Plug 'tpope/vim-surround'
- " 自定義代碼片斷
- Plug 'honza/vim-snippets'
- " 語法高亮支持
- Plug 'sheerun/vim-polyglot'
- " 主題、狀態欄設置
- Plug 'haishanh/night-owl.vim'
- Plug 'vim-airline/vim-airline'
- Plug 'vim-airline/vim-airline-themes'
- Plug 'ryanoasis/vim-devicons'
- " coc擴展
- Plug 'neoclide/coc.nvim', {'branch': 'release'}
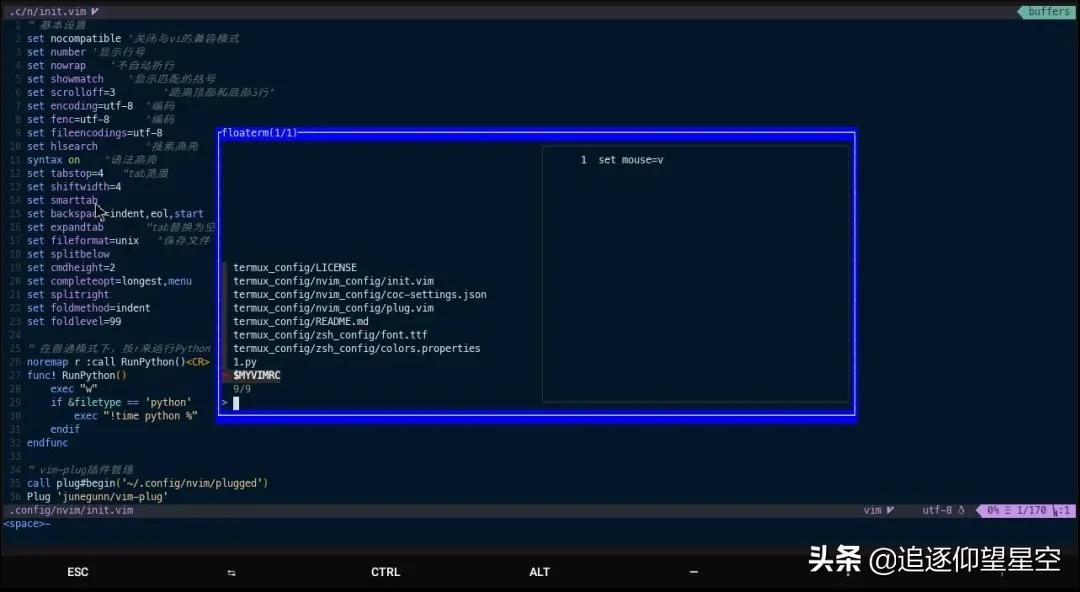
- " fzf模糊查找
- Plug 'junegunn/fzf', { 'dir': '~/.fzf', 'do': './install --all' }
- Plug 'junegunn/fzf.vim'
- " whichkey快捷菜單
- Plug 'liuchengxu/vim-which-key
- " 浮動窗口支持
- Plug 'voldikss/vim-floaterm'
- " ranger文件管理器支持
- Plug 'kevinhwang91/rnvimr'
- call plug#end()
- " 啟用標簽欄
- let g:airline#extensions#tabline#enabled = 1
- " 支持圖標字體
- let g:airline_powerline_fonts = 1
- " 設置狀態欄主題
- let g:airline_theme='night_owl'
- " 設置主題
- set termguicolors
- let &t_8f = "\<Esc>[38;2;%lu;%lu;%lum"
- let &t_8b = "\<Esc>[48;2;%lu;%lu;%lum"
- syntax enable
- colorscheme night-owl
安裝、配置coc.nvim擴展
coc.nvim是一款支持擴展的插件,類似于油猴,可以通過安裝擴展,以實現像Vscode一樣使用NeoVim,下面列舉了Python相關的coc擴展和配置:
- " coc擴展
- let g:coc_global_extensions = [
- \'coc-json',
- \'coc-pyright',
- \'coc-snippets',
- \'coc-xml',
- \'coc-explorer',
- \'coc-prettier',
- \'coc-highlight']
- " 使用tab鍵進行補全選擇
- inoremap <silent><expr> <TAB>
- \ pumvisible() ? "\<C-n>" :
- \ <SID>check_back_space() ? "\<TAB>" :
- \ coc#refresh()
- inoremap <expr><S-TAB> pumvisible() ? "\<C-p>" : "\<C-h>"
- function! s:check_back_space() abort
- let col = col('.') - 1
- return !col || getline('.')[col - 1] =~# '\s'
- endfunction
- " 使用回車進行補全選擇
- inoremap <silent><expr> <cr> pumvisible() ? coc#_select_confirm()
- \: "\<C-g>u\<CR>\<c-r>=coc#on_enter()\<CR>"
- " Highlight the symbol and its references when holding the cursor.
- autocmd CursorHold * silent call CocActionAsync('highlight')
- " Add `:Format` command to format current buffer.
- command! -nargs=0 Format :call CocAction('format')
- " Add `:Fold` command to fold current buffer.
- command! -nargs=? Fold :call CocAction('fold', <f-args>)
- " Add `:OR` command for organize imports of the current buffer.
- command! -nargs=0 OR :call CocAction('runCommand', 'editor.action.organizeImport')
- " 添加狀態欄顯示支持
- set statusline^=%{coc#status()}%{get(b:,'coc_current_function','')}
- " 啟用Prettier進行文件自動格式化
- command! -nargs=0 Prettier :CocCommand prettier.formatFile
- let g:prettier#autoformat = 1
- " 設置Coc Search
- nnoremap <leader>? :CocSearch <C-R>=expand("<cword>")<CR><CR>
此外,coc擴展可以通過在~/.config/nvim/文件夾中創建coc-settings.json文件來進行配置:
- {
- "python.defaultInterpreterPath": "/data/data/com.termux/files/usr/bin/python",
- "python.pythonPath": "/data/data/com.termux/files/usr/bin/python",
- "python.linting.pylintEnable":true,
- "python.formatting.provider": "yapf",
- "python.formatting.yapfArgs": [
- "--style",
- "{SPACES_AROUND_POWER_OPERATOR: True, SPACES_BEFORE_COMMENT: 1}"
- ],
- "explorer.width": 38,
- "explorer.quitOnOpen": true,
- "explorer.sources": [
- {
- "name": "buffer",
- "expand": false
- },
- {
- "name": "file",
- "expand": true
- }
- ],
- "explorer.file.column.indent.indentLine": true,
- "explorer.file.showHiddenFiles": true,
- "explorer.icon.enableNerdfont": true,
- "explorer.keyMappingMode": "none",
- "explorer.buffer.showHiddenBuffers": false,
- "explorer.keyMappings.global": {
- "o": ["wait", "expanded?", "collapse", "expand"],
- "<cr>": ["wait", "expandable?", "cd", "open"],
- "?": "help",
- "q": "quit"
- },
- "coc.preferences.formatOnSaveFiletypes": ["*"],
- "prettier.printWidth": 100,
- "prettier.eslintIntegration": true,
- "prettier.disableLanguages": [],
- "prettier.formatterPriority": 1,
- "prettier.useTabs": true,
- "prettier.trailingComma": "all",
- "prettier.singleQuote": false,
- "prettier.tabWidth": 4
- }
配置vim-which-key
vim-which-key是一款快捷鍵映射插件,可以通過簡單的設置進行快捷鍵自定義功能的實現。下面列舉了vim-which-key的簡單設置:
- " 將空格設置為whichkeyleader鍵
- nnoremap <silent> <leader> :WhichKey '<Space>'<CR>
- " whichkey基本配置
- let g:which_key_timeout = 100
- let g:which_key_display_names = {'<CR>': '↵', '<TAB>': '⇆'}
- let g:which_key_map = {}
- let g:which_key_sep = '→'
- let g:which_key_use_floating_win = 0
- let g:which_key_max_size = 0
- " 呼出whichkey時隱藏狀態欄
- autocmd! FileType which_key
- autocmd FileType which_key set laststatus=0 noshowmode noruler
- \| autocmd BufLeave <buffer> set laststatus=2 noshowmode ruler
- " 自定義whichkey
- let g:which_key_map['?'] = 'search word'
- let g:which_key_map['/'] = [ ':call Comment()' , 'comment' ]
- let g:which_key_map['.'] = [ ':e $MYVIMRC' , 'open init' ]
- let g:which_key_map[';'] = [ ':Commands' , 'commands' ]
- let g:which_key_map['e'] = [ ':CocCommand explorer --toggle --sources=file+' , 'explorer' ]
- let g:which_key_map['n'] = [ ':let @/ = ""' , 'no highlight' ]
- let g:which_key_map['q'] = [ '<Plug>(coc-fix-current)' , 'quickfix' ]
- let g:which_key_map['u'] = [ ':UndotreeToggle' , 'undo tree']
- let g:which_key_map['t'] = [':FloatermNew --wintype=normal --height=6' , 'terminal']
- let g:which_key_map['r'] = [ ':FloatermNew ranger' , 'ranger']
- let g:which_key_map['f'] = [':FloatermNew fzf' , 'fzf']
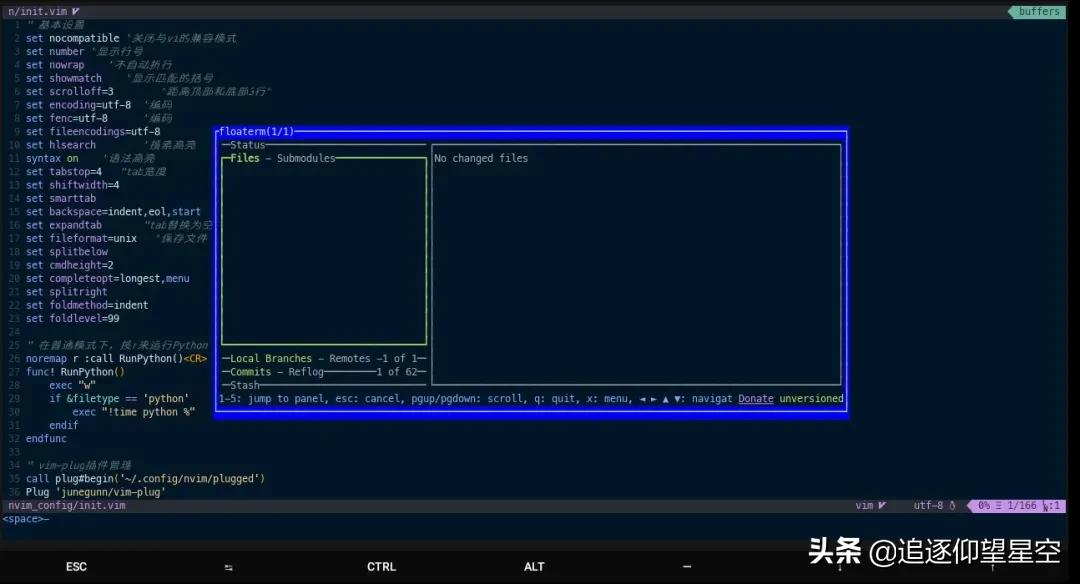
- let g:which_key_map['g'] = [':FloatermNew lazygit' , 'git']
- let g:which_key_map['p'] = [':FloatermNew python' , 'python']
- call which_key#register('<Space>', "g:which_key_map")
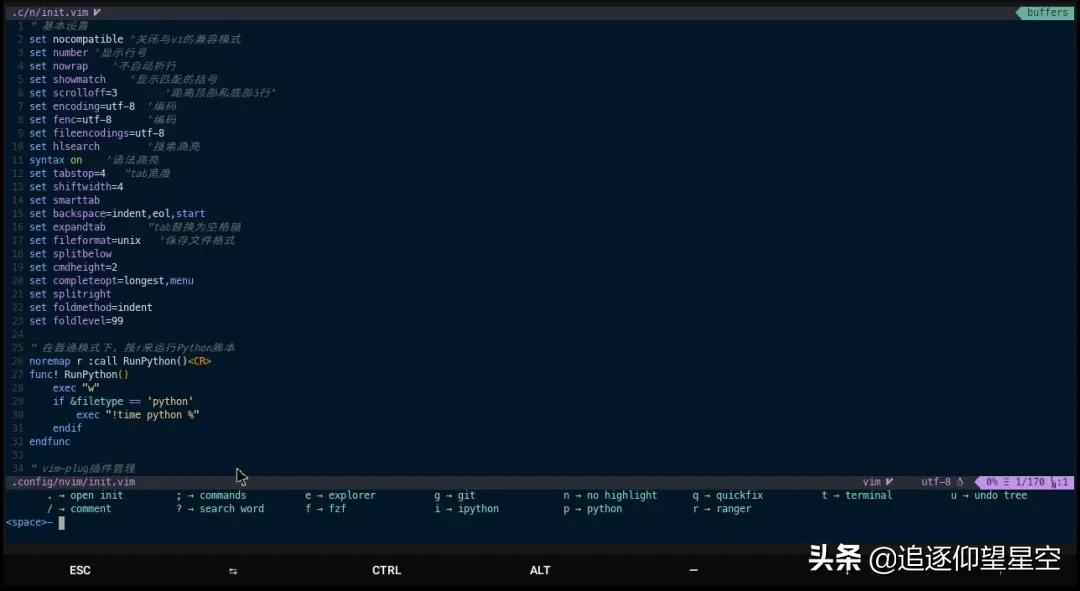
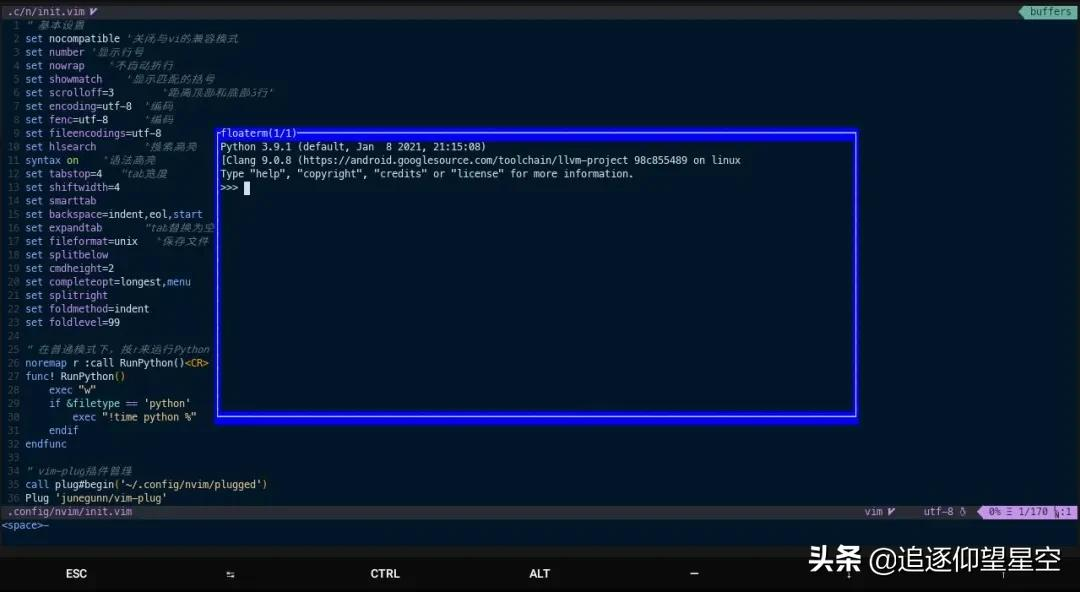
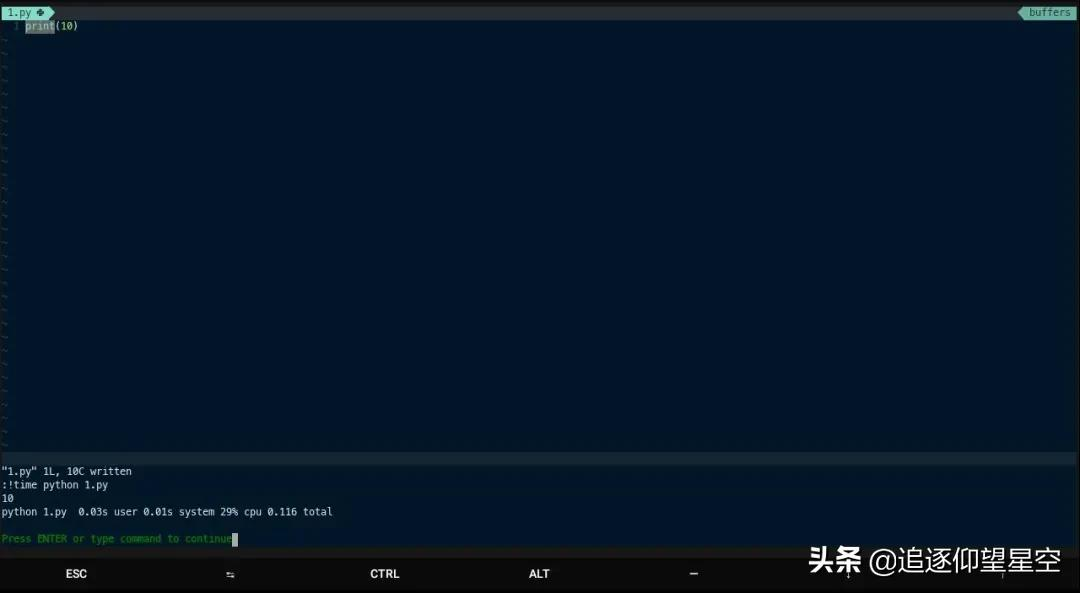
可以通過在NeoVim中添加自定義功能,從而在編寫時運行當前Python腳本。
- "在普通模式下,按r來運行Python腳本
- noremap r :call RunPython()<CR>
- func! RunPython()
- exec "w"
- if &filetype == 'python'
- exec "!time python %"
- endif
- endfunc
五、結語
本文主要分享了一下在Android平板上配置Python學習環境的經驗,相關配置文件請參見以下鏈接:
https://gitee.com/knightz1224/termux_config,謝謝大家支持!