HarmonyOS手表Demo—定位套件之一

前言
在當今的軟件開發中,一個完整移動應用功能的完善不僅需要用到大量的開源第三方組件,而且還需要由特定機構的云端技術服務提供支持,諸如游戲服務,推送服務等等。而在本期的知識分享中,筆者將循序漸進地給出一個定位服務Demo的完整創建過程,旨在幫助初學者們了解如何將云端服務融入一個應用的功能中。
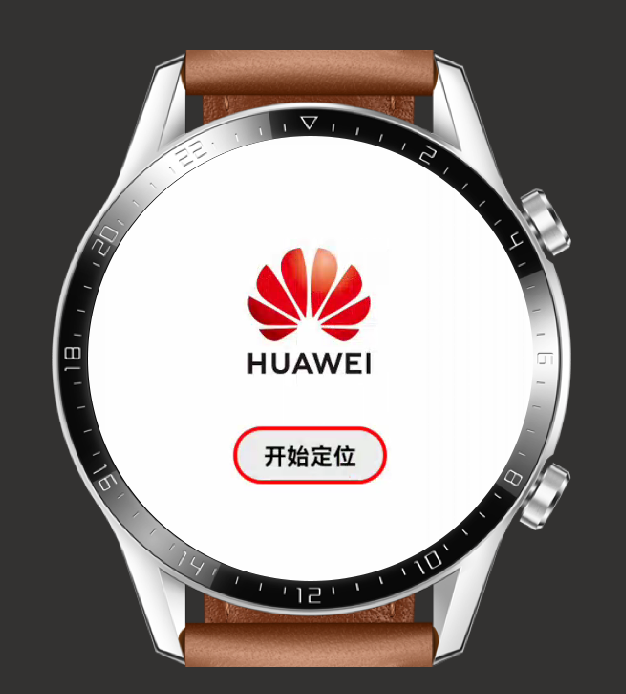
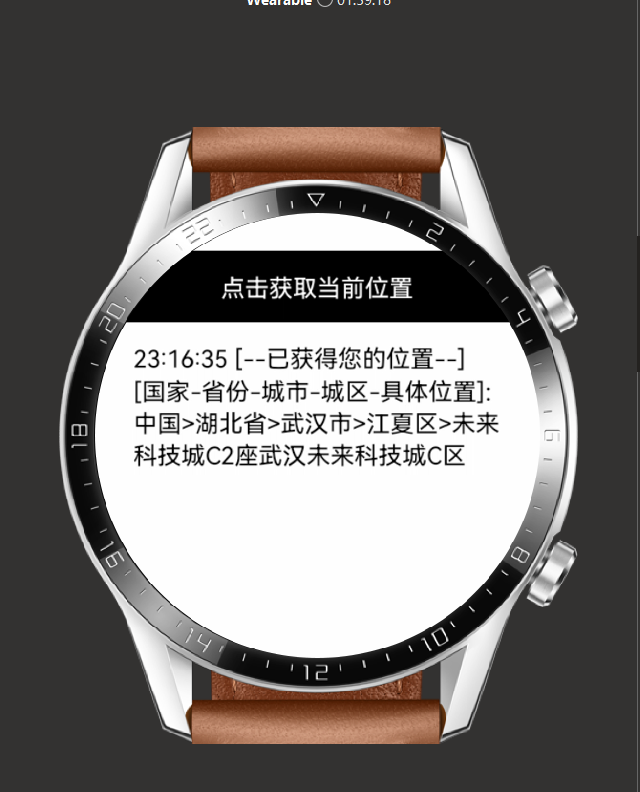
定位服務Demo的使用效果圖如下:
話不多說,Let us begin our journey。
正文
創建一個項目
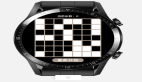
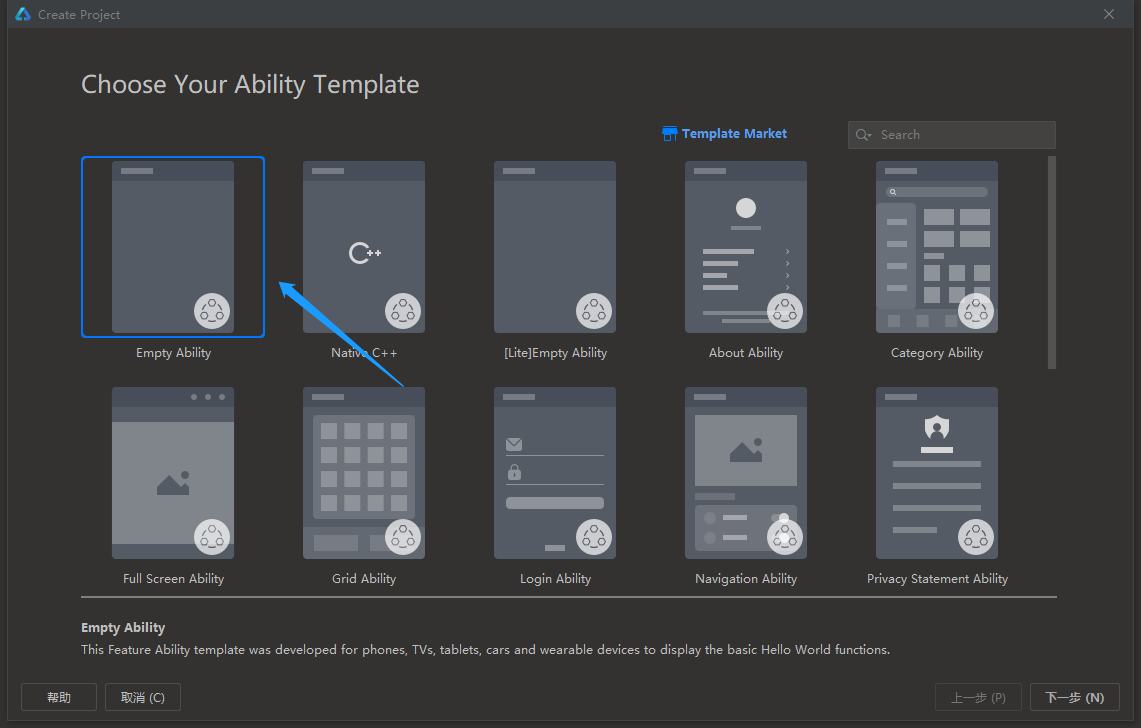
打開DevEco Studio, 創建一個新項目,相關勾選如下:
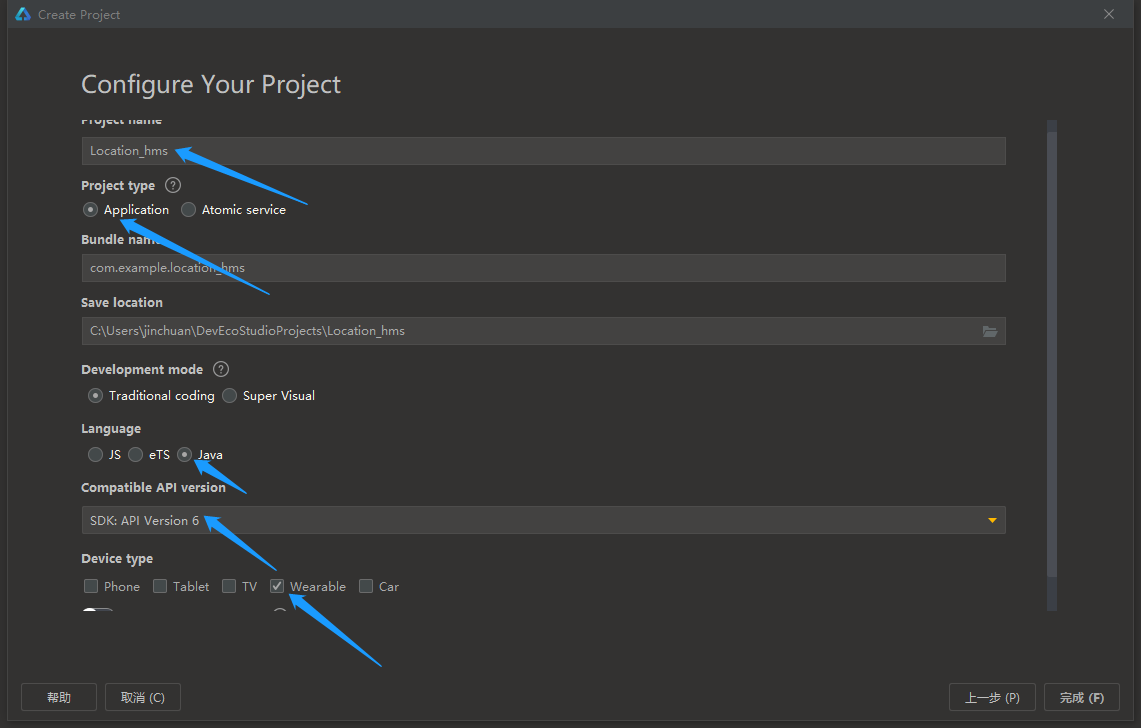
(提示:【1】包名可以自取,但盡量取復雜一點,這對后面的步驟有用; 【2】SDK一定要配置版本號為6的API,因為Wearable(智能穿戴)的模擬機僅支持此API)。
設計UI界面
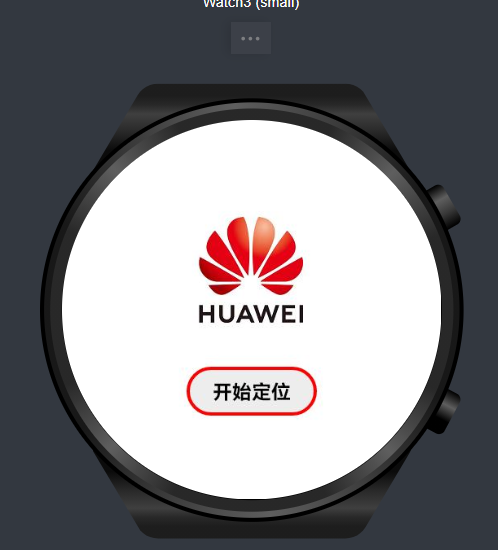
(1) 我們需要制作的第一個UI界面如下:
首先,打開entry>src>main>resources>base>graphic>background_ability_main.xml,將代碼修改為如下:
<?xml version="1.0" encoding="UTF-8" ?>
<shape xmlns:ohos="http://schemas.huawei.com/res/ohos"
       ohos:shape="rectangle">
    <corners
        ohos:radius="30"/>  //設置圓角
    <stroke
        ohos:width="4"
        ohos:color="red"/>  //設置邊框的厚度與顏色
    <solid
        ohos:color="#EDEDED"/>  //設置背景色
</shape>
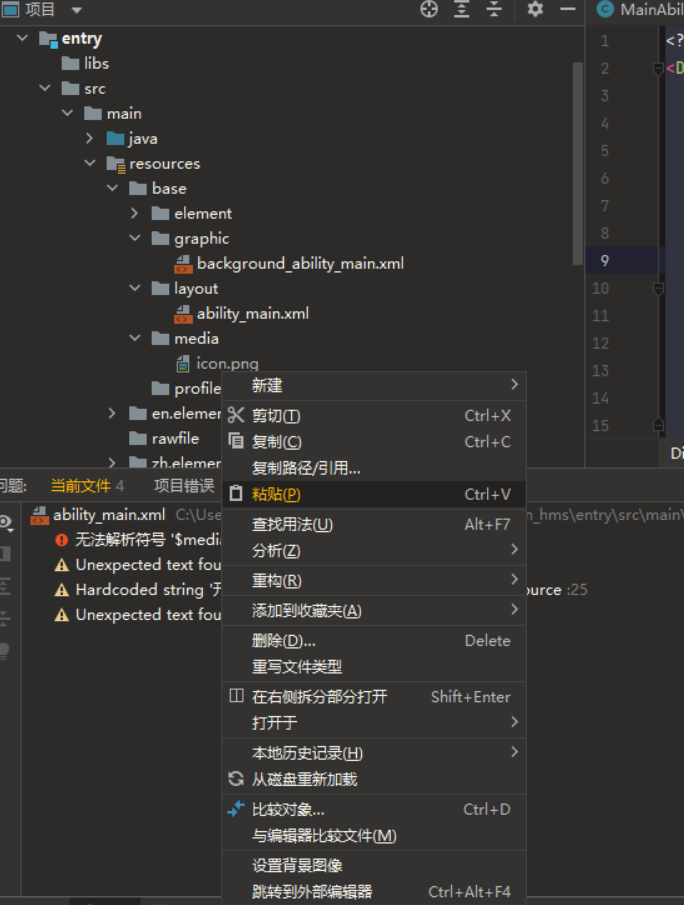
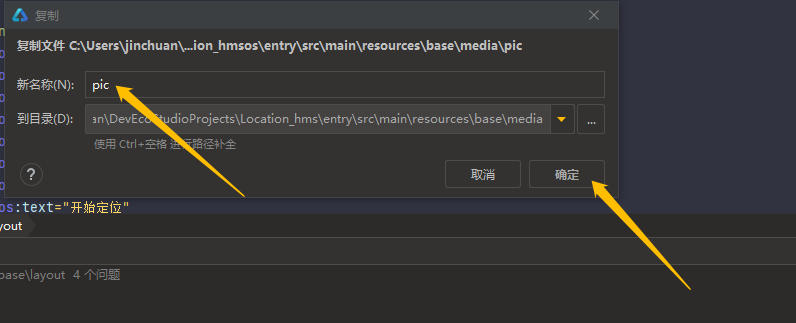
接著,我們將這張圖片復制到剪切板上:

然后打開之前在IDE創建的項目,并打開entry>src>main>resources>base>media,右擊icon.png并選擇粘貼,之后將所粘貼的圖片命名為pic。
最后,打開entry>src>main>resources>base>layout>ability_main.xml,將代碼修改為如下:
<?xml version="1.0" encoding="utf-8"?>
<DirectionalLayout
    xmlns:ohos="http://schemas.huawei.com/res/ohos"
    ohos:height="match_parent"
    ohos:width="match_parent"
    ohos:alignment="center"
    ohos:orientation="vertical">
    <Image
        ohos:height="80vp"
        ohos:width="80vp"
        ohos:image_src="$media:pic"
        ohos:margin="10vp"
        />  //加入一個Image組件
    <Button
        ohos:id="$+id:bn1"
        ohos:height="30vp"
        ohos:width="80vp"
        ohos:background_element="$graphic:background_ability_main"
        ohos:text_color="black"
        ohos:text_weight="700"
        ohos:text_size="12vp"
        ohos:text="開始定位"
        ohos:margin="10vp"
        />   //加入一個Button組件
</DirectionalLayout>
第一個UI界面便設計完成了,打開Previewer可查看效果。
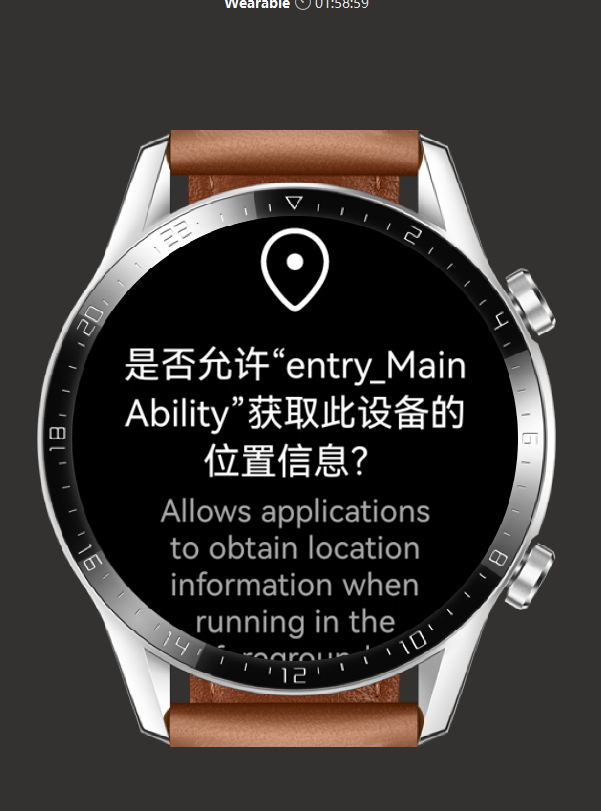
(2) 我們需要制作的第二個UI界面如下:

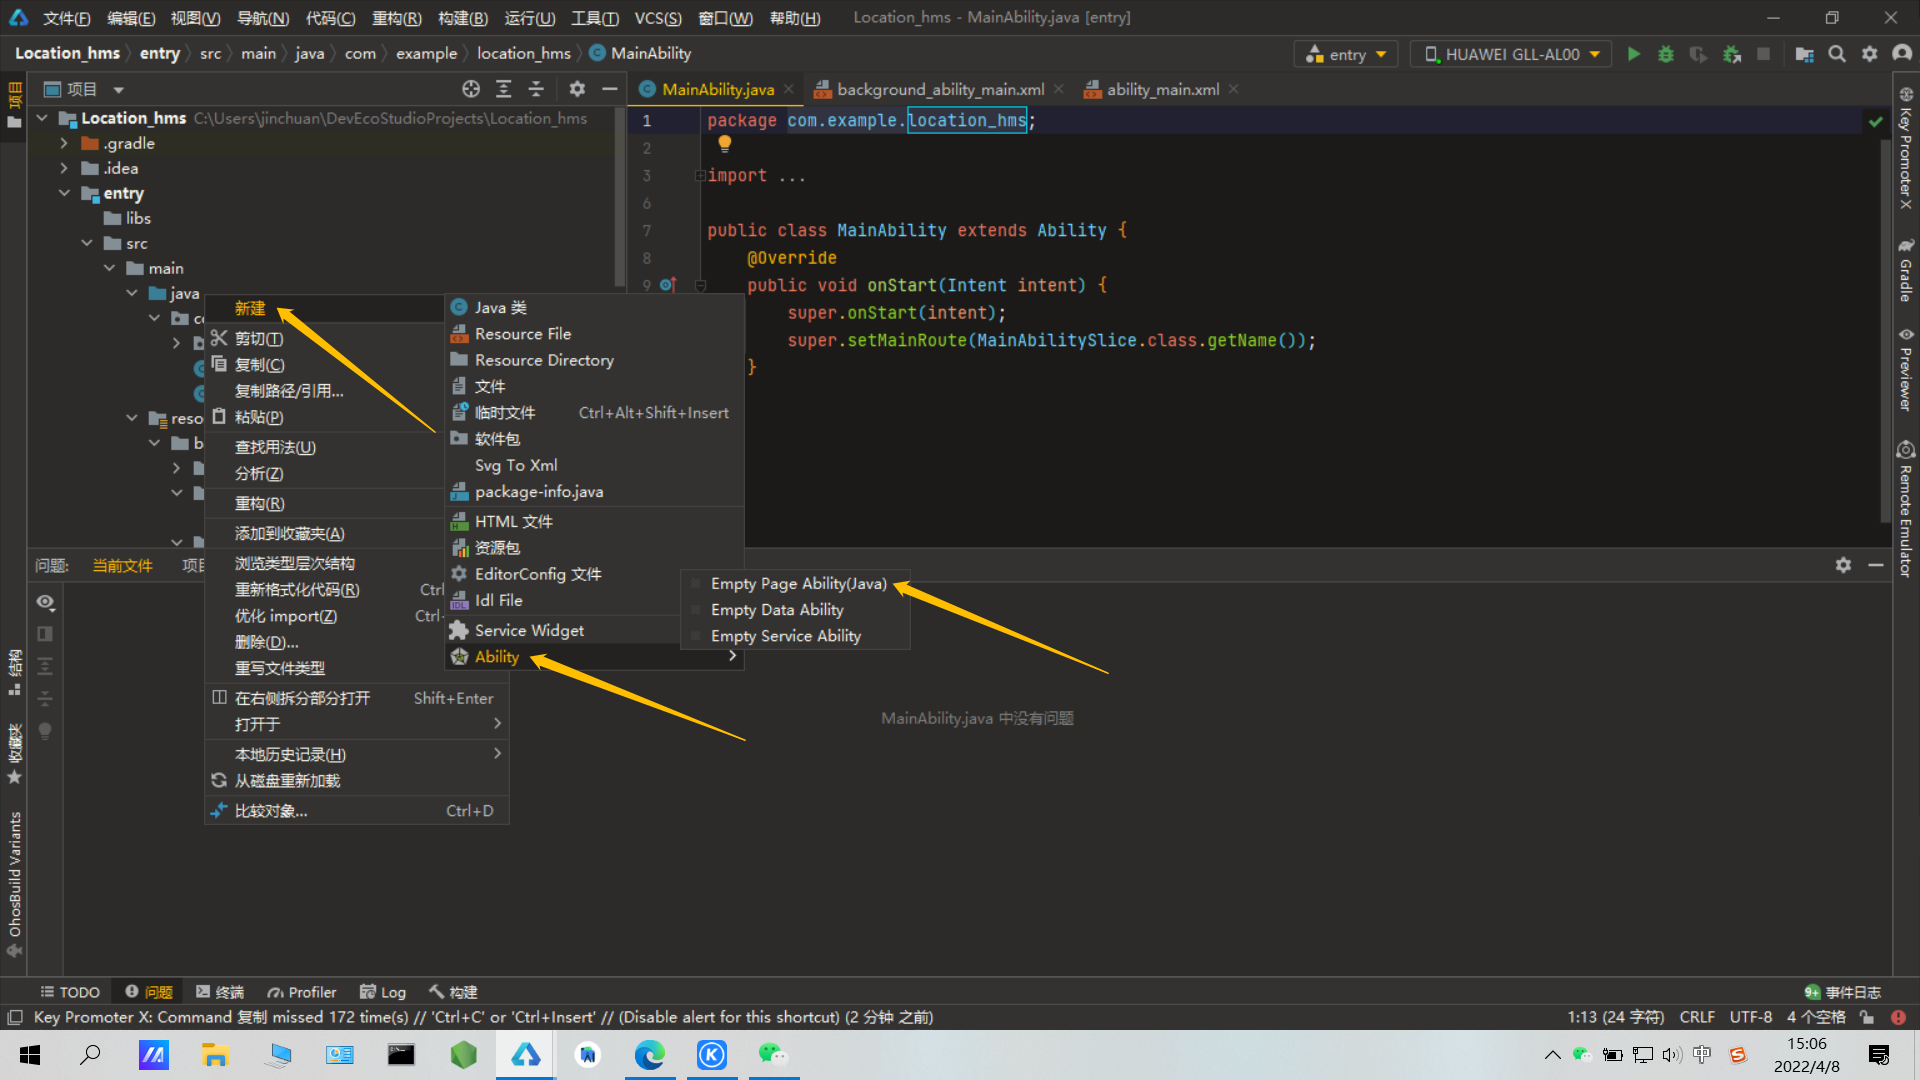
首先,我們需要創建一個新的Page Ability: 打開entry>src>main>Java>com.example.location_hms,右擊MainAbility,選擇并點擊新建>Ability>Empty Page Ability(Java)。
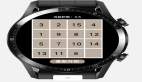
之后,將新建的Page Ability命名如下:
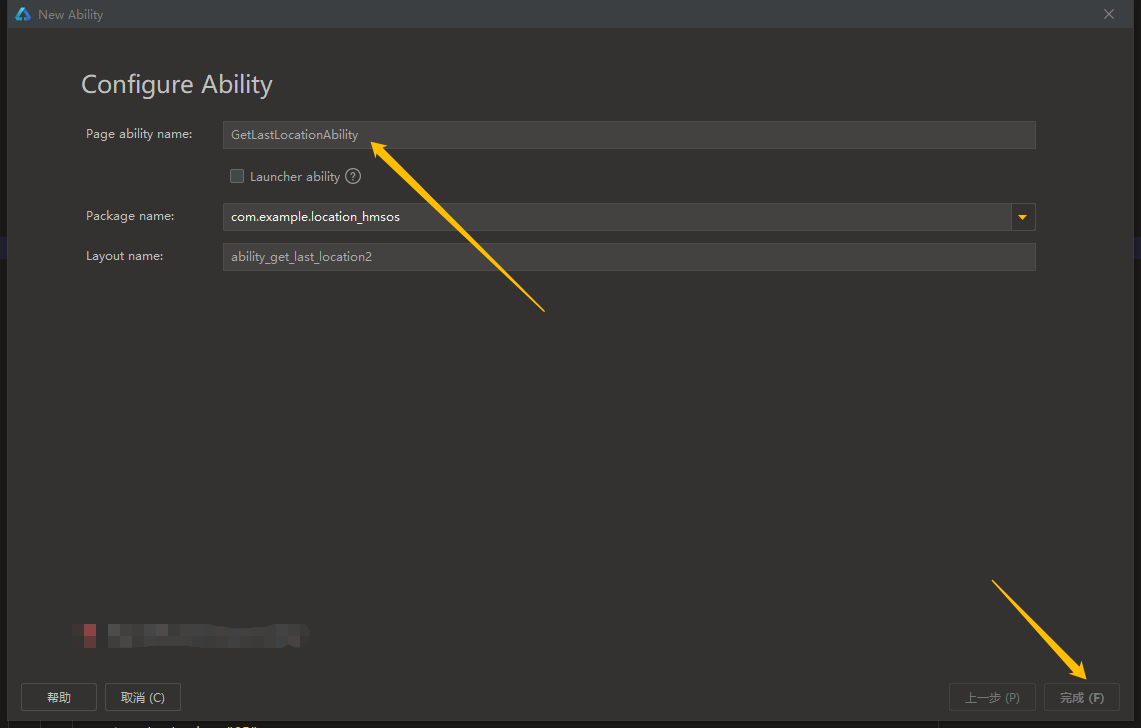
這樣,新的Page Ability(即GetLastLocationAbility)便被成功創建,它的默認AbilitySlice(即GetLastLocationAbilitySlice)與xml布局文件(即ability_get_last_location.xml)也隨之生成。
此時,打開entry>src>main>resources>base>layout>ability_get_last_location.xml,將代碼修改為如下:
<DirectionalLayout
    xmlns:ohos="http://schemas.huawei.com/res/ohos"
    ohos:height="match_parent"
    ohos:width="match_parent"
    ohos:orientation="vertical"
    ohos:padding="32">
    <ScrollView
        ohos:height="match_parent"
        ohos:width="match_parent">  //設置滾輪
        <DirectionalLayout
            ohos:height="match_content"
            ohos:width="match_parent"
            ohos:orientation="vertical">
            <Button
                ohos:id="$+id:btn_getLastLocationWithAddress"
                ohos:height="match_content"
                ohos:width="666vp"
                ohos:background_element="black"
                ohos:layout_alignment="horizontal_center"
                ohos:margin="5vp"
                ohos:padding="10vp"
                ohos:text="點擊獲取當前位置"
                ohos:text_color="white"
                ohos:text_size="25"/>
            //設置Button組件
            <Text
                ohos:id="$+id:show_location"
                ohos:height="match_content"
                ohos:width="match_parent"
                ohos:margin="5vp"
                ohos:text_color="black"
                ohos:layout_alignment="horizontal_center"
                ohos:text_size="25"
                />
            //設置一個用于顯示定位信息的Text組件
        </DirectionalLayout>
    </ScrollView>
</DirectionalLayout>
第二個UI界面便設計完成了,打開Previewer可查看效果。
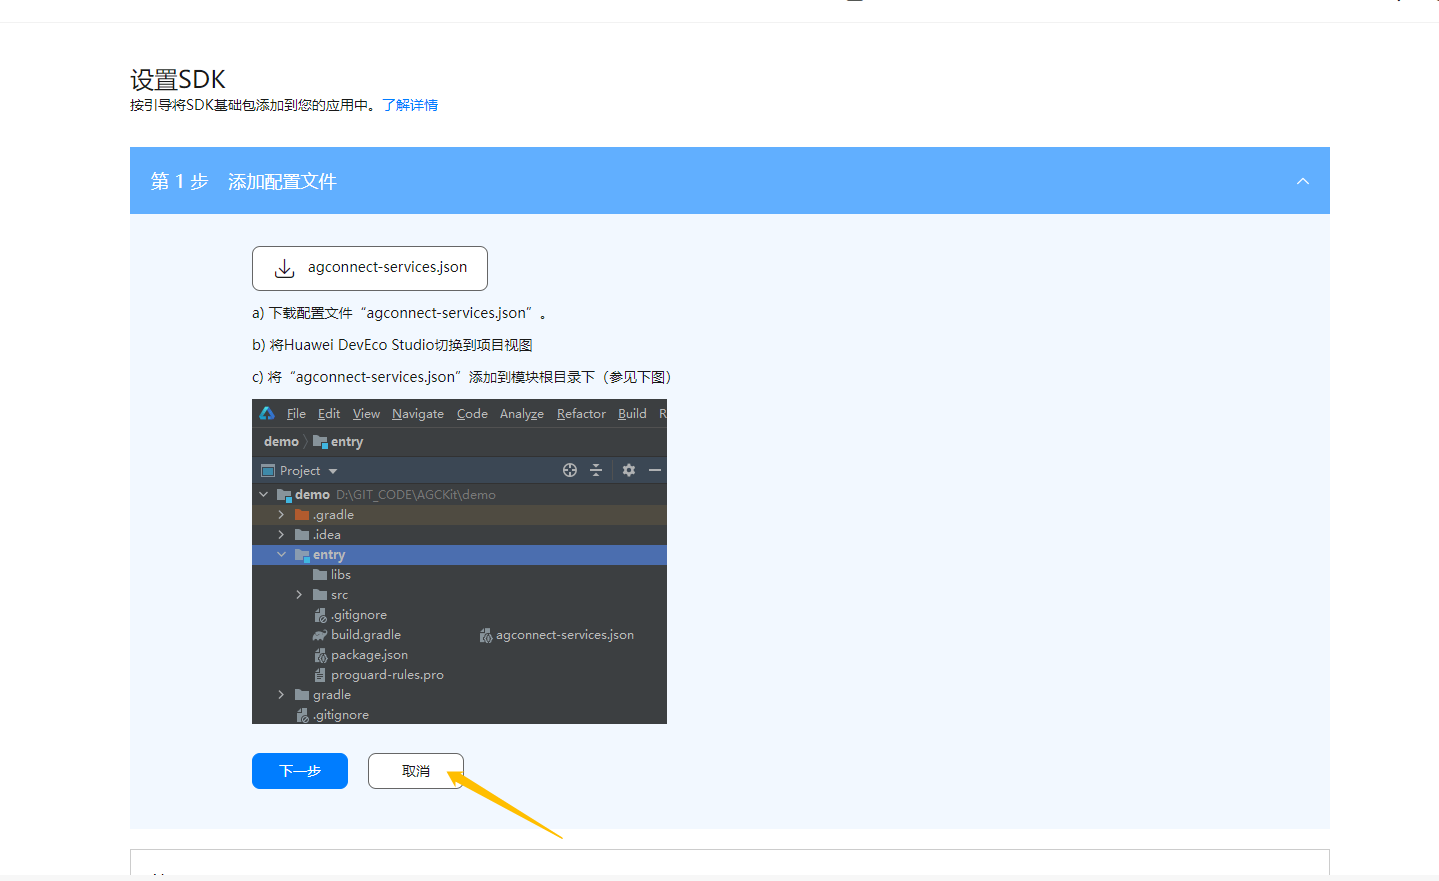
在AppGallery Connect上申請定位服務
首先,進入AppGallery Connect的官網——https://developer.huawei.com/consumer/cn/service/josp/agc/index.html#/。
然后,登陸你的華為賬號。
登陸完成后,點擊我的項目。
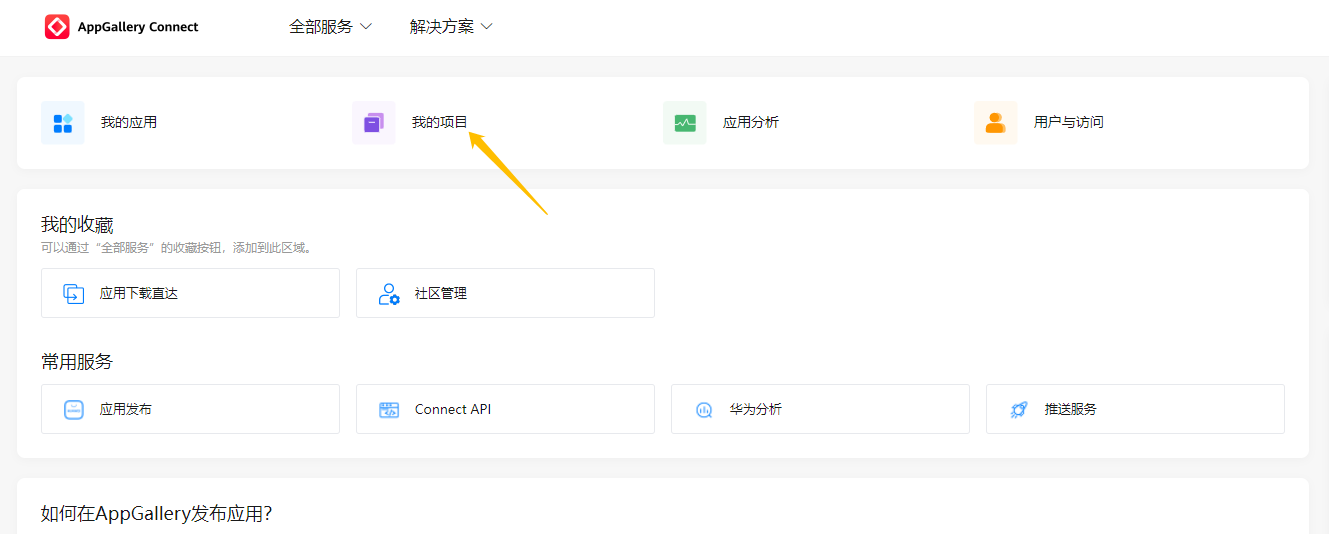
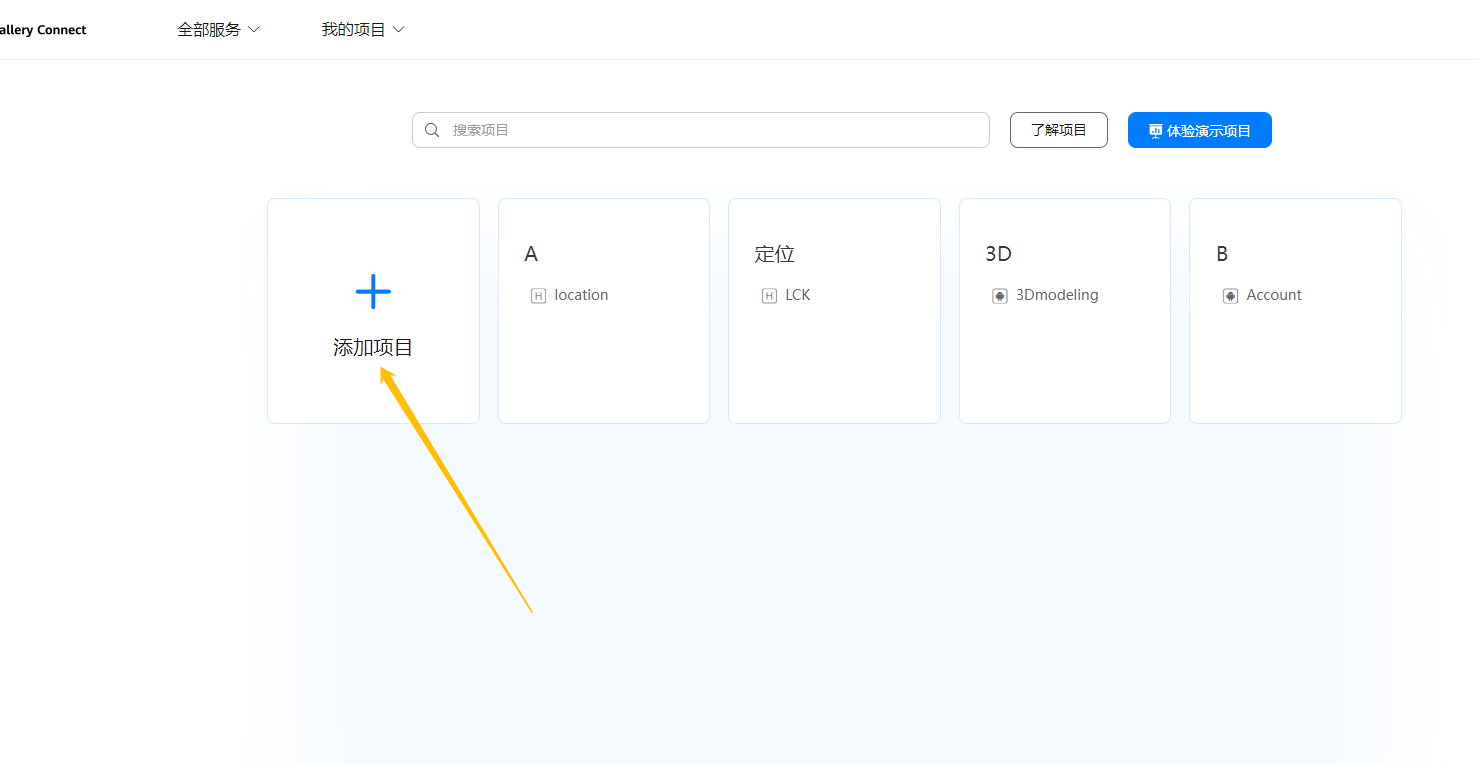
之后,點擊添加項目,并自取一個項目名。
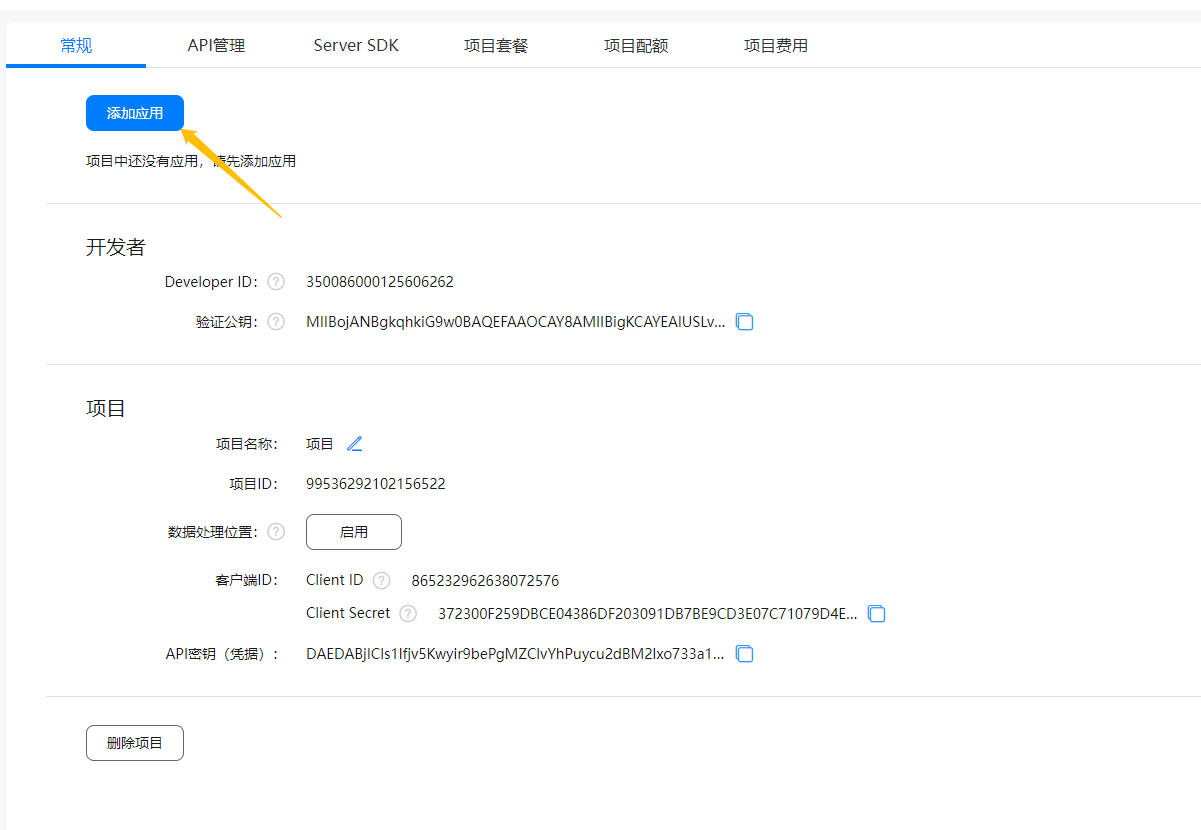
取完項目名后,點擊添加應用。
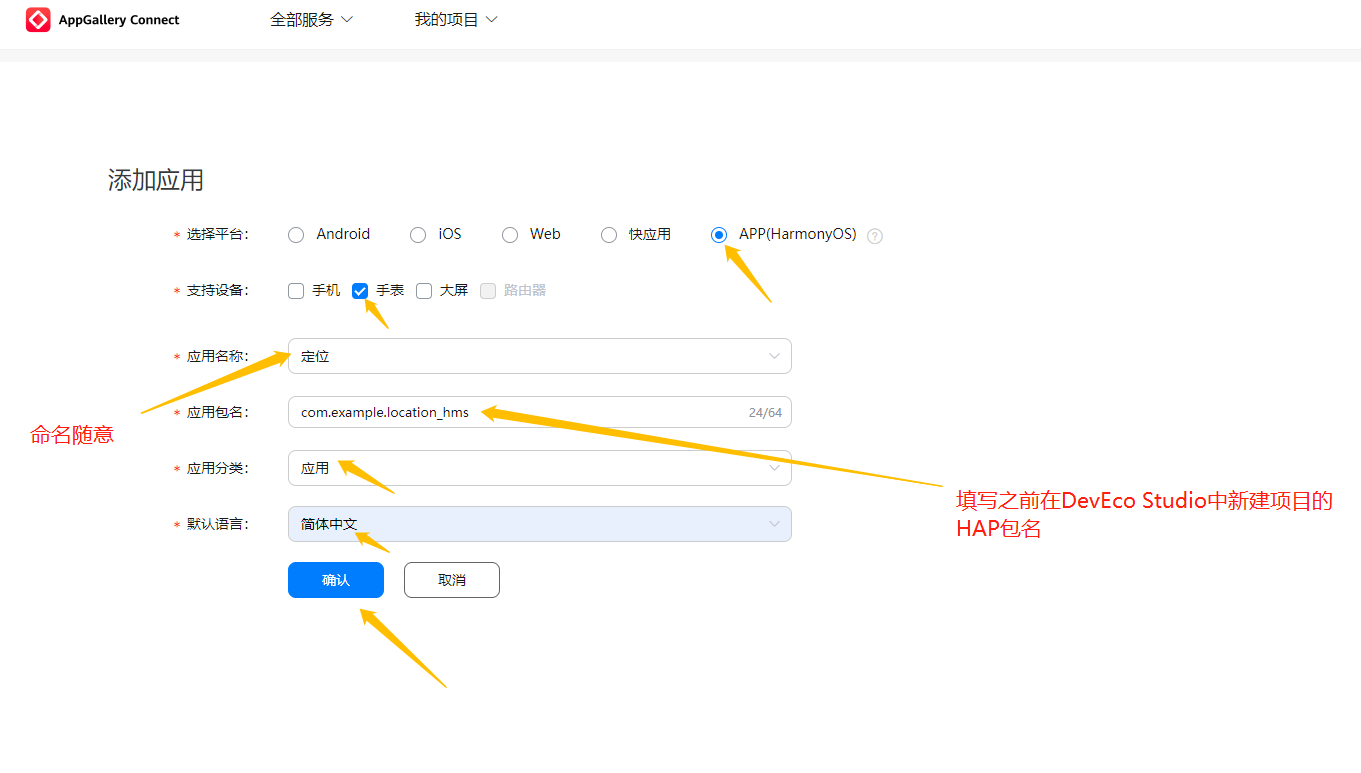
接著,依照下圖正確填寫關于添加應用的信息。
完成之后,網頁會給一些操作提示,但我們先點擊取消,暫時跳過這些步驟。
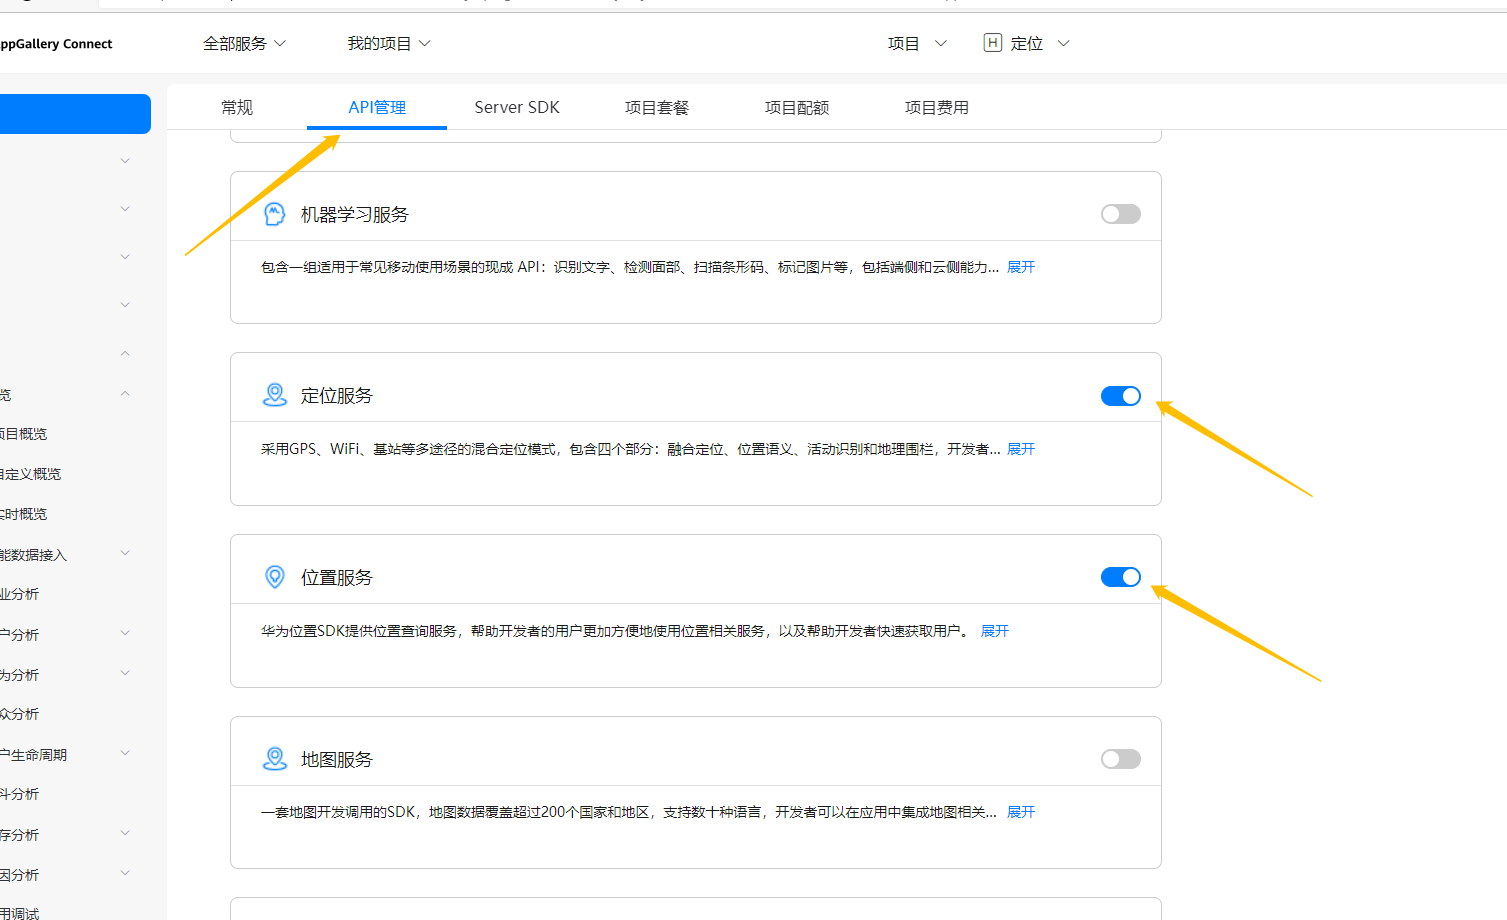
最后,點擊上方的API管理,并開啟定位服務與位置服務。
結尾
本期的內容就先分享到這,剩下的內容筆者將在下期的文章里揭曉。