PixiJS 源碼解讀:繪制矩形,底層都做了什么?

大家好,我是前端西瓜哥,今天帶大家看一下 PixiJS 的源碼實現。
PixiJS 是一個非常流行的 Canvas 庫,start 數將近 4w。
使用 PixiJS 簡單易用的 API,我們可以在瀏覽器頁面的 Canvas 元素上高性能地繪制圖形,實現流暢的動畫。它的底層是 WebGL。
用 PixiJS 繪制一個矩形,代碼實現為:
const app = new PIXI.Application({
  width: 500,
  height: 300,
});
document.body.appendChild(app.view);

const graph = new PIXI.Graphics();
graph.beginFill(0xff0044); // 填充色
graph.drawRect(10, 10, 100, 80);
graph.endFill();

app.stage.addChild(graph);
渲染結果:

這些代碼的底層究竟做了什么呢?這次西瓜哥就帶大家來一探究竟。
使用的 PixiJS 版本為 7.2.4。
Application 的初始化
首先是調用 Application 類的構造函數,創建 app 對象。
下面是 Application 構造函數的代碼。
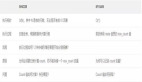
export class Application {
  // 創建 stage
  public stage: Container = new Container();
  // ...
  constructor(options) {
    options = Object.assign(
      {
        // 是否強制使用 Canvas 2D,否則如果支持 WebGL,用 WebGL
        // 默認為 false,且已經廢棄 Canvas 2D,僅 pixi.js-legacy 可用
        forceCanvas: false,
      },
      options
    );

    // 選擇渲染器
    this.renderer = autoDetectRenderer(options);

    // 插件初始化
    Application._plugins.forEach((plugin) => {
      plugin.init.call(this, options);
    });
  }
}
主要做了以下幾件事。
- 初始化 this.stage 為一個新的 Container 對象,將其作為根容器,之后我們繪制的矩形會放置于其下。
- 選擇渲染器 renderer,有兩種:Renderer(基于 WebGL) 和 CanvasRenderer(基于 Canvas 2D)。最新版 PixiJS 只內置了 Renderer。如果你希望在 WebGL 不可用時回退為 CanvasRenderer,需要改用 pixie.js-legacy 庫。
- 調用 Renderer 的構造函數。它的屬性 view 會指向一個 canvas 元素,Application 的 view 通過 getter 的代理方式拿到這個 view。
- 調用 Application 中注冊插件的 init 方法,進行初始化。
Application 默認內置兩個插件:
- TickerPlugin:不停地在繪制下一幀前調用(基于 requestAnimationFrame)傳入的回調函數,PixiJS 會在這里指定下一幀數要繪制的新內容。
- ResizePlugin:監聽容器尺寸變化,重繪畫布。

創建圖形
const graph = new PIXI.Graphics();創建一個 Graphics 對象。這個 Graphics 對象下可以繪制任何圖形,這里我只繪制一個矩形。
graph.beginFill(0xff0044); // 填充色該方法會給 Graphics 對象的 _fillStyle 設置為指定的顏色值。傳入的顏色值會進行標準化(normalize)。

Pixijs 實現有自己的風格:喜歡用類似 _varX 的方法保存 “私有” 變量,然后提供對應的 setter 和 getter 去讀寫這個內部變量。
getter 可能不提供,這樣一個屬性就會變成只讀屬性。有些 getter 里會做懶加載,在第一次讀取的時候再初始化,比如 Texture.WHITE。
如果我們不指定顏色,這個 _fillStyle 會使用默認值,且其 visible 屬性為 false,表示圖形沒有填充色,也會在之后的渲染階段跳過填充的邏輯。
然后是創建一個矩形。
graph.drawRect(10, 10, 100, 80);上面代碼其實調用的是:
return this.drawShape(new PIXI.Rectangle(x, y, width, height));首先創建一個 Rectangle 對象。
然后基于該 Rectangle 對象、之前設置的 fillStyle、lineStyle、matrix 創建一個 GraphicsData 對象,最后添加到給 rect._geometry.graphicsData 數組上。

總之就是將這個矩形的數據記錄下來,之后 PixiJS 會基于這些值構造出繪制 WebGL 可以直接使用的數據。
然后是重置填充色。
rect.endFill();將 rect 的 _fillStyle 設置為默認值:
public reset() {
  this.color = 0xFFFFFF;
  this.alpha = 1;
  this.texture = Texture.WHITE;
  this.matrix = null;
  this.visible = false;
}
最后是把 rect 添加到容器 app.stage 下。
app.stage.addChild(rect);對應的源碼是:
export class Container extends DisplayObject {
  // ...

  addChild(...children) {
    if (children.length > 1) {
      // 有多個圖形要添加,會遍歷調用當前 addChild 方法
      for (let i = 0; i < children.length; i++) {
        this.addChild(children[i]);
      }
    } else {
      const child = children[0];
      if (child.parent) {
        child.parent.removeChild(child);
      }

      child.parent = this;
      this.sortDirty = true; // 表示沒有排序

      child.transform._parentID = -1;

      this.children.push(child);

      this._boundsID++;

      // 觸發子節點改變的相關事件
      this.onChildrenChange(this.children.length - 1);
      this.emit("childAdded", child, this, this.children.length - 1);
      child.emit("added", this);
    }
    return children[0];
  }
}
至此,我們的矩形設置好屬性并添加到圖形樹上。
下面是渲染環節。
繪制
還記得我們初始化 Application 時,初始化的兩個插件嗎?
其中一個就是 TickerPlugin,它是 raf(requestAnimationFrame)的封裝,會在頁面繪制下一幀要之前執行回調函數。
Application 初始化時,調用了TickerPlugin.init() 方法,將 renderer 的 render 方法綁定到 Ticker 上。這樣,render 就會不斷地被異步調用。
class TickerPlugin {
  static init(options) {
    Object.defineProperty(this, "ticker", {
      set(ticker) {
        // 將 app.render 函數傳入 ticker 的回調列表
        ticker.add(this.render, this, UPDATE_PRIORITY.LOW);
      },
      // ...
    });

    // 觸發 ticker setter
    this.ticker = options.sharedTicker ? Ticker.shared : new Ticker();
  }
  // ...
}
render 方法:
class Application {
  // ...
  public render() {
    this.renderer.render(this.stage);
  }
}
因為渲染的過程非常長,代碼邏輯太多,各種細枝末節,這里只講大致流程,之后會寫一篇文章具體講解。
- 遞歸 app.stage 下的子 graph 對象,將其變換矩陣與父容器的做矩陣乘法(父容器的 transfrom 會影響子節點),最終計算出所有節點的最終復合變換矩陣;
- 之前創建的 Rectangle 對象,它的 x、y、width、height,轉換為 WebGL 頂點著色器(Vertex Shader)需要的 8 個頂點數據;
- 對頂點應用變換矩陣;
- 計算好的頂點和顏色的一些中間批量數據。最后在 BatchRenderer.drawBatches() 方法中,調用了 WebGL 的 API:gl.drawElements。
PixiJS 高性能的一個原因是減少 draw call,盡可能一次性批量(batch)提供大量頂點和片元給到 WebGL 去處理,充分利用 GPU 的并發計算能力。