使用Electron打造跨平臺程序需要關注的技術點

背景
上篇文章已經介紹了使用electron forge+vite+vue3來實現一個桌面應用程序的框架。本文重點介紹完善一個這樣的框架的幾個通用的需求點及實現方式。
需求
- 實現客戶端在線升級
- 實現與本地操作系統的交互
- 實現配置信息持久化
- 國際化配置
- 實現跨域訪問
實現客戶端在線升級
update.js
const {app,dialog,autoUpdater} = require('electron');
const log = require("electron-log")
autoUpdater.logger = log
autoUpdater.logger.transports.file.level = "info"

const server = 'https://update.electronjs.org'
const url = `${server}/dongluyang/intel-desktop-app/${process.platform}-${process.arch}/${app.getVersion()}`

autoUpdater.setFeedURL(
  {
    url:url
  }
)


autoUpdater.on('checking-for-update', () => {
    log.info("獲取版本信息")
})

autoUpdater.on('update-not-available', () => {
    log.info("沒有可更新版本")
})

autoUpdater.on('update-available', ()  => {
    log.info("發現新版本")
})

autoUpdater.on('update-downloaded', (event, releaseNotes, releaseName, releaseDate, updateUrl, quitAndUpdate) => {
    dialog.showMessageBox({
        type: 'info',
        title: '軟件更新',
        message: "發現新版本"+releaseName+", 確定安裝?",
        detail: process.platform === 'win32' ? releaseNotes : releaseName,
        buttons: ['確定', '取消']
      }).then(returnValue => {
        if (returnValue.response === 0)  autoUpdater.quitAndInstall()
      })
  })

autoUpdater.on('error', (message) => {
    log.error('There was a problem updating the application')
    log.error(message)
})

export default autoUpdater
main.js
import autoUpdater from './update'

const createWindow = () => {
  // Create the browser window.
  mainWindow = new BrowserWindow({
    width: 800,
    height: 600,
    webPreferences: {
      preload: path.join(__dirname, 'preload.js'),
    },
  });
  // and load the index.html of the app.
  if (MAIN_WINDOW_VITE_DEV_SERVER_URL) {
    mainWindow.loadURL(MAIN_WINDOW_VITE_DEV_SERVER_URL);
  } else {
    mainWindow.loadFile(path.join(__dirname, `../renderer/${MAIN_WINDOW_VITE_NAME}/index.html`));
  }
  // Open the DevTools.
  mainWindow.webContents.openDevTools();
  mainWindow.once('ready-to-show', () => {
     autoUpdater.autoDownload = false
     autoUpdater.checkForUpdates()
 });

};
優缺點比較
方案 | 優點 | 缺點 |
本方案 | 實現簡單,和electron-forge集成容易。electron-forge有豐富的插件生態 |
|
electron-builder + electron-updater的autoUpdater |
| 1.實現稍微比上述方案復雜。 2.官方推薦electron-forge打包,與主流技術分叉。 |
Electron Forge可以被認為是Electron Builder的替代品,后者在應用程序構建和發布方面實現了相同的用例。
這兩個項目在理念上的關鍵區別在于,Electron Forge專注于將現有的官方工具組合成一個單一的構建管道,而Builder則為大多數構建任務重寫自己的內部邏輯。
使用Forge有兩個主要優勢:
Forge一旦在Electron中得到支持,就會接收用于應用程序構建的新功能(例如ASAR完整性或通用macOS構建)。這些功能是在考慮到官方Electron工具的情況下構建的,因此Forge在發布后立即收到它們。
Forge的多包體系結構使其更易于理解和擴展。由于Forge由許多職責明確的較小包組成,因此更容易遵循代碼流。此外,它的可擴展API設計意味著您可以編寫自己的構建邏輯,而不必為高級用例提供配置選項。
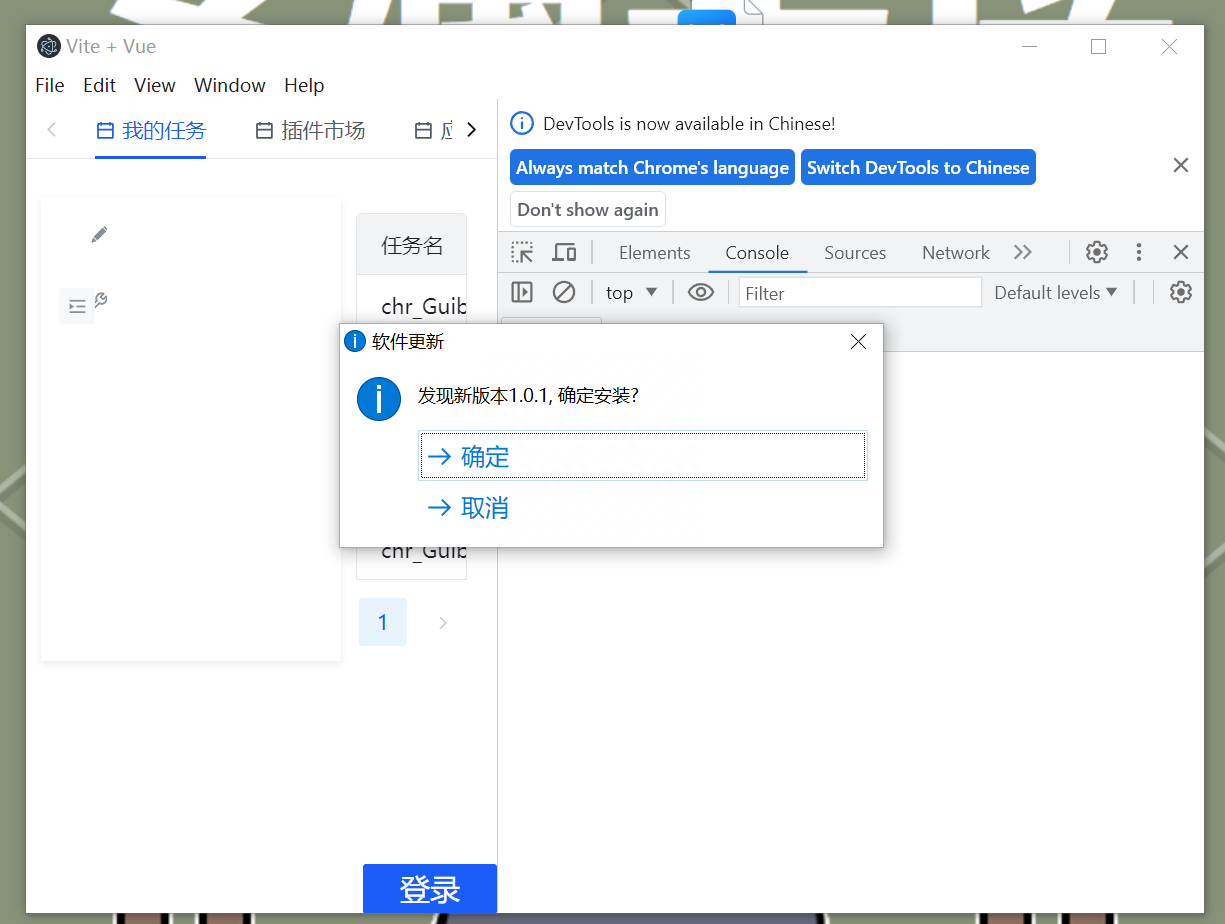
運行界面
日志查看
運行期間,有錯誤,可以及時查看內容,日志地址是:
windows: C:\Users\%USERPROFILE%\AppData\Roaming\你的工程\logs。
mac: ~/Library/Application Support/你的工程 或者 ~/Library/Logs/你的工程。
實現與本地操作系統的交互
preload.js
在這個問題中可以暴露一些接口,這些接口可以在前端頁面調用,例如下面的就可以在前端vue頁面調用window.versions.node調用node方法。
const { contextBridge, ipcRenderer } = require('electron')

contextBridge.exposeInMainWorld('versions', {
  node: () => process.versions.node,
  chrome: () => process.versions.chrome,
  electron: () => process.versions.electron,
  ping: () => ipcRenderer.send('ping') ,
  pong: () => ipcRenderer.invoke('pong')
})
main.js
通過ipcMain來處理。
async function handlePing (event, keyword) {
  const webContents = event.sender
  const win = BrowserWindow.fromWebContents(webContents)
  win.setTitle(keyword)
}


// This method will be called when Electron has finished
// initialization and is ready to create browser windows.
// Some APIs can only be used after this event occurs.
app.on('ready', ()=>{
  ipcMain.on('ping', handlePing)
  createWindow()
});
運行效果
總結
方向 | 解釋 | 對應元語 |
單向 | ipcRender向ipcMain發送消息 | ipcRender.send與ipcMain.on |
雙向 | ipcRender向ipcMain發送消息,并等待結果 | ipcRender.invoke與ipcMain.handle |
國際化配置
src/renderer/App.vue。
配置默認中文顯示。
<template>
 <a-config-provider :locale="locale">
    <router-view />
 </a-config-provider>
</template>

<script setup>
import { computed,ref } from 'vue';
import enUS from '@arco-design/web-vue/es/locale/lang/en-us';
import zhCN from '@arco-design/web-vue/es/locale/lang/zh-cn';
import useLocale from './hooks/locale';

const { currentLocale } = useLocale();

const locale = computed(() => {
  switch (currentLocale.value) {
    case 'zh-CN':
      return zhCN;
    case 'en-US':
      return enUS;
    default:
      return zhCN;
  }
});
const percentage = ref(0);
const showProgressBar = ref(false);
</script>
src/render/hooks/locale.js。
import { computed } from 'vue';
import { useI18n } from 'vue-i18n';
import { Message } from '@arco-design/web-vue';

export default function useLocale() {
  const i18 = useI18n();
  const currentLocale = computed(() => {
    return i18.locale.value;
  });
  const changeLocale = (value) => {
    if (i18.locale.value === value) {
      return;
    }
    i18.locale.value = value;
    localStorage.setItem('arco-locale', value);
    Message.success(i18.t('navbar.action.locale'));
  };
  return {
    currentLocale,
    changeLocale,
  };
}
src/render/main.js。
import { createI18n } from 'vue-i18n';

const i18n = createI18n({
  legacy: false, // 如果你使用 Composition API(推薦),請將legacy設置為false
  locale: 'zh', // 默認語言環境
  messages: {
    en: {
      hello: 'Hello',
      welcome: 'Welcome to our app!',
    },
    zh: {
      hello: '你好',
      welcome: '歡迎來到我們的應用!',
    },
  },
});


createApp(App).use(i18n).use(router).use(ArcoVue,{}).use(ArcoVueIcon).mount('#app');
顯示代碼:
<p>{{ $t('welcome') }}</p>剩余的兩個功能,下一篇再完善。預告下,后面我把這個項目的模塊進行分解,然后子模塊拆分成技術點,然后通過chatgpt來實現,看看它的效果如何。敬請期待!是否能實現大部分功能,我們拭目以待。