如何實現波紋進度條(ArkUI)
作者:野生菌君
應用開發過程中經常用到波紋進度條,常見的如充電進度、下載進度、上傳進度等,本例即為大家介紹如何實現上述場景。

場景說明
應用開發過程中經常用到波紋進度條,常見的如充電進度、下載進度、上傳進度等,本例即為大家介紹如何實現上述場景。
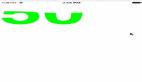
效果呈現
本示例最終效果如下:

運行環境
本例基于以下環境開發,開發者也可以基于其他適配的版本進行開發:
- IDE: DevEco Studio 3.1 Beta2
- SDK: Ohos_sdk_public 3.2.11.9(API Version 9 Release)
實現思路
本示例涉及4個主要特性及其實現方案如下:
- 進度條的圓形外框:使用Circle組件繪制外層圓環,實現外層框架。
- 圓框內進度數值變化:使用setInterval()讓進度值持續遞增控制進度數據變化(本案例未提供實時數據來源,所以直接通過數據遞增來呈現效果)。
- 圓框水紋區域繪制:通過Path組件的繪制命令(M、Q、T)去繪制水紋形狀并對中間進行填充。
- 底部進度條展示(主要用于跟波紋進度對比展示,方便大家理解):使用Slider組件繪制進度條。
開發步驟
針對上述所提到的內容,具體實現步驟如下:
先使用Cricle組件繪制外層的圓環。
具體代碼塊如下:
...
// 外框圓環
Circle({ width: BIG_DIAMETER, height: BIG_DIAMETER })
  .fill(COLOR_TRANSPARENT)  // 填充:透明
  .stroke('#007DFF')  //圓環顏色
  .strokeWidth(5)  //圓環環寬
...
通過setInterval()方法讓outSetValue值一直增加到100,使進度在規定時間內完成,最后通過clearInterval結束自增。
具體代碼塊如下:
...
aboutToAppear() {
  this.test()
}
test() {
  let timer = setInterval(() => {  //開始定時
    if (this.outSetValue < 100) {
      //進度值每次+1
      this.outSetValue += 1
      //進度顯示
      if (this.outSetValue == 100) {
        this.backGroundColor = COLOR_BACKGROUND_FILL
        this.pathCommands = '';
      } else {
        this.backGroundColor = COLOR_TRANSPARENT
        this.pathCommands = this.calPathCommands(this.outSetValue);
      }
    } else {
    clearInterval(timer)  //取消定時
    }
  }, 100)
}
...
通過方程表達進度百分比和y的關系,通過Path組件的路徑繪制命令(M、Q、T)去繪制路徑生成封閉的自定義形狀并對中間進行填充。
中間的填充有兩個狀態:
- 在進度100%時時填充顏色的圓形。
- 在進度不是100%時,使用Path組件繪制閉合曲線實現。
在使用Path組件繪制路徑時的計算過程和相關函數的使用如下(坐標系以Path組件的左上角為坐標原點):
- 進度百分比和y的關系:y = (1-k)* 2r。
- 圓心點的坐標是(r, r),使用圓方程就可以計算出圓弧的起點和終點。
- 使用 A(rx ry x-axis-rotation large-arc-flag sweep-flag x y) 繪制圓弧,注意點就是在過圓心之后,需要反轉下繪制角度。
- 使用 Q(x1 y1 x y) 和 T(x, y) 繪制對應的波浪,最后閉合路徑然后填充顏色。
具體代碼塊如下:
...
onPageShow() {
  //校準的路徑指令與進度值
  this.pathCommands = this.calPathCommands(this.outSetValue);
}

calXSquare(y: number) {
  return RADIUS_IN_PX * RADIUS_IN_PX - (y - RADIUS_IN_PX) * (y - RADIUS_IN_PX);
}

calY(k: number) {
  return (1 - k) * RADIUS_IN_PX * 2;//返回值為百分比
}
formatPathCommands(x1: number, x2: number, y: number, radius: number) {
  //填充區域波浪線
  return `M${x1} ${y} A${radius} ${radius} 0 ${y > RADIUS_IN_PX ? 0 : 1} 0  ${x2} ${y} `
+ `Q${(x1 + 3 * x2) / 4} ${y + 12.5 * (x2 - x1) / radius}, ${(x1 + x2) / 2} ${y} T${x1} ${y}`
}
calPathCommands(value: number) {
  let y = this.calY(value / 100.0)
  let squareX = this.calXSquare(y)
  if (squareX >= 0) {
    let x = Math.sqrt(squareX);
    let x1 = RADIUS_IN_PX - x;
    let x2 = RADIUS_IN_PX + x;
    return this.formatPathCommands(x1, x2, y, RADIUS_IN_PX);
  }
  return "";
}
...
繪制下方滑動條組件。
具體代碼塊如下:
...
Row() {
  Slider({
    value: this.outSetValue,
    min: 0,
    max: 100,
    step: 1,
    style: SliderStyle.OutSet
  })
    .blockColor('#FFFFFF')
    .trackColor('#182431')
    .selectedColor('#007DFF')
    .showSteps(true)
    .showTips(true)
    .onChange((value: number, mode: SliderChangeMode) => {
      if(this.outSetValue == 0) {
        this.test()
      }
      this.outSetValue = value //初始狀態
      if (this.outSetValue == 100) {
        this.backGroundColor = COLOR_BACKGROUND_FILL //進度為100時,滑動條拉滿,背景全滿
        this.pathCommands = '';
      } else {
        this.backGroundColor = COLOR_TRANSPARENT 、
        this.pathCommands = this.calPathCommands(this.outSetValue);
      }
      console.log(`value = ${value} ->` + this.pathCommands);
      //進度顯示
    })
  Text(this.outSetValue.toFixed(0)).fontSize(16)
}
...
完整代碼
具體代碼如下:
const COLOR_TRANSPARENT = '#00000000'
const COLOR_BACKGROUND_FILL = '#7ebede'

const DIAMETER = 200;
const RADIUS_IN_PX = vp2px(DIAMETER / 2.0);
const BIG_DIAMETER = 220;


@Entry
@Component
struct Page3 {
  @State outSetValue: number = 0
  @State pathCommands: string = ''
  @State backGroundColor: string = '#00000000'

  onPageShow() {
    this.pathCommands = this.calPathCommands(this.outSetValue);
  }

  calXSquare(y: number) {
    return RADIUS_IN_PX * RADIUS_IN_PX - (y - RADIUS_IN_PX) * (y - RADIUS_IN_PX);
  }

  calY(k: number) {
    return (1 - k) * RADIUS_IN_PX * 2;
  }

  formatPathCommands(x1: number, x2: number, y: number, radius: number) {
    return `M${x1} ${y} A${radius} ${radius} 0 ${y > RADIUS_IN_PX ? 0 : 1} 0  ${x2} ${y} `
    + `Q${(x1 + 3 * x2) / 4} ${y + 12.5 * (x2 - x1) / radius}, ${(x1 + x2) / 2} ${y} T${x1} ${y}`
  }

  calPathCommands(value: number) {
    let y = this.calY(value / 100.0)
    let squareX = this.calXSquare(y)
    if (squareX >= 0) {
      let x = Math.sqrt(squareX);
      let x1 = RADIUS_IN_PX - x;
      let x2 = RADIUS_IN_PX + x;
      return this.formatPathCommands(x1, x2, y, RADIUS_IN_PX);
    }
    return "";
  }

  aboutToAppear() {
    this.test()
  }
  test() {
    let timer = setInterval(() => {
      if (this.outSetValue < 100) {
        this.outSetValue += 1
        if (this.outSetValue == 100) {
          this.backGroundColor = COLOR_BACKGROUND_FILL
          this.pathCommands = '';
        } else {
          this.backGroundColor = COLOR_TRANSPARENT
          this.pathCommands = this.calPathCommands(this.outSetValue);
        }
      } else {
        clearInterval(timer)
      }
    }, 100)
  }
  build() {

    Column() {
      Column() {
        Stack() {
          // 外框圓環
          Circle({ width: BIG_DIAMETER, height: BIG_DIAMETER })
            .fill(COLOR_TRANSPARENT)
            .stroke('#007DFF')
            .strokeWidth(5)
          // 進度顯示

          Circle({ width: DIAMETER, height: DIAMETER })
            .fill(this.backGroundColor)
          Path()
            .width(DIAMETER)
            .height(DIAMETER)
            .commands(this.pathCommands)
            .fill(COLOR_BACKGROUND_FILL)

          // 進度
          Text(this.outSetValue.toFixed(0) + "%")
            .fontSize(60)


        }.width(BIG_DIAMETER)
        .height(BIG_DIAMETER)


        Row() {
          Slider({
            value: this.outSetValue,
            min: 0,
            max: 100,
            step: 1,
            style: SliderStyle.OutSet
          })
            .blockColor('#FFFFFF')
            .trackColor('#182431')
            .selectedColor('#007DFF')
            .showSteps(true)
            .showTips(true)
            .onChange((value: number, mode: SliderChangeMode) => {
              if(this.outSetValue == 0) {
                this.test()
              }
              this.outSetValue = value
              if (this.outSetValue == 100) {
                this.backGroundColor = COLOR_BACKGROUND_FILL
                this.pathCommands = '';
              } else {
                this.backGroundColor = COLOR_TRANSPARENT
                this.pathCommands = this.calPathCommands(this.outSetValue);
              }
              console.log(`value = ${value} ->` + this.pathCommands);
            })
          Text(this.outSetValue.toFixed(0)).fontSize(16)
        }
        .padding({ top: 50 })
        .width('80%')

      }.width('100%')
    }
    .height('100%')
    .justifyContent(FlexAlign.Center)
  }
}
場景說明
應用開發過程中經常用到波紋進度條,常見的如充電進度、下載進度、上傳進度等,本例即為大家介紹如何實現上述場景。
效果呈現
本示例最終效果如下:
如何實現波紋進度條(ArkUI)-鴻蒙開發者社區
運行環境
本例基于以下環境開發,開發者也可以基于其他適配的版本進行開發:
IDE: DevEco Studio 3.1 Beta2
SDK: Ohos_sdk_public 3.2.11.9(API Version 9 Release)
實現思路
本示例涉及4個主要特性及其實現方案如下:
進度條的圓形外框:使用Circle組件繪制外層圓環,實現外層框架。
圓框內進度數值變化:使用setInterval()讓進度值持續遞增控制進度數據變化(本案例未提供實時數據來源,所以直接通過數據遞增來呈現效果)。
圓框水紋區域繪制:通過Path組件的繪制命令(M、Q、T)去繪制水紋形狀并對中間進行填充。
底部進度條展示(主要用于跟波紋進度對比展示,方便大家理解):使用Slider組件繪制進度條。
開發步驟
針對上述所提到的內容,具體實現步驟如下:
先使用Cricle組件繪制外層的圓環
具體代碼塊如下:
...
// 外框圓環
Circle({ width: BIG_DIAMETER, height: BIG_DIAMETER })
.fill(COLOR_TRANSPARENT) // 填充:透明
.stroke('#007DFF') //圓環顏色
.strokeWidth(5) //圓環環寬
...
1.
2.
3.
4.
5.
6.
7.
通過setInterval()方法讓outSetValue值一直增加到100,使進度在規定時間內完成,最后通過clearInterval結束自增。
具體代碼塊如下:
...
aboutToAppear() {
this.test()
}
test() {
let timer = setInterval(() => { //開始定時
if (this.outSetValue < 100) {
//進度值每次+1
this.outSetValue += 1
//進度顯示
if (this.outSetValue == 100) {
this.backGroundColor = COLOR_BACKGROUND_FILL
this.pathCommands = '';
} else {
this.backGroundColor = COLOR_TRANSPARENT
this.pathCommands = this.calPathCommands(this.outSetValue);
}
} else {
clearInterval(timer) //取消定時
}
}, 100)
}
...
1.
2.
3.
4.
5.
通過方程表達進度百分比和y的關系,通過Path組件的路徑繪制命令(M、Q、T)去繪制路徑生成封閉的自定義形狀并對中間進行填充。
中間的填充有兩個狀態:
1.在進度100%時時填充顏色的圓形。
2.在進度不是100%時,使用Path組件繪制閉合曲線實現。
在使用Path組件繪制路徑時的計算過程和相關函數的使用如下(坐標系以Path組件的左上角為坐標原點):
如何實現波紋進度條(ArkUI)-鴻蒙開發者社區
進度百分比和y的關系:y = (1-k)* 2r。
圓心點的坐標是(r, r),使用圓方程就可以計算出圓弧的起點和終點。
使用 A(rx ry x-axis-rotation large-arc-flag sweep-flag x y) 繪制圓弧,注意點就是在過圓心之后,需要反轉下繪制角度。
使用 Q(x1 y1 x y) 和 T(x, y) 繪制對應的波浪,最后閉合路徑然后填充顏色。
具體代碼塊如下:
...
onPageShow() {
//校準的路徑指令與進度值
this.pathCommands = this.calPathCommands(this.outSetValue);
}
calXSquare(y: number) {
return RADIUS_IN_PX * RADIUS_IN_PX - (y - RADIUS_IN_PX) * (y - RADIUS_IN_PX);
}
calY(k: number) {
return (1 - k) * RADIUS_IN_PX * 2;//返回值為百分比
}
formatPathCommands(x1: number, x2: number, y: number, radius: number) {
//填充區域波浪線
return `M${x1} ${y} A${radius} ${radius} 0 ${y > RADIUS_IN_PX ? 0 : 1} 0 ${x2} ${y} `
+ `Q${(x1 + 3 * x2) / 4} ${y + 12.5 * (x2 - x1) / radius}, ${(x1 + x2) / 2} ${y} T${x1} ${y}`
}
calPathCommands(value: number) {
let y = this.calY(value / 100.0)
let squareX = this.calXSquare(y)
if (squareX >= 0) {
let x = Math.sqrt(squareX);
let x1 = RADIUS_IN_PX - x;
let x2 = RADIUS_IN_PX + x;
return this.formatPathCommands(x1, x2, y, RADIUS_IN_PX);
}
return "";
}
...
1.
2.
3.
4.
5.
繪制下方滑動條組件
具體代碼塊如下:
...
Row() {
Slider({
value: this.outSetValue,
min: 0,
max: 100,
step: 1,
style: SliderStyle.OutSet
})
.blockColor('#FFFFFF')
.trackColor('#182431')
.selectedColor('#007DFF')
.showSteps(true)
.showTips(true)
.onChange((value: number, mode: SliderChangeMode) => {
if(this.outSetValue == 0) {
this.test()
}
this.outSetValue = value //初始狀態
if (this.outSetValue == 100) {
this.backGroundColor = COLOR_BACKGROUND_FILL //進度為100時,滑動條拉滿,背景全滿
this.pathCommands = '';
} else {
this.backGroundColor = COLOR_TRANSPARENT 、
this.pathCommands = this.calPathCommands(this.outSetValue);
}
console.log(`value = ${value} ->` + this.pathCommands);
//進度顯示
})
Text(this.outSetValue.toFixed(0)).fontSize(16)
}
...
1.
2.
3.
4.
5.
完整代碼
具體代碼如下:
const COLOR_TRANSPARENT = '#00000000'
const COLOR_BACKGROUND_FILL = '#7ebede'
const DIAMETER = 200;
const RADIUS_IN_PX = vp2px(DIAMETER / 2.0);
const BIG_DIAMETER = 220;
@Entry
@Component
struct Page3 {
@State outSetValue: number = 0
@State pathCommands: string = ''
@State backGroundColor: string = '#00000000'
onPageShow() {
this.pathCommands = this.calPathCommands(this.outSetValue);
}
calXSquare(y: number) {
return RADIUS_IN_PX * RADIUS_IN_PX - (y - RADIUS_IN_PX) * (y - RADIUS_IN_PX);
}
calY(k: number) {
return (1 - k) * RADIUS_IN_PX * 2;
}
formatPathCommands(x1: number, x2: number, y: number, radius: number) {
return `M${x1} ${y} A${radius} ${radius} 0 ${y > RADIUS_IN_PX ? 0 : 1} 0 ${x2} ${y} `
+ `Q${(x1 + 3 * x2) / 4} ${y + 12.5 * (x2 - x1) / radius}, ${(x1 + x2) / 2} ${y} T${x1} ${y}`
}
calPathCommands(value: number) {
let y = this.calY(value / 100.0)
let squareX = this.calXSquare(y)
if (squareX >= 0) {
let x = Math.sqrt(squareX);
let x1 = RADIUS_IN_PX - x;
let x2 = RADIUS_IN_PX + x;
return this.formatPathCommands(x1, x2, y, RADIUS_IN_PX);
}
return "";
}
aboutToAppear() {
this.test()
}
test() {
let timer = setInterval(() => {
if (this.outSetValue < 100) {
this.outSetValue += 1
if (this.outSetValue == 100) {
this.backGroundColor = COLOR_BACKGROUND_FILL
this.pathCommands = '';
} else {
this.backGroundColor = COLOR_TRANSPARENT
this.pathCommands = this.calPathCommands(this.outSetValue);
}
} else {
clearInterval(timer)
}
}, 100)
}
build() {
Column() {
Column() {
Stack() {
// 外框圓環
Circle({ width: BIG_DIAMETER, height: BIG_DIAMETER })
.fill(COLOR_TRANSPARENT)
.stroke('#007DFF')
.strokeWidth(5)
// 進度顯示
Circle({ width: DIAMETER, height: DIAMETER })
.fill(this.backGroundColor)
Path()
.width(DIAMETER)
.height(DIAMETER)
.commands(this.pathCommands)
.fill(COLOR_BACKGROUND_FILL)
// 進度
Text(this.outSetValue.toFixed(0) + "%")
.fontSize(60)
}.width(BIG_DIAMETER)
.height(BIG_DIAMETER)
Row() {
Slider({
value: this.outSetValue,
min: 0,
max: 100,
step: 1,
style: SliderStyle.OutSet
})
.blockColor('#FFFFFF')
.trackColor('#182431')
.selectedColor('#007DFF')
.showSteps(true)
.showTips(true)
.onChange((value: number, mode: SliderChangeMode) => {
if(this.outSetValue == 0) {
this.test()
}
this.outSetValue = value
if (this.outSetValue == 100) {
this.backGroundColor = COLOR_BACKGROUND_FILL
this.pathCommands = '';
} else {
this.backGroundColor = COLOR_TRANSPARENT
this.pathCommands = this.calPathCommands(this.outSetValue);
}
console.log(`value = ${value} ->` + this.pathCommands);
})
Text(this.outSetValue.toFixed(0)).fontSize(16)
}
.padding({ top: 50 })
.width('80%')
}.width('100%')
}
.height('100%')
.justifyContent(FlexAlign.Center)
}
}責任編輯:jianghua
來源:
51CTO 開源基礎軟件社區