強大的異步任務處理類CompletableFuture使用詳解
環境:Java8
Future基本應用
Future是從JDK1.5開始有的,目的是獲取異步任務執行的結果,通常情況會結合ExecutorService及Callable一起使用。
1. Future結合Callable使用
單任務執行
private static class Task implements Callable<String> {


  @Override
  public String call() throws Exception {
    TimeUnit.SECONDS.sleep(3) ;
    return "success";
  }


}
public static void main(String[] args) throws Exception {
  ThreadPoolExecutor executor = new ThreadPoolExecutor(3, 3, 60, TimeUnit.SECONDS, new ArrayBlockingQueue<>(10)) ;
  Future<String> future = executor.submit(new Task()) ;
  String result = future.get() ;
  System.out.println("執行結果:" + result) ;
}
當執行到future.get()方法的時候會阻塞,等待3s后繼續執行。
多個任務同時執行
private static class Task implements Callable<String> {
  private int sleep ;
  public Task(int sleep) {
    this.sleep = sleep ;
  }


  @Override
  public String call() throws Exception {
    TimeUnit.SECONDS.sleep(this.sleep) ;
    return "success";
  }
}
public static void main(String[] args) throws Exception {
  ThreadPoolExecutor executor = new ThreadPoolExecutor(3, 3, 60, TimeUnit.SECONDS, new ArrayBlockingQueue<>(10)) ;
  Future<String> future1 = executor.submit(new Task(3)) ;
  Future<String> future2 = executor.submit(new Task(2)) ;
  Future<String> future3 = executor.submit(new Task(1)) ;
  String result1 = future1.get() ;
  String result2 = future2.get() ;
  String result3 = future3.get() ;
  System.out.println("result1:" + result1 + "\t" + "result2:" + result2 + "\t" + "result3:" + result3) ;
}
以上代碼執行的3個任務分別用時3,2,1s。future1用時最長。
從運行的結果看到即便future2, future3執行時間短也必須等待future1執行完后才會繼續,雖然你可以倒過來獲取結果,但是在實際項目中的應用你應該是不能確認每個任務執行需要多長時間,誰先執行完就先獲取誰。
雖然這種同步阻塞的方式在有些場景下還是很有必要的。但由于它的同步阻塞導致了當前線程不能干其它的事必須一致等待。
CompletionService解決Future的缺點
CompletionService是一邊生產新的任務,一邊處理已經完成的任務。簡單地說就是CompletionService不管任務執行先后順序,誰先執行完就處理誰。
private static class Task implements Callable<String> {
  private int time;
  private String name ;
  public Task(int time, String name) {
    this.time = time ;
    this.name = name ;
  }
  @Override
  public String call() throws Exception {
    TimeUnit.SECONDS.sleep(this.time) ;
    return name ;
  }


}
public static void main(String[] args) throws Exception {
  ThreadPoolExecutor pool = new ThreadPoolExecutor(3, 3, 60, TimeUnit.SECONDS, new ArrayBlockingQueue<>(10)) ;
  CompletionService<String> cs = new ExecutorCompletionService<>(pool) ;
  cs.submit(new Task(3, "name" + 3)) ;
  cs.submit(new Task(1, "name" + 1)) ;
  cs.submit(new Task(2, "name" + 2)) ;
  for (int i = 0; i < 3; i++) {
    System.out.println(cs.take().get()) ;
  }
}
通過執行結果發現,任務的結果獲取是以誰先執行完處理誰與任務的執行先后沒有關系。
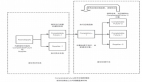
2. CompletableFuture異步編程
CompletableFuture通過如下4個靜態方法來執行異步任務
 圖片
圖片
2.1 簡單異步任務鏈式調用執行
ThreadPoolExecutor executor = new ThreadPoolExecutor(5, 5, 60, TimeUnit.SECONDS, new ArrayBlockingQueue<>(10)) ;
CompletableFuture.runAsync(() -> {
  try {
    TimeUnit.SECONDS.sleep(3) ;
    System.out.println(Thread.currentThread().getName() + ", 1 任務執行完成") ;
  } catch (InterruptedException e) {
    e.printStackTrace();
  }
}, executor).thenRun(() -> {
  try {
    TimeUnit.SECONDS.sleep(2) ;
    System.out.println(Thread.currentThread().getName() + ", 2 任務執行完成") ;
  } catch (InterruptedException e) {
    e.printStackTrace();
  }
}) ;
System.out.println("主線程:" + Thread.currentThread().getName()) ;
executor.shutdown() ;
執行結果:
 圖片
圖片
2.2 獲取上一步任務執行結果及任務完成處理
CompletableFuture.supplyAsync(() -> {
  try {
    TimeUnit.SECONDS.sleep(3) ;
    System.out.println(Thread.currentThread().getName() + ", 1 任務執行完成") ;
  } catch (InterruptedException e) {
    e.printStackTrace();
  }
  return "1" ;
}, executor).thenApply(res -> {
  System.out.println("獲取到上一步任務執行結果:" + res) ;
  try {
    TimeUnit.SECONDS.sleep(2) ;
    System.out.println(Thread.currentThread().getName() + ", 2 任務執行完成") ;
  } catch (InterruptedException e) {
    e.printStackTrace();
  }
  return "2" ;
}).whenComplete((res, tx) -> {
  System.out.println("獲取到結果:" + res) ;
  if (tx != null) {
    System.err.println("發生錯誤了:" + tx.getMessage()) ;
  }
  executor.shutdown();
}) ;
System.out.println("主線程:" + Thread.currentThread().getName()) ;
執行結果:
 圖片
圖片
這里如果任務執行的時候發生了異常那么在whenComplete方法中的res 會為空,tx為發生異常的對象。沒有異常時res有執行的機構,tx異常對象為空。
2.3 異步任務異常處理
CompletableFuture.supplyAsync(() -> {
  try {
    TimeUnit.SECONDS.sleep(3) ;
    System.out.println(Thread.currentThread().getName() + ", 1 任務執行完成") ;
  } catch (InterruptedException e) {
    e.printStackTrace();
  }
  return "1" ;
}, executor).thenApply(res -> {
  System.out.println("獲取到上一步任務執行結果:" + res) ;
  try {
    TimeUnit.SECONDS.sleep(2) ;
    System.out.println(Thread.currentThread().getName() + ", 2 任務執行完成") ;
    System.out.println(1 / 0) ;
  } catch (InterruptedException e) {
    e.printStackTrace();
  }
  return "2" ;
}).exceptionally(tx -> {
  System.out.println(Thread.currentThread().getName() + ", 任務執行發生了異常") ;
  return "error" ;
}).whenComplete((res, tx) -> {
  System.out.println("獲取到結果:" + res) ;
  if (tx != null) {
    System.err.println("發生錯誤了:" + tx.getMessage()) ;
  }
  executor.shutdown();
}) ;
System.out.println("主線程:" + Thread.currentThread().getName()) ;
這里我們人為的制造異常 1 / 0 。
執行結果:
 圖片
圖片
根據執行結果當發生異常時進入exceptionally方法,最終進入whenComplete方法此時 tx異常對象是發生異常的異常對象。
2.4 所有任務完成才算完成任務
CompletableFuture.allOf
CompletableFuture<Double> calc1 = CompletableFuture.supplyAsync(() -> {
  try {
    TimeUnit.SECONDS.sleep(2) ;
    System.out.println(Thread.currentThread().getName() + ", calc1任務執行完成") ;
  } catch (InterruptedException e) {
    e.printStackTrace();
  }
  return 10D ;
}, executor) ;


CompletableFuture<Double> calc2 = CompletableFuture.supplyAsync(() -> {
  try {
    TimeUnit.SECONDS.sleep(5) ;
    System.out.println(Thread.currentThread().getName() + ", calc2任務執行完成") ;
  } catch (InterruptedException e) {
    e.printStackTrace();
  }
  return 20D ;
}, executor) ;
// 當任何一個任務發生異常,這里的tx都不會為null
CompletableFuture.allOf(calc1, calc2).whenComplete((res, tx) -> {
  System.out.println("獲取到結果:" + res + ", " + tx) ;
  try {
    System.out.println(calc1.get()) ;
    System.out.println(calc2.get()) ;
  } catch (InterruptedException e) {
    e.printStackTrace();
  } catch (ExecutionException e) {
    e.printStackTrace();
  }
  executor.shutdown();
}) ;
執行結果:
 圖片
圖片
在這里whenComplete中的res是沒有結果的,要獲取數據我們的分別調用get方法獲取。
2.5 handle方法對結果處理
CompletableFuture.supplyAsync(() -> {
  try {
    TimeUnit.SECONDS.sleep(2) ;
    System.out.println(Thread.currentThread().getName() + ", 1 任務執行完成") ;
  } catch (InterruptedException e) {
    e.printStackTrace();
  }
  return "0" ;
}, executor).handle((res, tx) -> {
  // 處理結果數據
  return res + "1" ;
}).whenComplete((res, tx) -> {
  System.out.println("獲取到結果:" + res) ;
  if (tx != null) {
    System.err.println("發生錯誤了:" + tx.getMessage()) ;
  }
  executor.shutdown();
}) ;
執行結果:
正確
 圖片
圖片
發生異常時:

當發生異常時handle方法中的res是沒有值的,tx異常對象為發生異常的異常對象。
2.6 合并異步任務
將兩個異步任務完成后合并處理
CompletableFuture.thenCombine
CompletableFuture<Double> task1 = CompletableFuture.supplyAsync(() -> {
  try {
    TimeUnit.SECONDS.sleep(2) ;
    System.out.println(Thread.currentThread().getName() + ", 任務1執行完成") ;
  } catch (InterruptedException e) {
    e.printStackTrace();
  }
  return 10d ;
}, executor) ;
CompletableFuture<Double> task2 = CompletableFuture.supplyAsync(() -> {
  try {
    TimeUnit.SECONDS.sleep(2) ;
    System.out.println(Thread.currentThread().getName() + ", 任務2執行完成") ;
  } catch (InterruptedException e) {
    e.printStackTrace();
  }
  return 20d ;
}, executor) ;
task1.thenCombine(task2, (t1, t2) -> {
  System.out.println(Thread.currentThread().getName() + ", 合并任務完成") ;
  return t1 + "," + t2 ;
}).whenComplete((res, tx) -> {
  System.out.println("獲取到結果:" + res) ;
  if (tx != null) {
    System.err.println("發生錯誤了:" + tx.getMessage()) ;
  }
  executor.shutdown();
}) ;
執行結果:
 圖片
圖片
2.7 異步任務誰快誰就進入下一步的執行
CompletableFuture.applyToEither
兩個異步任務誰先執行完誰就繼續執行后續的操作。
CompletableFuture<Double> task1 = CompletableFuture.supplyAsync(() -> {
  try {
    TimeUnit.SECONDS.sleep(2) ;
    System.out.println(Thread.currentThread().getName() + ", 任務1執行完成") ;
  } catch (InterruptedException e) {
    e.printStackTrace();
  }
  return 10d ;
}, executor) ;
CompletableFuture<Double> task2 = CompletableFuture.supplyAsync(() -> {
  try {
    TimeUnit.SECONDS.sleep(2) ;
    System.out.println(Thread.currentThread().getName() + ", 任務2執行完成") ;
  } catch (InterruptedException e) {
    e.printStackTrace();
  }
  return 20d ;
}, executor) ;
task1.applyToEither(task2, res -> {
  return res ;
}).whenComplete((res, tx) -> {
  System.out.println("獲取到結果:" + res) ;
  if (tx != null) {
    System.err.println("發生錯誤了:" + tx.getMessage()) ;
  }
  executor.shutdown();
}) ;
執行結果:
 圖片
圖片
2.8 兩個異步任務都執行完了才繼續執行
只有兩個任務都執行完成了后才會繼續。
CompletableFuture.runAfterBoth
CompletableFuture<Double> task1 = CompletableFuture.supplyAsync(() -> {
  try {
    TimeUnit.SECONDS.sleep(2) ;
    System.out.println(Thread.currentThread().getName() + ", 任務1執行完成") ;
  } catch (InterruptedException e) {
    e.printStackTrace();
  }
  return 10d ;
}, executor) ;
CompletableFuture<Double> task2 = CompletableFuture.supplyAsync(() -> {
  try {
    TimeUnit.SECONDS.sleep(2) ;
    System.out.println(Thread.currentThread().getName() + ", 任務2執行完成") ;
  } catch (InterruptedException e) {
    e.printStackTrace();
  }
  return 20d ;
}, executor) ;
task1.runAfterBoth(task2, () -> {
  System.out.println("任務都執行完成了...") ;
}).whenComplete((res, tx) -> {
  System.out.println("獲取到結果:" + res) ;
  if (tx != null) {
    System.err.println("發生錯誤了:" + tx.getMessage()) ;
  }
  executor.shutdown();
}) ;
執行結果:
 圖片
圖片
2.9 任意一個任務執行完成就算完成
CompletableFuture.anyOf
CompletableFuture<String> task1 = CompletableFuture.supplyAsync(() -> {
  sleep(1000) ;
  System.out.println("我是任務1") ;
  return "Task1" ;
}, executor) ;


CompletableFuture<String> task2 = CompletableFuture.supplyAsync(() -> {
  sleep(3000) ;
  System.out.println("我是任務2") ;
  System.out.println(1 / 0) ;
  return "Task2" ;
}, executor) ;
// 任意一個任務執行完成就算完成
// 當任務執行發生異常后,th才不會為null
CompletableFuture.anyOf(task1, task2).whenCompleteAsync((v, th) -> {
  System.out.println("v = " + v) ;
  System.out.println("th = " + th) ;
}, executor) ;
執行結果:
 圖片
圖片
2.10 接收上一個任務的執行結果
CompletableFuture.supplyAsync(() -> {
  sleep(2000) ;
  System.out.println("第一個任務執行完成...") ;
  // System.out.println(1 / 0) ;
  return new Random().nextInt(10000) ;
}, executor).thenAcceptAsync(res -> { // 接收上一個任務的執行結果
  System.out.println("任務執行結果:" + res) ;
}, executor) ;
執行結果:
 圖片
圖片
以上是本篇文章的全部內容,希望對你有幫助。