不一樣的SVG!SVG在 CSS 中的應用

介紹一些你可能沒用過的SVG小技巧。
在平時開發中,很多時候都會用到SVG。大部分情況我們都不必關注SVG里面到底是什么,直接當成圖片資源引入就行,比如常見的圖標資源。

我們可以通過多種方式使用這個特殊的圖片。
<img src="a.svg">.icon{
background: url("a.svg")
}甚至直接放到HTML中。
<div>
  <svg>
  	...
  </svg>
</div>
這些都沒什么問題,但有時候,我們需要的是可以自適應尺寸的,比如像這樣的漸變邊框,尺寸會隨著文本內容的變化而變化,而不是固定尺寸,如下:

或者是這樣的虛線漸變邊框。

這樣的該如何用 SVG 動態實現呢,一起看看吧。
一、SVG導出的局限性
SVG通常不是手寫的(能手寫任意路徑的都是大神),幾乎都是設計師借助軟件繪制生成的,比如設計都很喜歡的Figma(對前端非常友好,可以嘗試一下)。
比如前面提到的漸變邊框,在Figma中就是這樣。

對于設計師來說,漸變邊框很容易,只需要選擇邊框類型就行了。

對于 CSS 來說,這還算一個比較麻煩的事,通常我們需要額外嵌套一層漸變背景,通過遮蓋或者mask裁切的方式實現,有興趣的可以嘗試一下,這里暫不展開。
那么,這個設計可以直接通過導出SVG實現嗎?
先試試,Figma中可以直接將這個邊框復制成SVG格式。

下面是這段復制出來的SVG代碼(大概還是能看得懂一些的...)。
<svg width="41" height="25" viewBox="0 0 41 25" fill="none" xmlns="http://www.w3.org/2000/svg">
  <rect x="1" y="1" width="39" height="23" rx="4" stroke="url(#paint0_linear_1_2)" stroke-linecap="round"/>
  <defs>
  <linearGradient id="paint0_linear_1_2" x1="0" y1="0" x2="1" y2="0">
  	<stop stop-color="#FFD75A"/>
  	<stop offset="1" stop-color="#ED424B"/>
  </linearGradient>
  </defs>
</svg>
我們嘗試讓這段SVG尺寸跟隨button的大小,就行這樣。
<style>
  svg{
    position: absolute;
    inset: 0;
  }
</style>
<button>
  CSS
  <svg>...</svg>
</button>
在內容不定的情況下,就變成了這樣。

很顯然不行,因為生成的SVG寬高是固定的,沒法跟隨文本內容自適應尺寸。
既然 SVG很擅長漸變邊框,而 CSS很擅長自適應,那么,有沒有取長補短的辦法呢?
當然也是有的!不過需要“改造”一下,接著往下看。
二、SVG 自適應尺寸
首先我們把上面的那段SVG拿過來。
<svg width="41" height="25" viewBox="0 0 41 25" fill="none" xmlns="http://www.w3.org/2000/svg">
  <rect x="1" y="1" width="39" height="23" rx="4" stroke="url(#paint0_linear_1_2)" stroke-linecap="round"/>
  <defs>
  <linearGradient id="paint0_linear_1_2" x1="0" y1="0" x2="1" y2="0">
  	<stop stop-color="#FFD75A"/>
  	<stop offset="1" stop-color="#ED424B"/>
  </linearGradient>
  </defs>
</svg>
有沒有發現這里很多數值都固定的?如果想實現自適應,我們就需要將這些值改成百分比形式,注意看這個rect,有個x、y坐標,我們現在寬高都是100%了,所以這里的坐標也要改成0,不然就撐出去了。
<svg width="100%" height="100%" viewBox="0 0 100% 100%" fill="none" xmlns="http://www.w3.org/2000/svg">
  <rect x="0" y="0" width="100%" height="100%" rx="4" stroke="url(#paint0_linear_1_2)" stroke-linecap="round"/>
  <defs>
  <linearGradient id="paint0_linear_1_2" x1="0" y1="0" x2="1" y2="0">
  	<stop stop-color="#FFD75A"/>
  	<stop offset="1" stop-color="#ED424B"/>
  </linearGradient>
  </defs>
</svg>
為了驗證這個 SVG的自適應,我們將這個SVG放在一個div中。
<div style="width: 100px;height: 80px;">
  <svg>...</svg>
</div>

<div style="width: 200px;height: 180px;">
  <svg>...</svg>
</div>
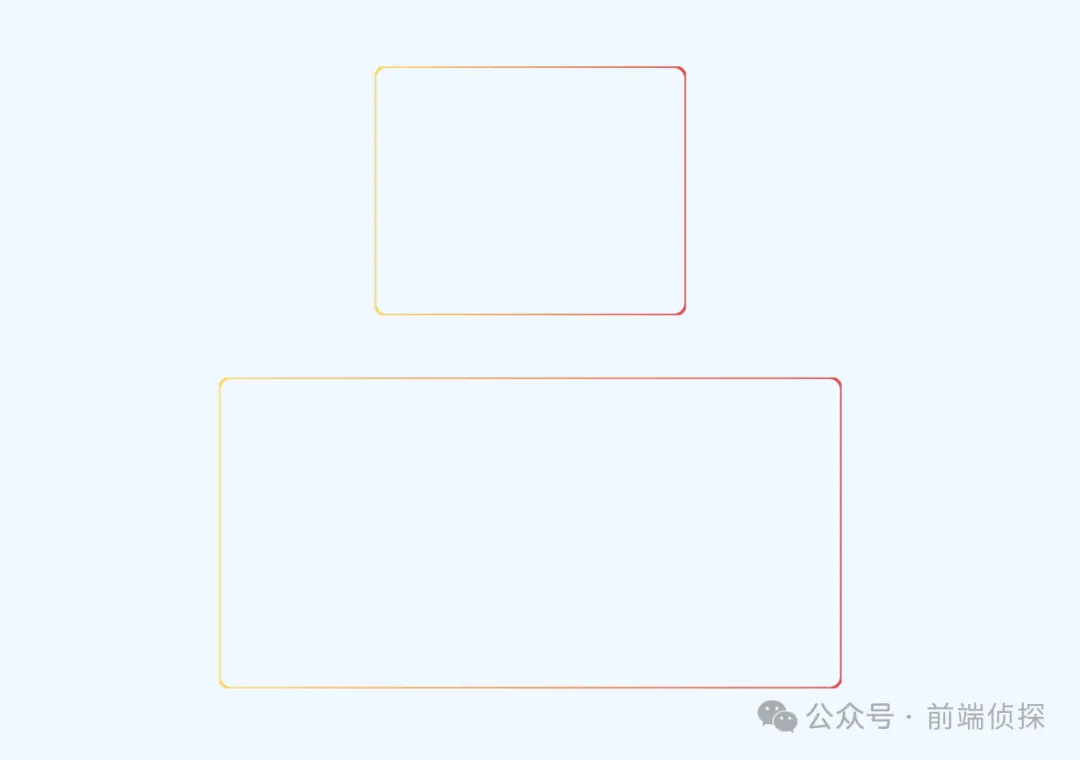
效果如下:

是不是已經自適應了?
不過還是有點問題,仔細觀察,圓角處有些不自然,感覺被裁剪了一樣。

造成這種現象的原因有兩個:
- SVG描邊是居中描邊,并且不可修改。
- SVG默認是超出隱藏的,也就是自帶overflow:hidden。
我們把邊框改大一點就可以很明顯的觀察到描邊是居中的。

由于是居中的,所以在不做修改的情況下,我們看到的其實只有原邊框的一半,利用這個原理我們其實可以實現常說的0.5px邊框。
在這里,我再介紹一種新的方式,那就是利用 CSS calc !
沒錯,在 SVG中也可以使用CSS函數,比如我們這里邊框是4px,那么坐標x、y就應該是2,然后寬高應該是calc(100% - 4px),所以可以很自然的改成這樣。
<div style="width: 100px;height: 80px;">
  <svg width="100%" height="100%">
    <rect x="2" y="2" width="100%" height="100%" style="width: calc(100% - 4px);height: calc(100% - 4px);"  rx="4" stroke="url(#paint0_linear_1_2)" stroke-width="4" stroke-linecap="round"/>
     <defs>
    <linearGradient id="paint0_linear_1_2" x1="0" y1="0" x2="1" y2="0">
      <stop stop-color="#FFD75A"/>
      <stop offset="1" stop-color="#ED424B"/>
    </linearGradient>
    </defs>
  </svg>
</div>
非常完美了,不會有任何裁剪!(大家也可以復制上面這段代碼放在 HTML 中驗證)。

這樣就“輕易”實現了SVG的尺寸自適應。
這里小結一下
- 將SVG的尺寸改為`百分比。
- 由于是居中描邊,所以要修正一下坐標和大小。
除此之外,還能直接加上style樣式,就像這樣。
<svg width="100%" height="100%" viewBox="0 0 100% 100%" fill="none" xmlns="http://www.w3.org/2000/svg">
  <style>
    rect{
      width: calc(100% - 4px);
      height: calc(100% - 4px);
    }
  </style>
  <rect x="2" y="2" width="100%" height="100%" rx="4" stroke="url(#paint0_linear_1_2)" stroke-width="4" stroke-linecap="round"/>
  <defs>
    <linearGradient id="paint0_linear_1_2" x1="0" y1="0" x2="1" y2="0">
      <stop stop-color="#FFD75A"/>
      <stop offset="1" stop-color="#ED424B"/>
    </linearGradient>
  </defs>
</svg>
雖然看著多,但后面作用更大,可以添加更多的 CSS 樣式。
三、SVG 在 HTML 中的應用
其實前面的這段 SVG 可以直接放到 HTML 中用了,比如:
<button>
  <svg width="100%" height="100%" fill="none" xmlns="http://www.w3.org/2000/svg">
    <rect x="2" y="2" width="100%" height="100%" style="width: calc(100% - 4px);height: calc(100% - 4px);" rx="16" stroke-width="2" stroke="url(#paint0_linear_3269_5233)"/>
    <defs>
      <linearGradient id="paint0_linear_3269_5233" x1="0" y1="0" x2="100%" y2="100%" gradientUnits="userSpaceOnUse">
        <stop stop-color="#FFD75A"/>
        <stop offset="1" stop-color="#ED424B"/>
      </linearGradient>
    </defs>
  </svg>
  CSS
</button>
我們需要將這個 SVG撐滿整個button,所以可以直接絕對定位。
button{
  position: relative;
}
button>svg{
  position: absolute;
  inset: 0;
}
這樣就得到了一個自適應尺寸的、帶有漸變邊框的按鈕,效果如下:

你也可以訪問在線鏈接:buton with SVG (juejin.cn)[1]
四、SVG 在 CSS 中的應用
不知道你有沒有這樣的感覺,把一大段 SVG放在 HTML不是特別優雅,總覺得太臃腫了。
如果你有這種感覺,不妨將這段 SVG轉換成內聯CSS代碼。
在這里可以借助張鑫旭老師的這個工具:SVG在線壓縮合并工具[2]

我們將這段SVG粘貼過去,可以得到這樣的一段內聯SVG。
data:image/svg+xml,%3Csvg fill='none' xmlns='http://www.w3.org/2000/svg'%3E%3Crect x='1' y='1' width='100%25' height='100%25' style='width:calc(100%25 - 2px);height:calc(100%25 - 2px)' rx='16' stroke-width='2' stroke='url(%23paint0_linear_3269_5233)'/%3E%3Cdefs%3E%3ClinearGradient id='paint0_linear_3269_5233' y2='100%25' gradientUnits='userSpaceOnUse'%3E%3Cstop stop-color='%23FFD75A'/%3E%3Cstop offset='1' stop-color='%23ED424B'/%3E%3C/linearGradient%3E%3C/defs%3E%3C/svg%3E有了這段內聯SVG,我們可以直接用在background背景上。
button{
  background: url("data:image/svg+xml,%3Csvg fill='none' xmlns='http://www.w3.org/2000/svg'%3E%3Crect x='1' y='1' width='100%25' height='100%25' style='width:calc(100%25 - 2px);height:calc(100%25 - 2px)' rx='16' stroke-width='2' stroke='url(%23paint0_linear_3269_5233)'/%3E%3Cdefs%3E%3ClinearGradient id='paint0_linear_3269_5233' y2='100%25' gradientUnits='userSpaceOnUse'%3E%3Cstop stop-color='%23FFD75A'/%3E%3Cstop offset='1' stop-color='%23ED424B'/%3E%3C/linearGradient%3E%3C/defs%3E%3C/svg%3E")
}
而HTML只需要干凈的button元素就夠了。
<button>CSS</button>
<button>CSS & SVG</button>
神奇的是,即便是轉為內聯了,SVG仍然保持著自適應特性,這樣也能實現同樣的效果,是不是好多了?

你也可以訪問在線鏈接:button with SVG background (juejin.cn)[3]
五、SVG 的獨特魅力
如果說上面的效果 CSS 還能勉強模擬一下,那如果是這樣的虛線呢?

對于 SVG 就非常容易了,只需要設置stroke-dasharray屬性就行,并且可以隨意更改虛線的間隔。
<svg width="100%" height="100%" fill="none" xmlns="http://www.w3.org/2000/svg">
  <rect x="2" y="2" width="100%" height="100%" style="width: calc(100% - 4px);height: calc(100% - 4px);" rx="16" stroke-width="2" stroke="url(#paint0_linear_3269_5233)"  stroke-dasharray="8 4"/>
  <defs>
    <linearGradient id="paint0_linear_3269_5233" x1="0" y1="0" x2="100%" y2="100%" gradientUnits="userSpaceOnUse">
      <stop stop-color="#FFD75A"/>
      <stop offset="1" stop-color="#ED424B"/>
    </linearGradient>
  </defs>
</svg>
還有這種虛線邊緣是圓角的情況,CSS就更加無能為力了。

SVG只需要設置stroke-linecap就行。
<svg width="100%" height="100%" fill="none" xmlns="http://www.w3.org/2000/svg">
  <rect x="2" y="2" width="100%" height="100%" style="width: calc(100% - 4px);height: calc(100% - 4px);" stroke-width="2" rx="16" stroke-linecap="round"  stroke="url(#paint0_linear_3269_5233)"  stroke-dasharray="8 6"/>
  <defs>
    <linearGradient id="paint0_linear_3269_5233" x1="0" y1="0" x2="100%" y2="100%" gradientUnits="userSpaceOnUse">
      <stop stop-color="#FFD75A"/>
      <stop offset="1" stop-color="#ED424B"/>
    </linearGradient>
  </defs>
</svg>
更進一步,SVG還能實現虛線滾動動畫,CSS 應該是實現不了了。

看似復雜,其實只需要改變stroke-dashoffset屬性就行了,我們可以直接在SVG中插入CSS動畫。
<svg width="100%" height="100%" fill="none" xmlns="http://www.w3.org/2000/svg">
  <style>
    .rect{
      width: calc(100% - 4px);
      height: calc(100% - 4px);
      animation: move .3s infinite linear;
    }
    @keyframes move {
      0% { stroke-dashoffset: 0; }
      100% { stroke-dashoffset: 14; }
    }
  </style>
  <rect class="rect" x="2" y="2" width="100%" height="100%" stroke-width="2" rx="16" stroke-linecap="round"  stroke="url(#paint0_linear_3269_5233)"  stroke-dasharray="8 6"/>
  <defs>
    <linearGradient id="paint0_linear_3269_5233" x1="0" y1="0" x2="100%" y2="100%" gradientUnits="userSpaceOnUse">
      <stop stop-color="#FFD75A"/>
      <stop offset="1" stop-color="#ED424B"/>
    </linearGradient>
  </defs>
</svg>
所有情況都可以將 SVG轉為內聯CSS直接用在背景上,極大的保證了HTML的簡潔性。
你也可以訪問在線鏈接:dot border with animation (juejin.cn)[4]
六、總結一下
以上就是本文的全部內容了,主要介紹了如何利用 SVG和CSS各種的優勢來實現更加靈活的布局,下面總結一下:
- 設計軟件導出的SVG都是固定尺寸的,不能自適應尺寸。
- SVG很擅長漸變邊框,而CSS很擅長自適應尺寸,得想辦法取長補短。
- SVG部分屬性支持百分比類型,可以實現尺寸自適應。
- SVG描邊是居中描邊,并且不可修改,所以需要調整圓角矩形的坐標的大小。
- SVG中也支持 CSS部分特性,比如calc計算函數。
- SVG還支持內嵌style標簽,直接插入CSS代碼。
- 可以將SVG轉為內聯CSS代碼,在支持SVG特性的同時極大的保證了HTML的整潔。
- 借助SVG可以很輕松的實現漸變虛線邊框。
- SVG中還支持CSS動畫,可以實現虛線滾動動畫。
你可能已經發現SVG并不是非常孤立的一門語言,現在還能和 CSS、HTML聯動起來,充分發揮各自的優勢,這樣才能事半功倍 。
[1]buton with SVG (juejin.cn): https://code.juejin.cn/pen/7341373491785236532。
[2]SVG在線壓縮合并工具: https://www.zhangxinxu.com/sp/svgo/。
[3]button with SVG background (juejin.cn): https://code.juejin.cn/pen/7341378448348643379。
[4]dot border with animation (juejin.cn): https://code.juejin.cn/pen/7341382517888876582。


