在Android系統中,一個Activity的Window創建和添加過程
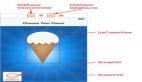
在Android系統中,一個Activity通常就表示一個頁面,這個頁面實際是由Window來管理的,每個Activity都對應著一個Window。Window是一個抽象類,具體實現類是PhoneWindow,對View進行管理。確切的來講是,PhoneWindow包含一個DecorView類型的成員,代表這個Window的頂層View,是一個FrameLayout。DecorView的布局結構包含兩部分:標題欄(title)和內容欄(content)。根據設置的主題不同,這兩部分也會有不同的呈現。但內容欄是一定存在的,并且id是固定的android.R.id.content。
Window的創建過程
Window的創建過程是一個涉及多個層次和組件的復雜過程。
- 當啟動一個Activity或系統通過Intent觸發一個Activity時,這個Activity的生命周期開始。
- onCreate()方法被調用,這是Activity生命周期中的一個重要回調。
- 在onCreate()方法中,通常會調用setContentView()來設置Activity的布局。
- setContentView()方法會觸發Window對象的創建。在Android中,每個Activity都與一個Window對象相關聯。
- Window對象通常是一個PhoneWindow的實例,用于處理與窗口相關的各種功能。
Activity啟動過程在ActivityThread的performLaunchActivity方法,會調用Activity的attach方法。與Activity相關聯的Window對象就是在attach方法中創建的。
final void attach(Context context, ActivityThread aThread,
        Instrumentation instr, IBinder token, int ident,
        Application application, Intent intent, ActivityInfo info,
        CharSequence title, Activity parent, String id,
        NonConfigurationInstances lastNonConfigurationInstances,
        Configuration config, String referrer, IVoiceInteractor voiceInteractor,
        Window window, ActivityConfigCallback activityConfigCallback, IBinder assistToken) {
    attachBaseContext(context);
    ...
    mWindow = new PhoneWindow(this, window, activityConfigCallback);
    mWindow.setWindowControllerCallback(this);
    mWindow.setCallback(this);
    mWindow.setOnWindowDismissedCallback(this);
    mWindow.getLayoutInflater().setPrivateFactory(this);
    if (info.softInputMode != WindowManager.LayoutParams.SOFT_INPUT_STATE_UNSPECIFIED) {
        mWindow.setSoftInputMode(info.softInputMode);
    }
    if (info.uiOptions != 0) {
        mWindow.setUiOptions(info.uiOptions);
    }
    ...
    mWindow.setWindowManager(
            (WindowManager)context.getSystemService(Context.WINDOW_SERVICE),
            mToken, mComponent.flattenToString(),
            (info.flags & ActivityInfo.FLAG_HARDWARE_ACCELERATED) != 0);
     ...

    mWindow.setColorMode(info.colorMode);
}
在attach方法中創建了一個PhoneWindow對象,并設置回調接口Callback和WindowManager。由于Activity類實現了Window.Callback接口,當Window接收到相關的事件觸發時就會調用Activity的相應方法。Callback接口中的方法很多,有幾個是我們比較常見的,比如dispatchTouchEvent、onAttachedToWindow、onDetachedFromWindow等。
Window的添加過程
- 與Window對象關聯的是一個DecorView。DecorView是一個特殊的ViewGroup,包含了窗口的標題欄(如果有的話)和主要內容區域。
- DecorView的創建是在Window的創建過程中自動完成的,并且與Window對象緊密相關。
- 通過setContentView()方法加載的布局文件(通常是XML文件)會被解析并轉換為相應的View對象。
- 這些View對象被添加到DecorView的內容區域中,形成一個View樹。
- 繪制的結果被渲染到屏幕上,就能看到Activity的界面了。
ActivityThread的performLaunchActivity方法:
private Activity performLaunchActivity(ActivityClientRecord r, Intent customIntent) {
        ...
        activity.attach(appContext, this, getInstrumentation(), r.token,
                        r.ident, app, r.intent, r.activityInfo, title, r.parent,
                        r.embeddedID, r.lastNonConfigurationInstances, config,
                        r.referrer, r.voiceInteractor, window, r.configCallback);
        ...
        if (r.isPersistable()) {
                    mInstrumentation.callActivityOnCreate(activity, r.state, r.persistentState);
                } else {
                    mInstrumentation.callActivityOnCreate(activity, r.state);
                }
}
在Activity的attach方法返回后,程序會調用mInstrumentation.callActivityOnCreate方法,而這個方法最終會觸發Activity的onCreate回調。而在onCreate中,會調用setContentView方法,開始Activity的Window添加過程。
public void setContentView(@LayoutRes int layoutResID) {
    getWindow().setContentView(layoutResID);
    initWindowDecorActionBar();
}
Activity的setContentView方法內部調用的mWindow的setContentView方法,這個mWindow對象就是在attach方法中創建的PhoneWindow對象。
public void setContentView(int layoutResID) {
    if (mContentParent == null) {
        installDecor();
    } else if (!hasFeature(FEATURE_CONTENT_TRANSITIONS)) {
        mContentParent.removeAllViews();
    }


    if (hasFeature(FEATURE_CONTENT_TRANSITIONS)) {
        final Scene newScene = Scene.getSceneForLayout(mContentParent, layoutResID,
                getContext());
        transitionTo(newScene);
    } else {
        mLayoutInflater.inflate(layoutResID, mContentParent);
    }
    mContentParent.requestApplyInsets();
    final Callback cb = getCallback();
    if (cb != null && !isDestroyed()) {
        cb.onContentChanged();
    }
    mContentParentExplicitlySet = true;
}
PhoneWindow的setContentView中,首先判斷mContentParent是否存在,否則調用installDecor方法。這個mContentParent指的就是DecorView的內容欄。它的賦值就只有一個地方,就是在installDecor方法中。
private void installDecor() {
    mForceDecorInstall = false;
    if (mDecor == null) {
        mDecor = generateDecor(-1);
        mDecor.setDescendantFocusability(ViewGroup.FOCUS_AFTER_DESCENDANTS);
        mDecor.setIsRootNamespace(true);
        if (!mInvalidatePanelMenuPosted && mInvalidatePanelMenuFeatures != 0) {
            mDecor.postOnAnimation(mInvalidatePanelMenuRunnable);
        }
    } else {
        mDecor.setWindow(this);
    }
    if (mContentParent == null) {
        mContentParent = generateLayout(mDecor);
    ...
}
如果mDecor為null,就先調用generateDecor方法創建DecorView。
protected DecorView generateDecor(int featureId) {
    ...
    return new DecorView(context, featureId, this, getAttributes());
}
DecorView對象創建之后,再判斷mContentParent對象是否存在,不存在調用generateLayout方法。
protected ViewGroup generateLayout(DecorView decor) {
    ...
    ViewGroup contentParent = (ViewGroup)findViewById(ID_ANDROID_CONTENT);
    ...
    return contentParent;
}
generateLayout會返回一個ViewGroup對象contentParent,ID_ANDROID_CONTENT就是com.android.internal.R.id.content。
最后調用mLayoutInflater.inflate(layoutResID, mContentParent)方法,將Activity的布局視圖添加到mContentParent中,回調Activity的onContentChanged方法通知Activity視圖已經發生改變。
這個時候,Activity的視圖布局還沒有顯示出來,DecorView還沒有被WindowManager正式添加到窗口中。
在Activity執行onResume方法之后視圖才能完全顯示,并和用戶正常交互,onResume方法是在ActivityThread的handleLaunchActivity方法中回調。
private void handleLaunchActivity(ActivityClientRecord r, Intent customIntent, String reason) {
    ...
    Activity a = performLaunchActivity(r, customIntent);
    if (a != null) {
    r.createdConfig = new Configuration(mConfiguration);
    reportSizeConfigurations(r);
    Bundle oldState = r.state;
    handleResumeActivity(r.token, false, r.isForward,
            !r.activity.mFinished && !r.startsNotResumed, r.lastProcessedSeq, reason);
    ...
}
執行完performLaunchActivity方法返回一個Activity的實例,接下來判斷如果創建的Activity實例不為null,就會執行handleResumeActivity方法。
final void handleResumeActivity(IBinder token,
        boolean clearHide, boolean isForward, boolean reallyResume, int seq, String reason) {
    ...
    r = performResumeActivity(token, clearHide, reason);
    if (r != null) {
        final Activity a = r.activity;
        ...
        if (r.activity.mVisibleFromClient) {
            r.activity.makeVisible();
        }
    ...
}
在handleResumeActivity方法中,會調用performResumeActivity方法,經過層層調用最終會回調Activity的onResume方法。
handleResumeActivity中,在performResumeActivity方法執行之后,會調用Activity的makeVisible方法。
void makeVisible() {
    if (!mWindowAdded) {
        ViewManager wm = getWindowManager();
        wm.addView(mDecor, getWindow().getAttributes());
        mWindowAdded = true;
    }
    mDecor.setVisibility(View.VISIBLE);
}
在makeVisible方法中,會調用WindowManager的addView方法,將DecorView正式添加到窗口中,同時DecorView設置為可見。
@Override
public void addView(@NonNull View view, @NonNull ViewGroup.LayoutParams params) {
    applyDefaultToken(params);
    mGlobal.addView(view, params, mContext.getDisplay(), mParentWindow);
}
在WindowManagerImpl的addView方法內部,調用的是WindowManagerGlobal的addView方法。WindowManagerImpl通過橋接模式,將功能實現委托給了WindowManagerGlobal。WindowManagerGlobal是一個單例,說明一個進程中只有一個WindowManagerGlobal實例。每一個Window都會有一個相關聯的WindowManagerImpl實例。
public void addView(View view, ViewGroup.LayoutParams params,
        Display display, Window parentWindow) {
    if (view == null) {
        throw new IllegalArgumentException("view must not be null");
    }
    if (display == null) {
        throw new IllegalArgumentException("display must not be null");
    }
    if (!(params instanceof WindowManager.LayoutParams)) {
        throw new IllegalArgumentException("Params must be WindowManager.LayoutParams");
    }
    final WindowManager.LayoutParams wparams = (WindowManager.LayoutParams) params;
    if (parentWindow != null) {
        parentWindow.adjustLayoutParamsForSubWindow(wparams);
    } else {
        final Context context = view.getContext();
        if (context != null
                && (context.getApplicationInfo().flags
                        & ApplicationInfo.FLAG_HARDWARE_ACCELERATED) != 0) {
            wparams.flags |= WindowManager.LayoutParams.FLAG_HARDWARE_ACCELERATED;
        }
    }
    ViewRootImpl root;
    View panelParentView = null;
    ...
        int index = findViewLocked(view, false);
        if (index >= 0) {
            if (mDyingViews.contains(view)) {
                // Don't wait for MSG_DIE to make it's way through root's queue.
                mRoots.get(index).doDie();
            } else {
                throw new IllegalStateException("View " + view
                        + " has already been added to the window manager.");
            }
            // The previous removeView() had not completed executing. Now it has.
        }
        if (wparams.type >= WindowManager.LayoutParams.FIRST_SUB_WINDOW &&
                wparams.type <= WindowManager.LayoutParams.LAST_SUB_WINDOW) {
            final int count = mViews.size();
            for (int i = 0; i < count; i++) {
                if (mRoots.get(i).mWindow.asBinder() == wparams.token) {
                    panelParentView = mViews.get(i);
                }
            }
        }
        root = new ViewRootImpl(view.getContext(), display);
        view.setLayoutParams(wparams);
        mViews.add(view);
        mRoots.add(root);
        mParams.add(wparams);
        try {
            root.setView(view, wparams, panelParentView);
        } catch (RuntimeException e) {
            // BadTokenException or InvalidDisplayException, clean up.
            if (index >= 0) {
                removeViewLocked(index, true);
            }
            throw e;
        }
    }
}
WindowManagerGlobal的addView方法主要完成三個步驟:
- 檢查參數是否合法,如果是子Window還需要調整一些布局參數
- 創建ViewRootImpl,并將傳進來的View添加到mViews列表里
- 通過ViewRootImpl來更新界面并完成Window的添加過程。
最終調用了root.setView(view, wparams, panelParentView)方法。
public void setView(View view, WindowManager.LayoutParams attrs, View panelParentView) {
    ...
    requestLayout();
    ...
    try {
    mOrigWindowType = mWindowAttributes.type;
    mAttachInfo.mRecomputeGlobalAttributes = true;
    collectViewAttributes();
    res = mWindowSession.addToDisplay(mWindow, mSeq, mWindowAttributes,
            getHostVisibility(), mDisplay.getDisplayId(),
            mAttachInfo.mContentInsets, mAttachInfo.mStableInsets,
            mAttachInfo.mOutsets, mInputChannel);
    ...
}
View樹被構建完成,系統會遍歷這個樹,對每個View進行測量和布局,調用requestLayout方法會觸發View層級的繪制遍歷,requestLayout方法內部會調用scheduleTraversals方法。scheduleTraversals方法實際就是View繪制過程的入口。
然后會調用mWindowSession對象的addToDisplay方法,mWindowSession的類型是IWindowSession,是一個Binder對象,用于進程間通信,IWindowSession是Client端的代理。Server端實現是Session。代碼都是運行在Activity所在的app進程,Session的addToDisplay方法則是運行在WMS所在的SystemServer進程中。
 圖片
圖片
@Override
public int addToDisplay(IWindow window, int seq, WindowManager.LayoutParams attrs,
        int viewVisibility, int displayId, Rect outContentInsets, Rect outStableInsets,
        Rect outOutsets, InputChannel outInputChannel) {
    return mService.addWindow(this, window, seq, attrs, viewVisibility, displayId,
            outContentInsets, outStableInsets, outOutsets, outInputChannel);
}
addToDisplay方法內部調用了mService的addWindow方法,并將Session對象本身作為第一個參數傳進去。mService就是WMS的實例,每一個app進程都會對應一個Session對象用來表示app進程與WMS的通信渠道。WMS會用ArrayList來存放這些Session對象。WMS會為這個要添加的窗口分配Surface,并確定窗口的顯示次序,真正負責顯示界面視圖的是畫布Surface而不是窗口本身。WMS會將所管理的Surface交由SurfaceFlinger處理,SurfaceFlinger會將這些Surface混合并繪制并最終呈現到屏幕上。