Thanos監控系統實戰部署
Thanos 是一個基于 Prometheus 實現的監控方案,其主要設計目的是解決原生 Prometheus 上的痛點,并且做進一步的提升,主要的特性有:全局查詢,高可用,動態拓展,長期存儲。
下圖是 Thanos 官方的架構圖:
 圖片
圖片
Thanos組件
Thanos是一組組件,可以組合成一個具有無限存儲容量的高可用指標系統,Thanos 主要由如下幾個特定功能的組件組成:
- 邊車組件(Sidecar):連接 Prometheus,并把 Prometheus 暴露給查詢網關(Querier/Query),以供實時查詢,并且可以上傳 Prometheus 數據給云存儲,以供長期保存
- 查詢網關(Querier/Query):實現了 Prometheus API,與匯集底層組件(如邊車組件 Sidecar,或是存儲網關 Store Gateway)的數據
- 存儲網關(Store Gateway):將云存儲中的數據內容暴露出來
- 壓縮器(Compactor):將云存儲中的數據進行壓縮和下采樣
- 接收器(Receiver):從 Prometheus 的 remote-write WAL(Prometheus 遠程預寫式日志)獲取數據,暴露出去或者上傳到云存儲
- 規則組件(Ruler):針對監控數據進行評估和報警
- Bucket:主要用于展示對象存儲中歷史數據的存儲情況,查看每個指標源中數據塊的壓縮級別,解析度,存儲時段和時間長度等信息。
讀取指標的流程
- 首先客戶端通過 query API 向 query 發起查詢,query 將請求轉換成 StoreAPI 發送到其他的 query、sidecar、rule 和 store 上。
- sidecar 接收到來自于 query 發起的查詢請求后將其轉換成 query API 請求,發送給其綁定的 Prometheus,由Prometheus 從本地讀取數據并響應,返回短期的本地采集和評估數據。
- rule 接收到來自于 query 發起的查詢請求后直接從本地讀取數據并響應,返回短期的本地評估數據。
- store 接收到來自于 query 發起的查詢請求后首先從對象存儲桶中遍歷數據塊的 meta.json,根據其中記錄的時間范圍和標簽先進行一次過濾。接下來從對象存儲桶中讀取數據塊的 index 和 chunks 進行查詢,部分查詢頻率較高的index 會被緩存下來,下次查詢使用到時可以直接讀取。最終返回長期的歷史采集和評估指標。
對于發送報警的流程如下所示:
- Prometheus 根據自身配置的 alerting 規則定期地對自身采集的指標進行評估,當告警條件滿足的情況下發起告警到 Alertmanager 上。
- rule 根據自身配置的 alerting 規則定期的向 query 發起查詢請求獲取評估所需的指標,當告警條件滿足的情況下發起告警到 Alertmanager 上。
- Alertmanager 接收到來自于 Prometheus 和 rule 的告警消息后進行分組合并后發出告警通知。
特性(優勢)
Thanos 相比起原生的 Prometheus 具有以下的一些優勢:
- 統一查詢入口——以 Query 作為統一的查詢入口,其自身實現了 Prometheus 的查詢接口和StoreAPI,可為其他的 Query 提供查詢服務,在查詢時會從每個 Prometheus 實例的 Sidecar 和 Store Gateway 獲取到指標數據。
- 查詢去重——每個數據塊都會帶有特定的集群標簽, Query 在做查詢時會去除集群標簽,將指標名稱和標簽一致的序列根據時間排序合并。雖然指標數據來自不同的采集源,但是只會響應一份結果而不是多份重復的結果。
- 高空間利用率——每個 Prometheus 本身不存儲長時間的數據,Sidecar 會將 Prometheus 已經持久化的數據塊上傳到對象存儲中。Compactor 會定時將遠端對象存儲中的長期數據進行壓縮,并且根據采樣時長做清理,節約存儲空間。
- 高可用——Query 是無狀態服務,天生支持水平拓展和高可用。Store、Rule 和 Sidecar 是有狀態服務,在多副本部署的情況下也支持高可用,不過會產生數據冗余,需要犧牲存儲空間。
- 存儲長期數據——Prometheus 實例的 Sidecar 會將本地數據上傳到遠端對象存儲中作為長期數據
- 橫向拓展——當 Prometheus 的指標采集壓力過大時,可以創建新的 Prometheus 實例,將scrape job 拆分給多個 Prometheus,Querier 從多個 Prometheus 查詢匯聚結果,降低單個 Prometheus 的壓力
- 跨集群查詢——需要合并多個集群的查詢結果時,僅需要在每個集群的 Querier 之上再添加一層 Querier 即可,這樣的層層嵌套,可以使得集群規模無限制拓展。
對象存儲
一般來說, 我們將存儲分為文件存儲, 塊存儲和對象存儲.
- 文件存儲: 一般都是POSIX協議的,比如我們的操作系統上的XFS,EXT4
- 塊存儲: 一般都是有虛擬化層實現的,有可能是kernel自帶的模塊,如AWS的EBS
- 對象存儲: 對象存儲通常向外提供API接口,系統通過網絡向對象存儲的接口傳輸數據.公有云的代表,AWS的s3,私有云的就是MinIO,案例中我也將用MinIO來作為存儲.
部署案例
在了解了Thanos的架構和組件服務之后,下面將進行實戰配置安裝。準備4臺虛擬機,配置如下:

部署Promethues
node3, node4 執行
useradd -s /sbin/nologin prometheus
mkdir -p /app/src
cd /app/src
wget https://github.com/prometheus/prometheus/releases/download/v2.36.1/prometheus-2.36.1.linux-amd64.tar.gz
tar -xvf prometheus-2.36.1.linux-amd64.tar.gz
cd prometheus-2.36.1.linux-amd64
mv prometheus promtool /usr/local/sbin
mkdir /var/lib/prometheus
mv consoles console_libraries /var/lib/prometheus/
mkdir /etc/prometheus
mv prometheus.yml /etc/prometheus/
chown -R prometheus:prometheus /usr/local/sbin/prometheus /usr/local/sbin/promtool /etc/prometheus/ /app/prometheus/ /var/lib/prometheus
修改配置文件
vim /etc/prometheus/prometheus.yml
# my global config
global:
  scrape_interval: 15s # Set the scrape interval to every 15 seconds. Default is every 1 minute.
  evaluation_interval: 15s # Evaluate rules every 15 seconds. The default is every 1 minute.
  # scrape_timeout is set to the global default (10s).
  external_labels:
    replica: A


# Alertmanager configuration
alerting:
  alertmanagers:
    - static_configs:
        - targets:
          # - alertmanager:9093


# Load rules once and periodically evaluate them according to the global 'evaluation_interval'.
rule_files:
  # - "first_rules.yml"
  # - "second_rules.yml"


# A scrape configuration containing exactly one endpoint to scrape:
# Here it's Prometheus itself.
scrape_configs:
  # The job name is added as a label `job=<job_name>` to any timeseries scraped from this config.
  - job_name: "prometheus"


    # metrics_path defaults to '/metrics'
    # scheme defaults to 'http'.


    static_configs:
      - targets: ["localhost:9090"]


  - job_name: "node_exporter"
    static_configs:
      - targets: ["192.168.100.30:9100","192.168.100.40:9100","192.168.100.50:9100","192.168.100.60:9100"]
system文件
vim /etc/systemd/system/prometheus.service
[Unit]
Descriptinotallow=prometheus
Documentatinotallow=https://prometheus.io/
After=network.target
[Service]
Type=simple
User=prometheus
ExecStartPre=/usr/local/sbin/promtool check config /etc/prometheus/prometheus.yml
ExecStart=/usr/local/sbin/prometheus \
          --config.file=/etc/prometheus/prometheus.yml \
          --web.listen-address=0.0.0.0:9090 \
          --web.enable-lifecycle \
          --web.enable-admin-api \
          --web.console.templates=/var/lib/prometheus/console \
          --web.console.libraries=/var/lib/prometheus/console_libraries \
          --storage.tsdb.path=/app/prometheus/ \
          --storage.tsdb.min-block-duratinotallow=5m \
          --storage.tsdb.max-block-duratinotallow=5m \
          --storage.tsdb.retention.time=30d \
          --log.level=info
ExecReload=/bin/curl -X POST http://127.0.0.1:9090/-/reload
TimeoutStopSec=20s
Restart=always
LimitNOFILE=20480000
[Install]
WantedBy=multi-user.target
--storage.tsdb.min-block-duratinotallow=5m--storage.tsdb.max-block-duratinotallow=5m 默認為2h, 修改為5分鐘, sidecar向store寫入數據,方便查看效果.
Node_exporter 安裝
node1, node2, node3, node4 執行
cd /app/src
wget https://github.com/prometheus/node_exporter/releases/download/v1.3.1/node_exporter-1.3.1.linux-amd64.tar.gz
tar -xvf node_exporter-1.3.1.linux-amd64.tar.gz
cd node_exporter-1.3.1.linux-amd64
mv node_exporter /usr/local/sbin/
創建system文件
vim /usr/lib/systemd/system/node_exporter.service
[Unit]
Descriptinotallow=node_exporter
Documentatinotallow=https://prometheus.io/
After=network.target


[Service]
Type=simple
ExecStart=/usr/local/sbin/node_exporter \
          --collector.systemd
ExecReload=/bin/kill -HUP
TimeoutStopSec=20s
Restart=always


[Install]
WantedBy=multi-user.target
部署 Thanos
Thanos 只需要兩個組件就可以簡單形成一個集群,query和sidecar用來抽象數據層,query 來查詢抽象出來的數據層,提供查詢的接口,
根據Thanos架構圖,不考慮高可用的情況下除了sidecar組件外,query,store,Compactor組件只需部署一份
node1, node3,node4 ,執行
cd /app/src/
wget https://github.com/thanos-io/thanos/releases/download/v0.26.0/thanos-0.26.0.linux-amd64.tar.gz
tar -xvf thanos-0.26.0.linux-amd64.tar.gz
cd thanos-0.26.0.linux-amd64
mv thanos /usr/local/sbin


mkdir /app/thanos
mkdir /app/thanos/compact
mkdir /app/thanos/store
mkdir /app/thanos/ruler


mkdir /etc/thanos
Thanos sidecar
node3,node4執行- systemd 文件
# vim /etc/systemd/system/thanos-sidecar.service
[Unit]
Descriptinotallow=thanos-sidecar
Documentatinotallow=https://thanos.io/
After=network.target
[Service]
Type=simple
ExecStart=/usr/local/sbin/thanos sidecar \
          --tsdb.path=/app/prometheus \
          --prometheus.url=http://localhost:9090 \
          --http-address=0.0.0.0:10901 \
          --grpc-address=0.0.0.0:10902
ExecReload=/bin/kill -HUP
TimeoutStopSec=20s
Restart=always
[Install]
WantedBy=multi-user.target
Thanos query
node1執行
- systemd文件
# vim /etc/systemd/system/thanos-query.service
[Unit]
Descriptinotallow=thanos-query
Documentatinotallow=https://thanos.io/
After=network.target
[Service]
Type=simple
ExecStart=/usr/local/sbin/thanos query \
          --http-address=0.0.0.0:10903 \
          --grpc-address=0.0.0.0:10904 \
          --store=192.168.100.50:10902 \
          --store=192.168.100.60:10902 \
          --query.timeout=10m \
          --query.max-cnotallow=200 \
          --query.max-concurrent-select=40 \
          --query.replica-label=replica
ExecReload=/bin/kill -HUP
TimeoutStopSec=20s
Restart=always
LimitNOFILE=20480000
[Install]
WantedBy=multi-user.targe
部署MinIO
node1,node2,node3,node4執行Minio存儲架構
- 單主機,單硬盤模式: Minio只在一臺服務器上搭建服務,且數據都存在單塊磁盤上,該模式存在單點風險
- 單主機,多硬盤模式: Minio在一臺服務器上搭建服務,但數據分散在多塊(大于4塊)磁盤上,提供了數據上的安全保障 (類似于容器模式)
- 多主機,多硬盤模式(分布式): 該模式是Minio服務最常用的架構,通過共享一個access_key和secret_key,在多臺(2-32)服務器上搭建服務,且數據分散在多塊(大于4塊,無上限)磁盤上,提供了較為強大的數據冗余機制
準備工作
這里我們采用分布式存儲,在四臺服務器上進行安裝.
注意: data目錄不可以和root目錄在同一磁盤,需要另外添加磁盤。錯誤信息 :ispart of root disk, will not be used (*errors.errorString)
wget http://dl.minio.org.cn/server/minio/release/linux-amd64/minio
mv minio /usr/local/sbin
chmod +x /usr/local/sbin/minio
mkdir -p /app/minio/data
mkdir /etc/minio
mkdir /app/minio/run
MinIO配置文件
- 用戶信息 vim /etc/minio/minio.pw
MINIO_ROOT_USER=root
MINIO_ROOT_PASSWORD=Password
這里指定了4臺minio的地址,通過統一的minio.pw和啟動文件,可以讓4臺minio做到數據互通。minio會依次啟動,順序為參數的先后順序
- systemd文件vim /etc/systemd/system/minio.service
[Unit]
Descriptinotallow=Minio service
Documentatinotallow=https://docs.minio.io/


[Service]
WorkingDirectory=/app/minio/run/
Envirnotallow=/etc/minio/minio.pw
ExecStart=/usr/local/sbin/minio server \
          --config-dir /etc/minio \
          --address :9000 \
          --console-address :9001 \
          http://192.168.100.30:9000/app/minio/data \
          http://192.168.100.40:9000/app/minio/data \
          http://192.168.100.50:9000/app/minio/data \
          http://192.168.100.60:9000/app/minio/data
Restart=on-failure
RestartSec=5
LimitNOFILE=20480000
[Install]
WantedBy=multi-user.target
負載均衡
在node1 配置nginx vim /etc/nginx/conf.d/minio.conf
server {
        listen 9900;
        server_name  192.168.100.30;


location / {
        proxy_pass http://minio;
        proxy_set_header Host $host;
        proxy_set_header X-Real-IP $remote_addr;
        }
}


upstream minio {
        server 192.168.100.30:9000;
        server 192.168.100.40:9000;
        server 192.168.100.50:9000;
        server 192.168.100.60:9000;
}
Thanos Store
node1執行
mkdir -p /app/thanos/store- systemd文件vim /etc/systemd/system/thanos-store.service
[Unit]
Descriptinotallow=thanos-store
Documentatinotallow=https://thanos.io/
After=network.target
[Service]
Type=simple
ExecStart=/usr/local/sbin/thanos store \
          --data-dir=/app/thanos/store \
          --objstore.config-file=/etc/thanos/thanos-minio.yml \
          --http-address=0.0.0.0:10905 \
          --grpc-address=0.0.0.0:10906 \
          --chunk-pool-size=8GB \
          --max-time=30d
ExecReload=/bin/kill -HUP
TimeoutStopSec=20s
Restart=always
LimitNOFILE=20480000
[Install]
WantedBy=multi-user.targe- 配置對象存儲配置文件vim /etc/thanos/thanos-minio.yml
type: S3
config:
  bucket: "thanos"
  endpoint: "192.168.100.30:9000"
  access_key: "root"
  secret_key: "Password"
  insecure: true
  signature_version2: false
  http_config:
    idle_conn_timeout: 5m
    response_header_timeout: 10m
    insecure_skip_verify: true
systemctl start thanos-store
在 node3, node4 ,sidecar的system文件添加
--objstore.config-file=/etc/thanos/thanos-minio.yml \


# cat /etc/systemd/system/thanos-sidecar.service
[Unit]
Descriptinotallow=thanos-sidecar
Documentatinotallow=https://thanos.io/
After=network.target
[Service]
Type=simple
ExecStart=/usr/local/sbin/thanos sidecar \
          --tsdb.path=/app/prometheus \
          --prometheus.url=http://localhost:9090 \
          --objstore.config-file=/etc/thanos/thanos-minio.yml \
          --http-address=0.0.0.0:10901 \
          --grpc-address=0.0.0.0:10902
ExecReload=/bin/kill -HUP
TimeoutStopSec=20s
Restart=always
[Install]
WantedBy=multi-user.target
在 node1 query 的system文件添加store的grpc地址
--store=192.168.100.30:10906 \
[root@node1 ~]# cat /etc/systemd/system/thanos-query.service
[Unit]
Descriptinotallow=thanos-query
Documentatinotallow=https://thanos.io/
After=network.target
[Service]
Type=simple
ExecStart=/usr/local/sbin/thanos query \
--http-address=0.0.0.0:10903 \
--grpc-address=0.0.0.0:10904 \
--query.timeout=10m \
--query.max-cnotallow=200 \
--query.max-concurrent-select=40 \
--store=192.168.100.30:10906 \
--query.replica-label=replica
ExecReload=/bin/kill -HUP
TimeoutStopSec=20s
Restart=always
LimitNOFILE=20480000
[Install]
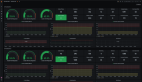
WantedBy=multi-user.targe為了展示對象存儲的效果,我們把node3和node4, sidecar的地址刪除,只查詢store的地址,這樣我們就可以在grafana看到下圖, 可以看到提供的信息并不是實時的,而是store寫入對象存儲的數據, 這只是為了測試store的可用性,實際環境中,數據的寫入默認為2h一次,不符合監控實時性的要求.

Thanos compact
node1執行:
compact的作用是定期把歷史數據存入對象存儲,其實他就像是一個cronjob, 如果發現滿足了條件,就會對對象存儲中的數據進行整理
- 初始化
mkdir /app/thanos/compact- systemd文件vim /etc/systemd/system/thanos-compact.service
[Unit]
Descriptinotallow=Thanos-compact
Documentatinotallow=https://thanos.io/
After=network.target
[Service]
Type=simple
ExecStart=/usr/local/sbin/thanos compact \
          --data-dir=/app/thanos/compact \
          --objstore.config-file=/etc/thanos/thanos-minio.yml \
          --http-address=0.0.0.0:10923 \
          --wait-interval=5m \
          --block-sync-cnotallow=30 \
          --compact.cnotallow=6
ExecReload=/bin/kill -HUP
TimeoutStopSec=20s
Restart=on-failure
[Install]
WantedBy=multi-user.target
Prometheus自動注冊
部署Consul
- node2
創建配置文件 vim /etc/consul/server.json
{
"data_dir": "/app/consul/data",
"log_file": "/app/consul/log/consul.log",
"log_level": "INFO",
"log_rotate_duration": "24h",
"node_name": "node2",
"server": true,
"bootstrap_expect": 1,
"client_addr": "0.0.0.0",
"advertise_addr": "192.168.100.40",
"acl": {
    "enabled": true,
    "default_policy": "deny",
    "down_policy": "extend-cache",
    "enable_token_persistence": true,
    "tokens":{
      "master": "727d2766-ac98-26c5-0f30-47b4f6a5632d"
  }
}
創建守護進程 vim /etc/systemd/system/consul-server.service
[Unit]
Descriptinotallow=Consul service
Documentatinotallow=https://www.consul.io/docs/


[Service]
ExecStart=/usr/local/bin/consul agent -ui -config-dir /etc/consul
KillSignal=SIGINT
Restart=on-failure
RestartSec=5


[Install]
WantedBy=multi-user.target
啟動consul并測試
systemctl start consul-server瀏覽器訪問 8500端口,提示需要登錄

使用 consul acl bootstrap 記錄SecretID 作為token
[root@node2 ~]# consul acl bootstrap
AccessorID:       6036d229-b123-5a0f-ef9f-df2b7efcd410
SecretID:         727d2766-ac98-26c5-0f30-47b4f6a5632d
Description:      Bootstrap Token (Global Management)
Local:            false
Create Time:      2022-09-19 05:21:26.374769398 +0800 CST
Policies:
   00000000-0000-0000-0000-000000000001 - global-management
把token添加到配置文件
vim /etc/consul/server.json
{
"data_dir": "/app/consul/data",
"log_file": "/app/consul/log/consul.log",
"log_level": "INFO",
"log_rotate_duration": "24h",
"node_name": "node2",
"server": true,
"bootstrap_expect": 1,
"client_addr": "0.0.0.0",
"advertise_addr": "192.168.100.40",
"acl": {
    "enabled": true,
    "default_policy": "deny",
    "down_policy": "extend-cache",
    "enable_token_persistence": true,
    "tokens":{
      "master": "727d2766-ac98-26c5-0f30-47b4f6a5632d"
  }
 }
}
重啟consul
github 地址: https://github.com/starsliao/ConsulManager
準備工作
添加鏡像倉庫
yum-``config``-manager--add-repo**https://mirrors.aliyun.com/docker-ce/linux/centos/docker-ce.repo
使用docker-compose來部署ConsulManager
- 下載:wget https://starsl.cn/static/img/docker-compose.yml(倉庫根目錄下docker-compose.yml)
- 編輯:docker-compose.yml,修改3個環境變量:
consul_token:consul的登錄token(上文獲取的,SecretID)
consul_url:consul的URL(http開頭,/v1要保留)
admin_passwd:登錄ConsulManager Web的admin密碼
啟動:docker-compose pull && docker-compose up -d
訪問:http://{IP}:1026,使用配置的ConsulManager admin密碼登錄
添加主機監控
安裝完成后,在平臺新增監控主機的信息
 圖片
圖片
添加完成后,查看consul;
 圖片
圖片
配置prometheus讀取consul信息;
 圖片
圖片
將之前配置好的內容刪除,添加生成的配置信息;
 圖片
圖片
查看query, grafana,顯示注冊完成;
 圖片
圖片
 圖片
圖片
在本文中,我們詳細探討了Thanos監控系統的部署過程,包括系統架構介紹、各個組件的配置和完整的部署案例。Thanos為Prometheus提供了強大的監控解決方案,具備全局查詢、高可用性、動態擴展和長期存儲等特性。借助Thanos,我們能夠高效管理大規模監控數據,并通過豐富的組件和集成功能,構建一個強大而可靠的監控生態系統。我們希望本文能為那些尋求提升監控系統性能和擴展性的用戶提供有價值的指導。隨著技術的不斷進步,Thanos將持續發展,我們期待它在未來帶來更多創新與可能性。