Android單元測試 - Sqlite、SharedPreference、Assets、文件操作 怎么測?
前言
上篇《Android單元測試 - 幾個重要問題》 講解了“何解決Android依賴、隔離Native方法、靜態方法、RxJava異步轉同步”這幾個Presenter單元測試中常見問題。如果讀者你消化得差不多,就接著看本篇吧。
在日常開發中,數據儲存是必不可少的。例如,網絡請求到數據,先存本地,下次打開頁面,先從本地讀取數據顯示,再從服務器請求新數據。既然如此重要,對這塊代碼進行測試,也成為單元測試的重中之重了。
筆者在學會單元測試前,也像大多數人一樣,寫好了sql代碼,運行app,報錯了....檢查代碼,修改,再運行app....這真是效率太低了。有了單元測試做武器后,我寫DAO代碼輕松了不少,不擔心出錯,效率也高。
常用的數據儲存有:sqlite、SharedPreference、Assets、文件。由于這前三種儲取數據方式,都必須依賴android環境,因此要進行單元測試,不能僅僅用junit & mockito了,需要另外的單元測試框架。接下來,筆者介紹如何使用robolectric進行DAO單元測試。
縮寫解釋:DAO (Data Access Object) 數據訪問對象
Robolectric配置
Robolectric官網:http://robolectric.org/
Robolectric配置很簡單的。
build.gradle :
- dependencies {
- testCompile "org.robolectric:robolectric:3.1.2"
- }
然后在測試用例XXTest加上注解:
- @RunWith(RobolectricTestRunner.class)
- @Config(constants = BuildConfig.class)
- public class XXTest {
- }
配置代碼是寫完了。
不過,別以為這樣就完了。Robolectric最麻煩就是下載依賴! 由于我們生活在天朝,下載國外的依賴很慢,筆者即使有了翻墻,效果也一般,可能是https://oss.sonatype.org 服務器比較慢。
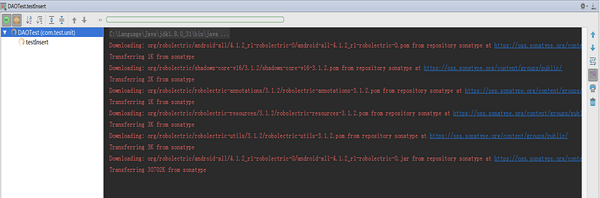
筆者已經下載好了依賴包,讀者們可以到 http://git.oschina.net/kkmike999/Robolectric-Dependencies 下載robolectric 3.1.2的依賴包,按照Readme.md說明操作。
Sqlite
DbHelper:
- public class DbHelper extends SQLiteOpenHelper {
- private static final int DB_VERSION = 1;
- public DbHelper(Context context, String dbName) {
- super(context, dbName, null, DB_VERSION);
- }
- ...
- }
Bean:
- public class Bean {
- int id;
- String name = "";
- public Bean(int id, String name) {
- this.id = id;
- this.name = name;
- }
- }
Bean數據操作類 BeanDAO:
- public class BeanDAO {
- static boolean isTableExist;
- SQLiteDatabase db;
- public BeanDAO() {
- this.db = new DbHelper(App.getContext(), "Bean").getWritableDatabase();
- }
- /**
- * 插入Bean
- */
- public void insert(Bean bean) {
- checkTable();
- ContentValues values = new ContentValues();
- values.put("id", bean.getId());
- values.put("name", bean.getName());
- db.insert("Bean", "", values);
- }
- /**
- * 獲取對應id的Bean
- */
- public Bean get(int id) {
- checkTable();
- Cursor cursor = null;
- try {
- cursor = db.rawQuery("SELECT * FROM Bean", null);
- if (cursor != null && cursor.moveToNext()) {
- String name = cursor.getString(cursor.getColumnIndex("name"));
- return new Bean(id, name);
- }
- } catch (Exception e) {
- e.printStackTrace();
- } finally {
- if (cursor != null) {
- cursor.close();
- }
- cursor = null;
- }
- return null;
- }
- /**
- * 檢查表是否存在,不存在則創建表
- */
- private void checkTable() {
- if (!isTableExist()) {
- db.execSQL("CREATE TABLE IF NOT EXISTS Bean ( id INTEGER PRIMARY KEY, name )");
- }
- }
- private boolean isTableExist() {
- if (isTableExist) {
- return true; // 上次操作已確定表已存在于數據庫,直接返回true
- }
- Cursor cursor = null;
- try {
- String sql = "SELECT COUNT(*) AS c FROM sqlite_master WHERE type ='table' AND name ='Bean' ";
- cursor = db.rawQuery(sql, null);
- if (cursor != null && cursor.moveToNext()) {
- int count = cursor.getInt(0);
- if (count > 0) {
- isTableExist = true; // 記錄Table已創建,下次執行isTableExist()時,直接返回true
- return true;
- }
- }
- } catch (Exception e) {
- e.printStackTrace();
- } finally {
- if (cursor != null) {
- cursor.close();
- }
- cursor = null;
- }
- return false;
- }
- }
以上是你在項目中用到的類,當然數據庫一般開發者都會用第三方庫,例如:greenDAO、ormlite、dbflow、afinal、xutils....這里考慮到代碼演示規范性、通用性,就直接用android提供的SQLiteDatabase。
大家注意到BeanDAO的構造函數:
- public BeanDAO() {
- this.db = new DbHelper(App.getContext(), "Bean").getWritableDatabase();
- }
這種在內部創建對象的方式,不利于單元測試。App是項目本來的Application,但是使用Robolectric往往會指定一個測試專用的Application(命名為RoboApp,配置方法下面會介紹),這么做好處是隔離App的所有依賴。
隔離原Application依賴
項目原本的App:
- public class App extends Application {
- private static Context context;
- @Override
- public void onCreate() {
- super.onCreate();
- context = this;
- // 各種第三方初始化,有很多依賴
- ...
- }
- public static Context getContext() {
- return context;
- }
- }
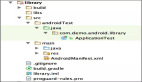
而單元測試使用的RoboApp:
- public class RoboApp extends Application {}
如果用Robolectric單元測試,不配置RoboApp,就會調用原來的App,而App有很多第三方庫依賴,常見的有static{ Library.load() }靜態加載so庫。于是,執行App生命周期時,robolectric就報錯了。
正確配置Application方式,是在單元測試XXTest加上@Config(application = RoboApp.class)。
改進DAO類
- public class BeanDAO {
- SQLiteDatabase db;
- public BeanDAO(SQLiteDatabase db) {
- this.db = db;
- }
- // 可以保留原來的構造函數,只是單元測試不用這個方法而已
- public BeanDAO() {
- this.db = new DbHelper(App.getContext(), "Bean").getWritableDatabase();
- }
單元測試
DAOTest
- @RunWith(RobolectricTestRunner.class)
- @Config(constants = BuildConfig.class, manifest = Config.NONE, sdk = Build.VERSION_CODES.JELLY_BEAN, application = RoboApp.class)
- public class DAOTest {
- BeanDAO dao;
- @Before
- public void setUp() throws Exception {
- // 用隨機數做數據庫名稱,讓每個測試方法,都用不同數據庫,保證數據唯一性
- DbHelper dbHelper = new DbHelper(RuntimeEnvironment.application, new Random().nextInt(1000) + ".db");
- SQLiteDatabase db = dbHelper.getWritableDatabase();
- dao = new BeanDAO(db);
- }
- @Test
- public void testInsertAndGet() throws Exception {
- Bean bean = new Bean(1, "鍵盤男");
- dao.insert(bean);
- Bean retBean = dao.get(1);
- Assert.assertEquals(retBean.getId(), 1);
- Assert.assertEquals(retBean.getName(), "鍵盤男");
- }
- }
DAO單元測試跟Presenter有點不一樣,可以說會更簡單、直觀。Presenter單元測試會用mock去隔離一些依賴,并且模擬返回值,但是sqlite執行是真實的,不能mock的。
正常情況,insert()和get()應該分別測試,但這樣非常麻煩,必然要在測試用例寫sqlite語句,并且對SQLiteDatabase 操作。考慮到數據庫操作的真實性,筆者把insert和get放在同一個測試用例:如果insert()失敗,那么get()必然拿不到數據,testInsertAndGet()失敗;只有insert()和get()代碼都正確,testInsertAndGet()才能通過。
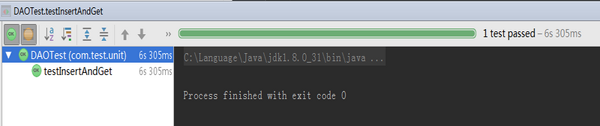
由于用Robolectric,所以單元測試要比直接junit要慢。僅junit跑單元測試,耗時基本在毫秒(ms)級,而robolectric則是秒級(s)。不過怎么說也比跑真機、模擬器的單元測試要快很多。
SharedPreference
其實,SharedPreference道理跟sqlite一樣,也是對每個測試用例創建單獨SharedPreference,然后保存、查找一起測。
ShareDAO:
- public class ShareDAO {
- SharedPreferences sharedPref;
- SharedPreferences.Editor editor;
- public ShareDAO(SharedPreferences sharedPref) {
- this.sharedPref = sharedPref;
- this.editor = sharedPref.edit();
- }
- public ShareDAO() {
- this(App.getContext().getSharedPreferences("myShare", Context.MODE_PRIVATE));
- }
- public void put(String key, String value) {
- editor.putString(key, value);
- editor.apply();
- }
- public String get(String key) {
- return sharedPref.getString(key, "");
- }
- }
單元測試ShareDAOTest
- @RunWith(RobolectricTestRunner.class)
- @Config(constants = BuildConfig.class, manifest = Config.NONE, sdk = Build.VERSION_CODES.JELLY_BEAN, application = RoboApp.class)
- public class ShareDAOTest {
- ShareDAO shareDAO;
- @Before
- public void setUp() throws Exception {
- String name = new Random().nextInt(1000) + ".pref";
- shareDAO = new ShareDAO(RuntimeEnvironment.application.getSharedPreferences(name, Context.MODE_PRIVATE));
- }
- @Test
- public void testPutAndGet() throws Exception {
- shareDAO.put("key01", "stringA");
- String value = shareDAO.get("key01");
- Assert.assertEquals(value, "stringA");
- }
- }
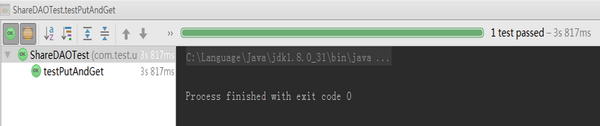
測試通過了。是不是很簡單?
Assets
Robolectric對Assets支持也是相當不錯的,測Assets道理也是跟sqlite、sharePreference相同。
/assets/test.txt:
- success
- public class AssetsReader {
- AssetManager assetManager;
- public AssetsReader(AssetManager assetManager) {
- this.assetManager = assetManager;
- }
- public AssetsReader() {
- assetManager = App.getContext()
- .getAssets();
- }
- public String read(String fileName) {
- try {
- InputStream inputStream = assetManager.open(fileName);
- StringBuilder sb = new StringBuilder();
- byte[] buffer = new byte[1024];
- int hasRead;
- while ((hasRead = inputStream.read(buffer, 0, buffer.length)) > -1) {
- sb.append(new String(buffer, 0, hasRead));
- }
- inputStream.close();
- return sb.toString();
- } catch (IOException e) {
- e.printStackTrace();
- }
- return "";
- }
- }
單元測試AssetsReaderTest:
- @RunWith(RobolectricTestRunner.class)
- @Config(constants = BuildConfig.class, manifest = Config.NONE, sdk = Build.VERSION_CODES.JELLY_BEAN, application = RoboApp.class)
- public class AssetsReaderTest {
- AssetsReader assetsReader;
- @Before
- public void setUp() throws Exception {
- assetsReader = new AssetsReader(RuntimeEnvironment.application.getAssets());
- }
- @Test
- public void testRead() throws Exception {
- String value = assetsReader.read("test.txt");
- Assert.assertEquals(value, "success");
- }
- }
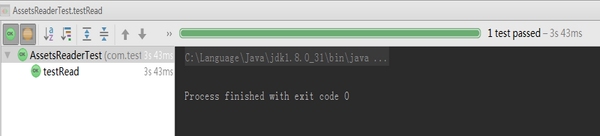
通過了通過了,非常簡單!
文件操作
日常開發中,文件操作相對比較少。由于通常都在真機測試,有時目錄、文件名有誤導致程序出錯,還是挺煩人的。所以,筆者教大家在本地做文件操作單元測試。
Environment.getExternalStorageDirectory()
APP運行時,通過Environment.getExternalStorageDirectory()等方法獲取android儲存目錄,因此,只要我們改變Environment.getExternalStorageDirectory()返回的目錄,就可以在單元測試時,讓jvm寫操作指向本地目錄。
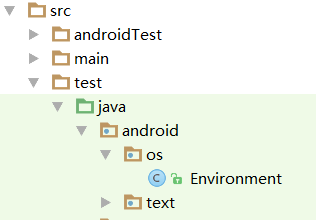
在《Android單元測試 - 幾個重要問題》 介紹過如何解決android.text.TextUtils依賴,那么android.os.Environment也是故伎重演:
在test/java目錄下,創建android/os/Environment.java
- package android.os;
- public class Environment {
- public static File getExternalStorageDirectory() {
- return new File("build");// 返回src/build目錄
- }
- }
Context.getCacheDir()
如果你是用contexnt.getCacheDir()、getFilesDir()等,那么只需要使用RuntimeEnvironment.application就行。
代碼
寫完android.os.Environment,我們離成功只差一小步了。FileDAO:
- public class FileDAO {
- Context context;
- public FileDAO(Context context) {
- this.context = context;
- }
- public void write(String name, String content) {
- File file = new File(getDirectory(), name);
- if (!file.getParentFile().exists()) {
- file.getParentFile().mkdirs();
- }
- try {
- FileWriter fileWriter = new FileWriter(file);
- fileWriter.write(content);
- fileWriter.flush();
- fileWriter.close();
- } catch (IOException e) {
- e.printStackTrace();
- }
- }
- public String read(String name) {
- File file = new File(getDirectory(), name);
- if (!file.exists()) {
- return "";
- }
- try {
- FileReader reader = new FileReader(file);
- StringBuilder sb = new StringBuilder();
- char[] buffer = new char[1024];
- int hasRead;
- while ((hasRead = reader.read(buffer, 0, buffer.length)) > -1) {
- sb.append(new String(buffer, 0, hasRead));
- }
- reader.close();
- return sb.toString();
- } catch (IOException e) {
- e.printStackTrace();
- }
- return "";
- }
- public void delete(String name) {
- File file = new File(getDirectory(), name);
- if (file.exists()) {
- file.delete();
- }
- }
- protected File getDirectory() {
- // return context.getCacheDir();
- return Environment.getExternalStorageDirectory();
- }
- }
FileDAO單元測試
- @RunWith(RobolectricTestRunner.class)
- @Config(constants = BuildConfig.class, manifest = Config.NONE, sdk = Build.VERSION_CODES.JELLY_BEAN, application = RoboApp.class)
- public class FileDAOTest {
- FileDAO fileDAO;
- @Before
- public void setUp() throws Exception {
- fileDAO = new FileDAO(RuntimeEnvironment.application);
- }
- @Test
- public void testWrite() throws Exception {
- String name = "readme.md";
- fileDAO.write(name, "success");
- String content = fileDAO.read(name);
- Assert.assertEquals(content, "success");
- // 一定要刪除測試文件,保留的文件會影響下次單元測試
- fileDAO.delete(name);
- }
- }
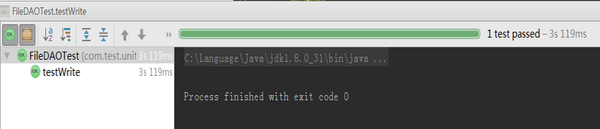
注意,用Environment.getExternalStorageDirectory()是不需要robolectric的,直接junit即可;而context.getCacheDir()需要robolectric。
小技巧
如果你嫌麻煩每次都要寫@RunWith(RobolectricTestRunner.class)&@Config(...),那么可以寫一個基類:
- @RunWith(RobolectricTestRunner.class)
- @Config(constants = BuildConfig.class, manifest = Config.NONE, sdk = Build.VERSION_CODES.JELLY_BEAN, application = RoboApp.class)
- public class RoboCase {
- protected Context getContext() {
- return RuntimeEnvironment.application;
- }
- }
然后,所有使用robolectric的測試用例,直接繼承RoboCase即可。
小結
我想,大家應該感覺到,Sqlite、SharedPreference、Assets、文件操作幾種單元測試,形式都差不多。有這種感覺就對了,舉一反三。
本篇文字描述不多,代碼比例較大,相信讀者能看懂的。
如果讀者對Presenter、DAO單元測試運用自如,那應該跟筆者水平相當了,哈哈哈。下一篇會介紹如何優雅地測試傳參對象,敬請期待!
關于作者
我是鍵盤男。在廣州生活,在創業公司上班,猥瑣文藝碼農。喜歡科學、歷史,玩玩投資,偶爾獨自旅行。