PHP圖片處理庫Grafika詳細教程(1):圖像基本處理
Grafika是一個PHP圖像處理庫,是基于Imagick和GD,可以用于改變圖片大小,剪裁,比較,添加水印等等功能。還有感知哈希,高級圖像過濾,繪制貝塞爾曲線等功能,可謂非常強大。
由于功能太多,所以分成幾篇文章寫。
優點:
- 縮略圖的速度非常快,質量非常高
- 支持智能剪裁
- 很好的支持GIF圖片
- 5種縮略圖模式
- 圖像對比功能
- 圖像高級過濾功能
- 圖像混合
- 其他圖像處理庫支持的API基本都支持
安裝
下載
1、直接下載:
??Grafika的官網???、??Github地址??
2、composer:
composer require kosinix/grafika:dev-master --prefer-dist
環境需求
- PHP >= 5.3,當然官方推薦php7
- GD庫 >= 2.0版本
- Imagick***(不強求)>=3.3.0 , ImageMagick >= 6.5.3
部署
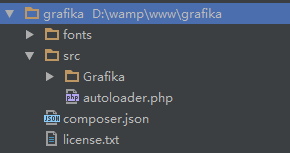
下載下來的Grafika目錄基本結構像下面這樣:
? ??
??
不過composer下載下來的多一點兒,你只需要使用kosinix/grafika目錄下的東西就好了。
我們在grafika目錄下建立一個index.php,之后的操作都在這里。
grafika給我們提供了一個非常好用的autoloader.php位于src目錄下。
在index.php中引入它,(說明下,以下示例都需要引入這個autoloader.php文件,我們默認省略),下面就可以直接開發了。
require_once 'src/autoloader.php';
創建Editors
1、createEditor
grafika通過靜態方法createEditor來創建一個editor。它包含所有的圖片處理方法。
由于,grafika是基于Imagick和GD庫,所以使用createEditor方法會根據當前情況,自動選擇所需要的圖片處理庫。(推薦使用)
use Grafika\Grafika; // Import package $editor = Grafika::createEditor(); // Create the best available editor
2、Imagick Editor
當然你也可以直接使用Imagick類庫。
use Grafika\Imagick\Editor; // Import package $editor = new Editor(); // Imagick editor
注意:有些情況可能不支持該類庫,你需要使用下面語句檢查后使用,(不過你***直接使用方法1,就沒這些事)
use Grafika\Imagick\Editor; // Import package $editor = new Editor(); // Imagick editor if( $editor->isAvailable() ) { // Safety check // Your code here } 3、GD Editor
你也可以直接使用GD庫,也有些情況可能不支持,記得檢查
use Grafika\Gd\Editor; // Import package $editor = new Editor(); // Gd editor if( $editor->isAvailable() ) { // Safety check // Your code here } 創建圖像
grafika允許你使用4種方式創建一個待處理的圖像
1、直接打開圖像
創建editor + open方法
use Grafika\Grafika; $editor = Grafika::createEditor(); $editor->open( $image, 'path/to/image.jpg');
2、使用靜態方法打開圖片
使用直接打開、創建圖片
use Grafika\Grafika; $image = Grafika::createImage('path/to/image.jpg'); // 這里省略了$editor = Grafika::createEditor(); 3、創建一個空白的畫布
新建一個畫布作為新圖像
use Grafika\Grafika; $image = Grafika::createBlankImage(100,100);
4、從已有圖片拷貝一個
拷貝一個圖像作為圖像處理
$copy = clone $image;
這種方法你要保證之前有一張圖片
這幾種方法之后的操作大同小異,我們只選擇***種常規方法作為講解示例
圖片縮略圖
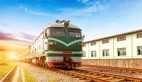
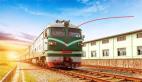
我們先準備一個原圖 ????
接下來,假設我們要創建的縮略圖長:200px寬200px
1、Resize Fit
等比例縮放類型。那么就保證圖片較長的一邊不超過200px,等比縮放,縮放后不填充背景。
use Grafika\Grafika; $editor = Grafika::createEditor(); $editor->open($image1 , 'yanying.jpg'); // 打開yanying.jpg并且存放到$image1 $editor->resizeFit($image1 , 200 , 200); $editor->save($image1 , 'yanying1.jpg'); $editor->open($image2 , 'yanying-h.jpg'); // 打開yanying.jpg并且存放到$image2 $editor->resizeFit($image2 , 200 , 200); $editor->save($image2 , 'yanying2.jpg');
2、Resize Exact
固定尺寸縮放類型。就是不管圖片長寬比,全部縮小到200px,可能導致圖片變形。
use Grafika\Grafika; $editor = Grafika::createEditor(); $editor->open($image1 , 'yanying.jpg'); // 打開yanying.jpg并且存放到$image1 $editor->resizeExact($image1 , 200 , 200); $editor->save($image1 , 'yanying1.jpg'); $editor->open($image2 , 'yanying-h.jpg'); // 打開yanying.jpg并且存放到$image2 $editor->resizeExact($image2 , 200 , 200); $editor->save($image2 , 'yanying2.jpg');
居中剪裁。就是把較短的變縮放到200px,然后將長邊的大于200px的部分居中剪裁掉,圖片不會變形。 ?????????
4、Resize Exact Width
等寬縮放。和***種功能相似,最終寬為200px,等比縮放,高度不管。
use Grafika\Grafika; $editor = Grafika::createEditor(); $editor->open($image1 , 'yanying.jpg'); // 打開yanying.jpg并且存放到$image1 $editor->resizeExactWidth($image1 , 200); $editor->save($image1 , 'yanying1.jpg'); $editor->open($image2 , 'yanying-h.jpg'); // 打開yanying.jpg并且存放到$image2 $editor->resizeExactWidth($image2 , 200); $editor->save($image2 , 'yanying2.jpg');
?????? ????5、Resize Exact Height
等高縮放。最終高為200px,等比縮放,不考慮圖片寬度。 ?????? ????
圖像對比功能
1、圖片相似度對比
我們首先準備一張基本圖,用來和其他圖片對比。(segmentfault網頁圖片可能處理過,直接使用本文圖片可能結果不一致) ????
1)、我們***次使用一張灰度圖片來比較 ????
use Grafika\Grafika; $editor = Grafika::createEditor(); $result = $editor->compare('yanying.jpg' , 'yanying_grey.jpg'); var_dump($result); // int 2 說明: grafika圖片對比方法compare返回一個數字,其中如果數字越接近于0,那么表示圖片越相似。如果數字在0-10范圍內,那么圖片都可能相似。但是如果數字大于10,那么,可能就完全不同。
這里返回2,說明相似度還是非常高的。
2)、我們再用一張縮小的圖片來測試,記住都是和***張基本圖比較。 ????
use Grafika\Grafika; $editor = Grafika::createEditor(); $result = $editor->compare('yanying.jpg' , 'yanying-smaller.jpg'); var_dump($result); // int 0 這里結果返回0,相似度非常高。
3)、我們再用一張剪裁下來的局部圖片測試 ????
use Grafika\Grafika; $editor = Grafika::createEditor(); $result = $editor->compare('yanying.jpg' , 'yanying-half.jpg'); var_dump($result); // int 20 結果超過10了,相似度不怎么高
4)、我們再用一張完全不同的圖片測試 ????
use Grafika\Grafika; $editor = Grafika::createEditor(); $result = $editor->compare('yanying.jpg' , 'yanying-h.jpg'); var_dump($result); // int 39 結果39,越來越大,越來越不像
2、比較圖片是否相同
grafika提供方法equal來檢查兩張圖片是否完全相同。這里的檢查是一個像素一個像素的檢測,所以時間可能會較長。
當然grafika也會預檢查,如果兩張圖片大小不相同,則直接返回false。只有其他都相同后才會進行逐像素檢查。
我們這里對比之前創建的一張縮略圖,因為大小不一致,所以直接返回false ????
use Grafika\Grafika; $editor = Grafika::createEditor(); $result = $editor->equal('yanying.jpg' , 'yanying-smaller.jpg'); var_dump($result); // boolean false 智能剪裁
智能剪裁是自動識別圖像中的重要部分,剪裁時候偏向于保留重點部分。
不過grafika也提供了人為操控位置剪裁,我們先說這個。
基本位置剪裁
基本位置剪裁包含9個位置
- top-left
- top-center
- top-right
- center-left
- center
- center-right
- bottom-left
- bottom-center
- bottom-right
我們這里一起說了,這里我們使用900*600的圖片,分成9塊 ????
use Grafika\Grafika; $editor = Grafika::createEditor(); $src = 'yanying.jpg'; $editor->open( $image, $src ); $editor->crop( $image, 300, 200, 'top-left' ); $editor->save( $image, 'result1.jpg' ); $editor->free( $image ); $editor->open( $image, $src ); $editor->crop( $image, 300, 200, 'top-center' ); $editor->save( $image, 'result2.jpg' ); $editor->free( $image ); $editor->open( $image, $src ); $editor->crop( $image, 300, 200, 'top-right' ); $editor->save( $image, 'result3.jpg' ); $editor->free( $image ); $editor->open( $image, $src ); $editor->crop( $image, 300, 200, 'center-left' ); $editor->save( $image, 'result4.jpg' ); $editor->free( $image ); $editor->open( $image, $src ); $editor->crop( $image, 300, 200, 'center' ); $editor->save( $image, 'result5.jpg' ); $editor->free( $image ); $editor->open( $image, $src ); $editor->crop( $image, 300, 200, 'center-right' ); $editor->save( $image, 'result6.jpg' ); $editor->free( $image ); $editor->open( $image, $src ); $editor->crop( $image, 300, 200, 'bottom-left' ); $editor->save( $image, 'result7.jpg' ); $editor->free( $image ); $editor->open( $image, $src ); $editor->crop( $image, 300, 200, 'bottom-center' ); $editor->save( $image, 'result8.jpg' ); $editor->free( $image ); $editor->open( $image, $src ); $editor->crop( $image, 300, 200, 'bottom-right' ); $editor->save( $image, 'result9.jpg' ); $editor->free( $image );
看下結果 ????
智能剪裁
原圖 ????
我們使用智能剪裁將圖片剪裁至200*200px
use Grafika\Grafika; $editor = Grafika::createEditor(); $editor->open( $image, 'yanying-smaller.jpg' ); $editor->crop( $image, 200, 200, 'smart' ); $editor->save( $image, 'yanying-smart.jpg' );
發現還是可以突出重點的 ????
GIF縮略圖
壓縮GIF,不丟失動畫
grafika可以直接壓縮GIF圖片,并且不丟失動畫功能。
? ??
??
use Grafika\Grafika; $editor = Grafika::createEditor(); $editor->open( $image, 'sample.gif' ); $editor->resizeFit( $image, 250, 128 ); $editor->save( $image, 'output.gif' );
我們這里將原圖壓縮到原來的一半,發現動畫并沒有丟失
? ??
??
移除GIF動畫效果
當然,如果有需要,我們也可以直接移除GIF的動畫效果
use Grafika\Grafika; $editor = Grafika::createEditor(); $editor->open( $image, 'sample.gif' ); $editor->flatten( $image ); $editor->save( $image, 'output-no-animation.gif' );
?? ??
??
圖片合并
圖片合并需要2張圖片,將其中一張作為基本圖,準備的第二章圖片就是放置在基礎圖片之上。
我們首先來看代碼
use Grafika\Grafika; $editor = Grafika::createEditor(); $editor->open($image1 , 'yanying-h.jpg'); $editor->open($image2 , 'yanying-smaller.jpg'); $editor->blend ( $image1, $image2 , 'normal', 0.9, 'center'); $editor->save($image1,'333/yanying-blend.jpg');
解釋一下
首先打開兩張圖片,其中$image1為基礎圖片,也就是放在下面的。重點在blend這個方法。
其中:
- ***個參數為基礎圖片
- 第二個參數為放置在基礎圖片之上的圖片normal, multiply, overlay or screen.,這里的類型意思就是圖片疊加的模式,下面會給出實例看每種的不同。
- 第三個參數為透明度,這個不說太多,容易想到。
- 第四個為位置,有10個選擇,其中,前面9種為用戶自定義拜訪位置,而***一個是智能拜訪,由grafika來判斷擺放在哪里好。top-left, top-center, top-right, center-left, center, center-right, bottom-left, bottom-center, bottom-right and smart
- 第五個參數為可選參數,表示圖片2距離圖片1左邊的距離
- 第六個參數也為可選參數,表示圖片2距離圖片1上邊的距離
我們試著擺幾種情況。
1、normal
其中位置信息:center,透明度為0.9,也就是上面代碼的那種 ????
2、multiply
位置信息:,top-left,其他不變 ????
3、overlay
位置信息:bottom-right,其他不變 ????
4、screen
位置信息:,***一個位置參數不給,也就是默認top-left ????
圖像旋轉
圖像旋轉比較簡單,只需要給一個旋轉角度參數就可以了,如果想要給背景填充個顏色,再給一個顏色參數即可。(默認不給背景色為黑色)
代碼如下
use Grafika\Grafika; use Grafika\Color; $editor = Grafika::createEditor(); $editor->open($image , 'yanying-smaller.jpg'); $editor->rotate($image ,'45',new Color('#ff0000')); $editor->save($image,'333/yanying-rotate.jpg'); ***一個背景顏色參數也是需要Color對象 ????
圖片寫文字
在圖片上面寫文字的參數比較多,不過如果正常使用,只需要給前兩個必填的即可,后面的參數都是可選的。
我們逐一的來看各個參數
- image:所需要寫文字的圖片
- text:需要寫的文字
- size:(選填)字體大小,默認為12px
- x:(選填)文字的最左邊距離圖片最左邊的距離,默認為0
- y:(選填)文字的基線到圖片的最上邊的距離,默認是12px,也就是文字的高度。(基線你就當做文字最下面好了)
- color:(選填)字體顏色,Color對象,需要new Color一下,默認為黑色。
- font:(選填)字體的完整路徑,默認Sans font.
- angle:(選填)文字旋轉角度,取值范圍為0-359,默認為0,也就是不旋轉
我們隨便找個文字試試
use Grafika\Grafika; use Grafika\Color; $editor = Grafika::createEditor(); $editor->open($image , 'yanying-smaller.jpg'); $editor->text($image ,'yanying',30,200,100,new olor("#000000"),'',45); $editor->save($image,'333/yanying-text.jpg'); 看下效果。這里說明下,如果文字為中文,需要找一個支持中文的字體。默認字體不支持中文,所以你寫中文,就是都是小方框。????