從源碼角度看Spark on yarn client & cluster模式的本質區別

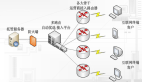
首先區分下AppMaster和Driver,任何一個yarn上運行的任務都必須有一個AppMaster,而任何一個Spark任務都會有一個Driver,Driver就是運行SparkContext(它會構建TaskScheduler和DAGScheduler)的進程,當然在Driver上你也可以做很多非Spark的事情,這些事情只會在Driver上面執行,而由SparkContext上牽引出來的代碼則會由DAGScheduler分析,并形成Job和Stage交由TaskScheduler,再由TaskScheduler交由各Executor分布式執行。
所以Driver和AppMaster是兩個完全不同的東西,Driver是控制Spark計算和任務資源的,而AppMaster是控制yarn app運行和任務資源的,只不過在Spark on Yarn上,這兩者就出現了交叉,而在standalone模式下,資源則由Driver管理。在Spark on Yarn上,Driver會和AppMaster通信,資源的申請由AppMaster來完成,而任務的調度和執行則由Driver完成,Driver會通過與AppMaster通信來讓Executor的執行具體的任務。
client與cluster的區別
對于yarn-client和yarn-cluster的唯一區別在于,yarn-client的Driver運行在本地,而AppMaster運行在yarn的一個節點上,他們之間進行遠程通信,AppMaster只負責資源申請和釋放(當然還有DelegationToken的刷新),然后等待Driver的完成;而yarn-cluster的Driver則運行在AppMaster所在的container里,Driver和AppMaster是同一個進程的兩個不同線程,它們之間也會進行通信,AppMaster同樣等待Driver的完成,從而釋放資源。
Spark里AppMaster的實現:org.apache.spark.deploy.yarn.ApplicationMaster Yarn里MapReduce的AppMaster實現:org.apache.hadoop.mapreduce.v2.app.MRAppMaster
在yarn-client模式里,優先運行的是Driver(我們寫的應用代碼就是入口),然后在初始化SparkContext的時候,會作為client端向yarn申請AppMaster資源,當AppMaster運行后,它會向yarn注冊自己并申請Executor資源,之后由本地Driver與其通信控制任務運行,而AppMaster則時刻監控Driver的運行情況,如果Driver完成或意外退出,AppMaster會釋放資源并注銷自己。所以在該模式下,如果運行spark-submit的程序退出了,整個任務也就退出了
在yarn-cluster模式里,本地進程則僅僅只是一個client,它會優先向yarn申請AppMaster資源運行AppMaster,在運行AppMaster的時候通過反射啟動Driver(我們的應用代碼),在SparkContext初始化成功后,再向yarn注冊自己并申請Executor資源,此時Driver與AppMaster運行在同一個container里,是兩個不同的線程,當Driver運行完畢,AppMaster會釋放資源并注銷自己。所以在該模式下,本地進程僅僅是一個client,如果結束了該進程,整個Spark任務也不會退出,因為Driver是在遠程運行的
下面從源碼的角度看看SparkSubmit的代碼調用(基于Spark2.0.0):
代碼公共部分
SparkSubmit#main =>
- val appArgs = new SparkSubmitArguments(args)
- appArgs.action match {
- // normal spark-submit
- case SparkSubmitAction.SUBMIT => submit(appArgs)
- // use --kill specified
- case SparkSubmitAction.KILL => kill(appArgs)
- // use --status specified
- case SparkSubmitAction.REQUEST_STATUS => requestStatus(appArgs)
- }
SparkSubmit的main方法是在用戶使用spark-submit腳本提交Spark app的時候調用的,可以看到正常情況下,它會調用SparkSubmit#submit方法
SparkSubmit#submit =>
- val (childArgs, childClasspath, sysProps, childMainClass) = prepareSubmitEnvironment(args)
- // 此處省略掉代理賬戶,異常處理,提交失敗的重提交邏輯,只看主干代碼
- runMain(childArgs, childClasspath, sysProps, childMainClass, args.verbose)
在submit方法內部,會先進行提交環境相關的處理,調用的是SparkSubmit#prepareSubmitEnvironment方法,之后利用拿到的mainClass等信息,再調用SparkSubmit#runMain方法來執行對于主函數
SparkSubmit#prepareSubmitEnvironment =>
主干相關的代碼如下:
- // yarn client mode
- if (deployMode == CLIENT) {
- // client 模式下,運行的是 --class 后指定的mainClass,也即我們的代碼
- childMainClass = args.mainClass
- if (isUserJar(args.primaryResource)) {
- childClasspath += args.primaryResource
- }
- if (args.jars != null) { childClasspath ++= args.jars.split(",") }
- if (args.childArgs != null) { childArgs ++= args.childArgs }
- }
- // yarn cluster mode
- val isYarnCluster = clusterManager == YARN && deployMode == CLUSTER
- if (isYarnCluster) {
- // cluster 模式下,運行的是Client類
- childMainClass = "org.apache.spark.deploy.yarn.Client"
- if (args.isPython) {
- childArgs += ("--primary-py-file", args.primaryResource)
- childArgs += ("--class", "org.apache.spark.deploy.PythonRunner")
- } else if (args.isR) {
- val mainFile = new Path(args.primaryResource).getName
- childArgs += ("--primary-r-file", mainFile)
- childArgs += ("--class", "org.apache.spark.deploy.RRunner")
- } else {
- if (args.primaryResource != SparkLauncher.NO_RESOURCE) {
- childArgs += ("--jar", args.primaryResource)
- }
- // 這里 --class 指定的是AppMaster里啟動的Driver,也即我們的代碼
- childArgs += ("--class", args.mainClass)
- }
- if (args.childArgs != null) {
- args.childArgs.foreach { arg => childArgs += ("--arg", arg) }
- }
- }
在 prepareSubmitEnvironment 里,主要負責解析用戶參數,設置環境變量env,處理python/R等依賴,然后針對不同的部署模式,匹配不同的運行主類,比如: yarn-client>args.mainClass,yarn-cluster>o.a.s.deploy.yarn.Client
SparkSubmit#runMain =>
骨干代碼如下
- try {
- mainClass = Utils.classForName(childMainClass)
- } catch {
- // ...
- }
- val mainMethod = mainClass.getMethod("main", new Array[String](0).getClass)
- try {
- // childArgs就是用戶自己傳給Spark應用代碼的參數
- mainMethod.invoke(null, childArgs.toArray)
- } catch {
- // ...
- }
在runMain方法里,會設置ClassLoader,根據用戶代碼優先的設置(spark.driver.userClassPathFirst)來加載對應的類,然后反射調用prepareSubmitEnvironment方法返回的主類,并調用其main方法
從所反射的不同主類,我們來看看具體調用方式的不同:
對于yarn-cluster
o.a.s.deploy.yarn.Client#main =>
- val sparkConf = new SparkConf
- val args = new ClientArguments(argStrings)
- new Client(args, sparkConf).run()
在Client伴生對象里構建了Client類的對象,然后調用了Client#run方法
o.a.s.deploy.yarn.Client#run =>
- this.appId = submitApplication()
- // report application ...
run方法核心的就是提交任務到yarn,其調用了Client#submitApplication方法,拿到提交完的appID后,監控app的狀態
o.a.s.deploy.yarn.Client#submitApplication =>
- try {
- // 獲取提交用戶的Credentials,用于后面獲取delegationToken
- setupCredentials()
- yarnClient.init(yarnConf)
- yarnClient.start()
- // Get a new application from our RM
- val newApp = yarnClient.createApplication()
- val newAppResponse = newApp.getNewApplicationResponse()
- // 拿到appID
- appId = newAppResponse.getApplicationId()
- // 報告狀態
- reportLauncherState(SparkAppHandle.State.SUBMITTED)
- launcherBackend.setAppId(appId.toString)
- // Verify whether the cluster has enough resources for our AM
- verifyClusterResources(newAppResponse)
- // 創建AppMaster運行的context,為其準備運行環境,java options,以及需要運行的java命令,AppMaster通過該命令在yarn節點上啟動
- val containerContext = createContainerLaunchContext(newAppResponse)
- val appContext = createApplicationSubmissionContext(newApp, containerContext)
- // Finally, submit and monitor the application
- logInfo(s"Submitting application $appId to ResourceManager")
- yarnClient.submitApplication(appContext)
- appId
- } catch {
- case e: Throwable =>
- if (appId != null) {
- cleanupStagingDir(appId)
- }
- throw e
- }
在 submitApplication 里完成了app的申請,AppMaster context的創建,***完成了任務的提交,對于cluster模式而言,任務提交后本地進程就只是一個client而已,Driver就運行在與AppMaster同一container里,對于client模式而言,執行 submitApplication 方法時,Driver已經在本地運行,這一步就只是提交任務到yarn而已
o.a.s.deploy.yarn.Client#createContainerLaunchContext
- val appStagingDirPath = new Path(appStagingBaseDir, getAppStagingDir(appId))
- // 非pySpark時,pySparkArchives為Nil
- val launchEnv = setupLaunchEnv(appStagingDirPath, pySparkArchives)
- // 這一步會進行delegationtoken的獲取,存于Credentials,在AppMasterContainer構建完的***將其存入到context里
- val localResources = prepareLocalResources(appStagingDirPath, pySparkArchives)
- val amContainer = Records.newRecord(classOf[ContainerLaunchContext])
- // 設置AppMaster container運行的資源和環境
- amContainer.setLocalResources(localResources.asJava)
- amContainer.setEnvironment(launchEnv.asJava)
- // 設置JVM參數
- val javaOpts = ListBuffer[String]()
- javaOpts += "-Djava.io.tmpdir=" + tmpDir
- // other java opts setting...
- // 對于cluster模式,通過 --class 指定AppMaster運行我們的Driver端,對于client模式則純作為資源申請和分配的工具
- val userClass =
- if (isClusterMode) {
- Seq("--class", YarnSparkHadoopUtil.escapeForShell(args.userClass))
- } else {
- Nil
- }
- // 設置AppMaster運行的主類
- val amClass =
- if (isClusterMode) {
- Utils.classForName("org.apache.spark.deploy.yarn.ApplicationMaster").getName
- } else {
- // ExecutorLauncher只是ApplicationMaster的一個warpper
- Utils.classForName("org.apache.spark.deploy.yarn.ExecutorLauncher").getName
- }
- val amArgs =
- Seq(amClass) ++ userClass ++ userJar ++ primaryPyFile ++ primaryRFile ++
- userArgs ++ Seq(
- "--properties-file", buildPath(YarnSparkHadoopUtil.expandEnvironment(Environment.PWD),
- LOCALIZED_CONF_DIR, SPARK_CONF_FILE))
- // Command for the ApplicationMaster
- val commands = prefixEnv ++ Seq(
- YarnSparkHadoopUtil.expandEnvironment(Environment.JAVA_HOME) + "/bin/java", "-server"
- ) ++
- javaOpts ++ amArgs ++
- Seq(
- "1>", ApplicationConstants.LOG_DIR_EXPANSION_VAR + "/stdout",
- "2>", ApplicationConstants.LOG_DIR_EXPANSION_VAR + "/stderr")
- val printableCommands = commands.map(s => if (s == null) "null" else s).toList
- // 設置需運行的命令
- amContainer.setCommands(printableCommands.asJava)
- val securityManager = new SecurityManager(sparkConf)
- // 設置應用權限
- amContainer.setApplicationACLs(
- YarnSparkHadoopUtil.getApplicationAclsForYarn(securityManager).asJava)
- // 設置delegationToken
- setupSecurityToken(amContainer)
對于yarn-client
args.mainClass =>
在我們的Spark代碼里,需要創建一個SparkContext來執行Spark任務,而在其構造器里創建TaskScheduler的時候,對于client模式就會向yarn申請資源提交任務,如下
- // 調用createTaskScheduler方法,對于yarn模式,master=="yarn"
- val (sched, ts) = SparkContext.createTaskScheduler(this, master, deployMode)
- _schedulerBackend = sched
- _taskScheduler = ts
- // 創建DAGScheduler
- _dagScheduler = new DAGScheduler(this)
SparkContext#createTaskScheduler =>
這里會根據master匹配不同模式,比如local/standalone/yarn,在yarn模式下會利用ServiceLoader裝載YarnClusterManager,然后由它創建TaskScheduler和SchedulerBackend,如下:
- // 當為yarn模式的時候
- case masterUrl =>
- // 利用當前loader裝載YarnClusterManager,masterUrl為"yarn"
- val cm = getClusterManager(masterUrl) match {
- case Some(clusterMgr) => clusterMgr
- case None => throw new SparkException("Could not parse Master URL: '" + master + "'")
- }
- try {
- // 創建TaskScheduler,這里masterUrl并沒有用到
- val scheduler = cm.createTaskScheduler(sc, masterUrl)
- // 創建SchedulerBackend,對于client模式,這一步會向yarn申請AppMaster,提交任務
- val backend = cm.createSchedulerBackend(sc, masterUrl, scheduler)
- cm.initialize(scheduler, backend)
- (backend, scheduler)
- } catch {
- case se: SparkException => throw se
- case NonFatal(e) =>
- throw new SparkException("External scheduler cannot be instantiated", e)
- }
YarnClusterManager#createSchedulerBackend
- sc.deployMode match {
- case "cluster" =>
- new YarnClusterSchedulerBackend(scheduler.asInstanceOf[TaskSchedulerImpl], sc)
- case "client" =>
- new YarnClientSchedulerBackend(scheduler.asInstanceOf[TaskSchedulerImpl], sc)
- case _ =>
- throw new SparkException(s"Unknown deploy mode '${sc.deployMode}' for Yarn")
- }
可以看到yarn下的SchedulerBackend實現對于client和cluster模式是不同的,yarn-client模式為YarnClientSchedulerBackend,yarn-cluster模式為 YarnClusterSchedulerBackend,之所以不同,是因為在client模式下,YarnClientSchedulerBackend 相當于 yarn application 的client,它會調用o.a.s.deploy.yarn.Client#submitApplication 來準備環境,申請資源并提交yarn任務,如下:
- val driverHost = conf.get("spark.driver.host")
- val driverPort = conf.get("spark.driver.port")
- val hostport = driverHost + ":" + driverPort
- sc.ui.foreach { ui => conf.set("spark.driver.appUIAddress", ui.appUIAddress) }
- val argsArrayBuf = new ArrayBuffer[String]()
- argsArrayBuf += ("--arg", hostport)
- val args = new ClientArguments(argsArrayBuf.toArray)
- totalExpectedExecutors = YarnSparkHadoopUtil.getInitialTargetExecutorNumber(conf)
- // 創建o.a.s.deploy.yarn.Client對象
- client = new Client(args, conf)
- // 調用submitApplication準備環境,申請資源,提交任務,并把appID保存下來
- // 對于submitApplication,前文有詳細的分析,這里與前面是一致的
- bindToYarn(client.submitApplication(), None)
而在 YarnClusterSchedulerBackend 里,由于 AppMaster 已經運行起來了,所以它并不需要再做申請資源等等工作,只需要保存appID和attemptID并啟動SchedulerBackend即可.