Redis企業(yè)級(jí)開(kāi)發(fā)與運(yùn)維-初識(shí)Redis
Redis概述
Redis的作者Salvatore Sanfilippo在開(kāi)發(fā)一個(gè)叫做LLOOGG的網(wǎng)站時(shí),需要實(shí)現(xiàn)一個(gè)高性能的隊(duì)列功能,最開(kāi)始是使用MySQL實(shí)現(xiàn),但是無(wú)論怎么優(yōu)化SQL語(yǔ)句也沒(méi)辦法提高網(wǎng)站的性能,后來(lái)決定做一個(gè)專屬于LLOOGG的數(shù)據(jù)庫(kù),這個(gè)就是Redis的前身,后來(lái)將Redis1.0的源碼開(kāi)放到GitHub上。redis github
Redis是一種開(kāi)源、基于鍵值對(duì)(key-value)的NoSQL數(shù)據(jù)庫(kù),但是與很對(duì)鍵值對(duì)數(shù)據(jù)庫(kù)不同的是Redis中的值可以由string(字符串)、hash(哈希)、list(列表)、set(集合)、zset(有序集合)、bitmaps(位圖)、HyperLogLog、GEO(地理信息定位)等多種數(shù)據(jù)結(jié)構(gòu)和算法組成。而且因?yàn)镽edis會(huì)將所有的數(shù)據(jù)放在內(nèi)存中,所以它的讀寫(xiě)性能是驚人的,不僅如此,Redis還可以將內(nèi)存中的數(shù)據(jù)利用快照和日志的形式保存到硬盤上,這樣發(fā)生類似斷點(diǎn)或者是機(jī)器故障的時(shí)候,內(nèi)存中的數(shù)據(jù)不會(huì)丟失。除此以外Redis還提供了鍵過(guò)期、發(fā)布訂閱、事務(wù)、流水線、Lua腳本等附加功能。redis官網(wǎng)
目前國(guó)外的Github、stackoverflow、Twitter以及國(guó)內(nèi)的阿里巴巴、騰訊、新浪、美團(tuán)、百度等都在使用Redis,無(wú)論你是開(kāi)發(fā)人員還是運(yùn)維人員Redis已經(jīng)是你必須要掌握的一項(xiàng)技能。
Redis特性
- 速度快Redis的數(shù)據(jù)存儲(chǔ)在內(nèi)存中,而內(nèi)存的IO性能相比普通磁盤和固態(tài)磁盤的IO性能要高得多,這也是Redis高性能最主要的原因,而且Redis是使用C語(yǔ)言開(kāi)發(fā)的,C語(yǔ)言相對(duì)于其他語(yǔ)言運(yùn)行效率更高。同時(shí)采用單線程的架構(gòu),也避免了多線程可能產(chǎn)生的競(jìng)爭(zhēng)問(wèn)題。
- 持久化Redis的數(shù)據(jù)存儲(chǔ)在內(nèi)存中,容易造成機(jī)器斷點(diǎn)后丟失數(shù)據(jù),因此提供了持久化的功能,用于對(duì)數(shù)據(jù)的更新將異步的保存在磁盤上。
- 多種數(shù)據(jù)結(jié)構(gòu)Redis提供了string(字符串)、hash(哈希)、list(列表)、set(集合)、zset(有序集合)、bitmaps(位圖)、HyperLogLog、GEO(地理信息定位)等多種數(shù)據(jù)結(jié)構(gòu)和算法組成。
- 支持多種主流的編程語(yǔ)言Java,Python,Go,Scala,Lua等主流編程語(yǔ)言
- 功能豐富支持發(fā)布訂閱、Lua腳本、事務(wù)以及pipline等功能
- 簡(jiǎn)單Redis單機(jī)版的核心代碼23000行,不依賴外部的庫(kù),使用單線程模型。
- 主從復(fù)制Redis提供了主從復(fù)制的功能,實(shí)現(xiàn)將服務(wù)器的數(shù)據(jù)復(fù)制到從服務(wù)器上,也是實(shí)現(xiàn)高可用和分布式的基礎(chǔ)。
- 高可用、分布式Redis在2.8版本以后提供了Redis-Sentinel來(lái)支持高可用。Redis3.0提供了Redis-Cluster來(lái)支持分布式。
Redis典型的應(yīng)用場(chǎng)景
- 緩存系統(tǒng)
- 計(jì)數(shù)器(例如微博的轉(zhuǎn)發(fā)數(shù)、評(píng)論數(shù))
- 簡(jiǎn)單的消息隊(duì)列系統(tǒng)
- 排行榜
- 社交網(wǎng)絡(luò)
- 實(shí)時(shí)系統(tǒng)
Redis單機(jī)安裝
本次演示的環(huán)境是基于CentOS7.8和Redis6.0.5,Redis官方?jīng)]有提供Windows版本的下載
在安裝Redis之前,首先需要下載Redis6.0.5
使用wget命令將redis6.0.5下載到/opt/soft目錄下
- [root@ittimeline opt]# mkdir /opt/soft
- [root@ittimeline opt]# wget http://download.redis.io/releases/redis-6.0.5.tar.gz
- --2020-07-04 18:02:53-- http://download.redis.io/releases/redis-6.0.5.tar.gz
- 正在解析主機(jī) download.redis.io (download.redis.io)... 45.60.125.1
- 正在連接 download.redis.io (download.redis.io)|45.60.125.1|:80... 已連接。
- 已發(fā)出 HTTP 請(qǐng)求,正在等待回應(yīng)... 200 OK
- 長(zhǎng)度:2217666 (2.1M) [application/octet-stream]
- 正在保存至: “redis-6.0.5.tar.gz”
- 100%[=======================================================================================>] 2,217,666 4.58MB/s 用時(shí) 0.5s
- 2020-07-04 18:02:54 (4.58 MB/s) - 已保存 “redis-6.0.5.tar.gz” [2217666/2217666])
下載完成以后解壓redis6.0.5
- [root@ittimeline opt]# tar -xzf redis-6.0.5.tar.gz
- [root@ittimeline opt]# ll|grep redis
- drwxrwxr-x. 7 root root 4096 6月 9 18:19 redis-6.0.5
- -rw-r--r--. 1 root root 2217666 6月 27 23:51 redis-6.0.5.tar.gz
解壓縮完成之后建立一個(gè)軟鏈接,方便管理和升級(jí)
- [root@ittimeline opt]# ln -s redis-6.0.5 redis
- [root@ittimeline opt]# ll|grep redis
- lrwxrwxrwx. 1 root root 11 7月 4 18:07 redis -> redis-6.0.5
- drwxrwxr-x. 7 root root 4096 7月 4 18:04 redis-6.0.5
- -rw-r--r--. 1 root root 2217666 6月 27 23:51 redis-6.0.5.tar.gz
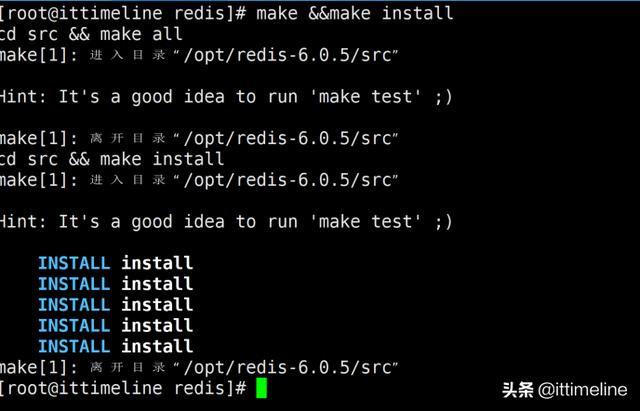
然后進(jìn)入redis的目錄使用make&&make install進(jìn)行編譯和安裝
- [root@ittimeline opt]# cd redis
- [root@ittimeline redis]# pwd
- /opt/redis
- [guanglei@ittimeline redis]$ make&&make install
如果在編譯時(shí)出現(xiàn)如下錯(cuò)誤提示
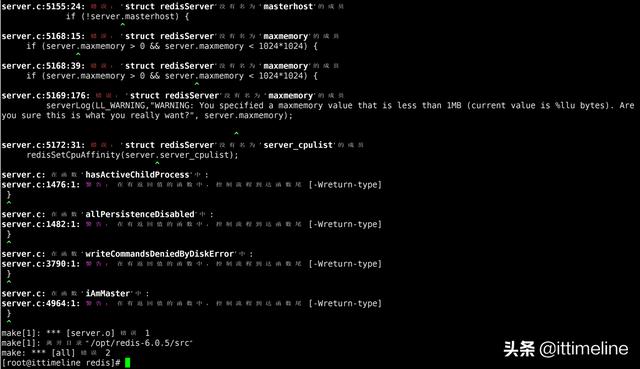
需要執(zhí)行如下命令
- [root@ittimeline opt]#yum install cpp
- [root@ittimeline opt]#yum install binutils
- [root@ittimeline opt]#yum install glibc
- [root@ittimeline opt]#yum install glibc-kernheaders
- [root@ittimeline opt]#yum install glibc-common
- [root@ittimeline opt]#yum install glibc-devel
- [root@ittimeline opt]#yum install gcc
- [root@ittimeline opt]#yum install make
- [root@ittimeline opt]#yum -y install centos-release-scl
- [root@ittimeline opt]#yum -y install devtoolset-9-gcc devtoolset-9-gcc-c++ devtoolset-9-binutils
- [root@ittimeline opt]#scl enable devtoolset-9 bash
然后再執(zhí)行make&&make install命令安裝redis
編譯安裝完成后在/opt/redis/src目錄下生成幾個(gè)常用的可執(zhí)行文件
- [root@ittimeline redis]# cd src/
- [root@ittimeline src]# pwd
- /opt/redis/src
- [root@ittimeline src]# ll|grep redis*
- 匹配到二進(jìn)制文件 redis-benchmark
- 匹配到二進(jìn)制文件 redis-check-aof
- 匹配到二進(jìn)制文件 redis-check-rdb
- 匹配到二進(jìn)制文件 redis-cli
- 匹配到二進(jìn)制文件 redis-sentinel
- 匹配到二進(jìn)制文件 redis-server
- redis-server redis服務(wù)器
- redis-cli redis客戶端
- redis-benchmark (基準(zhǔn)測(cè)試)
- redis-check-aof (aof持久化修復(fù)工具)
- redis-check-dump(RDB文件檢查工具)
- redis-sentinel(Redis Sentinel服務(wù)器)
Redis三種啟動(dòng)方法
在Redis編譯、安裝完成以后,可以使用最簡(jiǎn)啟動(dòng)、動(dòng)態(tài)參數(shù)啟動(dòng)和配置文件啟動(dòng)三種方式啟動(dòng)。
- 最簡(jiǎn)啟動(dòng)
直接在Linux終端上的任意路徑輸入redis-server命令就可以啟動(dòng)Redis服務(wù)器,此時(shí)默認(rèn)的端口是6379。
- [root@ittimeline src]# redis-server
redis服務(wù)器成功啟動(dòng)

Redis啟動(dòng)的驗(yàn)證方法
- ps -ef|grep redis
- netstat -antpl|grep redis
- redis-cli -h ip -p port ping
- 動(dòng)態(tài)參數(shù)啟動(dòng)
如果想要使用動(dòng)態(tài)參數(shù)的方式啟動(dòng),只需要在redis-server 后面加上參數(shù)即可,例如redis-server --port 6380
當(dāng)執(zhí)行此條命令時(shí),redis服務(wù)器就會(huì)使用6380端口啟動(dòng)。
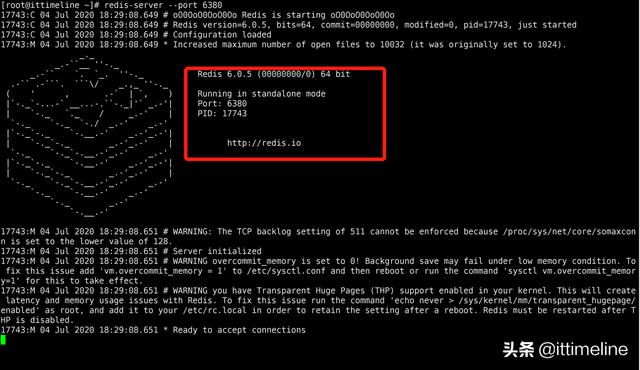
- redis-server --port 6380
當(dāng)Redis服務(wù)啟動(dòng)成功后,可以使用命令ps -ef|grep redis-server|grep -v grep命令來(lái)查看redis-server的進(jìn)程信息
- [root@ittimeline ~]# ps -ef|grep redis-server|grep -v grep
- root 17483 16967 0 18:17 pts/1 00:00:00 redis-server *:6379
- root 17743 17696 0 18:29 pts/3 00:00:00 redis-server *:6380
也可以使用命令netstat -antpl|grep redis-server 來(lái)查看redis-server的端口信息
- [root@ittimeline ~]# netstat -antpl|grep redis-server
- tcp 0 0 0.0.0.0:6379 0.0.0.0:* LISTEN 17483/redis-server
- tcp 0 0 0.0.0.0:6380 0.0.0.0:* LISTEN 17743/redis-server
- tcp 0 0 127.0.0.1:6379 127.0.0.1:36548 ESTABLISHED 17483/redis-server
- tcp6 0 0 :::6379 :::* LISTEN 17483/redis-server
- tcp6 0 0 :::6380 :::* LISTEN 17743/redis-server
- 配置文件啟動(dòng)
生產(chǎn)環(huán)境建議使用配置文件啟動(dòng),因?yàn)閱螜C(jī)多實(shí)例配置文件可以使用端口區(qū)分開(kāi)。
首先在/opt/redis目錄下創(chuàng)建一個(gè)config目錄
然后將redis的配置文件redis.conf復(fù)制到/opt/redis/config/目錄下
- [root@ittimeline redis]# mkdir config
- [root@ittimeline redis]# cp redis.conf ./config/redis.conf
然后將/opt/redis/config的redis.conf文件重命名,根據(jù)端口區(qū)分不同的配置
- [root@ittimeline config]# mv redis.conf redis-6381.conf
- [root@ittimeline config]# ll
- 總用量 84
- -rw-rw-r--. 1 root root 82645 7月 4 18:44 redis-6381.conf
然后使用命令簡(jiǎn)化(刪除注釋的說(shuō)明)redis-6381.conf的內(nèi)容并重定向到redis-6382.conf文件中
- [root@ittimeline config]# cat redis-6381.conf |grep -v "#" |grep -v "^$" >redis-6382.conf
可以使用命令vim -d redis-6381.conf redis-6382.conf來(lái)比較兩個(gè)文件的差異后理解上述命令的作用
redis服務(wù)端常用配置選項(xiàng)說(shuō)明
redis.conf配置文件中提供了許多redis服務(wù)器運(yùn)行的配置,目前現(xiàn)階段只要關(guān)注如下配置即可。
daemonize 是否是守護(hù)進(jìn)程,默認(rèn)是no,建議設(shè)置為yesport 啟動(dòng)端口,單機(jī)多實(shí)例必須配置,默認(rèn)端口是6379logfile Redis系統(tǒng)日志dir Redis工作目錄, 日志文件、持久化文件存儲(chǔ)路徑
redis-6382.config配置內(nèi)容
- [root@ittimeline config]# cat redis-6382.conf
- daemonize yes
- port 6382
- dir "/opt/redis/data"
- logfile "redis-6382.log"
- ~
在啟動(dòng)服務(wù)之前需要在/opt/redis目錄下創(chuàng)建data目錄
- [root@ittimeline config]# mkdir /opt/redis/data
然后使用指定配置文件啟動(dòng)的方式啟動(dòng)redis服務(wù)器,并使用ps命令查看6382端口的redis-server進(jìn)程是否啟動(dòng)
- [root@ittimeline config]# redis-server redis-6382.conf
- [root@ittimeline config]# ps -ef|grep redis-server|grep 6382
- root 18645 1 0 19:10 ? 00:00:00 redis-server *:6382
服務(wù)啟動(dòng)之后可以使用cat命令來(lái)查看redis-server的服務(wù)啟動(dòng)日志
- [root@ittimeline config]# cat /opt/redis/data/redis-6382.log
- 18819:C 04 Jul 2020 19:16:39.150 # oO0OoO0OoO0Oo Redis is starting oO0OoO0OoO0Oo
- 18819:C 04 Jul 2020 19:16:39.150 # Redis version=6.0.5, bits=64, commit=00000000, modified=0, pid=18819, just started
- 18819:C 04 Jul 2020 19:16:39.150 # Configuration loaded
- 18820:M 04 Jul 2020 19:16:39.152 * Increased maximum number of open files to 10032 (it was originally set to 1024).
- 18820:M 04 Jul 2020 19:16:39.153 * Running mode=standalone, port=6382.
- 18820:M 04 Jul 2020 19:16:39.153 # WARNING: The TCP backlog setting of 511 cannot be enforced because /proc/sys/net/core/somaxconn is set to the lower value of 128.
- 18820:M 04 Jul 2020 19:16:39.153 # Server initialized
- 18820:M 04 Jul 2020 19:16:39.153 # WARNING overcommit_memory is set to 0! Background save may fail under low memory condition. To fix this issue add 'vm.overcommit_memory = 1' to /etc/sysctl.conf and then reboot or run the command 'sysctl vm.overcommit_memory=1' for this to take effect.
- 18820:M 04 Jul 2020 19:16:39.153 # WARNING you have Transparent Huge Pages (THP) support enabled in your kernel. This will create latency and memory usage issues with Redis. To fix this issue run the command 'echo never > /sys/kernel/mm/transparent_hugepage/enabled' as root, and add it to your /etc/rc.local in order to retain the setting after a reboot. Redis must be restarted after THP is disabled.
- 18820:M 04 Jul 2020 19:16:39.153 * Ready to accept connections
Redis客戶端連接
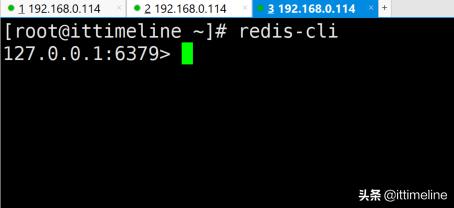
使用redis-cli工具連接redis服務(wù)器,通過(guò)-p選項(xiàng)指定redis服務(wù)器的端口,通過(guò)-h指定服務(wù)器的主機(jī),127.0.0.1表示本機(jī),即客戶端和服務(wù)器在同一臺(tái)服務(wù)器上。
- [root@ittimeline ~]# redis-cli -p 6379 -h 127.0.0.1
- 127.0.0.1:6379>
當(dāng)客戶端連接服務(wù)器成功之后就可以使用set/get命令來(lái)設(shè)值和取值,當(dāng)輸入set命令時(shí)客戶端會(huì)提示set命令的使用方法。

設(shè)置name屬性的值為tony
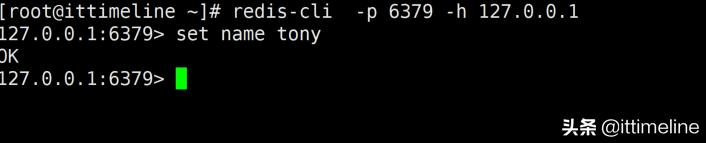
- 127.0.0.1:6379> set name tony
set值以后就可以使用get來(lái)獲取對(duì)應(yīng)的屬性值
- 127.0.0.1:6379> get name
- "tony"
當(dāng)客戶端輸入ping時(shí),服務(wù)端會(huì)返回PONG
- 127.0.0.1:6379> ping
- PONG
如果客戶端想要退出,只需要輸入exit就可以。
- exit

退出連接
redis-cli客戶端連接服務(wù)端默認(rèn)的端口是6379,默認(rèn)的ip就是127.0.0.1,因此如果客戶端和服務(wù)端在一臺(tái)機(jī)器上時(shí),直接輸入redis-cli就可以連接redis服務(wù)器。