Spring boot項目搭建(前端到數據庫,超詳細),大神勿進!
前段時間,有很多小伙伴私下跟我說,想搞一個項目實戰。今天剛好我有空,于是,我就搞了一個從前端到后臺的用戶系統(demo)。用戶系統基本是所有項目中都必須有的基礎模塊,可大可小。大的需要很大一個團隊來維護,小的一個人兼職就能搞定。對于很多還未參與工作的同學來說,這個項目也可以練練手,說不定,第一份工作進去就是搞用戶模塊呢。
技術棧
Spring Boot 、Jpa 、Thymeleaf、HTML、Maven、MySQL。
對于技術棧,還不清楚的同學,自行查找相關資料,至少知道個大概是干啥的。
需求功能
現在需要對用戶信息進行新增、列表展示、用戶詳情展示、信息修改、信息刪除等功能。
用戶信息:姓名、密碼、手機號碼、年齡。
數據庫表
自己本地安裝MySQL,并創建數據庫,然后在創建一張用戶表。
建表語句
- CREATE TABLE `user` (
- `uid` bigint NOT NULL AUTO_INCREMENT,
- `uname` varchar(32) CHARACTER SET utf8 COLLATE utf8_general_ci DEFAULT NULL,
- `password` varchar(6) CHARACTER SET utf8 COLLATE utf8_general_ci NOT NULL,
- `tel` varchar(255) CHARACTER SET utf8 COLLATE utf8_general_ci NOT NULL,
- `age` int DEFAULT NULL,
- PRIMARY KEY (`uid`)
- ) ENGINE=InnoDB AUTO_INCREMENT=4 DEFAULT CHARSET=utf8;
項目構建
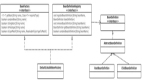
項目整體目錄
接下來,我們就一步一步,把這些代碼理清楚。
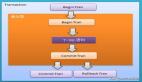
整體項目采用的是
- html-->controller--->service--repository-->DB
這也是當前實際開發中相對比較流行的,但為了演示,我這里就就用entity實體類就搞定了。
實際開發中會有其他什么O之類的,比如說:DTO/VO/BO.....。有的項目使用的是DTO,有的可能使用的是BO等。進入項目組了,按照項目組的開發規范來就行了,實在不理解的話,建議你先學會模仿別人是怎么做的。
廢話不多說,直接開干!
創建Spring Boot項目
可以使用spring官網給創建方式,地址:
https://start.spring.io/
這里也可以參考另外一篇文章:
如何快速構建Spring Boot基礎項目?
maven依賴
在項目的pom.xml中添加如下配置
- <?xml version="1.0" encoding="UTF-8"?>
- <project xmlns="http://maven.apache.org/POM/4.0.0" xmlns:xsi="http://www.w3.org/2001/XMLSchema-instance"
- xsi:schemaLocation="http://maven.apache.org/POM/4.0.0 http://maven.apache.org/xsd/maven-4.0.0.xsd">
- <modelVersion>4.0.0</modelVersion>
- <!-- Spring Boot 項目 -->
- <parent>
- <groupId>org.springframework.boot</groupId>
- <artifactId>spring-boot-starter-parent</artifactId>
- <version>2.1.6.RELEASE</version>
- </parent>
- <!-- 項目 maven 坐標 -->
- <groupId>com.tian.user</groupId>
- <artifactId>spring-boot-jpa-thymeleaf</artifactId>
- <version>1.0-SNAPSHOT</version>
- <!-- 項目名稱 -->
- <name>spring-boot-jpa-thymeleaf</name>
- <dependencies>
- <!-- web -->
- <dependency>
- <groupId>org.springframework.boot</groupId>
- <artifactId>spring-boot-starter-web</artifactId>
- </dependency>
- <!-- thymeleaf -->
- <dependency>
- <groupId>org.springframework.boot</groupId>
- <artifactId>spring-boot-starter-thymeleaf</artifactId>
- </dependency>
- <!-- jpa -->
- <dependency>
- <groupId>org.springframework.boot</groupId>
- <artifactId>spring-boot-starter-data-jpa
- </artifactId>
- </dependency>
- <!-- MySQL -->
- <dependency>
- <groupId>mysql</groupId>
- <artifactId>mysql-connector-java</artifactId>
- </dependency>
- </dependencies>
- <build>
- <plugins>
- <plugin>
- <groupId>org.springframework.boot</groupId>
- <artifactId>spring-boot-maven-plugin</artifactId>
- <configuration>
- <fork>true</fork>
- </configuration>
- </plugin>
- </plugins>
- </build>
- </project>
主要是SpringBoot項目parent、web、MySQL、jpa、thymeleaf依賴,這樣就把相關的jar包給依賴進來了。
啟動類
- import org.springframework.boot.SpringApplication;
- import org.springframework.boot.autoconfigure.SpringBootApplication;
- import org.springframework.boot.builder.SpringApplicationBuilder;
- import org.springframework.boot.web.servlet.support.SpringBootServletInitializer;
- /**
- * @author java 后端技術全棧
- * 就是一個簡單的啟動類
- */
- @SpringBootApplication
- public class Application {
- public static void main(String[] args) {
- SpringApplication.run(Application.class, args);
- }
- }
注意:此時數據庫相關信息沒有配置進項目里,所以,項目是啟動不了的。
集成MySQL數據庫
在resource目錄下,創建一個application.properties文件,加入以下內容:
- spring.datasource.driver-class-name=com.mysql.cj.jdbc.Driver
- spring.datasource.url=jdbc:mysql://localhost:3306/test?useUnicode=true&characterEncoding=UTF-8&serverTimezone=UTC
- spring.datasource.username=root
- spring.datasource.password=123456
注意:如果MySQL是8.0版本,必須要配置服務時區,否則會啟動不了。
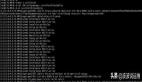
此時項目就可以正常啟動了。
集成 Jpa
在application.properties中添加
- spring.jpa.properties.hibernate.hbm2dl.auto=create
- spring.jpa.properties.hibernate.dialect=org.hibernate.dialect.MySQL5InnoDBDialect
- spring.jpa.show-sql=true
創建一個UserRepository
- package com.tian.user.repository;
- import com.tian.user.entity.User;
- import org.springframework.data.jpa.repository.JpaRepository;
- import org.springframework.data.jpa.repository.Modifying;
- import org.springframework.data.jpa.repository.Query;
- import org.springframework.stereotype.Repository;
- @Repository
- public interface UserRepository extends JpaRepository<User, Long> {
- }
這樣jpa就集成就來了。
集成Thymeleaf
前面我們已經把jar包給以來進來了,需要在application.properties中添加
- spring.thymeleaf.cache=false
- spring.thymeleaf.prefix=classpath:/templates/
- spring.thymeleaf.mode=.html
- spring.thymeleaf.encoding=UTF-8
- spring.thymeleaf.content-type=text/html
然后在resources目錄下添加兩個文件夾:
- templates 前端頁面模板目錄
- static 前端靜態資源目錄
新增用戶
在templates目錄下創建index.html
創建UserService接口和UserServiceImpl實現類。
- public interface UserService {
- void add(User user);
- }
- @Service
- public class UserServiceImpl implements UserService {
- @Resource
- private UserRepository userRepository;
- @Override
- public void add(User user) {
- userRepository.save(user);
- }
- }
創建UserController
- @Controller
- public class UserController {
- @Resource
- private UserService userService;
- @RequestMapping("/index")
- public String add(Model model) {
- return "index";
- }
- @RequestMapping("/save")
- public String save(Model model,User user) {
- userService.add(user);
- //跳轉到用戶列表
- return "redirect:/userList";
- }
- }
這樣一個新增功能我們就做完了。這里我們順帶著把用戶列表也給搞出來。
用戶列表
在templates目錄下創建user_list.html頁面
- <!DOCTYPE html>
- <html lang="zh" xmlns:th="http://www.thymeleaf.org">
- <head>
- <!-- 為了減少篇幅,樣式代碼這里就省略掉,樣式不是我們的重點內容 -->
- </head>
- <body>
- <a href="/">
- <div id="ret">
- <button>新增用戶</button>
- </div>
- </a>
- <table id="content" style="border: 1px solid;">
- <tr>
- <th>姓名</th>
- <th>年齡</th>
- <th>手機號碼</th>
- <th>操作</th>
- </tr>
- <tr th:each="user:${users}">
- <td th:text="${user.uname}"></td>
- <td th:text="${user.age}"></td>
- <td th:text="${user.tel}"></td>
- <td><a th:href="@{'/userInfo/'+${user.uid}}" target="_blank">用戶詳情</a> |
- <a th:href="@{'/deleteById/'+${user.uid}}" target="_blank">刪除用戶信息</a> |
- <a th:href="@{'/update/'+${user.uid}}" target="_blank">修改用戶信息</a>
- </td>
- </tr>
- </table>
- </body>
- </html>
在service和實現類中添加用戶列表的方法,這里沒有做分頁。
- //UserService中添加
- List<User> findAll();
- //UserServiceImpl中添加方法
- @Override
- public List<User> findAll() {
- return userRepository.findAll();
- }
然后我們再在controller中添加一個方法用戶列表的方法。
- @RequestMapping("/userList")
- public String index(Model model) {
- List<User> users = userService.findAll();
- model.addAttribute("users", users);
- return "user_list";
- }
好了,自此用戶列表也搞定。下面我們來啟動項目,然后演示一下:
演示
新增流程的演示,訪問:
http://localhost:8080/
來到新增用戶頁面:
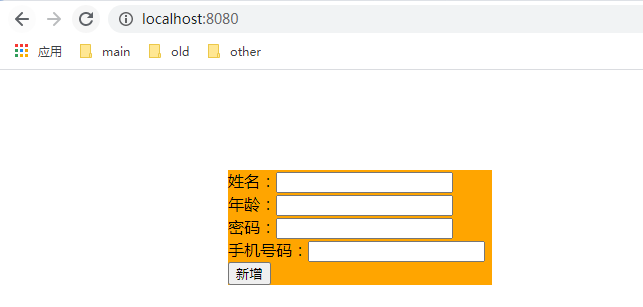
填入用戶信息

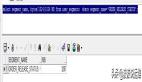
點擊新增,來到用戶列表:
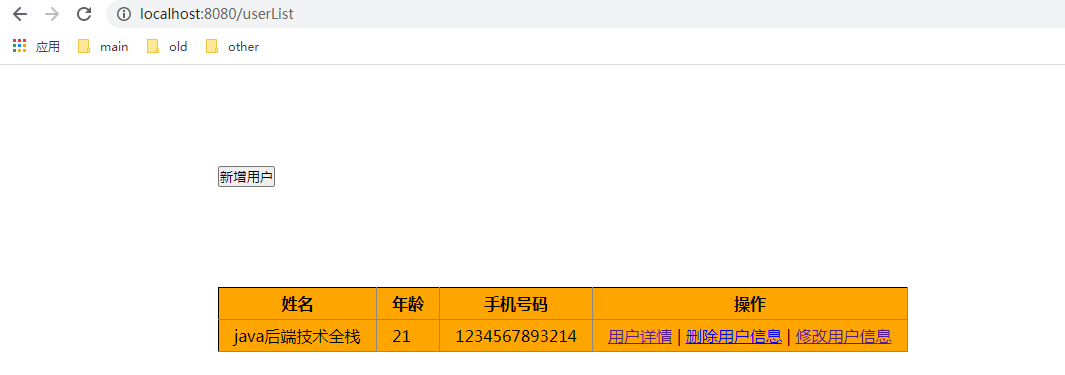
用戶詳情
在templates目錄下創建user_info.html頁面:
- <!DOCTYPE html>
- <html lang="zh" xmlns:th="http://www.thymeleaf.org">
- <head>
- <meta charset="UTF-8">
- <title>用戶詳情</title>
- </head>
- <body>
- <div id="content">
- 姓名:<input type="text" th:value="${user.uname}"><br/>
- 年齡:<input type="text" th:value="${user.age}"><br/>
- 密碼:<input type="text" th:value="${user.password}"><br/>
- 手機號碼:<input type="text" th:value="${user.tel}"><br/>
- </div>
- </body>
- </html>
在service和實現類分別添加相應的方法。
- //UserService中添加方法
- User findById(Long id);
- //UserServiceImpl添加方法
- @Override
- public User findById(Long id) {
- return userRepository.getOne(id);
- }
然后在controller中添加方法
- @RequestMapping("/userInfo/{id}")
- public String userInfo(Model model, @PathVariable("id") Long id) {
- User user = userService.findById(id);
- model.addAttribute("user", user);
- return "user_info";
- }
然后再次啟動項目,我們就直接可以從用戶列表中進入到用戶詳情里。
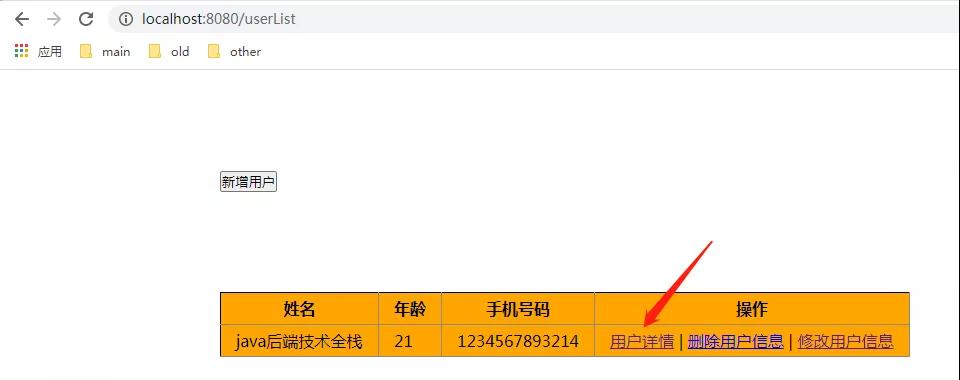
點擊:用戶詳情。
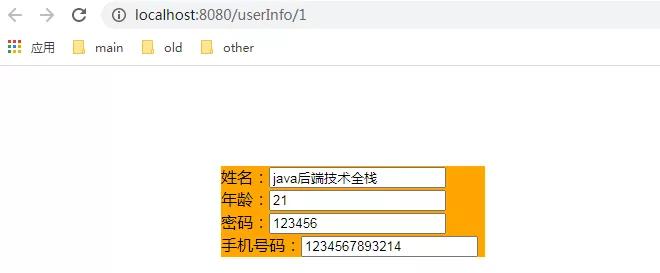
OK,到此,用戶詳情也就搞定了。剩下的我們繼續搞修改功能。
用戶信息修改
在templates目錄下創建update.html頁面。
- <!DOCTYPE html>
- <html lang="zh" xmlns:th="http://www.thymeleaf.org">
- <head>
- <meta charset="UTF-8">
- <title>Index</title>
- </head>
- <body>
- <div id="content">
- <form action="/updateById" method="post">
- <input type="text" th:value="${user.uid}" name="uid"><br/>
- 姓名:<input type="text" th:value="${user.uname}" name="uname"><br/>
- 年齡:<input type="text" th:value="${user.age}" name="age"><br/>
- 密碼:<input type="text" th:value="${user.password}" name="password"><br/>
- 手機號碼:<input type="text" th:value="${user.tel}" name="tel"><br/>
- <button>修改</button>
- </form>
- </div>
- </body>
UserRepository中添加更新方法:
- @Repository
- public interface UserRepository extends JpaRepository<User, Long> {
- @Modifying
- @Query("update User u set u.tel=?1 ,u.uname=?2 , u.password=?3 where u.uid=?4")
- void updateById(String tel, String uname, String password, Long uid);
- }
繼續在UserService和實現類中添加想要的方法。
- //UserService中添加方法
- void update(User user);
- //UserServiceImpl中添加方法
- @Transactional
- @Override
- public void update(User user) {
- userRepository.updateById(user.getTel(), user.getUname(), user.getPassword(), user.getUid());
- }
注意:UserServiceImpl添加的 這個update方法,必須要事務注解@Transactional,否則更新失敗。異常信息如下:
- javax.persistence.TransactionRequiredException: Executing an update/delete query
- at org.hibernate.internal.AbstractSharedSessionContract.checkTransactionNeededForUpdateOperation(AbstractSharedSessionContract.java:398) ~[hibernate-core-5.3.10.Final.jar:5.3.10.Final]
加上事務注解@Transactional就搞定了。
然后在controller中添加方法
- @RequestMapping("/updateById")
- public String updateById(Model model,User user) {
- userService.update(user);
- return "redirect:/userList";
- }
- //跳轉到修改頁面
- @RequestMapping("/update/{id}")
- public String update(Model model, @PathVariable("id") Long id) {
- User user = userService.findById(id);
- model.addAttribute("user", user);
- return "update";
- }
再次啟動項目,繼續來到用戶列表頁面:
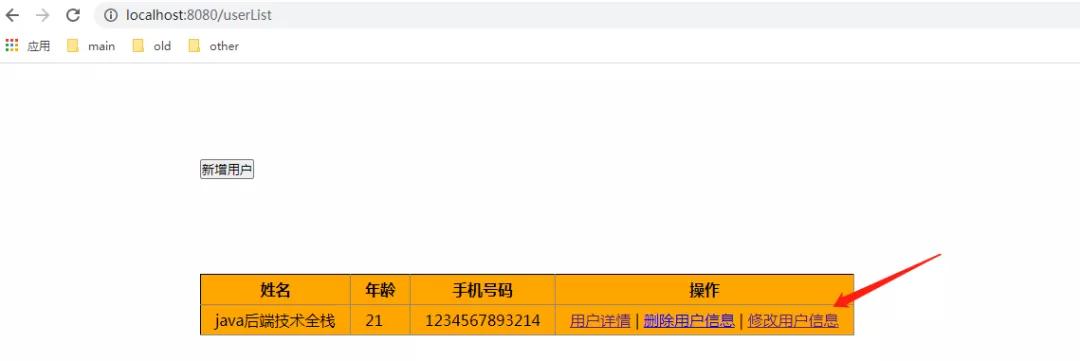
點擊:修改用戶信息,然后跳轉到用戶信息修改頁面:
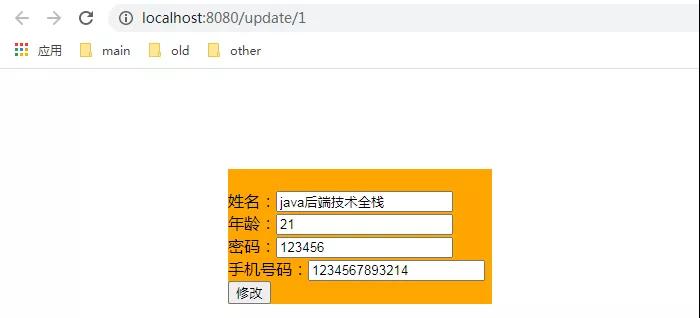
這里我們把手機尾號修改成666:

點擊修改按鈕。跳轉到用戶列表頁面:

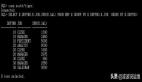
發現此時的用戶手機號已經修改完了。
到這里,我們已經做了用戶新增、單個用戶信息查詢、多個用戶信息查詢、單個用戶信息修改。剩下的刪除功能留給大家自己去做。相信大家也是很輕松的就能完成的。
總結
本文使用了技術棧:
Spring Boot +Jpa + Thyneleaf +MySQL+Maven+HTML
實戰演練一個用戶信息新增、查詢、修改。
注意點:
1、配置信息是一點要小心,不能有誤。
2、得自己安裝MySQL數據庫,然后創建數據庫,創建用戶表。
3、分層:html頁面、controller、service接口、service實現類、repository接口。
好了,一個簡單的用戶信息模塊就這樣了,刪除就靠你們自己去實現了。非常簡單的~,如有疑惑、問題的可以隨時聯系我。
「展望」
后面我們基于這個不斷擴大,比如:用戶信息刪除、用戶登錄、用戶注冊、權限、角色、集成Redis做緩存、使用Redis搞一個分布式鎖、用戶積分排行榜等待功能。
本文轉載自微信公眾號「Java后端技術全棧」,可以通過以下二維碼關注。轉載本文請聯系Java后端技術全棧公眾號。