輕松玩轉平行視界(下)
前言
先來回顧一下上一篇文章的easygo.json配置文件的相關元素的描述:【木棉花】輕松玩轉平行視界(上)
- {
- "easyGoVersion": 必選,固定值為"1.0",
- "client": 必選,該程序的應用包名,
- "logicEntities": [
- {
- "head": {
- "function": 必選,調用組件名,固定值為"magicwindow",
- "required": 必選,預留字段,固定值為"true"
- },
- "body": {
- "mode": 必選,基礎分屏模式."0":購物模式,abilityPairs節點不生效;"1":自定義模式(包含導航模式),
- "abilityPairs": [自定義模式下必選,配置從from頁面到to頁面的分屏顯示
- {
- "from": 自定義模式下必選,AbilityA的包名,
- "to": 自定義模式下必選,AbilityB的包名,
- }表示A上啟動B,觸發分屏(A左B右)
- ],
- "Abilities": [可選,應用Page Ability屬性列表,
- {
- "name": 可選,Page Ability包名,
- "defaultFullScreen": 可選,Page Ability是否支持默認以全屏啟動."true": 支持;,"false": 不支持
- },
- {
- "name": 可選,Page Ability包名,
- "defaultFullScreen": 可選,Page Ability是否支持默認以全屏啟動."true": 支持;,"false": 不支持
- }
- ],
- "UX": {可選,頁面UX控制配置
- "isDraggable": 可選,是否支持分屏窗口拖動(僅針對平板產品生效)."true": 支持;,"false": 不支持(缺省值為false)
- }
- }
- }
- ]
- }
導航模式
代碼文件
代碼文件結構如下:
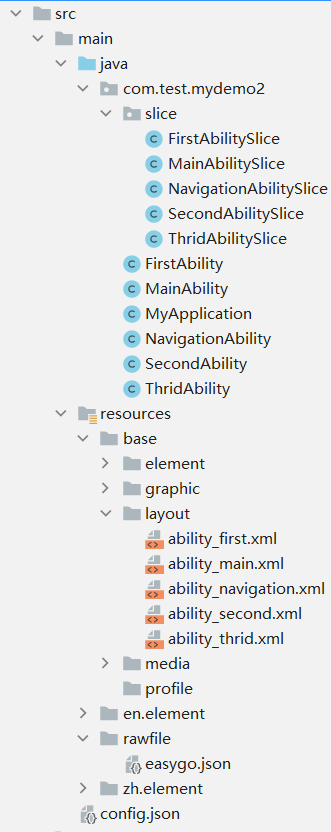
下面只給出部分重點代碼
FirstAbilitySlice.java:
- public class FirstAbilitySlice extends AbilitySlice {
- @Override
- public void onStart(Intent intent) {
- super.onStart(intent);
- super.setUIContent(ResourceTable.Layout_ability_first);
- findComponentById(ResourceTable.Id_btn_yes).setClickedListener(new Component.ClickedListener() {
- @Override
- public void onClick(Component component) {
- getContext().setDisplayOrientation(AbilityInfo.DisplayOrientation.LANDSCAPE);//申請橫屏方向可進入全屏顯示狀態
- }
- });
- findComponentById(ResourceTable.Id_btn_no).setClickedListener(new Component.ClickedListener() {
- @Override
- public void onClick(Component component) {
- getContext().setDisplayOrientation(AbilityInfo.DisplayOrientation. PORTRAIT);//調用申請豎屏方向即可退出全屏狀態
- }
- });
- findComponentById(ResourceTable.Id_btn2).setClickedListener(new Component.ClickedListener() {
- @Override
- public void onClick(Component component) {
- Operation operation = new Intent.OperationBuilder()
- .withDeviceId("")
- .withBundleName(getBundleName())
- .withAbilityName(SecondAbility.class.getName())
- .build();
- intent.setOperation(operation);
- startAbility(intent);
- }
- });
- findComponentById(ResourceTable.Id_btn3).setClickedListener(new Component.ClickedListener() {
- @Override
- public void onClick(Component component) {
- Operation operation = new Intent.OperationBuilder()
- .withDeviceId("")
- .withBundleName(getBundleName())
- .withAbilityName(ThridAbility.class.getName())
- .build();
- intent.setOperation(operation);
- startAbility(intent);
- }
- });
- findComponentById(ResourceTable.Id_btn_back).setClickedListener(new Component.ClickedListener() {
- @Override
- public void onClick(Component component) {
- terminateAbility();
- }
- });
- }
- @Override
- public void onActive() {
- super.onActive();
- }
- @Override
- public void onForeground(Intent intent) {
- super.onForeground(intent);
- }
- }
config.json配置文件的module對象中新增metaData:
- "metaData": {
- "customizeData": [
- {
- "name": "EasyGoClient",
- "value": "true"
- }
- ]
- }
在src -> main -> resources -> rawfile目錄下增加easygo.json配置文件:
- {
- "easyGoVersion": "1.0",
- "client": "com.test.mydemo2",
- "logicEntities": [
- {
- "head": {
- "function": "magicwindow",
- "required": "true"
- },
- "body": {
- "mode": "1",
- "abilityPairs": [
- {
- "from": "com.test.mydemo2.NavigationAbility",
- "to": "*"
- }
- ],
- "Abilities": [
- {
- "name": "com.test.mydemo2.MainAbility",
- "defaultFullScreen": "false"
- },
- {
- "name": "com.test.mydemo2.NavigationAbility",
- "defaultFullScreen": "false"
- },
- {
- "name": "com.test.mydemo2.FirstAbility",
- "defaultFullScreen": "false"
- },
- {
- "name": "com.test.mydemo2.SecondAbility",
- "defaultFullScreen": "false"
- },
- {
- "name": "com.test.mydemo2.ThridAbility",
- "defaultFullScreen": "false"
- }
- ],
- "UX": {
- "isDraggable": "true"
- }
- }
- }
- ]
- }
上述代碼easygo.json配置文件的相關元素的描述如下:
- {
- "easyGoVersion":
- "client":
- "logicEntities": [
- {
- "head": {
- "function":
- "required":
- },
- "body": {
- "mode":
- "abilityPairs": [
- {
- "from": 自定義模式下必選,AbilityA的包名,
- "to": "*"表示任意Page Ability,
- }表示A上啟動任意Page Ability,觸發分屏(A左任意右)
- ],
- "Abilities": [
- {
- "name":
- "defaultFullScreen":
- }
- ],
- "UX": {
- "isDraggable":
- }
- }
- }
- ]
- }
運行效果
平板橫屏的運行效果如下:
小結
導航模式是一種系統提供的“分欄”,能幫助用戶在應用內高效地來回切換。
從上述運行效果可以發現導航模式有三個特點:
1. 右半屏總是最后一個窗口。
2. 左邊固定導航主頁,左點右出,右點右出。
3. 左邊觸發的返回,左右分屏中的所有界面都將退出;右邊觸發的返回,右邊回到上一層級,左邊保持不變。
全屏顯示Page Ability
另外關于平行視界狀態下,部分Page Ability希望以全屏來顯示,分別有動態方法和靜態方法:
動態方法:
全屏顯示:調用如下接口申請橫屏方向可進入全屏顯示狀態:
- getContext().setDisplayOrientation(AbilityInfo.DisplayOrientation.LANDSCAPE);
退出全屏:調用申請豎屏方向即可退出全屏狀態:
- getContext().setDisplayOrientation(AbilityInfo.DisplayOrientation. PORTRAIT);
靜態方法:
在easygo.json文件的Abilities屬性中,將Page Ability的defaultFullScreen配置為true,即可實現Page Ability默認以全屏顯示:
- {
- "name": "com.test.mydemo2.MainAbility",
- "defaultFullScreen": "true"
- }
在config.json文件的Abilities屬性中,將Page Ability的orientation配置為landscape(橫屏),Page Ability會一直以全屏狀態顯示:
- {
- "orientation": "landscape",
- "visible": true,
- "name": "com.test.mydemo2.MainAbility",
- "icon": "$media:icon",
- "description": "$string:mainability_description",
- "label": "$string:entry_MainAbility",
- "type": "page",
- "launchType": "standard"
- }
購物模式
代碼文件
代碼文件結構如下:
下面只給出部分重點代碼
config.json配置文件的module對象中新增metaData:
- "metaData": {
- "customizeData": [
- {
- "name": "EasyGoClient",
- "value": "true"
- }
- ]
- }
在src -> main -> resources -> rawfile目錄下增加easygo.json配置文件:
- {
- "easyGoVersion": "1.0",
- "client": "com.test.mydemo3",
- "logicEntities": [
- {
- "head": {
- "function": "magicwindow",
- "required": "true"
- },
- "body": {
- "mode": "0",
- "transActivities": [
- "com.test.mydemo3.NavigationAbility",
- "com.test.mydemo3.FirstAbility",
- "com.test.mydemo3.SecondAbility"
- ],
- "Abilities": [
- {
- "name": "com.test.mydemo3.MainAbility",
- "defaultFullScreen": "false"
- },
- {
- "name": "com.test.mydemo3.NavigationAbility",
- "defaultFullScreen": "false"
- },
- {
- "name": "com.test.mydemo3.FirstAbility",
- "defaultFullScreen": "false"
- },
- {
- "name": "com.test.mydemo3.SecondAbility",
- "defaultFullScreen": "false"
- },
- {
- "name": "com.test.mydemo3.ThridAbility",
- "defaultFullScreen": "false"
- }
- ],
- "UX": {
- "isDraggable": "true",
- "supportLock": "true"
- }
- }
- }
- ]
- }
上述代碼easygo.json配置文件的相關元素的描述如下:
- {
- "easyGoVersion":
- "client":
- "logicEntities": [
- {
- "head": {
- "function":
- "required":
- },
- "body": {
- "mode": 0":購物模式,
- "transActivities": [
- 過渡頁面列表
- ],
- "Abilities": [
- {
- "name":
- "defaultFullScreen":
- }
- ],
- "UX": {
- "isDraggable":
- "supportLock":, 可選,是否支持應用內用戶鎖定功能."true": 支持鎖定,;,"false": 不支持(缺省值為false)
- }
- }
- }
- ]
- }
運行效果
平板橫屏的運行效果如下:
小結
購物模式能有效解決寬屏設備上的顯示適配問題,適用于購物類的場景和應用。
從上述運行效果可以發現購物模式有三個特點:
1. 左點右出。
2. 右邊點擊啟動新的窗口,把當前內容往左推,新的內容在右邊展示。
3. 左邊觸發的返回,左右側窗口內的界面都將退出上一層級或首頁;右邊觸發的返回,右側窗口回到上一層級,不影響左邊的頁面。
后臺鎖定
應用啟用平行視界后,特定的適合多任務并行/有多任務并行需求的場景,可使用后臺鎖定。
可通過以下進行配置:
- "UX": {
- "supportLock": "true"
- }
雙窗口顯示狀態會顯示鎖定按鈕,用戶點擊后可以進行鎖定和解鎖操作;鎖定后,左右窗口不再關聯,即左側打開新窗口在左側顯示,右側打開新窗口在右側顯示。例如普通購物模式下,點擊右側屏幕的內容,會把右側內容向左推;直播場景鎖定后,直播固定在左側顯示,點擊右側內容,更換右側的顯示內容。
其它
- {
- "easyGoVersion": ,
- "client": ,
- "logicEntities": [
- {
- "head": {
- "function": ,
- "required":
- },
- "body": {
- "mode": "0",
- "abilityPairs": [
- {
- "from": ,
- "to":
- }
- ],
- "defaultDualAbilities": {可選,應用冷啟動默認打開首頁雙屏配置
- "mainPages": Page Ability包名,冷啟動應用打開此頁面時,系統在左屏自動啟動的頁面,
- "relatedPage": Page Ability包名,冷啟動應用打開此頁面時,系統在右屏自動啟動的頁面
- },
- "transActivities": [
- ],
- "Abilities": [
- {
- "name": ,
- "defaultFullScreen":
- }
- ],
- "UX": {
- "supportRotationUxCompat": 可選,是否開啟窗口縮放,用于提高轉屏應用UX顯示兼容性(僅針對平板產品生效)."true": 支持;"false": 不支持(缺省值為false),
- "isDraggable": ,
- "supportVideoFullscreen": 可選,是否支持視頻全屏(僅針對平板產品生效)."true": 支持;"false": 不支持(缺省值為false),
- "supportDraggingToFullScreen": 可選,是否支持在分屏和全屏之間拖動切換."ALL": 所有設備上支持此功能;"PAD": 僅平板產品上支持此功能;,"FOLD": 僅折疊屏上支持此功能,
- "supportLock":
- }
- }
- }
- ]
- }