一篇文章帶你搞定Python中urllib庫(操作URL)
作者:Go進階者
使用Python語言,能夠幫助大家更好的學習Python。urllib提供的功能就是利用程序去執行各種HTTP請求。如果要模擬瀏覽器完成特定功能,需要把請求偽裝成瀏覽器。
Hey,大家好呀,我是Go進階者。
一、操作URL
urllib提供了一系列用于操作URL的功能。分類講解相關內容。
二、Get()
urllib的request模塊可以非常方便地抓取URL內容,也就是發送一個GET請求到指定的頁面,然后返回HTTP的響應:
例如,對豆瓣的URLhttps://api.growingio.com/v2/22c937bbd8ebd703f2d8e9445f7dfd03/web/pv?stm=1593747087078進行抓取,并返回響應:

- from urllib import request
- with request.urlopen('https://api.growingio.com/v2/22c937bbd8ebd703f2d8e9445f7dfd03/web/pv?stm=1593747087078') as f:
- data = f.read()
- print('Status:', f.status, f.reason)
- for k, v in f.getheaders():
- print('%s: %s' % (k, v))
- print('Data:', data.decode('utf-8'))
可以看到HTTP響應的頭和JSON數據:

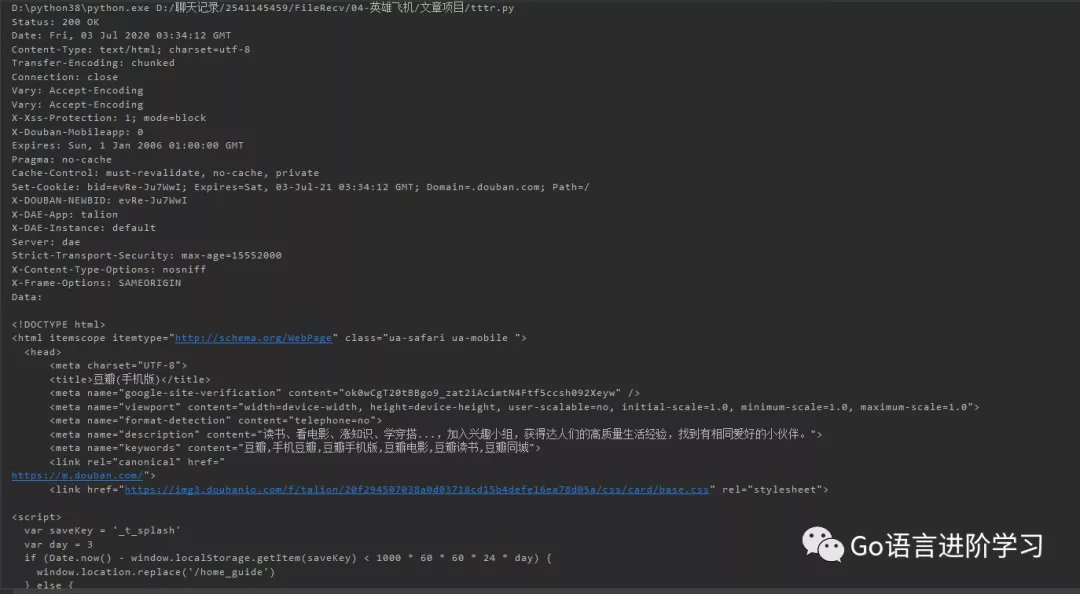
如果要想模擬瀏覽器發送GET請求,就需要使用Request對象,通過往Request對象添加HTTP頭,就可以把請求偽裝成瀏覽器。例如,模擬iPhone 6去請求豆瓣首頁:
- from urllib import request
- req = request.Request('http://www.douban.com/')
- req.add_header('User-Agent', 'Mozilla/6.0 (iPhone; CPU iPhone OS 8_0 like Mac OS X) AppleWebKit/536.26 (KHTML, like Gecko) Version/8.0 Mobile/10A5376e Safari/8536.25')
- with request.urlopen(req) as f:
- print('Status:', f.status, f.reason)
- for k, v in f.getheaders():
- print('%s: %s' % (k, v))
- print('Data:', f.read().decode('utf-8'))
這樣豆瓣會返回適合iPhone的移動版網頁:
三、Post()
如果要以POST發送一個請求,只需要把參數data以bytes形式傳入。
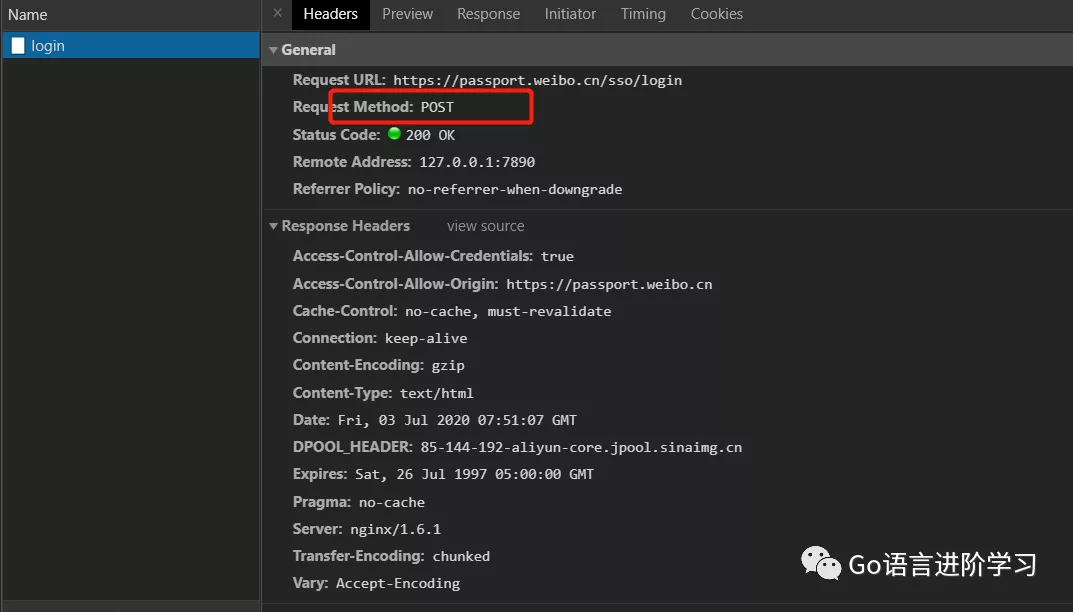
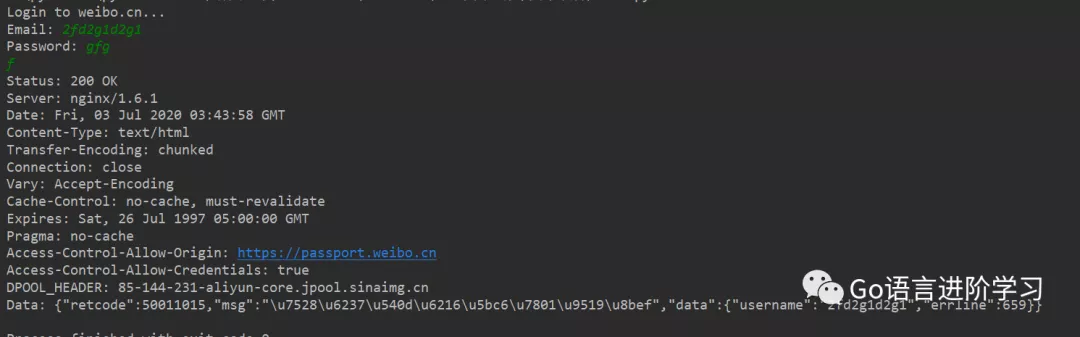
模擬一個微博登錄,先讀取登錄的郵箱和口令,然后按照weibo.cn的登錄頁的格式以username=xxx&password=xxx的編碼傳入:
- from urllib import request, parse
- print('Login to weibo.cn...')
- #電子郵件
- email = input('Email: ')
- #密碼
- passwd = input('Password: ')
- #相關的參數
- login_data = parse.urlencode([
- ('username', email),
- ('password', passwd),
- ('entry', 'mweibo'),
- ('client_id', ''),
- ('savestate', '1'),
- ('ec', ''),
- ('pagerefer', 'https://passport.weibo.cn/signin/welcome?entry=mweibo&r=http%3A%2F%2Fm.weibo.cn%2F')
- ])
- #網址請求
- req = request.Request('https://passport.weibo.cn/sso/login')
- req.add_header('Origin', 'https://passport.weibo.cn')
- #構造User-Agent
- req.add_header('User-Agent', 'Mozilla/6.0 (iPhone; CPU iPhone OS 8_0 like Mac OS X) AppleWebKit/536.26 (KHTML, like Gecko) Version/8.0 Mobile/10A5376e Safari/8536.25')
- req.add_header('Referer', 'https://passport.weibo.cn/signin/login?entry=mweibo&res=wel&wm=3349&r=http%3A%2F%2Fm.weibo.cn%2F')
- with request.urlopen(req, data=login_data.encode('utf-8')) as f:
- print('Status:', f.status, f.reason)
- for k, v in f.getheaders():
- print('%s: %s' % (k, v))
- print('Data:', f.read().decode('utf-8'))
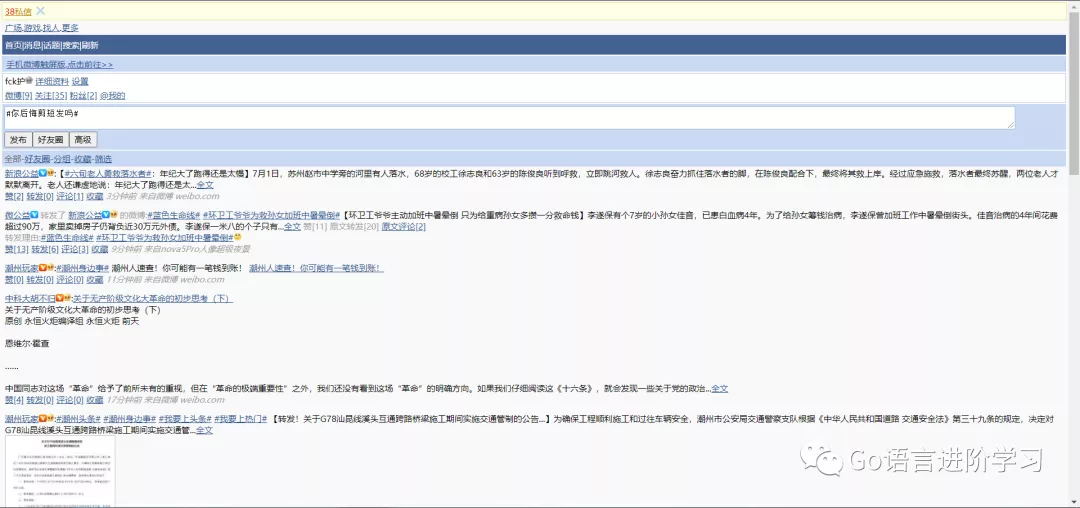
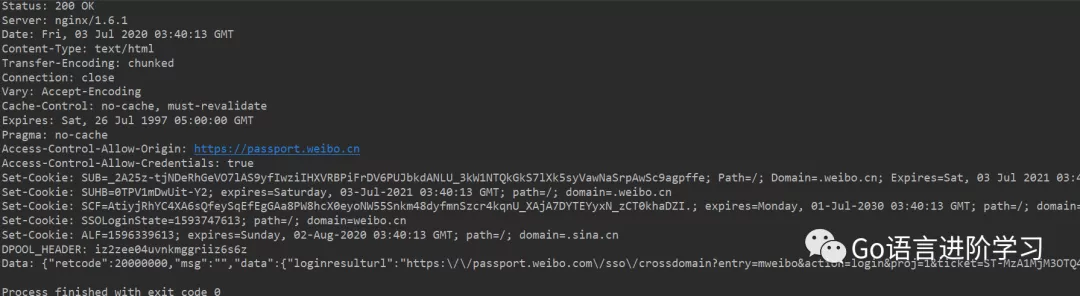
如果登錄成功,獲得的響應如下:
如果登錄失敗,獲得的響應如下:
四、Handler
如果還需要更復雜的控制,比如通過一個Proxy去訪問網站,需要利用ProxyHandler來處理,示例代碼如下:
- import urllib.request
- # 構建了兩個代理Handler,一個有代理IP,一個沒有代理IP
- httpproxy_handler = urllib.request.ProxyHandler({"https": "27.191.234.69:9999"})
- nullproxy_handler = urllib.request.ProxyHandler({})
- # 定義一個代理開關
- proxySwitch = True
- # 通過 urllib.request.build_opener()方法使用這些代理Handler對象,創建自定義opener對象
- # 根據代理開關是否打開,使用不同的代理模式
- if proxySwitch:
- opener = urllib.request.build_opener(httpproxy_handler)
- else:
- opener = urllib.request.build_opener(nullproxy_handler)
- request = urllib.request.Request("http://www.baidu.com/")
- # 1. 如果這么寫,只有使用opener.open()方法發送請求才使用自定義的代理,而urlopen()則不使用自定義代理。
- response = opener.open(request)
- # 2. 如果這么寫,就是將opener應用到全局,之后所有的,不管是opener.open()還是urlopen() 發送請求,都將使用自定義代理。
- # urllib.request.install_opener(opener)
- # response = urllib.request.urlopen(request)
- # 獲取服務器響應內容
- html = response.read().decode("utf-8")
- # 打印結果
- print(html)
如果代理成功返回網址的信息。
如果網址出錯或者代理地址有誤,返回下面界面。

五、總結
使用Python語言,能夠幫助大家更好的學習Python。urllib提供的功能就是利用程序去執行各種HTTP請求。如果要模擬瀏覽器完成特定功能,需要把請求偽裝成瀏覽器。偽裝的方法是先監控瀏j覽器發出的請求,再根據瀏覽器的請求頭來偽裝,User-Agent頭就是用來標識瀏覽器的。
責任編輯:姜華
來源:
Go語言進階學習