全新的 Vue3 狀態管理工具:Pinia
Vue3 發布已經有一段時間了,它采用了新的響應式系統,而且構建了一套全新的 Composition API。Vue 的周邊生態都在加緊適配這套新的系統,官方的狀態管理庫 Vuex 也在適配中,為此官方提出了一個 Vuex 5 的全新提案。
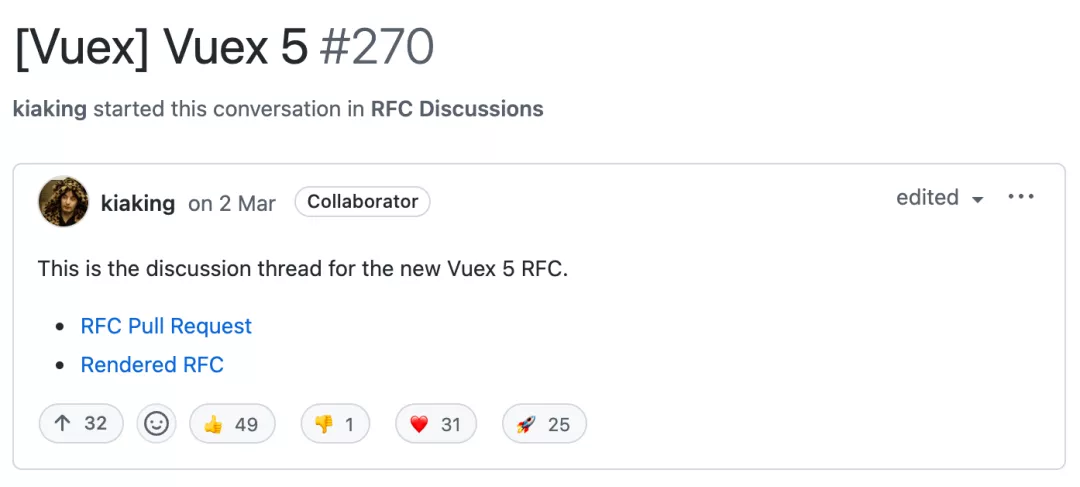
- 支持兩種語法創建 Store:Options Api 和 Composition Api;
- 刪除 mutations,只支持 state、getters、actions;
- 模塊化的設計,能很好支持代碼分割;
- 沒有嵌套的模塊,只有 Store 的概念;
- 完整的 TypeScript 支持;
在這個提案下方,有個評論很有意思。簡單翻譯一下:
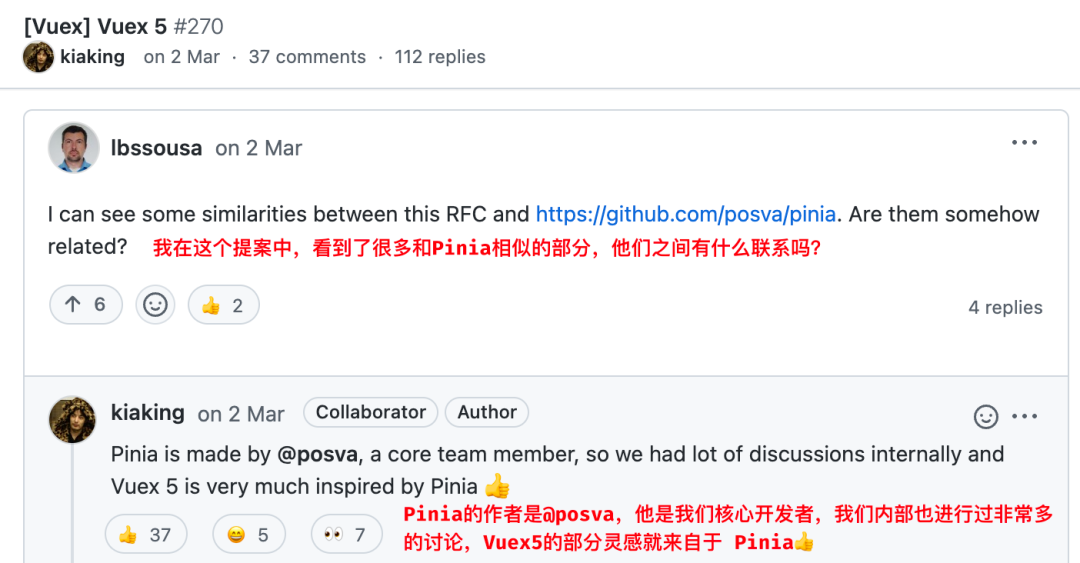
好巧不巧,Vuex5 的提案,與 Pinia 實現的功能不能說毫無關系,只能說一模一樣,今天的文章就來給大家介紹一下這個菠蘿。
安裝
在現有項目中,用過如下命令進行 Pinia 模塊的安裝。
- # yarn
- yarn add pinia@next
- # npm
- npm i pinia@next
安裝完成后,需要在 Vue3 項目的入口文件中,進行導入安裝。
- // main.js
- import { createApp } from 'vue'
- import { createPinia } from 'pinia'
- import App from './App.vue'
- // 實例化 Vue
- const app = createApp(App)
- // 安裝 Pinia
- app.use(createPinia())
- // 掛載在真實 DOM
- app.mount('#app')
上手
要使用 Pinia 的話,只需要定義一個 store,然后在用到該數據的地方進行導入。
定義 Store
- import { defineStore } from "pinia"
- // 對外部暴露一個 use 方法,該方法會導出我們定義的 state
- const useCounterStore = defineStore({
- // 每個 store 的 id 必須唯一
- id: 'counter',
- // state 表示數據源
- state: () => ({
- count: 0
- }),
- // getters 類似于 computed,可對 state 的值進行二次計算
- getters: {
- double () {
- // getter 中的 this 指向👉 state
- return this.count * 2
- },
- // 如果使用箭頭函數會導致 this 指向有問題
- // 可以在函數的第一個參數中拿到 state
- double: (state) => {
- return state.count * 2
- }
- },
- // actions 用來修改 state
- actions: {
- increment() {
- // action 中的 this 指向👉 state
- this.count++
- },
- }
- })
- export default useCounterStore
除了使用上述類似 vuex 的方式來構建 state,還可以使用 function 的形式來創建 store,有點類似于 Vue3 中的 setup()。
- import { ref, computed } from "vue"
- import { defineStore } from "pinia"
- // 對外部暴露一個 use 方法,該方法會導出我們定義的 state
- const useCounterStore = defineStore('counter', function () {
- const count = ref(0)
- const double = computed(() => count.value * 2)
- function increment() {
- count.value++
- }
- return {
- count, double, increment
- }
- })
- export default useCounterStore
使用 Store
前面也介紹過,Pinia 提供了兩種方式來使用 store,Options Api 和 Composition Api 中都完美支持。
Options Api
在 Options Api 中,可直接使用官方提供的 mapActions 和 mapState 方法,導出 store 中的 state、getter、action,其用法與 Vuex 基本一致,很容易上手。
- import { mapActions, mapState } from 'pinia'
- import { useCounterStore } from '../model/counter'
- export default {
- name: 'HelloWorld',
- computed: {
- ...mapState(useCounterStore, ['count', 'double'])
- },
- methods: {
- ...mapActions(useCounterStore, ['increment'])
- }
- }
Composition Api
Composition Api 中,不管是 state 還是 getter 都需要通過 computed 方法來監聽變化,這和 Options Api 中,需要放到 computed 對象中的道理一樣。另外, Options Api 中拿到的 state 值是可以直接進行修改操作的,當然還是建議寫一個 action 來操作 state 值,方便后期維護。
- // Composition Api
- import { computed } from 'vue'
- import { useCounterStore } from '../stores/counter'
- export default {
- name: 'HelloWorld',
- setup() {
- const counter = useCounterStore()
- return {
- // state 和 getter 都需要在使用 computed,這和 Options Api 一樣
- count: computed(() => counter.count),
- double: computed(() => counter.double),
- increment: () => { counter.count++ }, // 可以直接修改 state 的值
- increment: counter.increment, // 可以引用 store 中定義的 action
- }
- }
- }
類型提示
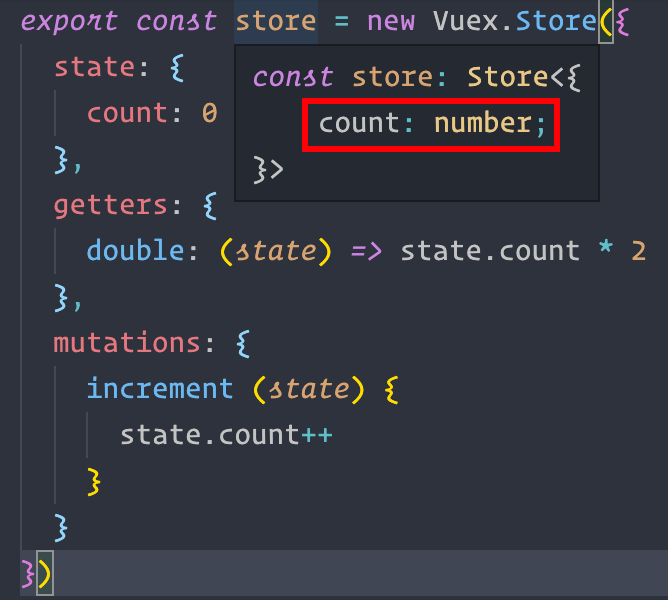
在 Vuex 中,TypeScript 的類型提示做得不是很好,在進行類型推導時,只能找到它的 state。特別是寫代碼的過程中,代碼提示就很不智能。
而 pinia,就能推導出定義的所有 state、getter、action,這樣在寫代碼的時候,就會方便很多。
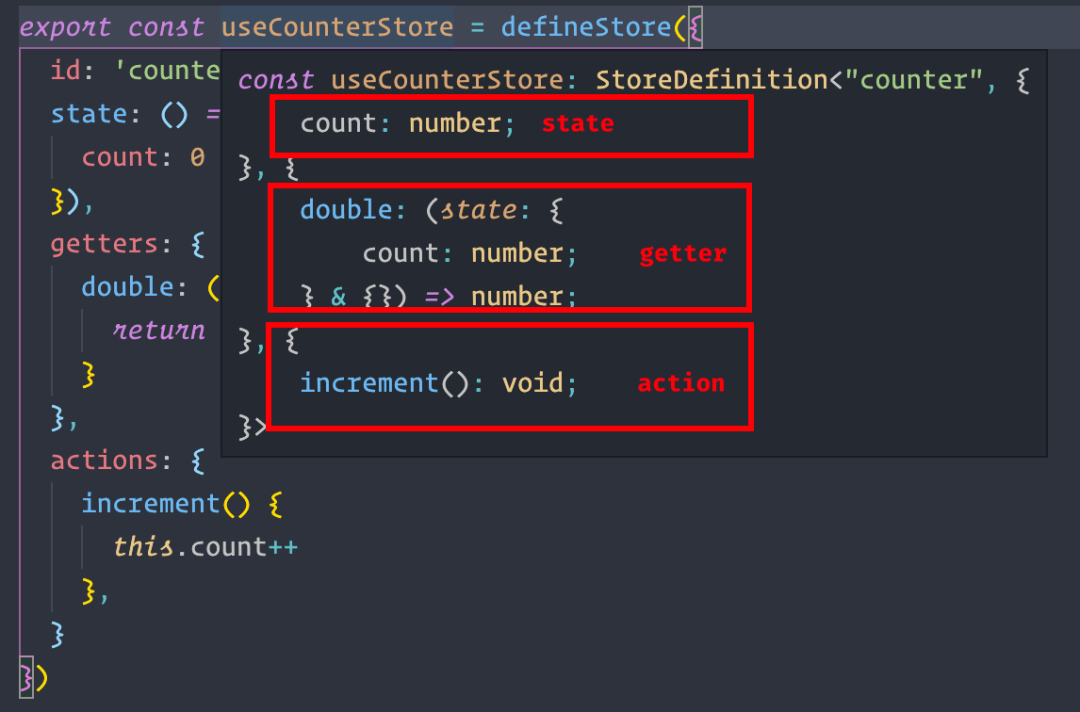
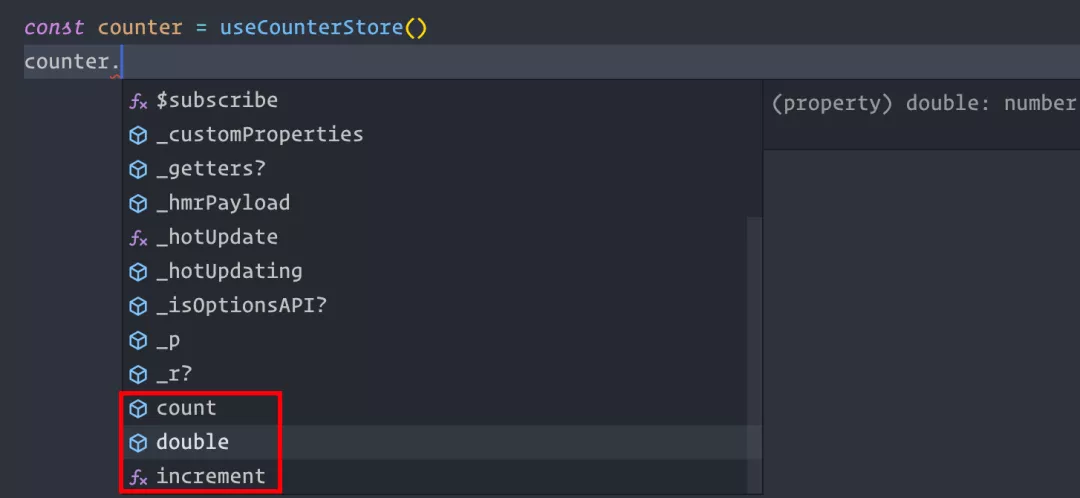
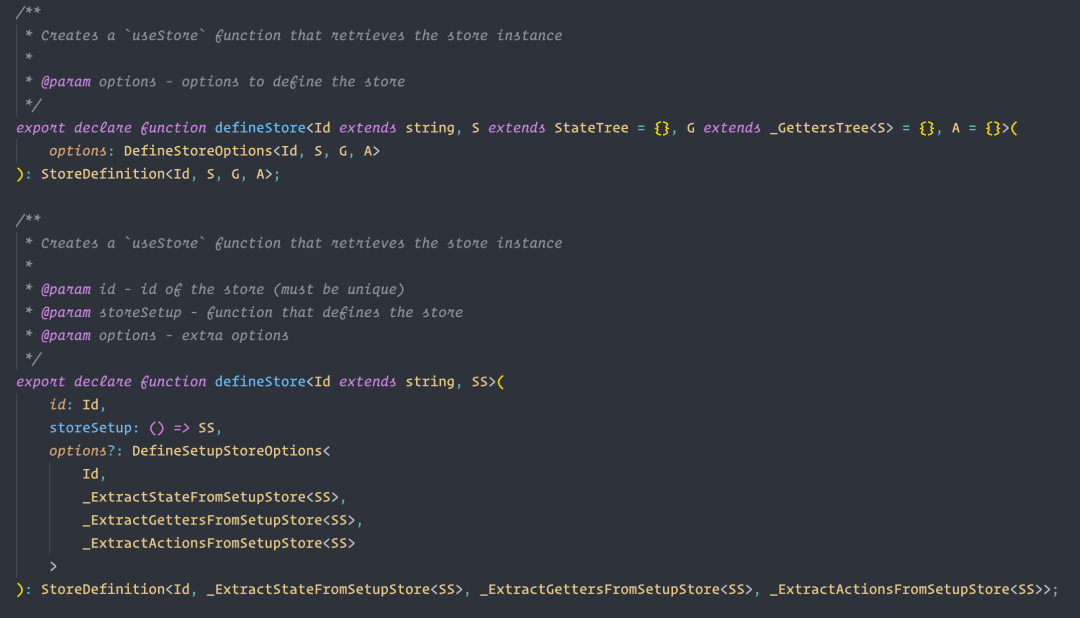
主要是 pinia 通過 TypeScript 進行了十分友好的類型定義,感興趣的可以看看 pinia 的類型定義文件(pinia.d.ts):
代碼分割
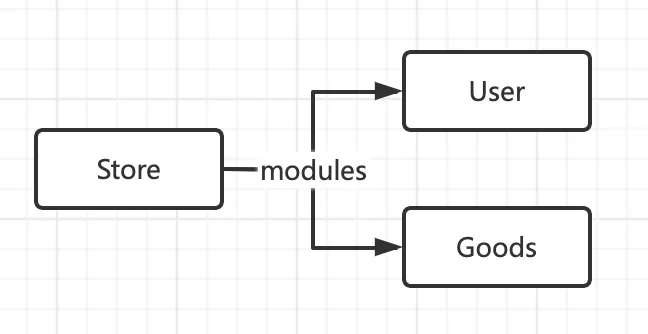
由于使用了模塊化設計,所有的 store 都能夠單獨引入,而不是像 vuex 一樣,通過 modules 的方式,將所有的 module 掛載到一個 store 上。
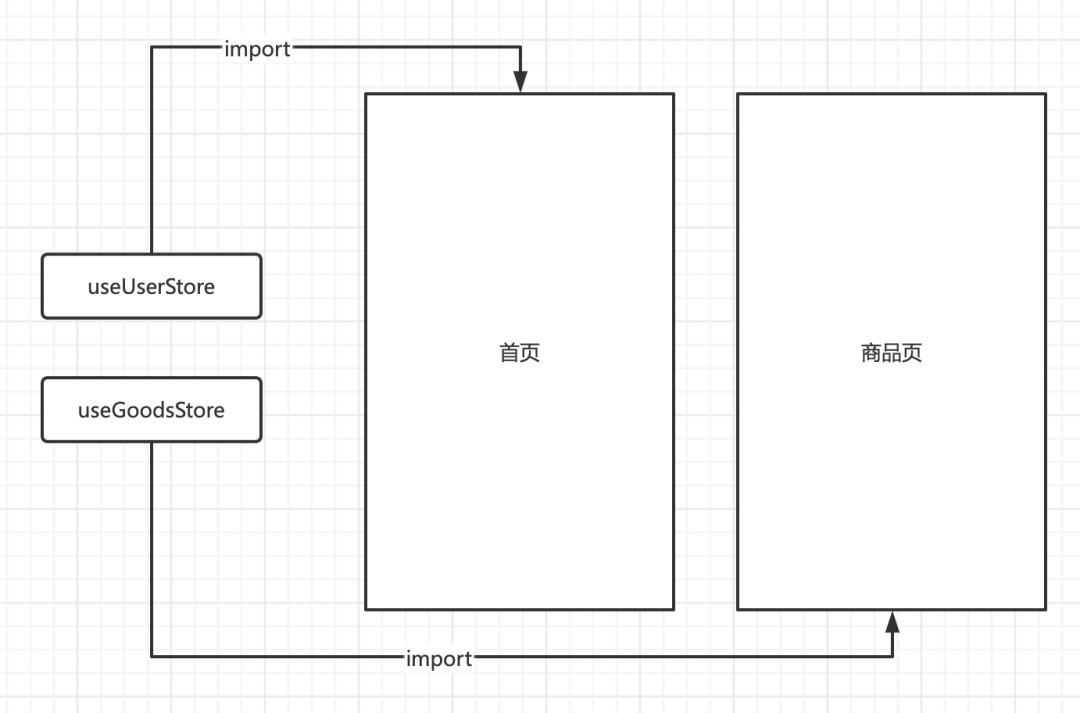
假設,我們當前通過 Vuex 創建了一個 Store,這個 Store 下有兩個 module,分別是用戶模塊(User)和商品模塊(Goods)。即使當前首頁只使用到了用戶信息,但是整個 Store 都會被打包到首頁的 js chunk 中。
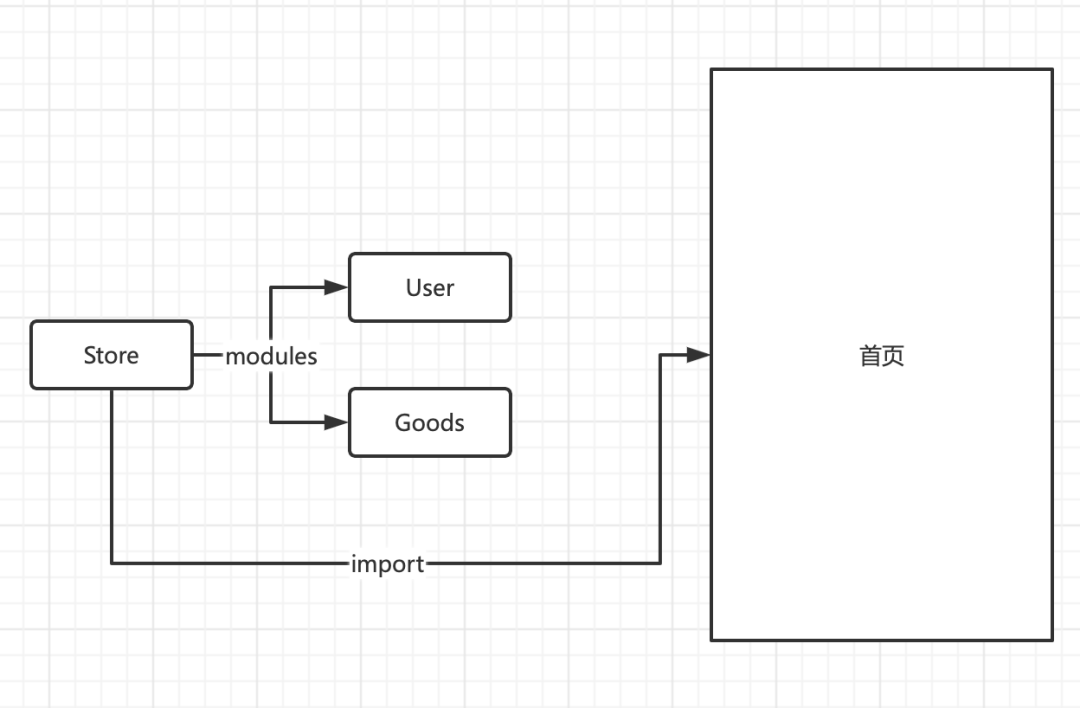
如果我們使用 pinia,我們會使用 defineStore 定義兩個 完全是分離狀態的 store,兩個頁面在引入時,也互不影響。最后打包的時候,首頁的 js chunk 和商品頁的 js chunk 會分別打包對應的 store。
Pinia 的介紹到這里就告一段落了,如果現在有新項目要使用 Vue3 進行開發,推薦無腦使用 Pinia,更加簡潔,而且大小僅 1KB。