女朋友背著我,用 Python 偷偷隱藏了她的行蹤
作者:星安果
女朋友會 Python 是多么可怕的一件事!上篇文章發布之后,一位朋友告訴忽略了一件事,假設女朋友會 Python 的話,那豈不是要翻車?如果是這樣的話,女朋友發過來的圖片包含的地理位置是否真實,要打一個 Big Big 的問號了?
1.目標場景
女朋友會 Python 是多么可怕的一件事!
上篇文章發布之后,一位朋友告訴忽略了一件事,假設女朋友會 Python 的話,那豈不是要翻車?如果是這樣的話,女朋友發過來的圖片包含的地理位置是否真實,要打一個 Big Big 的問號了?
實際上,利用 Python 是可以非常方便地修改一張圖片的地理位置。
2.編寫代碼
在編寫腳本之前,需要在虛擬環境下安裝依賴庫:piexif
第一步,我們讀取原圖的經度和緯度,然后將地理位置格式化為浮點類型。
拿到 GPS 圖片坐標之后,需要轉為火星坐標系數據。
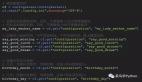
- def read_image(self, image_path):
- """
- 開始處理圖片
- exifread:讀取圖片屬性
- :return:
- """
- exif_dict = piexif.load(image_path)
- if exif_dict['GPS']:
- # 緯度
- gps_lati_pre = exif_dict['GPS'][2]
- gps_lati = dms_to_gps(gps_lati_pre)
- # 經度
- gps_long_pre = exif_dict['GPS'][4]
- gps_long = dms_to_gps(gps_long_pre)
- # GPS坐標轉為高德坐標
- lng, lat = wgs84togcj02(gps_long, gps_lati)
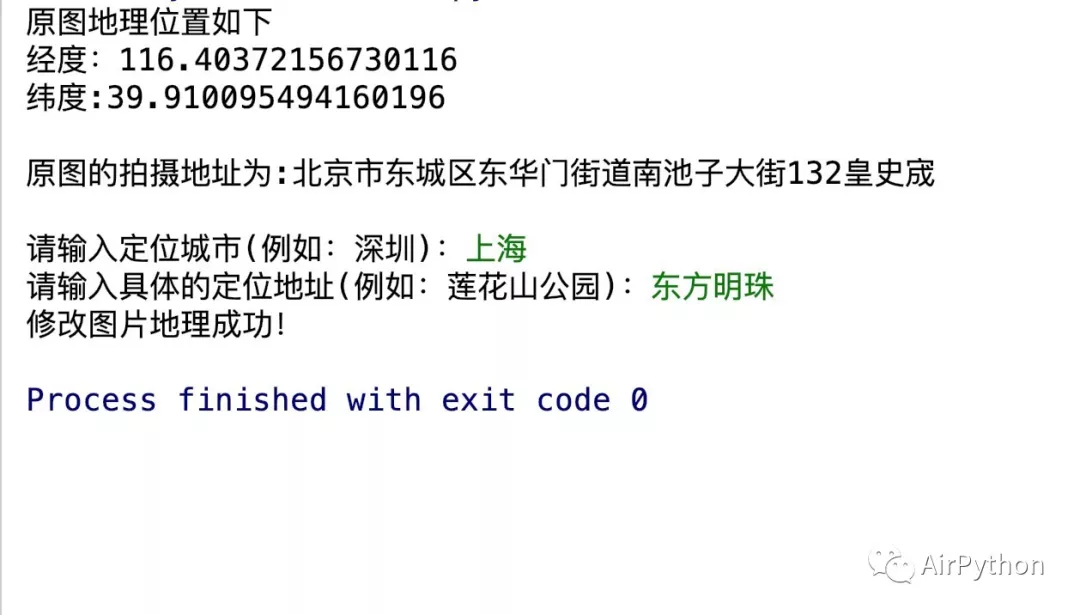
- print(f"原圖地理位置如下\n經度:{lng}\n緯度:{lat}\n")
- return f'{lng}, {lat}'
- else:
- print(f'抱歉!這張圖片不包含地理位置!')
第二步,利用高德 Web 服務 API 中的 逆地理編碼 解析出原圖的詳細位置。
- def get_address_by_location(self, location):
- """
- 通過經緯度拿到地理位置
- :param location:
- :return:
- """
- params = {
- 'key': self.ak,
- 'location': location,
- 'sig': self.sign
- }
- resp = json.loads(requests.get(url=self.url_regeo, params=params).text)
- if resp and resp.get('regeocode') and resp.get('regeocode').get('formatted_address'):
- address = resp.get('regeocode').get('formatted_address')
- print(f'原圖的拍攝地址為:{address}\n')
- else:
- print('api解析地址出錯,請檢查ak!\n')
第三步,尋找一個要定位的地理位置。
首先,輸入目標城市和具體地址,利用高德 Web 服務 API 中的地理編碼拿到要定位的地理位置。
- def get_location_by_address(self, city, address):
- """
- 通過地理位置到拿到經緯度
- 地理編碼:https://lbs.amap.com/api/webservice/guide/api/georegeo/
- :param address:
- :return:
- """
- params = {
- 'key': self.ak,
- 'city': city,
- 'address': address,
- 'sig': self.sign
- }
- resp = json.loads(requests.get(url=self.url_geo, params=params).text)
- # 獲取坐標地址
- if resp and len(resp.get('geocodes')) >= 1 and resp.get('geocodes')[0].get('location'):
- location = resp.get('geocodes')[0].get('location')
- gps_data = location.split(',')
- # 得到經度和緯度
- gps_long = float(gps_data[0])
- gps_lati = float(gps_data[1])
- return gps_long, gps_lati
- else:
- print('api解析地址出錯,請檢查ak!')
- return None
第四步,修改圖片的地理位置。
由于 piexif 中經、緯度數據都是元組類型,因此需要將要設置的數據進行一次處理。
- def gps_to_dms(gps_data):
- """
- 坐標轉為度、分、秒(double)
- 116.397451
- http://www.gzhatu.com/du2dfm.html
- :param gps_data:
- :return:{1: b'N', 2: ((22, 1), (32, 1), (945, 100)), 3: b'E', 4: ((114, 1), (1, 1), (3445, 100))
- """
- # 度:向下取整
- gps_degree = math.floor(gps_data)
- gps_data_temp1 = (gps_data - gps_degree) * 60
- # 分
- gps_minute = math.floor(gps_data_temp1)
- gps_data_temp2 = gps_data_temp1 - gps_minute
- # 秒,取小數點后4位
- gps_second = round(gps_data_temp2 * 60, 2)
- # 注意:秒必須轉換為整形
- result = ((gps_degree, 1), (gps_minute, 1), (int(gps_second * 100), 100))
- return result
最后,將正確格式的經緯度數據寫入到圖片中去。
- def write_image(self, image_path, gps_long, gps_lati):
- """
- 修改文件夾下所有文件的屬性
- :param image_path: 文件夾路徑
- :return:
- """
- # 讀取圖片
- img = Image.open(image_path)
- try:
- exif_dict = piexif.load(img.info['exif'])
- except:
- print('加載文件地理位置異常!')
- return
- # 修改地理位置
- # GPS GPSLatitudeRef:N
- # GPS GPSLatitude:[22, 32, 189/20]
- # GPS GPSLongitudeRef:E
- # GPS GPSLongitude:[114, 1, 689/20]
- exif_dict['GPS'][2] = gps_to_dms(gps_lati)
- exif_dict['GPS'][4] = gps_to_dms(gps_long)
- exif_bytes = piexif.dump(exif_dict)
- # 寫入到新的圖片中去
- img.save(image_path, 'jpeg', exif=exif_bytes)
3.結果結論
通過上面的 4 步操作,能將任意地理位置寫入到圖片中。
除了地理位置,圖片的元數據,包含:拍攝器材、拍攝時間、拍攝參數都能進行二次修改。
責任編輯:華軒
來源:
AirPython