分享AWS的Redis如何正確遷移至阿里云項目實踐

一、背景
最近項目上有一個需求,需要把aws的redis遷移至阿里云的redis,本來是想著用阿里云的dts實現在線遷移,但是aws對自己產品的redis高級命令作了限制,不允許用戶使用,所以無法實現用dts遷移aws的redis。經過一番曲折之后,用下面的方法成功實現了aws的redis遷移至阿里云的redis。下面分享一下具體實現的過程。
二、實施過程
1、安裝配置AWS的CLI
(1)安裝AWS CLI
Amazon Linux(本環境) AWS CLI 預安裝在 Amazon Linux AMI 上。
檢查當前安裝的版本,請使用以下命令:
$ aws --version
aws-cli/2.4.5 Python/3.8.8 Linux/4.14.133-113.105.amzn2.x86_64 botocore/1.13
(2)配置AWS CLI
AWS CLI 將此信息存儲在文件中指定的配置文件(設置集合)default中 credentials。默認情況下,當您運行未明確指定要使用的配置文件的 AWS CLI 命令時,將使用此配置文件中的信息。
$aws configure
AWS Access Key ID [None]: ***************
AWS Secret Access Key [None]: wJa***************LEKEY
Default region name [None]: cn-northwest-1
Default output format [None]: json
注:regoin name根據自己的實際情況填寫,目前國內主要有寧夏(cn-northwest-1)、北京(cn-north-1)兩個區。
2、安裝遷移工具redis-shake
前提條件
目標Redis實例的版本社區版(4.0或5.0版本)或企業版(5.0版本)
Redis-shake介紹
Redis-shake是阿里云自研的開源Redis數據傳輸工具,支持對Redis數據進行解析(decode)、恢復(restore)、備份(dump)和同步(sync或rump),易于部署,靈活高效。本案例通過使用Redis-shake的restore(恢復)模式,將本地RDB文件中的數據恢復至云數據庫Redis,從而實現數據遷移上云。
安裝Redis-shake
1、登陸待安裝的Redis-shake機器。
2、下載Redis-shake文件。
wget 'http://docs-aliyun.cn-hangzhou.oss.aliyun-inc.com/assets/attach/120287/cn_zh/1608173646665/redis-shake-v2.0.3.tar.gz'3、解壓Redis-shake文件。
tar xzf redis-shake-v2.0.3.tar.gz
4、修改參數文件。
參數 | 是否必填 | 說明 | 示例 |
source.rdb.input | 是 | 備份文件(RDB文件)的相對路徑或絕對路徑。多個文件請使用英文分號(;)分隔。 | /root/tools/RedisShake/demo.rdb |
target.address | 是 | 目標Redis實例的連接地址與端口號,連接地址和端口號之間使用英文冒號(:)分隔。 | r-bp1wcw2rlw76acc5k.redis.rds.aliyuncs.com:6379 |
target.password_raw | 是 | 目標Redis實例的賬號(需具備讀寫權限)及其密碼,賬號和密碼之間使用英文冒號(:)分隔。 | testaccount:Rp829dlwa |
key_exists | 否 | 當源庫中的Key與目標庫中的Key相同時,采取的數據寫入策略,取值:rewrite:覆蓋寫入至目標庫。none:默認值,停止運行Redis-shake程序并提示沖突的Key。ignore:直接跳過當前遷移的Key,保留目標庫的數據,繼續執行數據遷移。 | rewrite |
parallel | 否 | Redis-shake執行遷移的并發線程數,適當調大該值可提高同步性能。默認值為32,最小值為1。 | 32 |
3、開始執行遷移
為了實現遷移的自動化,寫了一個一鍵遷移腳本。
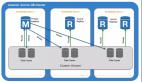
遷移流程簡介:
- 源庫redis備份。
- 把備份文件復制至S3。
- 從s3下載備份文件至本地。
- 運行Redis-shake程序,開始執行遷移。
#!/bin/bash
date=$(date +%Y%m%d%H%M%S)
#dump redis file
aws elasticache create-snapshot --cache-cluster-id deviceredis  --snapshot-name myredis${date}
sleep 120s
copy_status=`aws elasticache  describe-snapshots --cache-cluster-id deviceredis --snapshot-name myredis${date} |grep  "available"  |wc -l`
until [ $copy_status -eq 1 ]
do
  copy_status=`aws elasticache  describe-snapshots --cache-cluster-id deviceredis --snapshot-name myredis${date} |grep  "available"  |wc -l`
  sleep 5s
done
#copy redisfile to  s3
aws elasticache copy-snapshot --source-snapshot-name myredis${date} --target-snapshot-name myredis${date} --target-bucket redistmp
#download redisfile from s3
get_status=`aws elasticache  describe-snapshots --cache-cluster-id deviceredis --snapshot-name myredis${date} |grep  "available"  |wc -l`
until [ $get_status -eq 1 ]
do
   get_status=`aws elasticache  describe-snapshots --cache-cluster-id deviceredis --snapshot-name myredis${date} |grep  "available"  |wc -l`
   sleep 5s
done
aws s3api get-object --bucket redistmp --key myredis${date}-0001.rdb ./myredis${date}-0001.rdb
#restore to aliyun redis
sed -i  "s/\/root\/redis-shake-v2.0.3\/.*rdb$/\/root\/redis-shake-v2.0.3\/myredis${date}-0001.rdb/g"  redis-shake.conf
./redis-shake.linux -type=restore -conf=redis-shake.conf
說明:
日志中出現restore: rdb done表示數據恢復完成,此時使用Ctrl+C組合鍵停止運行Redis-shake。如下圖所示: