聊一聊時間輪的實現
上一篇我們講了定時器的幾種實現,分析了在大數據量高并發的場景下這幾種實現方式就有點力不從心了,從而引出時間輪這種數據結構。在netty 和kafka 這兩種優秀的中間件中,都有時間輪的實現。文章最后,我們模擬kafka 中scala 的代碼實現java版的時間輪。
Netty 的時間輪實現
接口定義
Netty 的實現自定義了一個超時器的接口io.netty.util.Timer,其方法如下:
- public interface Timer
- {
- //新增一個延時任務,入參為定時任務TimerTask,和對應的延遲時間
- Timeout newTimeout(TimerTask task, long delay, TimeUnit unit);
- //停止時間輪的運行,并且返回所有未被觸發的延時任務
- Set < Timeout > stop();
- }
- public interface Timeout
- {
- Timer timer();
- TimerTask task();
- boolean isExpired();
- boolean isCancelled();
- boolean cancel();
- }
Timeout接口是對延遲任務的一個封裝,其接口方法說明其實現內部需要維持該延遲任務的狀態。后續我們分析其實現內部代碼時可以更容易的看到。
Timer接口有唯一實現HashedWheelTimer。首先來看其構造方法,如下:
- public HashedWheelTimer(ThreadFactory threadFactory, long tickDuration, TimeUnit unit, int ticksPerWheel, boolean leakDetection, long maxPendingTimeouts)
- {
- //省略代碼,省略參數非空檢查內容。
- wheel = createWheel(ticksPerWheel);
- mask = wheel.length - 1;
- //省略代碼,省略槽位時間范圍檢查,避免溢出以及小于 1 毫秒。
- workerThread = threadFactory.newThread(worker);
- //省略代碼,省略資源泄漏追蹤設置以及時間輪實例個數檢查
- }
mask 的設計和HashMap一樣,通過限制數組的大小為2的次方,利用位運算來替代取模運算,提高性能。
構建循環數組
首先是方法createWheel,用于創建時間輪的核心數據結構,循環數組。來看下其方法內容
- private static HashedWheelBucket[] createWheel(int ticksPerWheel)
- {
- //省略代碼,確認 ticksPerWheel 處于正確的區間
- //將 ticksPerWheel 規范化為 2 的次方冪大小。
- ticksPerWheel = normalizeTicksPerWheel(ticksPerWheel);
- HashedWheelBucket[] wheel = new HashedWheelBucket[ticksPerWheel];
- for(int i = 0; i < wheel.length; i++)
- {
- wheel[i] = new HashedWheelBucket();
- }
- return wheel;
- }
數組的長度為 2 的次方冪方便進行求商和取余計算。
HashedWheelBucket內部存儲著由HashedWheelTimeout節點構成的雙向鏈表,并且存儲著鏈表的頭節點和尾結點,方便于任務的提取和插入。
新增延遲任務
方法HashedWheelTimer#newTimeout用于新增延遲任務,下面來看下代碼:
- public Timeout newTimeout(TimerTask task, long delay, TimeUnit unit)
- {
- //省略代碼,用于參數檢查
- start();
- long deadline = System.nanoTime() + unit.toNanos(delay) - startTime;
- if(delay > 0 && deadline < 0)
- {
- deadline = Long.MAX_VALUE;
- }
- HashedWheelTimeout timeout = new HashedWheelTimeout(this, task, deadline);
- timeouts.add(timeout);
- return timeout;
- }
可以看到任務并沒有直接添加到時間輪中,而是先入了一個 mpsc 隊列,我簡單說下 mpsc【多生產者單一消費者隊列】 是 JCTools 中的并發隊列,用在多個生產者可同時訪問隊列,但只有一個消費者會訪問隊列的情況。,采用這個模式主要出于提升并發性能考慮,因為這個隊列只有線程workerThread會進行任務提取操作。
工作線程如何執行
- public void run()
- {
- {//代碼塊①
- startTime = System.nanoTime();
- if(startTime == 0)
- {
- //使用startTime==0 作為線程進入工作狀態模式標識,因此這里重新賦值為1
- startTime = 1;
- }
- //通知外部初始化工作線程的線程,工作線程已經啟動完畢
- startTimeInitialized.countDown();
- }
- {//代碼塊②
- do {
- final long deadline = waitForNextTick();
- if(deadline > 0)
- {
- int idx = (int)(tick & mask);
- processCancelledTasks();
- HashedWheelBucket bucket = wheel[idx];
- transferTimeoutsToBuckets();
- bucket.expireTimeouts(deadline);
- tick++;
- }
- } while (WORKER_STATE_UPDATER.get(HashedWheelTimer.this) == WORKER_STATE_STARTED);
- }
- {//代碼塊③
- for(HashedWheelBucket bucket: wheel)
- {
- bucket.clearTimeouts(unprocessedTimeouts);
- }
- for(;;)
- {
- HashedWheelTimeout timeout = timeouts.poll();
- if(timeout == null)
- {
- break;
- }
- if(!timeout.isCancelled())
- {
- unprocessedTimeouts.add(timeout);
- }
- }
- processCancelledTasks();
- }
- }
看 waitForNextTick,是如何得到下一次執行時間的。
- private long waitForNextTick()
- {
- long deadline = tickDuration * (tick + 1);//計算下一次需要檢查的時間
- for(;;)
- {
- final long currentTime = System.nanoTime() - startTime;
- long sleepTimeMs = (deadline - currentTime + 999999) / 1000000;
- if(sleepTimeMs <= 0)//說明時間已經到了
- {
- if(currentTime == Long.MIN_VALUE)
- {
- return -Long.MAX_VALUE;
- }
- else
- {
- return currentTime;
- }
- }
- //windows 下有bug sleep 必須是10 的倍數
- if(PlatformDependent.isWindows())
- {
- sleepTimeMs = sleepTimeMs / 10 * 10;
- }
- try
- {
- Thread.sleep(sleepTimeMs);// 等待時間到來
- }
- catch(InterruptedException ignored)
- {
- if(WORKER_STATE_UPDATER.get(HashedWheelTimer.this) == WORKER_STATE_SHUTDOWN)
- {
- return Long.MIN_VALUE;
- }
- }
- }
- }
簡單的說就是通過 tickDuration 和此時已經滴答的次數算出下一次需要檢查的時間,時候未到就sleep等著。
任務如何入槽的。
- private void transferTimeoutsToBuckets() {
- //最多處理100000 怕任務延遲
- for(int i = 0; i < 100000; ++i) {
- //從隊列里面拿出任務呢
- HashedWheelTimer.HashedWheelTimeout timeout = (HashedWheelTimer.HashedWheelTimeout)HashedWheelTimer.this.timeouts.poll();
- if (timeout == null) {
- break;
- }
- if (timeout.state() != 1) {
- long calculated = timeout.deadline / HashedWheelTimer.this.tickDuration;
- //計算排在第幾輪
- timeout.remainingRounds = (calculated - this.tick) / (long)HashedWheelTimer.this.wheel.length;
- long ticks = Math.max(calculated, this.tick);
- //計算放在哪個槽中
- int stopIndex = (int)(ticks & (long)HashedWheelTimer.this.mask);
- HashedWheelTimer.HashedWheelBucket bucket = HashedWheelTimer.this.wheel[stopIndex];
- //入槽,就是鏈表入隊列
- bucket.addTimeout(timeout);
- }
- }
- }
如何執行的
- public void expireTimeouts(long deadline) {
- HashedWheelTimer.HashedWheelTimeout next;
- //拿到槽的鏈表頭部
- for(HashedWheelTimer.HashedWheelTimeout timeout = this.head; timeout != null; timeout = next) {
- boolean remove = false;
- if (timeout.remainingRounds <= 0L) {//如果到這輪l
- if (timeout.deadline > deadline) {
- throw new IllegalStateException(String.format("timeout.deadline (%d) > deadline (%d)", timeout.deadline, deadline));
- }
- timeout.expire();//執行
- remove = true;
- } else if (timeout.isCancelled()) {
- remove = true;
- } else {
- --timeout.remainingRounds;//輪數-1
- }
- next = timeout.next;//繼續下一任務
- if (remove) {
- this.remove(timeout);//移除完成的任務
- }
- }
- }
就是通過輪數和時間雙重判斷,執行完了移除任務。
小結一下
總體上看 Netty 的實現就是上文說的時間輪通過輪數的實現,完全一致。可以看出時間精度由 TickDuration 把控,并且工作線程的除了處理執行到時的任務還做了其他操作,因此任務不一定會被精準的執行。
而且任務的執行如果不是新起一個線程,或者將任務扔到線程池執行,那么耗時的任務會阻塞下個任務的執行。
并且會有很多無用的 tick 推進,例如 TickDuration 為1秒,此時就一個延遲350秒的任務,那就是有349次無用的操作。出現空推。
但是從另一面來看,如果任務都執行很快(當然你也可以異步執行),并且任務數很多,通過分批執行,并且增刪任務的時間復雜度都是O(1)來說。時間輪還是比通過優先隊列實現的延時任務來的合適些。
Kafka 中的時間輪
上面我們說到 Kafka 中的時間輪是多層次時間輪實現,總的而言實現和上述說的思路一致。不過細節有些不同,并且做了點優化。
先看看添加任務的方法。在添加的時候就設置任務執行的絕對時間。
Kafka 中的時間輪
上面我們說到 Kafka 中的時間輪是多層次時間輪實現,總的而言實現和上述說的思路一致。不過細節有些不同,并且做了點優化。
先看看添加任務的方法。在添加的時候就設置任務執行的絕對時間。
- def add(timerTaskEntry: TimerTaskEntry): Boolean = {
- val expiration = timerTaskEntry.expirationMs
- if (timerTaskEntry.cancelled) {
- // Cancelled
- false
- } else if (expiration < currentTime + tickMs) {
- // 如果已經到期 返回false
- // Already expired
- false
- } else if (expiration < currentTime + interval) {//如果在本層范圍內
- // Put in its own bucket
- val virtualId = expiration / tickMs
- val bucket = buckets((virtualId % wheelSize.toLong).toInt)//計算槽位
- bucket.add(timerTaskEntry)//添加到槽內雙向鏈表中
- // Set the bucket expiration time
- if (bucket.setExpiration(virtualId * tickMs)) {//更新槽時間
- // The bucket needs to be enqueued because it was an expired bucket
- // We only need to enqueue the bucket when its expiration time has changed, i.e. the wheel has advanced
- // and the previous buckets gets reused; further calls to set the expiration within the same wheel cycle
- // will pass in the same value and hence return false, thus the bucket with the same expiration will not
- // be enqueued multiple times.
- queue.offer(bucket)//將槽加入DelayQueue,由DelayQueue來推進執行
- }
- true
- } else {
- //如果超過本層能表示的延遲時間,則將任務添加到上層。這里看到上層是按需創建的。
- // Out of the interval. Put it into the parent timer
- if (overflowWheel == null) addOverflowWheel()
- overflowWheel.add(timerTaskEntry)
- }
- }
那么時間輪是如何推動的呢?Netty 中是通過固定的時間間隔掃描,時候未到就等待來進行時間輪的推動。上面我們分析到這樣會有空推進的情況。
而 Kafka 就利用了空間換時間的思想,通過 DelayQueue,來保存每個槽,通過每個槽的過期時間排序。這樣擁有最早需要執行任務的槽會有優先獲取。如果時候未到,那么 delayQueue.poll 就會阻塞著,這樣就不會有空推進的情況發送。
我們來看下推進的方法。
- def advanceClock(timeoutMs: Long): Boolean = {
- //從延遲隊列中獲取槽
- var bucket = delayQueue.poll(timeoutMs, TimeUnit.MILLISECONDS)
- if (bucket != null) {
- writeLock.lock()
- try {
- while (bucket != null) {
- // 更新每層時間輪的currentTime
- timingWheel.advanceClock(bucket.getExpiration())
- //因為更新了currentTime,進行一波任務的重新插入,來實現任務時間輪的降級
- bucket.flush(reinsert)
- //獲取下一個槽
- bucket = delayQueue.poll()
- }
- } finally {
- writeLock.unlock()
- }
- true
- } else {
- false
- }
- }
- // Try to advance the clock
- def advanceClock(timeMs: Long): Unit = {
- if (timeMs >= currentTime + tickMs) {
- // 必須是tickMs 整數倍
- currentTime = timeMs - (timeMs % tickMs)
- //推動上層時間輪也更新currentTime
- // Try to advance the clock of the overflow wheel if present
- if (overflowWheel != null) overflowWheel.advanceClock(currentTime)
- }
- }
從上面的 add 方法我們知道每次對比都是根據expiration < currentTime + interval 來進行對比的,而advanceClock 就是用來推進更新 currentTime 的。
小結一下
Kafka 用了多層次時間輪來實現,并且是按需創建時間輪,采用任務的絕對時間來判斷延期,并且對于每個槽(槽內存放的也是任務的雙向鏈表)都會維護一個過期時間,利用 DelayQueue 來對每個槽的過期時間排序,來進行時間的推進,防止空推進的存在。
每次推進都會更新 currentTime 為當前時間戳,當然做了點微調使得 currentTime 是 tickMs 的整數倍。并且每次推進都會把能降級的任務重新插入降級。
可以看到這里的 DelayQueue 的元素是每個槽,而不是任務,因此數量就少很多了,這應該是權衡了對于槽操作的延時隊列的時間復雜度與空推進的影響。
模擬kafka的時間輪實現java版
定時器
- public class Timer {
- /**
- * 底層時間輪
- */
- private TimeWheel timeWheel;
- /**
- * 一個Timer只有一個delayQueue
- */
- private DelayQueue<TimerTaskList> delayQueue = new DelayQueue<>();
- /**
- * 過期任務執行線程
- */
- private ExecutorService workerThreadPool;
- /**
- * 輪詢delayQueue獲取過期任務線程
- */
- private ExecutorService bossThreadPool;
- /**
- * 構造函數
- */
- public Timer() {
- timeWheel = new TimeWheel(1000, 2, System.currentTimeMillis(), delayQueue);
- workerThreadPool = Executors.newFixedThreadPool(100);
- bossThreadPool = Executors.newFixedThreadPool(1);
- //20ms獲取一次過期任務
- bossThreadPool.submit(() -> {
- while (true) {
- this.advanceClock(1000);
- }
- });
- }
- /**
- * 添加任務
- */
- public void addTask(TimerTask timerTask) {
- //添加失敗任務直接執行
- if (!timeWheel.addTask(timerTask)) {
- workerThreadPool.submit(timerTask.getTask());
- }
- }
- /**
- * 獲取過期任務
- */
- private void advanceClock(long timeout) {
- try {
- TimerTaskList timerTaskList = delayQueue.poll(timeout, TimeUnit.MILLISECONDS);
- if (timerTaskList != null) {
- //推進時間
- timeWheel.advanceClock(timerTaskList.getExpiration());
- //執行過期任務(包含降級操作)
- timerTaskList.flush(this::addTask);
- }
- } catch (Exception e) {
- e.printStackTrace();
- }
- }
- }
任務
- public class TimerTask {
- /**
- * 延遲時間
- */
- private long delayMs;
- /**
- * 任務
- */
- private MyThread task;
- /**
- * 時間槽
- */
- protected TimerTaskList timerTaskList;
- /**
- * 下一個節點
- */
- protected TimerTask next;
- /**
- * 上一個節點
- */
- protected TimerTask pre;
- /**
- * 描述
- */
- public String desc;
- public TimerTask(long delayMs, MyThread task) {
- this.delayMs = System.currentTimeMillis() + delayMs;
- this.task = task;
- this.timerTaskList = null;
- this.next = null;
- this.pre = null;
- }
- public MyThread getTask() {
- return task;
- }
- public long getDelayMs() {
- return delayMs;
- }
- @Override
- public String toString() {
- return desc;
- }
- }
時間槽
- public class TimerTaskList implements Delayed {
- /**
- * 過期時間
- */
- private AtomicLong expiration = new AtomicLong(-1L);
- /**
- * 根節點
- */
- private TimerTask root = new TimerTask(-1L, null);
- {
- root.pre = root;
- root.next = root;
- }
- /**
- * 設置過期時間
- */
- public boolean setExpiration(long expire) {
- return expiration.getAndSet(expire) != expire;
- }
- /**
- * 獲取過期時間
- */
- public long getExpiration() {
- return expiration.get();
- }
- /**
- * 新增任務
- */
- public void addTask(TimerTask timerTask) {
- synchronized (this) {
- if (timerTask.timerTaskList == null) {
- timerTask.timerTaskList = this;
- TimerTask tail = root.pre;
- timerTask.next = root;
- timerTask.pre = tail;
- tail.next = timerTask;
- root.pre = timerTask;
- }
- }
- }
- /**
- * 移除任務
- */
- public void removeTask(TimerTask timerTask) {
- synchronized (this) {
- if (timerTask.timerTaskList.equals(this)) {
- timerTask.next.pre = timerTask.pre;
- timerTask.pre.next = timerTask.next;
- timerTask.timerTaskList = null;
- timerTask.next = null;
- timerTask.pre = null;
- }
- }
- }
- /**
- * 重新分配
- */
- public synchronized void flush(Consumer<TimerTask> flush) {
- TimerTask timerTask = root.next;
- while (!timerTask.equals(root)) {
- this.removeTask(timerTask);
- flush.accept(timerTask);
- timerTask = root.next;
- }
- expiration.set(-1L);
- }
- @Override
- public long getDelay(TimeUnit unit) {
- return Math.max(0, unit.convert(expiration.get() - System.currentTimeMillis(), TimeUnit.MILLISECONDS));
- }
- @Override
- public int compareTo(Delayed o) {
- if (o instanceof TimerTaskList) {
- return Long.compare(expiration.get(), ((TimerTaskList) o).expiration.get());
- }
- return 0;
- }
- }
時間輪
- public class TimeWheel {
- /**
- * 一個時間槽的范圍
- */
- private long tickMs;
- /**
- * 時間輪大小
- */
- private int wheelSize;
- /**
- * 時間跨度
- */
- private long interval;
- /**
- * 時間槽
- */
- private TimerTaskList[] timerTaskLists;
- /**
- * 當前時間
- */
- private long currentTime;
- /**
- * 上層時間輪
- */
- private volatile TimeWheel overflowWheel;
- /**
- * 一個Timer只有一個delayQueue
- */
- private DelayQueue<TimerTaskList> delayQueue;
- public TimeWheel(long tickMs, int wheelSize, long currentTime, DelayQueue<TimerTaskList> delayQueue) {
- this.currentTime = currentTime;
- this.tickMs = tickMs;
- this.wheelSize = wheelSize;
- this.interval = tickMs * wheelSize;
- this.timerTaskLists = new TimerTaskList[wheelSize];
- //currentTime為tickMs的整數倍 這里做取整操作
- this.currentTime = currentTime - (currentTime % tickMs);
- this.delayQueue = delayQueue;
- for (int i = 0; i < wheelSize; i++) {
- timerTaskLists[i] = new TimerTaskList();
- }
- }
- /**
- * 創建或者獲取上層時間輪
- */
- private TimeWheel getOverflowWheel() {
- if (overflowWheel == null) {
- synchronized (this) {
- if (overflowWheel == null) {
- overflowWheel = new TimeWheel(interval, wheelSize, currentTime, delayQueue);
- }
- }
- }
- return overflowWheel;
- }
- /**
- * 添加任務到時間輪
- */
- public boolean addTask(TimerTask timerTask) {
- long expiration = timerTask.getDelayMs();
- //過期任務直接執行
- if (expiration < currentTime + tickMs) {
- return false;
- } else if (expiration < currentTime + interval) {
- //當前時間輪可以容納該任務 加入時間槽
- Long virtualId = expiration / tickMs;
- int index = (int) (virtualId % wheelSize);
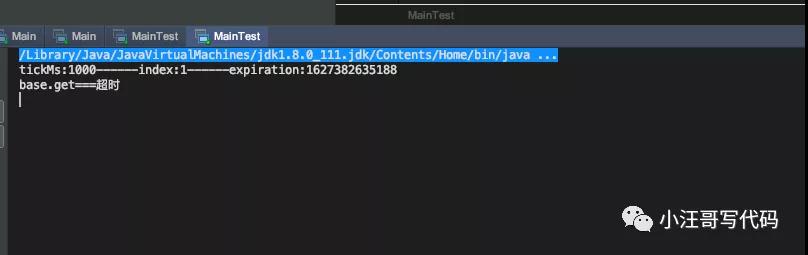
- System.out.println("tickMs:" + tickMs + "------index:" + index + "------expiration:" + expiration);
- TimerTaskList timerTaskList = timerTaskLists[index];
- timerTaskList.addTask(timerTask);
- if (timerTaskList.setExpiration(virtualId * tickMs)) {
- //添加到delayQueue中
- delayQueue.offer(timerTaskList);
- }
- } else {
- //放到上一層的時間輪
- TimeWheel timeWheel = getOverflowWheel();
- timeWheel.addTask(timerTask);
- }
- return true;
- }
- /**
- * 推進時間
- */
- public void advanceClock(long timestamp) {
- if (timestamp >= currentTime + tickMs) {
- currentTime = timestamp - (timestamp % tickMs);
- if (overflowWheel != null) {
- //推進上層時間輪時間
- System.out.println("推進上層時間輪時間 time="+System.currentTimeMillis());
- this.getOverflowWheel().advanceClock(timestamp);
- }
- }
- }
- }
我們來模擬一個請求,超時和不超時的情況
首先定義一個Mythread 類,用于設置任務超時的值。
- public class MyThread implements Runnable{
- CompletableFuture<String> cf;
- public MyThread(CompletableFuture<String> cf){
- this.cf = cf;
- }
- public void run(){
- if (!cf.isDone()) {
- cf.complete("超時");
- }
- }
- }
模擬超時
- public static void main(String[] args) throws Exception{
- Timer timer = new Timer();
- CompletableFuture<String> base =CompletableFuture.supplyAsync(()->{
- try {
- Thread.sleep(3000);
- } catch (InterruptedException e) {
- e.printStackTrace();
- }
- return "正常返回";
- });
- TimerTask timerTask2 = new TimerTask(1000, new MyThread(base));
- timer.addTask(timerTask2);
- System.out.println("base.get==="+base.get());
- }
模擬正常返回
- public static void main(String[] args) throws Exception{
- Timer timer = new Timer();
- CompletableFuture<String> base =CompletableFuture.supplyAsync(()->{
- try {
- Thread.sleep(300);
- } catch (InterruptedException e) {
- e.printStackTrace();
- }
- return "正常返回";
- });
- TimerTask timerTask2 = new TimerTask(2000, new MyThread(base));
- timer.addTask(timerTask2);
- System.out.println("base.get==="+base.get());
- }

本文轉載自微信公眾號「小汪哥寫代碼」,可以通過以下二維碼關注。轉載本文請聯系小汪哥寫代碼公眾號。