神操作!居然有人用 Python 在 Excel 中畫畫
作者: 派森醬
用 Python 讀取圖片的像素值,然后輸出到 Excel 表格中,最終形成一幅像素畫,也就是電子版的十字繡了。

十字繡大家都知道吧,今天咱們來玩個電子版的十字繡。
用 Python 讀取圖片的像素值,然后輸出到 Excel 表格中,最終形成一幅像素畫,也就是電子版的十字繡了。
準備
既然要讀取圖片,那就需要用到 Pillow 庫,操作 Excel 需要用到 openpyxl 庫,先把這兩個庫安裝好。
- $ pip3 install openpyxl
- $ pip3 install Pillow
色值轉換
從圖片讀取的像素塊色值是 RGB 值,而 openpyxl 向 Excel cell 內填充顏色是十六進制色值,因此咱們先寫一個 RGB 和十六進制色值轉換的一個函數。
- def rgb_to_hex(rgb):
- rgb = rgb.split(',')
- color = ''
- for i in RGB:
- num = int(i)
- color += str(hex(num))[-2:].replace('x', '0').upper()
- return color
圖片轉換
有了色值轉換函數,接下來要做的操作就是逐行讀取圖片的 RGB 色值,之后將 RGB 色值轉換為十六進制色值填充到 Excel 的 cell 中即可。
- def img2excel(img_path, excel_path):
- img_src = Image.open(img_path)
- # 圖片寬高
- img_width = img_src.size[0]
- img_height = img_src.size[1]
- str_strlist = img_src.load()
- wb = openpyxl.Workbook()
- wb.save(excel_path)
- wb = openpyxl.load_workbook(excel_path)
- cell_width, cell_height = 1.0, 1.0
- sheet = wb["Sheet"]
- for w in range(img_width):
- for h in range(img_height):
- data = str_strlist[w, h]
- color = str(data).replace("(", "").replace(")", "")
- color = rgb_to_hex(color)
- # 設置填充顏色為 color
- fille = PatternFill("solid", fgColor=color)
- sheet.cell(h + 1, w + 1).fill = fille
- for i in range(1, sheet.max_row + 1):
- sheet.row_dimensions[i].height = cell_height
- for i in range(1, sheet.max_column + 1):
- sheet.column_dimensions[get_column_letter(i)].width = cell_width
- wb.save(excel_path)
- img_src.close()
最后再來個入口函數,就大功告成啦~
- if __name__ == '__main__':
- img_path = '/Users/xyz/Documents/tmp/03.png'
- excel_path = '/Users/xyz/Documents/tmp/3.xlsx'
- img2excel(img_path, excel_path)
驚艷時刻
激動的心,顫抖的手,來看下最終效果咋樣。
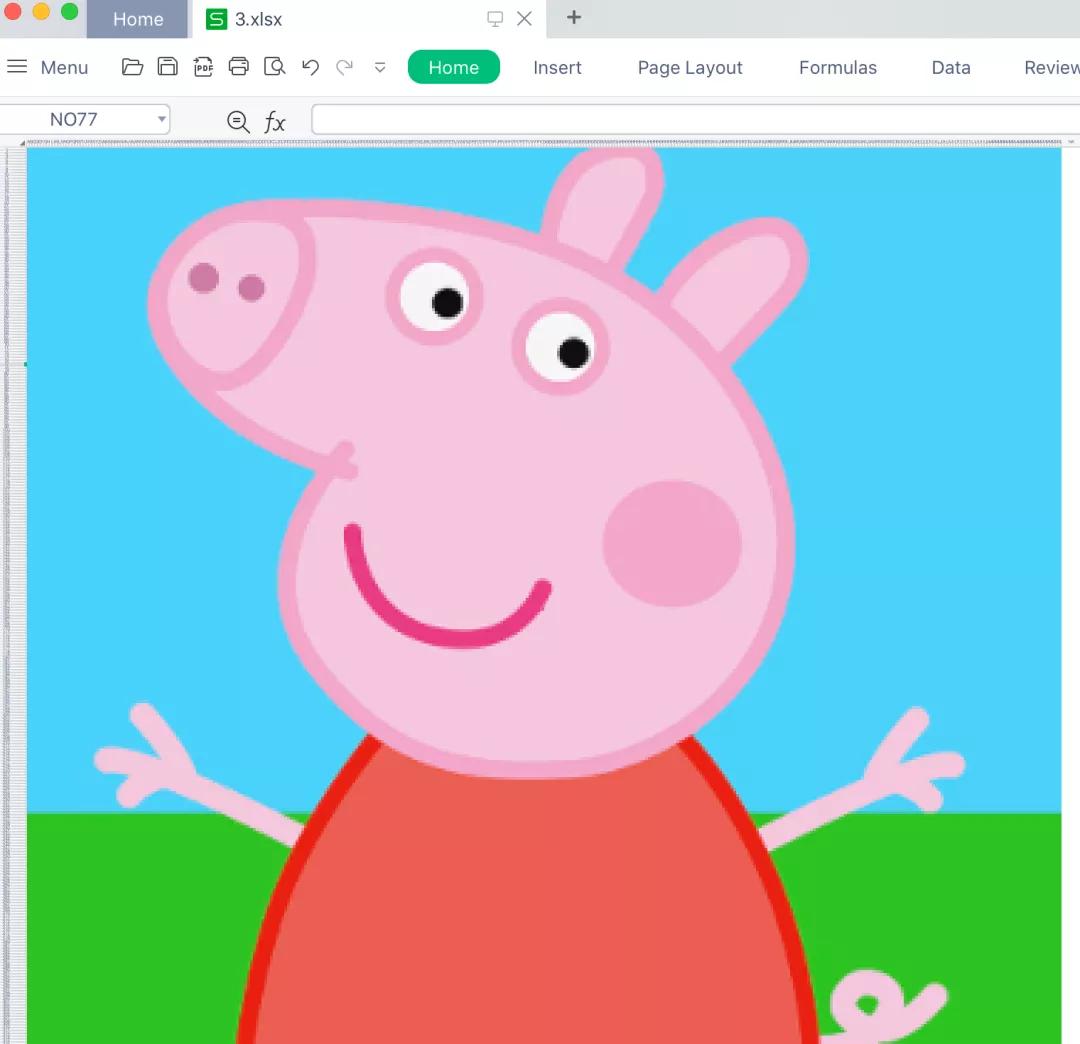
是不是覺得有那么一絲絲韻味呢...
總結
今天派森醬帶大家一起實現了 Excel 像素畫,小伙伴們可以發揮自己的想象,比如把女神的頭像藏進 Excel 中然后發她,你猜女神會不會被驚艷到呢。
責任編輯:武曉燕
來源:
Python技術