手機游戲—黑白翻棋
前言
之前發過兩篇黑白翻棋游戲的手表版本,感興趣的uu們可以點擊👉 穿梭機1和穿梭機2。這次給大家帶來的小分享是黑白翻棋的手機版本,也是JS寫的,功能代碼基本一致(采用第二篇的算法),只是布局會作相應修改。
概述
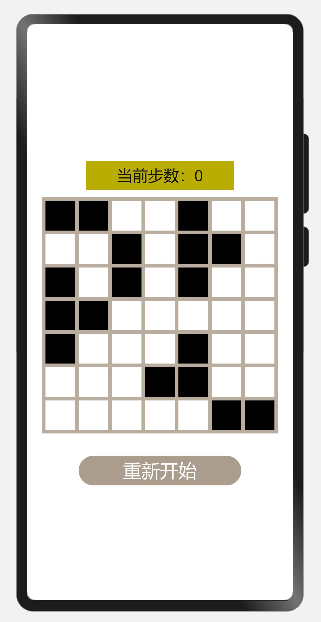
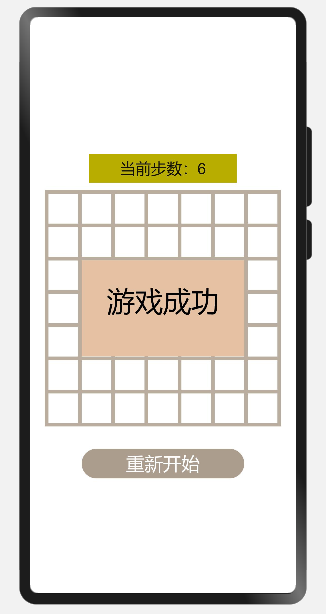
該游戲會隨機生成一個題目,最終當棋盤上的方格都為白色的時候游戲成功,效果如下👇
正文
一.創建一個空白的工程
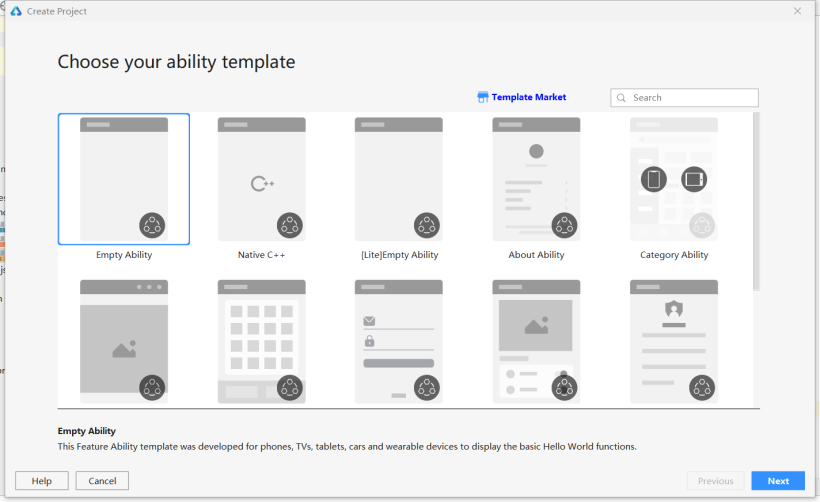
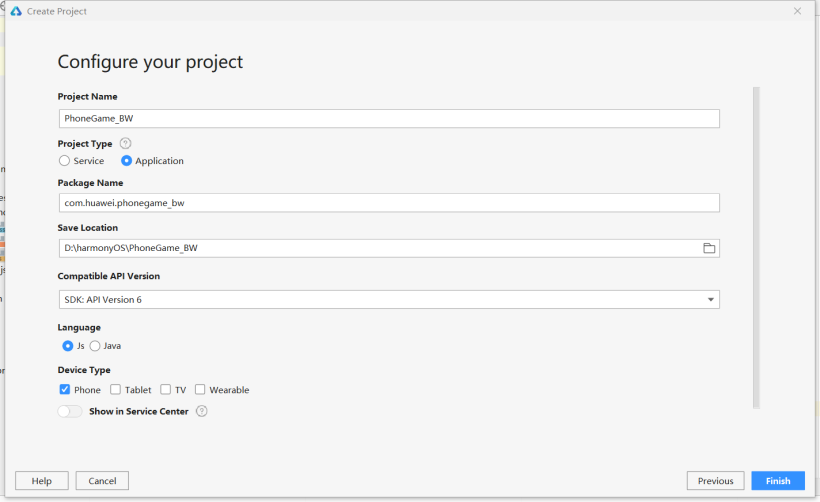
DevEco Studio下載安裝成功后,打開DevEco Studio,點擊左上角的File,點擊New,再選擇New Project,選擇Empty Ability,然后點擊Next,給項目命名PhoneGame_BW,選擇設備類型Phone,選擇語言類型JS最后點擊Finish。
二.界面布局
1.代碼刪除的部分
先在entry>src>main>js>default>pages.index>index.hml 文件里把以下代碼刪掉
- <text class="title">
- {{ $t('strings.hello') }} {{ title }}
- </text>
在entry>src>main>js>default>pages.index>index.js 文件里把以下代碼刪掉
- title:" "
- onInit() {
- this.title = this.$t('strings.world');
- }
在entry>src>main>js>default>pages.index>index.css 文件里把container部分以下的代碼刪掉
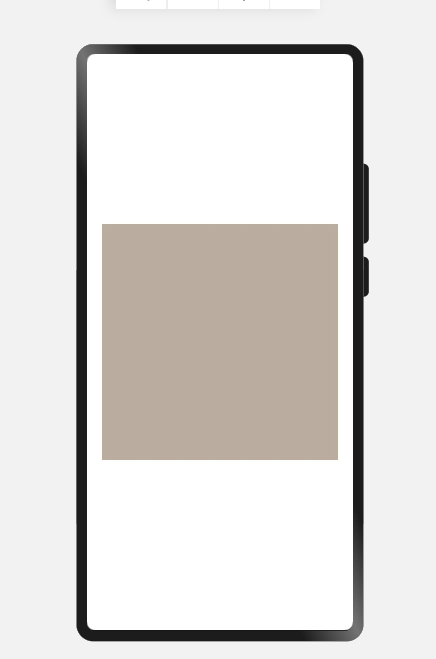
2.棋盤設置
這里以畫布組件canvas來描繪棋盤
- <canvas class="canvas" ref="canvas"> </canvas>
index.css
- .canvas{
- width:320px;
- height:320px;
- background-color: #BBADA0;
- }
打開模擬器,界面如下
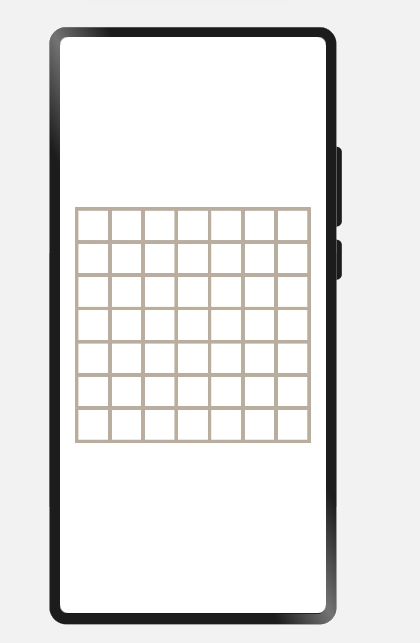
3.棋子設置
棋子是通過canvas組件的方法來繪制填充多個正方形,這里我設置的棋盤是7x7的,每個方格的邊長SIDELEN為40,方格間的間距MARGIN為5,以一個數組來表示每個方格,并初始化賦值為0,用0表示白色,1代表黑色,這樣我們就能定義一個用0和1表示鍵,顏色表示值的字典COLORS
index.js,在export default上方添加以下代碼
- var grids=[[0, 0, 0, 0, 0, 0, 0],
- [0, 0, 0, 0, 0, 0, 0],
- [0, 0, 0, 0, 0, 0, 0],
- [0, 0, 0, 0, 0, 0, 0],
- [0, 0, 0, 0, 0, 0, 0],
- [0, 0, 0, 0, 0, 0, 0],
- [0, 0, 0, 0, 0, 0, 0],
- [0, 0, 0, 0, 0, 0, 0]];
- var context;
- const SIDELEN=40;
- const MARGIN=5;
- const COLORS = {
- "0": "#FFFFFF",
- "1": "#000000"
- }
在export default下方添加以下代碼,遍歷數組grids的每一個元素,將其轉換成String型,對應的是COLORS中的顏色,然后調用畫布組件中的方法fillRect填充方格的顏色,參數為方格的左上角的坐標及方格的長寬
- drawGrids(){
- context=this.$refs.canvas.getContext('2d');
- for (let row = 0 ;row < 7 ;row++){
- for (let column = 0; column < 7;column++){
- let gridStr = grids[row][column].toString();
- context.fillStyle = COLORS[gridStr];
- let leftTopX = column * (MARGIN + SIDELEN) + MARGIN;
- let leftTopY = row * (MARGIN + SIDELEN) + MARGIN;
- context.fillRect(leftTopX, leftTopY, SIDELEN, SIDELEN);
- }
- }
- },
最后在drawGrids函數上方添加以下代碼調用drawGrids
- onShow(){
- this.drawGrids();
- },
打開模擬器,就能有如下效果
三.游戲規則的設置
1.獲取點擊位置的坐標并對應方格
給畫布組件添加點擊事件onclick和觸摸事件touchstart
- <canvas class="canvas" ref="canvas" onclick="click" @touchstart='touchstartfunc'>
事件touchstart,在手指剛觸摸屏幕時就觸發該事件,其參數為TouchEvent,其對象屬性touches包含屏幕觸摸點的信息數組,而我們需要的坐標信息就包含在這個數組里;這里我們需要獲取到的坐標是相對于組件左上角的,即localX和localY,這樣也方便我們設置點擊范圍來觸發色塊的翻轉(獲取坐標這塊詳細可看我上一篇文章)其次,參數a和b分別代表傳遞的方格的行列值。
index.js
- var localx;
- var localy;
- var a;
- var b;
- touchstartfunc(msg) {
- localx=msg.touches[0].localX;
- localy=msg.touches[0].localY;
- },
- getgrid() {
- if (MARGIN < localx && localx < (MARGIN + SIDELEN)) {
- b = 0;
- }
- if (1 * (MARGIN + SIDELEN) + MARGIN < localx && localx < 2 * (MARGIN + SIDELEN)) {
- b = 1;
- }
- if (2 * (MARGIN + SIDELEN) + MARGIN < localx && localx < 3 * (MARGIN + SIDELEN)) {
- b = 2;
- }
- if (3 * (MARGIN + SIDELEN) + MARGIN < localx && localx < 4 * (MARGIN + SIDELEN)) {
- b = 3;
- }
- if (4 * (MARGIN + SIDELEN) + MARGIN < localx && localx < 5 * (MARGIN + SIDELEN)) {
- b = 4;
- }
- if (5 * (MARGIN + SIDELEN) + MARGIN < localx && localx < 6 * (MARGIN + SIDELEN)) {
- b = 5;
- }
- if (6 * (MARGIN + SIDELEN) + MARGIN < localx && localx < 7 * (MARGIN + SIDELEN)) {
- b = 6;
- }
- if (MARGIN < localy && localy < (MARGIN + SIDELEN)) {
- a = 0;
- }
- if (1 * (MARGIN + SIDELEN) + MARGIN < localy && localy < 2 * (MARGIN + SIDELEN)) {
- a = 1;
- }
- if (2 * (MARGIN + SIDELEN) + MARGIN < localy && localy < 3 * (MARGIN + SIDELEN)) {
- a = 2;
- }
- if (3 * (MARGIN + SIDELEN) + MARGIN < localy && localy < 4 * (MARGIN + SIDELEN)) {
- a = 3;
- }
- if (4 * (MARGIN + SIDELEN) + MARGIN < localy && localy < 5 * (MARGIN + SIDELEN)) {
- a = 4;
- }
- if (5 * (MARGIN + SIDELEN) + MARGIN < localy && localy < 6 * (MARGIN + SIDELEN)) {
- a = 5;
- }
- if (6 * (MARGIN + SIDELEN) + MARGIN < localy && localy < 7 * (MARGIN + SIDELEN)) {
- a = 6;
- }
- }
2.點擊的方格及其上下左右都變色
change控制變色,若值為0則變為1,若為1則變為0。方格的橫縱坐標都是0~6,changeOneGrids第一個判斷是被點擊的方格的變色,第二個判斷是右邊的格子是否在棋盤上,假如被點擊的格子是右邊界,則判斷為假,右格子不會變色。以此類推對左格,上格,下格作判斷,最后調用drawGrids繪制方格。
index.js
- change(x,y){
- if(grids[x][y] == 0){
- grids[x][y] = 1;
- }else{
- grids[x][y] = 0;
- }
- },
- changeOneGrids(x,y){
- if(x>-1 && y>-1 && x<7 && y<7){
- this.change(x,y);
- }
- if(x+1>-1 && y>-1 && x+1<7 && y<7){
- this.change(x+1,y);
- }
- if(x-1>-1 && y>-1 && x-1<7 && y<7){
- this.change(x-1,y);
- }
- if(x>-1 && y+1>-1 && x<7 && y+1<7){
- this.change(x,y+1);
- }
- if(x>-1 && y-1>-1 && x<7 && y-1<7){
- this.change(x,y-1);
- }
- this.drawGrids();
- }
最后在點擊事件上調用getgrid和changeOneGrids
- click(){
- this.getgrid();
- this.changeOneGrids(a,b);
- }
到此,效果如下
3.生成隨機打亂的棋盤(游戲題目)
先將數組以坐標形式存儲在array,共49組坐標,然后隨機生成0~48的整數,取該組坐標中第一個元素作為橫坐標,第二個元素作為縱坐標,這里設置的是隨機生成點擊10下后的題目(后期為在此基礎上以不同次數來設置不同難度)
- initGrids(){
- let array = [];
- for (let row = 0; row < 7; row++) {
- for (let column = 0; column < 7; column++) {
- if (grids[row][column] == 0) {
- array.push([row, column])
- }
- }
- }
- for (let i = 0; i < 10; i++){
- let randomIndex = Math.floor(Math.random() * array.length);
- let row = array[randomIndex][0];
- let column = array[randomIndex][1];
- this.changeOneGrids(row,column);
- }
- }
然后在onshow上調用initGrids,注意initGrids要放在drawGrids之前
- onShow(){
- this.initGrids();
- this.drawGrids();
- },
四.設置步數顯示及游戲的重新開始
1.步數顯示
步數這個文本組件顯示在棋盤上方,故在index.hml文件里,將以下代碼放在canvas上方,其中由于步數是個變量,故以currentSteps的值的變動來動態更新步數
index.hml
- <text class="steps">
- 當前步數:{{currentSteps}}
- </text>
index.css
- .steps {
- font-size: 21px;
- text-align:center;
- width:200px;
- height:39px;
- letter-spacing:0px;
- margin-top:10px;
- background-color: #BBAD20;
- }
由于initGrids會隨機點擊10下,為了使步數清零,在data里給它賦初值-10
index.js
- data: {
- currentSteps:-10,
- },
在changeOneGrids上添加以下代碼,使每次點擊步數加一
- this.currentSteps+=1;
2.游戲的重新開始
重新開始的按鈕在棋盤的下方,故index.hml文件中在canvas下方添加代碼
- <input type="button" value="重新開始" class="bit" onclick="restartGame"/>
index.css
- .bit {
- top: 20px;
- width: 220px;
- height: 40px;
- background-color: #AD9D8F;
- font-size: 25px;
- margin-top: 10px;
- }
游戲重新開始時,會再次隨機生成游戲題目,并且步數重置為0
index.js
- restartGame(){
- this.initGrids();
- this.drawGrids();
- this.currentSteps = 0;
- }
五.游戲成功的設置
游戲成功的彈窗是顯示在棋盤(canvas)上方的,該實現可通過添加一個堆疊容器stack,將游戲成功的文本組件放在畫布組件之后;其次,“游戲成功”的顯示在初始時不會顯示,所以要設置屬性show,對應設一個布爾型變量isShow,并令isShow的初始值為假,游戲成功時其值為真,當為真時就可以顯示了
index.hml
- <stack class="stack">
- <canvas class="canvas" ref="canvas" onclick="click" @touchstart='touchstartfunc'> </canvas>
- <div class="subcontainer" show="{{isShow}}">
- <text class="gameover">
- 游戲成功
- </text>
- </div>
- </stack>
index.css
- .stack{
- width: 320px;
- height: 320px;
- margin-top: 10px;
- }
- .subcontainer{
- left: 50px;
- top: 95px;
- width: 220px;
- height: 130px;
- justify-content: center;
- align-content: center;
- background-color: #E9C2A6;
- }
- .gameover{
- font-size: 38px;
- color:black;
- justify-content: center;
- margin-top: 30px;
- }
index.js
- data: {
- currentSteps:-10,
- isShow:false
- },
- gameover(){
- for (let row = 0 ;row < 7 ;row++){
- for (let column = 0; column < 7;column++){
- if (grids[row][column]==1){
- return false;
- }
- }
- }
- return true;
- },
在changeOneGrids中給“步數增加”添加判斷條件
- if(this.isShow==false){
- this.currentSteps+=1;
- }
- if(this.gameover()){
- this.isShow=true;
- }
在restartGame中添加代碼
- this.isShow = false;
恭喜你!!完成以上步驟后你就可以開始玩啦!!O(∩_∩)O
結語
以上就是我這次的小分享啦❀❀!后續會有該游戲的進階版,我會不斷完善的(ง •_•)ง
文章相關附件可以點擊下面的原文鏈接前往下載
https://harmonyos.51cto.com/resource/1288